Today we will talk to you about whether it is possible to glue wallpaper on chipboard without any preparation. If you decide to make a renovation and some of your walls are made of chipboard, then before covering such walls with wallpaper, it is advisable to perform some manipulations with them - to prepare the walls.
Of course, you can simply paste wallpaper on chipboard, but all joints will be clearly visible through the wallpaper. We strongly advise against performing repairs in this manner. If you want to save money, this is of course appropriate, but at the end you will get rather ugly walls, which will not only have seams visible through the wallpaper, but also over time your wallpaper may begin to tear at these seams.
What is chipboard
Let's not go far and turn to Wikipedia.
Chipboard (chipboard) is a sheet composite material made by hot pressing of wood particles, mainly shavings, mixed with a binder of non-mineral origin with the introduction, if necessary, of special additives (6-18% by weight of the shavings) on single- and multi-deck periodic presses 0.2-5 MPa, 120-190 °C) or in continuous belt, track or extrusion units.
Correct finishing of OSB in the interior
Frame house building technology involves covering load-bearing structures with a variety of slab materials, most often OSB. Appearing later than chipboard and plywood, oriented strand boards quickly gained popularity. Today, almost no frame builder can do without them inside. The construction of enclosing structures and partitions is only the first stage, followed by finishing work that turns the box into a residential building. But in order for the finishing to be both presentable and durable, it is necessary to take into account the specifics of the base. With the participation of the head of the paint and varnish materials department, we will understand the features of finishing oriented strand boards in the interior.
OSB interior finishing options
For interior cladding, it is recommended to choose a material with toxicity class E0.5 or E1 (ECO boards), but even these cannot be left unfinished. Even though there will still be formaldehyde emissions in minimal quantities (0.08-0.124 mg/m³), the material itself must be protected from moisture. Therefore, when you like the original look, and there is no desire to somehow “smooth” the slabs, you need to treat their surface with at least a specialized primer in one, or better yet, two or three layers. Adherents of a more traditional design will not have any problems either, since OSB (oriented strand board) is a universal base for subsequent finishing work and does not impose any restrictions on choice.
How to prepare chipboard walls for wallpapering
- First of all, you need to clean all the chipboard walls, removing all dirt from them, be it old wallpaper or something else.
- Next, you will need to cover the chipboard joints with gauze.
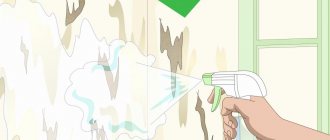
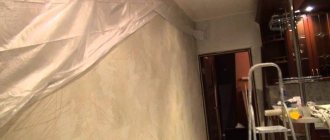
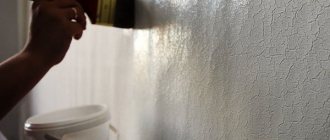
- Afterwards we move on to priming the chipboard and you need to let the primer dry.
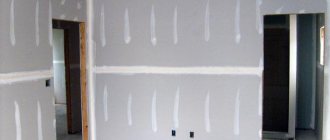
- Next, we putty the walls and let the putty dry.
- We clean the walls with sandpaper.
- We prime the walls with a finishing primer.
This way we properly prepare the walls for wallpapering. It is worth understanding that such operations to prepare chipboard for wallpapering are simply necessary, otherwise your walls will look bad, even if you stick good, expensive wallpaper on them.
Technology for gluing rolled products
You can wallpaper wood panels only with your own hands. In order for all procedures to be performed correctly, it is necessary to observe accuracy and sequence of actions.
Materials and tools
For pasting work you will need the following materials and equipment:
- Primer. It is necessary to choose a composition with deep penetration. The best option is polymer mixtures. You can also use “concrete contact”.
To treat the base, exceptionally deep penetration soil is used.
- Wallpaper. The variety is selected based on the wishes and style of the room. Single-layer paper products should be abandoned.
- Glue. For each type of material there is a special composition.
- Putty. It is recommended to purchase acrylic or oil-based putty for chipboard that is elastic. This is especially true for newly built houses. Ready-made solutions are preferred.
The putty must be intended for wood or wood-based materials - Serpyanka mesh. Required for reinforcing slab joints.
- Brushes and roller. To apply primer and glue, several types and replaceable nozzles should be provided.
- Set of spatulas. You will need a small, medium and wide tool.
- Containers for mixing solutions.
- Devices for smoothing wallpaper.
Minimum set of tools for puttying walls.
Everything you need must be purchased in advance. If used tools are used, they are first cleaned of previous materials.Surface preparation
The application of roll products to different panels may vary slightly, so it is necessary to proceed from the specific situation. Preliminary work includes a number of procedures, individual for each type:
- Chipboard. This base needs sanding. The fact is that the upper structure is not always uniform, particles can flake off. To prevent them from interfering with work in the future, they are removed with sandpaper.
Fiberboard. Gluing wallpaper to fibreboards is much more difficult. This is explained by the fact that the front side of the hardboard is impregnated with a paraffin-based composition to increase moisture resistance. When gluing decorative products, this creates difficulties, so the slabs are processed with a grinding machine, evenly removing a very thin layer.
- Chipboard. The laminated coating also makes adhesion difficult, so this surface is carefully sanded - as in the previous version - until a rough base is obtained.
- MDF. To hang wallpaper on an MDF panel, you will need to perform similar procedures, but be careful: the surface only needs light sanding.
All wood-based materials must be sanded before finishing.
General preparatory processes after completion of preliminary work:
Padding. Using a roller, the surface is covered with two layers of the composition, each one is dried.
The primer is applied with a brush or roller. Sealing of joints. When working with fiber boards, the edges of adjacent ends are cut at an angle with a construction knife. Chipboard walls are not subject to jointing. Next, the seams are filled and the excess is removed.
The first to be puttied are the seams and fastening screws. Laying serpyanka. It covers the front and corner joints (there is a special variety), and a thin layer of the mixture is applied on top, completely covering the reinforcing mesh.
Serpyanka fiberglass mesh significantly increases the level of adhesion to the puttying surface. The base should be puttyed as follows: the solution is scooped onto the blade of a wide spatula and distributed over the surface using arcuate movements from top to bottom. The procedure is repeated, after which the coating is primed.
The putty dries for at least 2 - 3 days.
The walls are left until completely dry.
On a note! If the vertical structure has a deviation, then it is initially recommended to plaster the surface, and then lay the finishing layer of putty.
Pasting
Work begins with assessing the adhesion of the putty; for this, the surface is tapped a little. If there are no delaminations, proceed to the process:
Wallpaper pasting tool
- The work area is pre-prepared and all unnecessary items are removed. Wallpaper should be cut taking into account the fit of the pattern.
- It is recommended to start gluing from the window opening. The first strip is carefully measured, since the remaining fragments are oriented towards it.
- The glue is evenly applied to the underside of the wallpaper, after which the sheets are folded in half. This will avoid drying out and ensure the desired level of impregnation. If required, the wall is also treated with the solution.
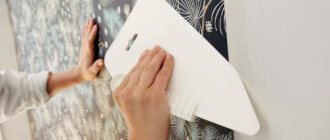
- The strip is placed in its place, adjusted from above and pressed. For smoothing, use a rag or rubber spatula.
- The remaining elements are glued in a similar way.
The algorithm for gluing wallpaper does not change depending on the type of base.
There is a recommendation that the surfaces should be varnished. Indeed, this can be done, but achieving the desired decorative effect will be difficult. In addition, the face layer will become heavier, which can lead to peeling.
You should know! If the strips are connected end-to-end, then it is advisable to attach a special intermediate tape.
What are the subtleties when working with chipboard?
It is also worth understanding that chipboard is a material that is attached to a wooden or metal frame with self-tapping screws. As a rule, the screw caps will be visible. However, even if they are buried in the material, the contours will still be visible through the wallpaper. This way you will get walls covered with wallpaper, through which the seams and screw heads can be seen. Over time, if you frequently press on such walls, cracks will appear on the wallpaper, which will ultimately lead to the need to carry out repairs again.
Miser pays twice! If your walls are made of any materials that are joined together, then such walls must be prepared. Without preparation, the finish will be of poor quality.
Useful tips
Useful tips will help you do the gluing yourself and get excellent results:
- It is better to choose white primer paint. This will help prevent the wood from showing through the thin paper wallpaper. It will also hide old materials that could not be dismantled.
- Pasting near doors and windows is done last.
- Dense material is glued end-to-end, thin material - overlapped.
- Use a thick roller at the joints.
- When bubbles form, they are cut, air is released by pressing, and smoothed with a roller.
We recommend watching the video instructions:
How to glue wallpaper on chipboard
By and large, if you have prepared the walls correctly, then wallpapering them will be easy. The method is no different from the method of gluing wallpaper on walls made of concrete or other prepared material.
- Depending on the type of wallpaper used, we apply glue either to the walls or to the walls and to the wallpaper.
- For paper wallpaper, as for non-woven wallpaper, glue is applied only to the walls.
- For vinyl wallpaper, the adhesive is applied to both the walls and the wallpaper.
- Choose glue only for those types of wallpaper that you bought for gluing.
- After you have hung the wallpaper, do not allow drafts in the rooms, otherwise they may affect the drying of the glue and your wallpaper will peel off in permanent places.
Preparatory process
Before the preparatory stage, wallpaper is purchased, and then, based on its quality, tools and materials are prepared:
- Glue selected specifically for this type of material and a container for it.
- Brush or paint brush for applying glue.
- Roller for smoothing fabrics.
- Scissors, ruler, pencil, rag.
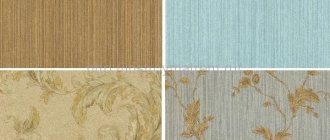
For wood-based panels, it is better to purchase vinyl, non-woven materials or silk-screen printing. It is these types that will hide unevenness and some deformations of the slabs in the future.
Plane preparation process:
- Treat the chipboard and seal the heads of nails, self-tapping screws and screws with putty.
- Putty the uneven surfaces of the planes with a special mixture for wood.
- Process and seal openings using special meshes.
- If there are old paintings hanging on the walls, then they must be dismantled.
If the old materials are firmly glued, then do not clean them, but coat them with a layer of adhesive solution.
- Prime the entire surface in two layers.
Conclusions on the topic
Nowadays, queries in search engines are quite popular regarding whether it is possible to glue wallpaper to unprepared surfaces. Of course, any professional will tell you that it is impossible. However, we will say that it is possible, but the result most likely will not suit you. In the event that you decide to glue it to unprepared concrete walls, then it may turn out quite well, but in the case of chipboard, or other materials such as OSB, drywall, etc., all the seams will be visible through the wallpaper and soon the wallpaper may tear.
If you still have questions on the topic, you can ask them in the comments to this article and we or our readers will be happy to answer your questions.
Happy renovation!
Rules for marking and gluing
In order to properly glue rolls of wallpaper, you need an auxiliary and working tool:
- plumb line;
- brush or roller;
- pencil with ruler;
- scissors and rags;
- container with glue.
The quality of the work largely depends on how we glue the first strip. Therefore, this should be done strictly according to the rules. To do this, you need to draw a vertical strip on the wall along a plumb line. Next, take the wallpaper and measure its width. At this distance we draw another plumb line.
The first canvas should always be glued strictly along these lines. The rag is needed so that you can press the wallpaper strips tightly against the chipboard, moving your hand with it from top to bottom. This removes excess glue from under the wallpaper rolls and air bubbles. A clean rag does not leave marks, but allows you to apply more force to the wallpaper. When laying the next strip, you need to ensure that the pattern or pattern matches.
Soil consumption
The consumption of deep penetration soil is approximately 80-160 g per 1m2. The same amount of alkyd primer will be needed. The consumption of moisture-resistant soil is from 70 to 100 ml.
Oil primer is consumed at 50-100 ml per 1 m2. The same applies to the adhesive composition.
Primer consumption can be reduced by pre-treating the surface with coarse sandpaper. Dust will fill the pores, preventing the coloring composition from penetrating deeply into the fiberboard structure. In order to save soil, drying oil is also used.
As you can see, using a primer before wallpapering or painting walls made of chipboard and fiberboard is simply necessary. Its use not only increases the service life of the product, but also reduces the consumption of decorative coatings, and also serves as additional protection for wood-based panels from moisture and other adverse factors.