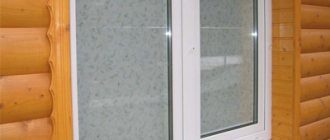
Before installing blinds on plastic windows, you need, first of all, to acquire a minimum set of necessary tools, and also familiarize yourself with information about how to install them. Blinds help regulate the flow of bright sunlight into the room, as well as protect from prying eyes from the street. But at the same time, they do not interfere with the passage of fresh air through an open window and are very easy to use.
Methods for attaching this type of curtains depend on their design, as well as on the condition of the surface to which they will be attached. They can be installed even without drilling, using double-sided tape or other special fasteners.
Question:
What are blinds?
Answer:
Blinds are one of the types of window curtains, which is a structure made of plates (slats), a special cornice, as well as a mechanism by which control is carried out.
Variety of species
Horizontal
Horizontal blinds (Venetian shutters) are a canvas made of thin plates arranged horizontally. They are built into a rotating system of a special drum and a system of cords that sets them in motion. With their help, it is convenient to regulate the level of natural light in the room, so they are appropriate to use on windows in the bedroom, kitchen or bathroom.
The photo shows horizontal blinds in a home interior; they add special charm and comfort to the design of the room.
Horizontal blinds, in addition to standard models, are:
- Cassette curtains - this type of curtains has a system in which the lamellas, rising upward, are hidden in a special box - a cassette. They are compact and take up very little space, so they allow you to make maximum use of the window sill surface.
- Inter-frame horizontal blinds are installed between window frames and can only be mounted inside windows that have two independently opening frames, with at least 40 mm between the panes. Therefore, they are installed between wooden window frames, and it is technically impossible to install them inside a sealed double-glazed window.
Inter-frame blinds are controlled using a rope, which is pulled out through pre-drilled holes, which are then covered with a decorative plug
Vertical
Vertical blinds consist of a cornice and vertical slats attached to it using holders in the upper part, and connected with a chain in the lower part. They slide apart in both directions thanks to a rotary-sliding mechanism and a cord. More often they are made of fabric impregnated with special compounds, but there are also models made of aluminum or plastic.
Based on the width of the lamellas, they are divided into narrow - 89 mm (American standard) and wide - 127 mm (European standard).
This type of blinds helps to visually expand a narrow room, but for small rooms it is better not to use them, as they take up a lot of space, because they are mounted above the window opening or even on the ceiling
Rolled
Roller blinds are a solid canvas that, when closed, rolls up onto a special shaft in the form of a roll. They can be mounted either on the ceiling or wall, or on the vertical part of the window opening.
Roller blinds are designed to completely cover the entire window or its individual sashes, so if you need to change the degree of shading during the day, then this option of curtains will not be entirely convenient
Features and purpose of blinds
The main characteristic of blinds is their simple installation, in which the product is quickly and easily fixed in the window opening. A convenient control process allows you to effectively change the level of illumination in the room.
When choosing blinds, you should decide not only on the appearance and material of the blinds, but also on the method of fixing them on a plastic window so that their operation is as efficient as possible.
Wide range of fabric slats for vertical blinds
The main element of blinds is the slats. They can be:
- Vertical or horizontal.
- Rolled or pleated.
- Fabric, plastic, wood, aluminum.
Fixation methods
The location method varies:
- Inside the window opening - in the trim.
- On the sash of a plastic window.
- Above the window opening. Fixation is made to the wall.
Note! When choosing between the first and second fixation methods, the width of the window sill and the depth of the window opening are taken into account. In the third case, the window opening is completely closed.
More information about types of blinds
The main function is to protect premises and furniture from direct sunlight. Traditional curtains can also cope with this task, but the advantage of blinds in this case is that they do not interfere with the circulation of fresh air, and also allow you to regulate the intensity of light in the room in a wide range - from complete darkness to filling the room with sunlight. You don't have to put in any special effort.
Blinds in the bedroom
Blinds can be used in many modern and some classic styles. Most of all, they correspond to the trends of minimalist interiors - they allow you to rationally use free space, do not require much space, and are easy to use and maintain.
Horizontal devices do not affect the functionality of the window system
Table 1. The most common types of blinds
| Illustration | Description |
| A practical option that reliably covers the room from prying eyes and sunlight. Fixed to the wall or window sash. The second method is more practical, since it does not affect the functionality (opening, closing) of the window system. Most often, such blinds are made in the form of thin aluminum slats, so they are popular in rooms with high humidity - in the bathroom and kitchen. The movement of the blade is only possible up/down. The lighting intensity is adjusted by moving the slats. |
| They are represented by fabric vertically located lamellas of the same width. They are fixed to the wall in such a way that it is possible to open the window sash for ventilation. The control method involves not only changing the angle of the slats, but also moving them to the left, right or in both directions (like a curtain). |
| They are presented as a continuous, dense canvas that shades the room. When opened, the canvas is rolled into a roll. Used together with light curtains. |
| A practical option that involves installing the box in the frame, which does not interfere with the free opening of the window sashes. |
Prices for blinds
Blinds
Material of manufacture
The choice of blinds is not limited only to the functionality of the design, but also to the material from which they are made.
Aluminum
– lightweight material, not susceptible to temperature changes. Curtains made from it can be placed in rooms with high humidity and dust, but they have a small drawback - noise in the event of a draft. To clean them, you can use a sponge dipped in soapy water or even a vacuum cleaner.
For the manufacture of lamellas, a tape is used from a special bend- and fracture-resistant aluminum alloy with a heat-resistant color coating of acrylic.
Aluminum can be easily painted in different colors, so blinds made from this very practical material can become a bright highlight in a house or apartment.
Textile
(cotton, polyester or mixed fabric), after pre-treatment with special compounds, is used for the manufacture of vertical or roller blinds. Depending on the density of the fabric, they can be 100% light-proof and also create light shading, which is why they are best placed in the bedroom, nursery or living room.
Textile blinds can be cleaned dry or wet, but it is still not advisable to hang them in rooms with high levels of humidity and pollution
Tree
does not tolerate high humidity, and it is also not advisable to install products made from it next to a radiator, stove or fireplace, as they may become deformed. Wooden structures are made from very thin plates, which undergo preliminary preparation, including lamination.
Thanks to their color scheme, wooden blinds will bring nobility and sophistication to the interior; they should be placed in offices, dining rooms or living rooms
Plastic
used for the manufacture of blinds for industrial premises, as it is resistant to most acids and solvents, mineral oils and alkalis. Such products do not absorb odors, they are easy to care for and do not fade in the sun.
Products made from thermoplastic polymer vinyl chloride - plastic, do not accumulate dust and dirt, they are resistant to deformation, as well as temperature changes, therefore blinds made from it always retain their original shape
Selection of design and materials
Before choosing a design, it is important to determine the complexity of the work and the possibility of doing it yourself. Using ready-made parts - a pipe with brackets-holders, a mechanism for twisting fabric into a roller - you can “swing” at the classic version
If there are no such details or it is preferable to reduce manufacturing costs, it is better to stick to Roman blinds in the simplest design.
Comparing the above diagrams, it is easy to notice the difference in the number and complexity of elements. So, for both options you need:
a piece of fabric along the length and width of the window; a pipe for wrapping fabric and a bottom strip for roller blinds, a base strip and intermediate strips (for forming folds) for Roman blinds; brackets or other fastenings for pipe or base plate
Important: the pipe for the roll model must be rotatable, the bar must be fixed; assembly mechanism. In the case of the roll type, these are gears that, when pulling the ball chain, rotate the winding pipe
For Roman blinds, the simplest method is to pull the cord through rings (eyelets).
Additionally, you can use special guides that prevent the product from “dangling” when the window is open for ventilation, or special clamps.
Material selection
Depending on the purpose - decor, high-quality shading, minimal window shading - different types of materials are chosen:
- textile. It can be natural (cotton, linen, silk, mixed fabrics, synthetics) of varying density, texture and color;
- high-quality thick paper on a fabric or non-woven basis. In fact, these are roll wallpapers or their equivalent;
- composite materials - mat, mat made of straw, bamboo, thin planks and other things.
For the sunny side, where high-quality protection from direct rays and heat is required, dense materials are preferred, including multilayer ones
When planning to use paper rolls, it is important to remember that with active exposure to ultraviolet radiation they can quickly lose density and strength, the same applies to moisture
Elegant mixed fabrics of light structure are suitable for decorative window decoration.
Mounting options
Before choosing a method for attaching blinds to a window, you must first of all pay attention to the condition of the walls and the design of the window opening, as well as the type of curtains themselves, because each has its own characteristics in fastening.
Main types of fastening:
- Inside the window opening;
- Overlay;
- Separately for each sash;
- To the ceiling;
- On the wall.
Installing blinds on plastic windows is quite simple, and you can do it yourself without resorting to the services of a specialist. They come with instructions that describe the recommended installation process for this type of curtain. The main thing is to think about whether it will be convenient to open the window for ventilation, and whether constant access to the window sill is needed.
You need to use the blind mount that matches the material of the walls, ceiling and window profile.
Installation using self-tapping screws is considered the most common, simple and reliable.
Tips for use
In order for the installed structure to last long enough, maintaining its original appearance and functionality, we advise you to adhere to the following operating rules:
- The doors on which the blinds are installed should be opened and closed smoothly and carefully. This will avoid a situation where the lamellas become deformed, accidentally falling between the frame and the sash;
- Raise and lower the system canvas carefully. Strong jerks and significant mechanical impact can negatively affect the condition of the control mechanism. Due to severe premature wear, it will begin to constantly jam, which will create serious difficulties in the process of using the system. You will have to purchase a repair kit and replace it with a worn one;
- Blinds should be cleaned of dirt and dust in a timely manner. Especially when it comes to horizontal models. Manufacturers offer special brushes consisting of several fleecy surfaces that can be used to collect dirt. You can also use a vacuum cleaner to collect dust. To do this, set the power to a minimum, lower the lamellas down, fit as closely as possible to each other, and then vacuum the canvas, making forward movements;
- Periodically carry out preventive and quick cleaning. To do this, lift the canvas up and then vacuum the entire structure. By performing such manipulations once a week, you will be able to avoid lengthy and tedious cleaning of large accumulations of dirt and dust every six months;
- Be sure to take into account the characteristics of the materials being cleaned. Only gentle cleaning agents should be used to clean metal blinds. Do not use hot water to clean plastic, as heat can easily deform the thin slats. Fabric blinds can be vacuumed and washed gently in warm water. For the manufacture of such structures, high-quality material is used that can withstand numerous cleanings. After soaking in warm water for half an hour, the fabric is rinsed and hung on the window.
Attention! During installation and subsequent operation, water should not be allowed to enter the internal metal elements of the cornice. They may rust.
Thus, anyone can install blinds on a plastic window if they wish. You just need to carefully study the manufacturer’s instructions and use our advice. A correctly installed system will certainly last for a long time without creating problems during operation.
Installation on plastic windows
Preliminary preparation: measurements and markings
Blinds have a clear geometric shape, so you need to carefully prepare and take the necessary measurements to avoid unnecessary holes and asymmetry. Proper placement of the structure depends on the dimensions of the window opening, as well as on the distance between the fasteners. To install it, it is enough to have a screwdriver or screwdriver, a pencil, a tape measure and a level. The height is measured from the mounting location and, of course, an allowance must be made depending on the type of installation.
- Inside the window opening - you need to subtract 4 cm from the width of the window opening, and 2 cm from the height, this is so that there is a gap between the curtains and the window so that it opens freely when the blinds are raised.
- Outside the window opening (if the window is located in a recess in the wall) - add 10 cm to the width and height of the blinds.
- Outside the window opening (the window is on the same plane as the wall) - you need to add 20 cm to the width of the curtains, this will better darken the room, and their height should be no less than the height of the window.
- On window sashes, add 3 cm to the width of the blinds so that they do not interfere with the rotation of the window handle.
Proper preparation is the key to comfortable use of this type of curtains, because they must completely cover the glass, slightly extending beyond the frame and not scratch the window sill
Before installing the blinds on the window, you need to make markings and mark the attachment points using a marker and draw a straight line with a pencil along the level. Correct markings must be carried out with extreme precision, because the slightest distortion will ruin the appearance of the window. The main thing is to maintain the optimal distance between the fasteners - symmetrically on all sides.
Experts recommend installing an additional fastener on the side on which the adjusting cord is attached, because that side will bear the heaviest load. After marking, you can install the cornice, to which the slats and runners themselves will be mounted in the future.
Installation instructions
To hang blinds on tape or clips, you don’t need to drill holes, so you can handle the task yourself.
It is important that the brackets do not touch the moving part of the rollers and cords inside the curtain rod. Before installation, be sure to try on the fasteners and, in this form, attach the blinds to the window to mark the location of installation of brackets or clamps
Installation on tape
You can install regular and cassette blinds using tape, the only difference is in the fastening, the installation technology is identical
It is important to ensure reliable adhesion here, so the surface should be properly prepared:
- be sure to wash the window frame and dry it well so that dust and debris do not get under the tape;
- treat the installation site with a degreaser; according to reviews from experts and home craftsmen, acetone is best suited for this.
To hang a regular model, you need to attach special platforms to the profile. The adhesive tape is already glued to the parts; you just need to remove the protective layer and attach the pad in place to the prepared surface. Next, a holder with grooves is hung on it, onto which the cornice is fastened.
The diagram shows the installation of blinds on tape; the method is suitable for attaching light-weight structures
Horizontal cassette blinds are also installed using double-sided tape. The adhesive strip is located on the inside of the box on the top bar and on the sides
Here it is important to place the cornice evenly against the frame and press it tightly. To avoid distortions, it is recommended to put marks on top, which will serve as guidelines
Hanging blinds with tape with your own hands is very simple, but this method does not leave room for error. If the curtains are installed unevenly, you will have to remove the structure, tear off the tape and re-stick it. Be sure to watch the video tips from the master; he explains all the nuances of installing cassette curtain rods with tape.
How to hang blinds on plastic brackets
Plastic brackets for hanging blinds come in the form of hooks or brackets, it all depends on the design features of the cornice. The hooks are installed on the top of the frame, and brackets are attached to them in grooves, onto which the blinds are placed.
Diagram of how to attach blinds to hook brackets
The clips have a more rigid fixation and are suitable for installing small horizontal blinds, including pleated blinds. The cornice is placed at the installation site, pressed against the sash, and a bracket is placed on top, grasping two surfaces at once, like a paper clip on paper. The clamp should be pressed until there is a characteristic click, which indicates that the edge of the bracket has completely entered the groove of the cornice.
Features of installation on metal brackets
To install a metal bracket, you must first mark the space for the clamp. Then the base part of the bracket and the movable element are put on the sash and pressed on the front side with screws.
The diagram shows detailed instructions for installing horizontal blinds on brackets.
The video below shows how to attach blinds to different types of brackets; you can compare designs and choose the best option for yourself.
Possible options for installing cornices
The cornice is the basis of any blinds and there are several basic ways to install it. When purchasing curtains, the kit always includes installation instructions, which indicate recommended mounting methods.
Installation of cornice without drilling
The advantage of this method is that there are no visible holes in the profile, and the blinds can be easily removed without leaving traces of them on the window.
Installation is carried out using special brackets, which are attached to the frame of the plastic window, and the load-bearing part of the blinds is already mounted on them. The brackets are attached to the window sash using double-sided tape or by hooking onto the upper part of the profile.
Installing a cornice on a window profile using self-tapping screws
To do this, you need to determine and mark the location of the top bar of the blinds - this will help to avoid displacement of the load-bearing part and the formation of cracks in the profile. Only after this make holes for the screws, and then, and then attach the curtains and screw them with screws.
Installation of a curtain rod with mounting to a wall or ceiling
It is necessary to drill holes 3-4 cm deep in the marked places and insert dowels into them corresponding to the wall material. After that, attach the brackets using screws and insert the curtain rod into the bracket locks until it clicks (or screw it in).
If the blinds will be attached to the ceiling, the vertical distance from the window can be any, and if to the wall, then this distance is limited by the length of the standard bracket - 15 cm
Conclusion
Installation of blinds can be carried out without hiring specialists; any of the above-described options for carrying out the work can be done even by an inexperienced craftsman. The video in this article will help you understand the topic even better, and if you have additional questions, write them in the comments below.
Did you like the article? Subscribe to our Yandex.Zen channel
September 21, 2016
Accessories,Windows
If you want to express gratitude, add a clarification or objection, or ask the author something, add a comment or say thank you!
Adjusting the size of blinds
Standard blinds do not always fit window openings in size, and custom-made products are much more expensive than ready-made ones. In order to save money, horizontal blinds can be cut on the sides yourself, and vertical ones can be shortened.
Cutting horizontal blinds to width and height
If horizontal blinds do not match the width or height of the opening, their size can be changed. This process is labor-intensive and requires special tools.
Since designs from different manufacturers have different sizes, sometimes it is necessary to adjust the product to a specific window. To do this, the main thing is to make the correct calculations and all manipulations must be carried out very carefully so as not to spoil the product itself.
In order to change the width of the blinds, you need to cut the slats and cornice themselves, on one or both sides at once. It is better to shorten on the side on which the control mechanism is located.
Step by step trimming process:
- Remove the plugs and protective cover from the cornice, and move the control mechanism and cord system to the pin;
- Place a mark on one of the slats and, folding all the slats into one multi-layer strip, clamp them with clamps or an elastic band;
- Using a hacksaw with fine teeth, saw off the excess along the mark - cornice, lamellas and rail;
- Finish the edges with a file or sandpaper;
- Reassemble the structure in reverse order.
In order to change the height of horizontal blinds you need:
- Open the blinds completely and make a mark at the desired height;
- Open the bottom bar and untie the knots on the restrictive cords, then remove the clamps;
- Remove excess trims and trim the lace;
- Reassemble the structure in reverse order.
Cutting vertical blinds to height and width
In order to adjust the width of the vertical structure, you must first cut the cornice, but adhering to the basic rule - the cornice should be slightly larger than the window opening.
Step-by-step process for cutting vertical blinds:
- In order to trim the cornice, you need to measure the required length with a tape measure and make a mark on the side on which the lifting mechanism is located;
- Since there is an aluminum rod and cord inside the cornice, you need to remove the side cover from the cornice using a screwdriver and move the cord to the side so that it does not interfere;
- Using a hacksaw, grinder or special file, first make a small cut so as not to damage the lace, and then cut the cornice according to the mark;
- Remove excess hooks from the cornice, unfastening them from each other if you need to cut the top with wire cutters;
- Shorten the cord by first unscrewing the plug that secures it and removing the end from the cord. After cutting, the plug must be put in place;
- To cut the chain - to do this, you need to unfasten the special plastic clasp connecting its edges, take out the outermost ball and cut off the required length, and then fasten the clasp again.
When cutting vertical blinds to width, it is important not to damage the cord during the process of shortening the cornice.
In order to make the slats of vertical blinds shorter you need:
- Remove all the plates from the hooks and pull out the bar with the hook eye from each one.
- Place all the plates together, perfectly straight, and secure them with an elastic band.
- Measure the desired size and make a mark, adding 3-4 cm for the hem.
- Cut the slats using scissors.
- The edge of each strip must be treated with fire so that the fabric does not fray.
- Fold each lamella and make a hole in each for fastening.
- Insert the strip into each lamella and secure the ends with glue.
It is very important to make marks with a pencil so that each lamella is the same size, because an error of a few millimeters will create a sloppy effect.
Cutting roller blinds to width and height
To cut a roller blind to width you need:
- Unwind the roller blind and pull out the control mechanism along with the fabric weight.
- Make a mark at the desired height and carefully cut the fabric with scissors.
- The length of the curtain drum should be 1 cm longer, so it needs to be cut with a margin.
- Cut the weighting material exactly to the size of the fabric.
- Assemble the structure.
Photo instructions for correct cutting of roller blinds to width
It is very easy to change the length of a roller blind; to do this, you just need to remove the bottom curtain rod and cut off the excess, then trim the edges of the curtain and insert the weighting material into place.
Preparation
We decide what type of blinds we purchased: horizontal, vertical or roller blinds.
Horizontal blinds are called blinds with slats (slats) parallel to the floor and ceiling, vertical blinds are called blinds with slats perpendicular to them. Roller blinds are sun protection products that consist of a canvas (in most cases fabric) wound on a shaft.
Horizontal blinds
Vertical blinds
Roller blinds
It is necessary to take the measurements correctly, otherwise all the work will go down the drain. If you make a mistake and the lamellas turn out to be too long, then removing the extra lamellas will not be difficult, but on the contrary, you will hardly be able to add them if you have shortened more than necessary.
Features of fastening curtains depending on the type
All types of blinds have a similar design, which includes slats, latches, brackets, holders (lower cornice) and a mechanism for controlling the product. But at the same time, each type of these curtains has its own installation characteristics.
Installation of vertical blinds
Vertical models are supplied with all the necessary elements for fastening, as well as instructions for their installation. First of all, you need to decide on the place of attachment of this type of curtains - on the wall, ceiling or upper window slope, as well as carry out the correct preparation and marking - this process is described above.
Installation process for vertical blinds:
- Make markings for installing the cornice.
- Drill holes in the wall and secure the brackets.
- Snap the curtain rod into the brackets.
- Insert the slats into the cornice - to do this, you need to insert each plate into the corresponding latch until it clicks.
- Unfold the lamella runners perpendicular to the cornice.
- Insert the slats into the runners.
- Attach the weights to the bottom of the slats and connect the weights with a chain.
To attach vertical blinds with a width of more than 1.6 m to the ceiling, you need to install 3 fastening brackets, instead of 2. To do this, you need to place an additional fastening point at a distance of 10 cm from the control cord.
With the help of vertical curtains you can transform the interior, making it elegant
Installation of horizontal models
Horizontal blinds can be attached to the wall, in the window opening, or on each sash separately.
Installation of horizontal models
- Fix the brackets (fasteners) on the top panel of the blinds.
- Attach the curtains to the window and make markings for the top fastening.
- Secure the brackets with self-tapping screws and insert the curtain rod until it clicks.
- Unfold the secured fabric downwards and mark the points where the lower bar will be attached and install it according to the same principle as the top one.
- Attach the adjusting strips.
When installing this type of curtains, it is important to attach the brackets symmetrically to each other, as well as to the window opening
Installation of horizontal cassette blinds
A special feature of the installation of horizontal cassette models is that its box with the mechanism must be mounted on the window frame. Installation of this type of curtains is very simple:
- Attach the top strip with the canvas using screws.
- Side guides on an adhesive base, glue to the window sash in a vertical position.
- Unfold the canvas and adjust the boundaries of the upper and lower positions of the canvas.
- Install all accessories.
With the help of this photo instruction you can learn the basic principle of how blinds are attached. Cassette curtains are easy to install yourself and you don’t have to contact an installer
Installation of roller blinds
Roller blinds have the same mechanism as horizontal ones, which is why they are installed in almost the same way. It is more convenient to mount them directly on the window sash, so it will be more convenient to open the window for ventilation. To attach this type of curtain, you need to use special brackets so that the window handle does not protrude from under the curtain.
The photo shows the mechanism for installing open-type roller blinds without drilling
How to install inter-frame blinds
To install interframe blinds you need:
- Unscrew the window frame and attach them to the inner sash of the window to check that the sizes of the slats match the size of the glass - ideally, these slats should be a little wider.
- Make markings for the holes for the cord and control handle.
- Using a drill, make two vertical holes in the window frame - top and bottom.
- Secure the brackets.
- Route the cord and flexible lead out through the holes.
- Secure the blinds using inter-frame brackets.
- Connect the control stick to the flexible rod using a clamp.
- Close the frame.
Inter-frame blinds require special installation skills, so if they are not available, it is better to contact specialists
Assembly of vertical blinds
Vertical blinds are installed exactly as described above. The difference is that the slats are installed after the cornice (the guide along which the runners move) has been secured. For convenience, before attaching the slats, you can use an adjustment cord to turn the sliders so that the slots in them are perpendicular to the cornice. Next, we simply snap the slats into the runners, inserting the strip until it clicks. So, we fasten all the slats one by one.
Fastening plastic vertical slats
If the slats are made of fabric, then after installing them do not forget to insert the lower weight.
Next, we attach the lower connecting chain to the lamellas. How to assemble vertical blinds
Photo gallery
Installation of blinds outside window openings
This method is most effective in order to level out the broken geometry of openings. And it is mainly used for installing vertical blinds.
Before starting work, you need to measure the window and mark with a pencil or marker where the dowels will be installed.
After this, holes are drilled at these points and dowels are placed on which the brackets are mounted. To prevent vertical blinds from swinging due to drafts, weights are used under each strip, connected to each other by a chain. There are two methods of external installation - inside the opening and outside it (on the ceiling or wall).
Drilled fasteners
This type of installation is much more reliable and durable, since screws screwed into a window frame or wall better withstand the weight of the structure and the constant mechanical loads placed on it.
Drilling requires precise preliminary measurements and perfect horizontal alignment using a level
Drilling the frame leads to damage to the window profile. Although they are insignificant (they do not interfere with sound and heat insulation), if you decide to remove the blinds in the future, when you remove the structure, noticeable marks will remain that will have to be masked, for example, with silicone or liquid plastic. Roller or horizontal systems are usually placed inside the window. To hang vertical blinds, drill into the ceiling or wall above the window opening.
Installation with drilling can be done independently or entrusted to specialists
For installation you will need:
- pencil;
- building level;
- screwdriver;
- drill (with drills 3 and 6 mm);
- hammer;
- screwdriver (flat or Phillips).
How to hang horizontal blinds
First, we mark the places for the mounting plates or brackets: measure 6 cm from the glass on both sides and mark with a pencil the places for the upcoming drilling. The line between the intended holes must be checked using a level so that it is strictly horizontal
This is important for the correct and long-term operation of the blind system. A window profile (especially not a new one) can crack when screwing in screws, so it is recommended to first use a thin drill in the marked fastening places, and then screw the screws into the prepared holes
On opening windows, holes for fastening brackets are made in the upper part of the sash
Holes for screws for brackets are drilled in the upper part of the sash (on opening windows) or on the outside of the glazing bead (on fixed windows). Then you need to hang the blinds, securing them in the brackets. When placing a blind system inside a window opening, a fishing line (clamp) is pulled to hold the roller blind or slats near the glass when the sashes are opened. A hole for the fishing line is drilled in the lower glazing bead (below the main beads) or on the side of the sash, the fastener is threaded through the plugs, achieving medium tension, and tied into a knot. All decorative and working parts are installed on the mounted structure: trim, latches, fastenings for the lever and chain.
Video: Installation of roller blinds
Instead of bulky curtains, people are increasingly installing light and elegant blinds on their windows. Their design is very easy to clean from dust, weighs less than any cornice with curtains, and costs much less. How to properly install blinds after purchasing them?
You need to think about this even before going to a specialty store. You first need to think about options for mounting the system, then purchase a kit and install the blinds. Installing blinds yourself largely depends on the method of opening and closing the window.
Blinds not only protect windows from bright sunlight, but also decorate the interior of the room.
Window sash installation
Can be used to install both roller and horizontal blinds.
The main advantage of this method is the possibility of selective shading of the sashes and maintaining the accessibility of the window sill space. This type of installation can be done with or without drilling. If you decide to drill the sashes, try not to damage the glass unit by first finding out its dimensions.
At the same time, there is no need to worry about the blinds being level, since the manufacture of windows always takes this important factor into account. It is enough that the top installation line is parallel to the top line of the sash. The tightness of the window will not be affected by the installation of blinds, thanks to modern multi-chamber packages.
If the sash to which the blinds are attached opens, then in this case the frame is not drilled, securing the blinds using a special tape - self-adhesive or clamps. This method is also optimal for new plastic windows, which are still under warranty from the manufacturer.