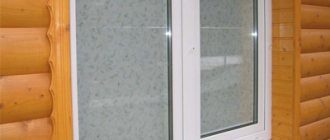
To eliminate malfunctions, you need to adjust the plastic windows. To do this, you can call specialists, or you can do everything yourself, following the instructions.
A prerequisite for the effective performance of the functions of a plastic window is correct adjustment. It maintains the tightness of the rebate, the necessary tightness, and the smooth movement of the sash without distortions or touching the frame. The initial adjustment of plastic windows is carried out by installers during their installation. After this, they should work without defects or irregularities. However, over time, small gaps appear and the sashes begin to sag a little. In the future, these deviations intensify, which interferes with the normal operation of the structure.
What is adjustment of plastic windows
Each window or door product has factory specifications. Over time they change, not for the better. Adjusting windows and doors returns the structure to its original state, which extends its service life.
Adjustment of plastic windows and doors is carried out in the following cases:
- creaking when opening or closing the sash;
- the handle gets stuck;
- it also stops fixing the movable element of the window - the sash;
- the sash must be lifted when it needs to be closed;
- draft through the gap between the frame and the window sash;
- traces of wear on the plastic.
Why do you need to regulate?
There are several reasons why a person has to independently adjust plastic windows.
Incorrect setting during installation
The main reason for manual adjustment of PVC window products is incorrect adjustment when they are built into the opening. Often, when installing such structures, a pre-developed diagram is used, which helps to insert the window correctly. However, some people do not use it, and because of this, windows are often installed incorrectly.
If errors were made during installation of the structure, the window hinges will not be in the correct position. This leads to the fact that the doors begin to close worse. Sometimes even manual adjustment of the frame does not help to eliminate the problem, and you have to dismantle the structure in order to then install it correctly in compliance with all the rules for installing PVC window frames.
Natural wear of the seal
It is no secret that the window opening must be well sealed, especially in winter when frost sets in. Special seals made of durable rubber are responsible for sealing the structure. Also, such rubberized gaskets retain moisture, prevent dust from entering the room and are responsible for sound insulation. Therefore, all expensive plastic structures are equipped with rubber gaskets.
However, even high-quality seals fail over time. The following factors contribute to this:
- improper care of rubber gaskets;
- use of low-quality rubber in the manufacture of seals;
- gasket damage.
If the seal wears out, you will have to adjust the PVC window products.
Sloppy and rough closing of the doors
It is known that plastic windows must be used carefully so as not to damage them. However, some people use them carelessly and close the doors roughly.
Such rough handling has a negative impact on the tightness of the window frames. Most often, this leads to minor or serious sagging of the sashes.
It is known that all sashes are held on the bottom hinge. If the window structure is not equipped with a special lock, then during ventilation mode you can accidentally move the handle incorrectly and the sash will sag. If such a problem occurs, you must immediately adjust the window and install the sash in place. If you do not do this, the bottom loop will come off the fastenings and you will have to install a new fastening loop.
Shrinkage of the window structure
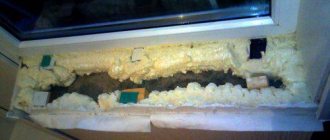
Some owners of a plastic window notice over time that it has sagged a lot. There are several reasons that lead to window frame shrinkage:
- Careless installation of spacer plates. Metal spacers are installed around the perimeter under the glass unit. If they are placed incorrectly, the structure may sag under the pressure of the metal plates.
- Shrinkage of the building. A common cause of sagging and damage to installed metal-plastic frames. If the shrinkage is insignificant, the windows sag by a few millimeters.
- Large gap between the window opening and the frame. When the window does not fit tightly against the window frame, it begins to shrink.
Wear of parts of the tilt and turn mechanism
If the window is sagging, it means that some parts related to the turning mechanism have worn out. To prevent them from wearing out for a long time, you must adhere to the following recommendations:
- Regular lubrication. All moving parts of the windows must be lubricated periodically. The first lubrication is carried out when an unpleasant creak appears when opening or closing the structure. When lubricating such products, it is better to use special oil compounds used for lubricating sewing machines. It is enough to apply 2-3 drops of oil to the moving parts so that they stop squeaking.
- The window mode needs to be changed. The structure cannot be left in one position for a long time. Therefore, you will have to periodically alternate the window opening modes.
Types of adjustment of plastic windows
There are several functionalities of PVC windows, where different mechanisms are used. They must be adjusted from time to time.
But there is a type called seasonal adjustment, which must be carried out when the seasons change - before the onset of cold weather and warming . That’s what it’s called – adjustment for winter or summer. Regulatory processes are carried out in autumn and spring.
Seasonal adjustment
This is a simple setup option. It is based on changing the gap between the sash and the frame of the plastic window. The bottom line is that in winter and at low temperatures, rubber decreases in size, which causes a gap to appear through which cold air will freely penetrate into the room. Therefore, the gap is kept minimal or closed tightly.
In the warm season, on the contrary, the rubber expands. Therefore, the pressure is made weaker. At the same time, the tightness of the window remains maximum.
Find out how to install a supply ventilation valve on a plastic window.
Adjusting the folding mechanism
This device is necessary for ventilation. That is, the sash does not open completely, but leaves a small gap for air to penetrate from the street. This is an additional feature.
The window itself opens and closes using standard technology:
- if the handle is down, it means the window is closed;
- if it is turned to the side, it is open.
To ventilate, the handle must be turned 180º from the “closed” position.
Adjusting the pressure of a plastic window is that the pressure often weakens, and it must be brought to normal. Therefore, using an asterisk or hexagon, turn the screw located in the corner of the window structure. As a result, the sash either rises or falls.
Adjusting fittings
The word “hardware” includes several elements: a plastic window handle, pins, scissors, strikers and locking strips, a micro-ventilation system, a lock. As for the settings, three positions are taken into account:
- repair;
- replacing them with new ones;
- adjustment of fittings.
REPLACING THE SEAL
Since blowing through windows can occur due to wear of the rubber seal, do not forget to monitor its condition. It is a gasket made of various materials (rubber, silicone or thermoplastic) with a tubular structure. Its main task is to seal joints, which increases the protective properties of the profile.
Over time, even the highest quality material will need to be replaced. Regular exposure to different temperatures, water, and dust leads to the loss of the rubber seal’s functional properties—insulating properties. Typically, this problem occurs 5-7 years after installing a plastic window structure (balcony door).
Initially, cracks form that are no longer able to prevent the penetration of moisture. At low temperatures, wet rubber is highly susceptible to ruptures, which is why wind, cold, dust, and noise easily enter the room.
In addition, a violation of the tightness can cause water to enter the window parts, and this in turn reduces its service life. Timely replacement of the gasket will help avoid this.
A dried out or damaged seal can be easily replaced. You need to remove the old rubber band from the groove, and then carefully put the new one in, without stretching it (this is important). To ensure that it maintains the required level of insulation longer, wipe and lubricate it with silicone grease several times a year. Try not to use aggressive cleaning agents that may damage the parts.
Main adjustment points for PVC windows
There are three points through which adjustment is made:
- Bottom loop. Here you can raise the sash or lower it, or move it horizontally. The displacement usually does not exceed 2 mm.
- Top loop. Here you can only achieve movement in the horizontal direction.
- Trunnions, also known as eccentrics, located on the side of the plastic window sash. With their help, the pressure is adjusted. Their number varies from 4 to 8, respectively, and there may be several adjustment points.
What tools will you need?
To adjust plastic windows yourself, you will need a fairly simple kit, including:
- Hex wrench No. 4;
- Pliers;
- Phillips and flat screwdrivers;
- A screwdriver with a set of bits of different shapes.
The tools from this set are usually always available at home. An exception may be a hexagon, without which the work cannot be completed - this is the main regulatory tool. If you don’t know what key is needed to adjust plastic windows and where you can find it, then contact any furniture hardware store. 4 mm hexagons are used when assembling any modern cabinet furniture, so finding such a key will not be a problem.
A screwdriver and screwdrivers will be needed to work with the screw connections with which the hardware elements are attached to the profile. Pliers are needed as an auxiliary tool.
It is recommended to additionally prepare silicone grease for the fittings. You can also use WD-40 or other similar spray lubricants.
How to adjust a plastic window for winter and summer
It is easy to correctly adjust a plastic window for winter and summer. In window structures, the trunnions are factory installed in a neutral position. This is not the “winter” or “summer” pressure mode. But you need to understand that there is a certain variety of window fittings models. Accordingly, trunnions come in different types in shape:
- Oval.
- Round with a mark (groove) or a dot on the front plane. Another option is when there is no mark. But there are different thicknesses of the eccentric wall. Less thickness is considered a mark.
- Round with rotating head.
- Round with eccentric roller. A convenient option because adjustment is made without tools - manually.
- Static, refer to models with the index “E”.
For the winter
If there is a mark on the pin of a plastic window, then in the “winter” mode it should be located towards the room, otherwise – towards the rubber seal of the sash. Therefore, you need to take a hexagon, insert it into the hole in the trunnion and turn it so that the point or groove is in the right place.
If the eccentric has an oval shape, then the rotation is made using pliers. The neutral position of the trunnion is at an angle.
To transfer to winter, you need to install the element horizontally.
For summer
Here it's the other way around:
- The round pins with a mark are rotated so that the mark is on the outside - facing the street.
- Oval ones are placed vertically.
There are several pins on the plastic window that serve as clamping bolts. That is, opposite them, pressure strips are always installed on the frame, they are also reciprocal. Before you start making adjustments, you need to count the slats. Their number corresponds to the number of eccentrics. And each of the latter must be adjusted to the correct position.
If at least one is not adjusted, then the geometry of the clamp will be disrupted, which will entail a distortion with gaps between the frame and the sash.
Negative aspects of changing the mode of a plastic window
Strong pressure in winter mode has a negative effect on the seals. They are subjected to heavy loads because they are compressed under the action of the axles inserted behind the strikers. And although the rubber is ready for such loads, it is only on an ongoing basis.
If you increase or decrease the load, the rubber will lose its properties. Here we must also add different temperature and humidity conditions, which change in accordance with the beginning and end of a particular season.
It is optimal for seals to be in one of the modes constantly. If you change the latter, the service life of rubber products is reduced. They will have to be changed more often. But on the other hand, when changing the pressure mode, living comfort improves, plus heat loss in winter is reduced, which is an important factor today.
Winter and summer mode
Most often, plastic windows need to be adjusted for the new season: in winter, complete tightness is desirable, and in summer, you can let in a little fresh air. This is achieved by adjusting the sash pressure density. It's easy to do it yourself. Once you figure it out, you’ll be surprised how simple everything is...
The window sash is pressed to the frame using pins. These are movable metal protrusions on the side surface of the sash. When the handle is turned, they move behind the mating metal plates mounted on the frame. In order to be able to adjust the tightness of the fit of the sash and frame, they have an eccentric - either they themselves are made of an oval shape, or in the center of the round protrusion there is an adjustment with an offset center. By changing the position of the trunnions (see photo), you change the degree of pressure, that is, eliminate the draft from under the sash.
Adjusting the pressure of the plastic window sash to the frame
As you can see, the shapes of the locking protrusions can be different. Various tools can be used to adjust them. If your window has eccentrics like those in the picture on the left - oval-shaped protrusions - change their position using pliers: clamp it and turn it in the desired direction.
If the locking tab is round, as in the picture on the left, it can be slotted for a screwdriver or hex key. After examining them, you will easily understand which tool you need: a regular screwdriver or a No. 4 hexagon. Insert a key or screwdriver into the slot and also turn it to the desired position.
Place all the protrusions in the same position. Please note that they are not only on one side of the sash - the outer one, but also on the inner side (at least one, but there is one), and can also be at the top and bottom. Set all the existing locking lugs in the same position, otherwise the frame will warp and there will be blowing from under it.
Turn the eccentric using pliers or a hex wrench.
When adjusting the fittings of plastic windows, remember that weak pressure corresponds to the summer mode of closing plastic windows, standard or strong - to the winter mode. If you carry out maintenance work in winter, first set it to the standard position and check if there is airflow. It is not recommended to immediately pinch the rubber bands on new PVC windows. In this position, the rubber seal installed around the perimeter is strongly pressed. Because of this, over time it loses elasticity. A normal seal has a 15-year warranty, but still... If the pressure is immediately set to maximum, the rubber will deteriorate faster. As a result, once again setting the winter position on the plastic windows, you will find that it is still blowing from under the sash, and the rubber is all cracked. This means it's time to change the seal. This is also not very difficult, but it takes more time, and you still need to buy tires.
So: the winter and summer positions of plastic windows are set by changing the position of the locking lugs - trunnions. Everything is explained in detail in the video below. After viewing, adjusting plastic windows yourself will finally cease to be a problem.
Read how to install a mosquito net on a window here.
Plastic window handle repair
The handle has only one function - to fix the sash when it is necessary to close the window. Conversely, when opening, stop committing. Purely functionally it goes like this:
- turned the handle down;
- the trunnions move along the locking bars;
- They go behind the counter bars, where they stop.
The strike plates are a kind of retainer.
It is impossible to adjust the plastic window using the handle. That's not what it's intended for. And it itself cannot be regulated either - there is no point. It can only be repaired if:
- it's broken;
- it was jammed;
- it's hard to turn it;
- there was a backlash.
Replacing the handle
This must be done when the handle is broken. Process step by step:
- under the handle there is a rectangular bar that must be pulled towards you and turned 90º in any direction;
- there are two screws under it that can be unscrewed with a Phillips screwdriver;
- Removed the screws and pulled the handle towards you.
In reverse order, you need to install new fittings.
The handle is loose
The backlash is the easiest to remove. For this:
- the decorative strip rotates;
- tighten the screws with a screwdriver if they are loose.
Difficult to turn
There are two reasons:
- Lack of lubrication and contamination of the mechanism. To do this, you need to carry out operations, as with replacement. – pull out the handle, clean it of dirt and lubricate it.
- Strong pressure. This is sometimes reflected at the end of a turn when closing the plastic window. It is necessary to loosen the trunnions - move them slightly to the “summer” position.
The handle is jammed
This happens when the sash is opened without fully tightening the handle. But at the same time the plastic window opened. It's all about the blocker. This element is installed specifically so that the locking mechanism does not break.
The location of the blocker is usually under the handle on the end side of the sash. It is he who blocks the movement of the eccentrics. This blocking part has a different shape from different manufacturers and can be located in different places. For example, under the upper or lower eccentric.
To unlock, you need to press the locking latch, pressing it against the surface of the end of the plastic window sash. And at the same time you need to immediately turn the handle. In some models of plastic windows, the blocker must be returned to the vertical position.
The sash stopped closing: problem solving
Adjustment of the pressure must be made when the window has difficulty moving from the open position to the closed position. Often the reason is the lock device, which does not allow the handle to be turned. The exact sequence of actions depends on the specific manufacturer. Some examples are equipped with a thin plate equipped with a spring on the inside, which must be pressed and the handle turned to close the window. Other copies are equipped with a tongue under the handle - when you press on it, the lock of the adjusted mechanism is removed.
If the sash stops closing, you need to unlock the lock
In a situation where the window still does not want to close, minor repairs will be required. It is necessary to open the sash, find the element of the mechanism that serves as a hook for the tongue, unscrew and install a thin plate on the inside. The solution helps to shift the mechanism closer to the response element. As a result, the contact area will increase, allowing you to easily close the window.
Adjusting the micro-ventilation system
The design of a modern PVC window has a number of additional convenient functions. One of them is the window function. This is when the top of the sash moves away from the frame, creating a gap.
This function has two possible options:
- Ventilation. The window sash extends a considerable distance from the frame so that a large volume of air masses can be admitted into the room.
- Micro-ventilation. The gap is small, which allows you to leave the plastic window in this position for a long time.
To use this function, you must use the handle of the plastic window. It can have four positions, as shown in the photo below:
- Located at the bottom - the window is closed.
- Installation in a horizontal plane - open.
- Rises up vertically - ventilation.
- Rotate 45º – micro-ventilation.
With micro-ventilation, adjustments can be made by increasing or decreasing the gap. The design of the plastic window has a micro-ventilation system mechanism; it is sliding and resembles scissors. That's what the masters call him.
One of the elements of the scissors is the adjusting screw. It can be used to make two types of adjustments:
- clamp;
- the angle of inclination of the sash during micro-ventilation.
How to change the pressure
First you need to open the window. Further:
- the handle is turned up for ventilation;
- the adjusting screw is turned 180º clockwise using a hexagon;
- the handle is moved to a horizontal position - open;
- the window is closed;
- the handle is lowered down.
This sequence of operations allows you to increase the pressure and reduce the gap. To check the work, you can use a burning match, simply by bringing it to the junction of the frame and the sash. If the flame does not deviate towards the plastic window, then the pressure is maximum. If it deviates, then all the above operations must be carried out again in the same sequence.
Angle adjustment
The operations here are the same as when adjusting the pressure. If the screw is tightened clockwise all the way, the angle of inclination decreases within a few millimeters. If you unscrew the screw, the angle increases to 2 cm.
Working with fittings
To achieve the desired result, when adjusting window structures, the owner of a living space should familiarize himself with some of the nuances of this process :
- Adjustment should be carried out only after diagnosing the operability of the window structure and identifying all violations.
- Each element of the hardware is responsible for a specific function - before you start turning the screw, you should accurately identify its purpose so as not to aggravate the situation.
- When adjusting, you need to use only hand screwdrivers and wrenches, since the fittings are a highly sensitive mechanism, and even a slight turn of the screw can cause misalignment.
- After each adjustment, all moving metal parts must be serviced and lubricated.
When making adjustments, you should also monitor the performance of the mechanism step by step. It is not allowed to adjust the position of the fittings immediately with a large amplitude, as this will lead to a violation of the geometry, touching metal elements and the formation of uneven gaps.
The plastic window does not close
Situations where plastic windows do not close tightly are rare. This usually occurs after prolonged use of the product. The reason is a decrease in the quality of the locking system.
The locking system stops working correctly for three reasons:
- Window fittings are worn out.
- The geometry of the inserted glass unit is broken.
- The height of the sash was adjusted incorrectly - the trunnions were raised to the maximum, so they simply did not go beyond the strikers.
The last reason must be dealt with in this way. First of all, determine which trunnion does not extend beyond the bar. To do this, use your hands at each eccentric to pull the plastic window sash towards you. There is no need to pull hard. If the sash moves slightly away from the frame, it means there is no engagement.
The problem can be solved simply - using the adjusting screw on the strike plates you need to raise them. If the shift is large and the screw does not help, you will have to remove the bar and reinstall it higher. Unscrew the screws, move the bar higher and secure it in a new place with the same fasteners.
There may be another reason behind this defect. In this case, the trunnions and strikers are located in the required positions. It’s just that a gap is formed between these two elements due to the concavity of the sash profile. Therefore, no engagement occurs. The easiest way to correct the situation is to raise the counter bars:
- they are removed after unscrewing the screws;
- plastic linings 2-4 mm thick are installed under them;
- The slats are set in place and secured to the window frame.
Sometimes this method doesn't help. Then the whole point is the loss of the geometry of the glass unit, so the window does not close well. This can happen for various reasons, but the basis of the defect is the straightening gaskets, with the help of which a gap is formed between the double-glazed window and the profiles. These gaskets, after deformation of the plastic window profile, do not maintain the required gap. It needs to be restored by adding additional gaskets.
This is done like this:
- The glazing bead is removed near the profile that has become deformed.
- The amount of profile deformation is measured. You can use a long ruler for this.
- The gap is measured.
- Gaskets are selected based on its size.
- Using a plastic spatula (not metal), the glass unit is pressed away from the profile.
- Prepared gaskets are installed in the resulting space. Sometimes one is enough.
- The spatula is removed.
- The bead is installed in place.
At the very beginning of work on the site, I published a small material - a guide on adjusting plastic windows. Despite the short and insufficiently informative post, in my opinion, it is still in demand. Many years have passed since then, and it seems that the time has come to expand the information “in depth.” So what can you do yourself, and what is better left to the master?
Content:
What is window adjustment Preliminary diagnostics Adjustment of windows by width and height using a key Adjustment of slot ventilators Strike plates and their correct installation Adjustment of windows by clamping Adjustment of sashes by geometry, or “crossbar” Adjustment of windows - profitable Summary
What is window adjustment?
As a rule, people think about adjusting plastic windows when they close or open poorly, touch and stick, blow out from different sides, etc. That is, when the window is not yet broken, but is already acting up and has difficulty performing its functions. Many people believe that window adjustment is a simple “tightening” of the trunnions and hinges of the fittings, which need to be “tightened” almost every year. And it’s not surprising, because sooner or later your plastic window sags again and starts to blow. Think about it: PVC structures have been installed in Russia for three decades now. Everything was calculated, even by the Germans, down to the smallest detail, and tested in practice. However, the same problems with windows are observed year after year. Why is this happening? How to adjust the window “once and for all”, and is it possible? The answer is yes, it’s possible if you know what to do. Window adjustment is a process whose ultimate goal is not just eliminating basic faults and bringing it into working condition. The window must again (or for the first time) become the way the manufacturer intended and designed it. This is, in fact, a whole set of measures in which, contrary to popular belief, screws and hinges are assigned a modest, auxiliary role.
In all the years of my work (more than 15 years), I remember only a couple of cases when it was more expedient to replace windows rather than repair them. Adjusting windows, even those that have served for many years, and “returning them to service” is much more profitable than replacing them. After all, in addition to the obvious costs of purchasing new double-glazed windows, you have to go through the entire “debacle” of installation work again, and, often, renovate the apartment. The material will go “from simple to complex.” You can easily do the simplest adjustment of the window fittings yourself (twist it a little, so to speak), but, for example, I strongly recommend entrusting disassembling the sash and correcting its “geometry” (that is, shape) to an experienced specialist.
Diagnostics of the sash position of a plastic window
To determine the algorithm for future window adjustment, it is advisable to make simple diagnostics. You need to take a regular pencil and mark the position of the corners and the middle part of the sash, as shown in the photo.
Then open the window and measure how many millimeters the sash “overlaps” the frame. The average amount of the so-called “overlap” should normally be approximately 8 mm.
For correctly assembled and installed windows, the overlap on all sides is almost the same. If a window does not close well, after diagnostics it will be immediately clear whether it is sagging too much. By comparing the marks in several places, you will get an idea of how much the sash is skewed relative to the frame. If there is a slight (1-2 mm) deviation from the norm, it is enough to adjust the window by tightening or loosening the screws on the fittings. If the difference in height between the corners is more than 2-3 mm, the sash geometry may need to be corrected (this is done from the inside; here, adjusting the window with a key will not help).
If the “overlap” is too large, the sash will constantly touch the frame, and if it is too small, it will blow from the window.
Adjusting the window sash position using a key
If the window does not close well, touching the frame from below, above or from the side, the easiest option is to adjust it with a key, using screws specially designed for this. As a rule, these keys are not some special “window” keys - one suitable for our purposes can almost always be found at the nearest auto parts store. Most often you need a regular 4 mm “furniture” hexagon, but there are other options, for example, stars. The problem can only arise when adjusting windows with non-standard keys, but this rarely happens. For example, a branded key for the lower hinges of Aubi 300 fittings, due to its discontinuation, can be difficult to find on sale (however, most experienced craftsmen have it).
Window adjustment when sagging and touching the lower corner under the handle
When closing a window that has sagged downward, it usually has to be “pushed” into the frame. To raise it, you can use two screws - a height adjustment screw in the bottom hinge, and a width adjustment screw in the top hinge. We screw these screws in clockwise, and the angle under the handle rises (the features of adjusting the lower hinge of the Aubi 300 fittings can be found here).
In some fitting systems, for example Winkhaus, the top hinge can be tightened by turning the screw counterclockwise. On Roto swing doors, the width adjustment screw is located on the opposite side of the hinge, along the same axis.
In the Aubi 300 system, instead of a screw, there is a shaped washer for several fixed positions.
If the sash knocks on the top striker on the frame when closing
To eliminate the knocking, screw in the screw for adjusting the upper hinge width, and the sash moves away from the strike plate.
When touching the side of the window (in the center) , the width adjustment screws of both the upper and lower hinges are used. At the same time, the sash moves towards the hinges.
If the contact occurs above the sash , you can try to slightly unscrew the height adjustment screw in the lower hinge (the sash will drop lower). Problems with slot ventilators are discussed in the next section.
When opening a window, does something click between the hinges? Try to lift the sash up a little using the same screw for raising the height of the lower hinge. In addition, it may be necessary to rearrange the corresponding striker (see below).
That, in fact, is all you need to know to adjust a window that slightly touches the frame.
If the window is sagging a lot, and simple adjustment does not help (for example, when you try to lift the sash, the top immediately begins to touch), you need to correct its “geometry”. I will tell you about the features of window sash at the end of the article.
Adjustment of slot ventilators and their counters
The fittings on the swing-out doors may include a 45-degree slot ventilation system. For all its advantages, it requires fairly precise adjustment of the window, often causing jamming, noise and knocking in the mechanism. Diagnosing this malfunction sometimes causes difficulties, since the ventilator is usually located in the upper part of the sash and is not visible during operation.
To adjust the window, it is better to stand on a window sill or stepladder and look from above the sash. When turning the handle strictly horizontally or vertically , the pin of the fittings should be at the same distance (2-3 mm) from the central protrusion of the bar, without touching it. Correct position of the strike plate relative to the fittings (using MACO as an example):
Displacement of the plank or sash causes rubbing and knocking.
To adjust the position of the strip, the holes for the screws are usually made oval. You should completely unscrew them, remove the bar and install it correctly. If the cause of the jamming is the sideways movement of the window sash (determined by the overlap), use the corresponding screw in the upper hinge. Plastic windows with ROTO NT fittings may require sash height adjustment.
Due to the design features of the slot ventilator, the locking pin of the fittings works “closely” to the strip and often touches it. You should adjust the sash using the key, lowering it down a little, and if this does not work, adjust it according to the geometry.
Before rearranging the strikers on a plastic window, you need to make sure that the sash is not skewed relative to the frame.
Pressure counters and adjustment of their position
The clamping of the plastic window sash is provided by strikers on the frame. They are the hooks for the locking pins of the mechanism and must be installed correctly.
Checking the position of the strikers
Have you determined whether the sash is level, or even adjusted it to overlap, but it is still blowing from the window? This often happens when the strikers are incorrectly positioned on the frame. Even in the most modern window factories, there is a “human factor”, not to mention the fact that the assembly of sashes and frames usually takes place in different areas. In general, the distance from the strike plate to the locking pin of a plastic window should be 3-5 mm (with the window open, the handle is strictly horizontal).
If the gap is significantly larger, the sash may simply not be pressed all the way, and if there is practically no gap, knocking and clicking can be heard when opening and closing the window.
Errors especially often occur when installing strips on swing-out sashes on the hinge side (they are not visible if the sashes are not fully open).
There are also frequent cases of intentional rearrangement of strikers by installers after unsuccessful attempts to adjust the window. When you remove such a strip, you will see a second hole from the screw.
If the sash is level and does not sag (the overlap at the top and bottom is the same), the planks should be installed in the desired position and the screws should be screwed into new places. However, you should be aware that such discrepancies may also indicate serious deformation of the sash. In the case of a strong diagonal distortion, first of all you should adjust the window according to its geometry - then most likely there will be no need to rearrange the slats.
If the distance between the locking pin and the strike plate is too large, the fittings do not work - therefore there is blowing from under the seal, and attempts to adjust the window to the clamp do not bring results.
Adjusting windows for pressure
To begin with, you need to answer yourself the question - why, in fact, adjust the clamps? To eliminate the blowing - most likely, you will say. There are many such recommendations on the Internet, and, in part, they have a right to exist. But only under two conditions that do not always occur simultaneously: - your window sashes are not deformed; - windows (or their seals) are more than 10 years old. Then adjusting the window to the pressure will help delay the replacement of “tired” tires for some time. If there is a deflection of the plastic profile of more than 2-3 mm, most likely, such an adjustment will not help, and closing the window will become much worse. In practice, on the contrary, I often have to loosen the clamps (return them to the factory position), since after adjusting the windows according to their geometry, the tightness is usually completely restored - the window stops blowing. That is why the “winter-summer” adjustment is not discussed in this article. After all, under maximum load, and even in winter, the seal does not last long, and the fittings behind it, due to constant torsion back and forth and increased wear, will require replacement ahead of schedule. I consider absolutely unnecessary any regular manipulations with fully functional plastic windows, except for mandatory annual lubrication . As they say, don’t interfere with the mechanism working properly :). And I answer clients’ questions about their service life like this: it will last for our lifetime!
A simple adjustment of the windows to the pressure is done as follows.
If you want to increase the pressing density of the sash, the eccentric (usually this is the locking pin) must be installed with a point (or its wide side) to the sealing rubber .
If, on the contrary, you need to loosen the pressure and make the handle move easier, turn the point (or the wide part of the eccentric) away from the rubber .
With the “old” Roto Centro fittings (the one in which the eccentric is located in the striker), to adjust for increased pressure, you should turn that part of the strip towards the rubber, on the side of which the locking pin is located.
The pins of the Winkhaus AutoPilot fittings are adjusted without a key, simply by hand, by pulling and turning in the desired direction.
Adjustment of the sash pressure in the lower hinge (not available for all windows). There are options for both an asterisk and a regular screwdriver.
It is also possible to adjust the pressure in the top loop.
However, the latter adjustment is used extremely rarely, since the degree of pressure practically does not affect the blowing through the upper loops (in most cases, in the upper loop, air constantly passes through small gaps, this is a normal situation).
And remember, the rubber window seal is not designed for constant operation in “winter” mode. Being strongly “flattened”, it will quickly lose its elasticity and finally stop retaining heat.
Adjusting windows according to geometry (“crosslinking” sashes)
What happens to a plastic window sash over time? To put it simply, the main influence on it is exerted by two forces - the force of gravity and the force of, so to speak, “friction” (it occurs when the window is closed).
The first turns the rectangle of the plastic profile into a parallelogram, causing the corner under the handle to sag and problems with opening and closing. This also causes air to blow through the top of wide windows, and the pressure in the area of the handle deteriorates. The second causes a significant deflection of the “hinged” vertical part of the sash, due to the lateral pressure of the rubber on the plastic when closing the window. The notorious blowing between the hinges begins, which has become almost a “calling card” of low-quality plastic windows. Sometimes the deflection is so great that, combined with installation defects, the fittings on the hinge side simply do not engage. The window, in fact, does not close completely, and often you can even hear the street. Therefore, the usual adjustment of the window trunnions with a key in this case is pointless, and replacing the seal does not help for long, or does not help at all. The problem with skew and deflection of profiles also has internal reasons. The fact is that the rectangular shape required for normal operation is given to the window by a double-glazed window. Yes, yes, everything is supported by glass and special adjustment plates. This is how plates under a double-glazed window should be installed according to GOST 30674-99.
Why is this so? Let's look at a simple example, using a children's construction set as a model of our window sash.
If you assemble a rectangle from planks, under the influence of gravity, at the slightest loosening of the screws, it will tend to turn into a parallelogram (provided that one side is rigidly fixed).
A plastic window sash without a double-glazed window behaves the same way - the profiles are reinforced with metal, but there is no reinforcement in the corners. If we install another bar diagonally, then our “sash” will no longer sag, right? A block of 2-3 glued glasses, or a double-glazed window, is one of the load-bearing elements in the design of a plastic window, and must expand (or “wedge”) the sash in a strictly defined way. For this purpose, there are special support (leveling) and adjustment plates (or pads). The linings, indicated in the GOST diagram in black, give the sash the necessary rigidity, holding it diagonally. In cases where they are located differently, are incorrectly selected in thickness, or are missing (and are not visible from the outside), there can be no talk of any successful window adjustment with a key . Moreover, despite GOST, in practice it is often necessary to install additional side plates (in the center of the vertical sides) to prevent deflection, especially on high sashes.
The adjustment plates have a thickness of 1 to 6 mm, different colors corresponding to their thickness, and must be installed with the flat part against the glass unit. Available in different widths, in the photo - 32 mm plates.
Attention! The following outlines the general principles of adjusting plastic windows “according to geometry”. I categorically do not recommend doing this to “home craftsmen”! To correct the shape of the sash, it is necessary to remove and reinstall the glazing beads, and sometimes the glass unit. The re-linking should be done by a window repair specialist, or at least an installer with relevant experience and special tools. Without practice, you can dent and scratch the plastic, as well as seriously cut your hands on the sharp edges of the glass (or even break the glass unit). I am not responsible for the consequences of disassembling and repairing windows myself. This section is purely informational in nature and will help you understand what an experienced, knowledgeable master should do.
When the sash sag
Often, when disassembling such sashes, it is discovered that one or several adjustment plates are missing at all, or they are not in the right place, or their thickness is incorrectly selected.
To correctly adjust the window height, it is enough to achieve the same “overlap” at the top and bottom by rearranging and adding adjustment plates of suitable thickness. Sometimes it is enough to simply move the existing plates as close to the corners as possible to eliminate sagging of the sash.
Before adjustment:
After adjustment:
An attentive reader may notice that according to GOST, the linings are installed at some distance from the inner corner of the sash, but in my photos they are right in the corner. The fact is that in reality, the rigidity of modern metal-plastic window profiles is usually, alas, significantly lower than it should have been according to the calculations of German engineers. Therefore, I install the plates in this way to reduce the deformation of the sash (which occurs mainly at the bottom, due to the weight of the glass unit).
When touching the middle of the lower part of a wide sash
If a wide sash rubs a lot from below, in the center (often against the striker bar), and does not close well, you should, again, move the lower adjustment plate to the very corner, until it stops. The load on the profile is reduced and grazing stops in most cases.
Please note that when adjusting the windows according to geometry, the hinges do not need to be “twisted” at all - they remain in the optimal, middle position.
When blowing
When blowing from the side (usually the window blows between the hinges), it is often necessary to install additional adjustment plates in the center of the sash.
Thus, the sash is leveled, the fittings engage, the seal is pressed against the frame, and the blowing stops. If the window blows from the side of the handle, the actions are similar. The width of the “overlap”, again, is checked with a pencil (should be approximately 8 mm).
You probably already realized that the main thing in adjusting the window geometry is to ensure uniform overlap of the sash along the entire perimeter of the frame . Without this, there will be neither a normal fit of the rubber seal nor correct operation of the fittings. No matter how you twist the screws, it is usually impossible to achieve such a result with them alone.
Using a crossbar can also correct some mistakes made during the installation of plastic windows. For example, if the frame was “stretched” during installation, the craftsman can slightly pull the sash in the same direction. In this relatively simple way, it is often possible to ensure good pressure on the seal and eliminate blowing without redoing the installation (no need to break and rebuild the side slopes again). Visually, a slight “barrel” bend of the sash will be invisible.
If even after all the manipulations, alignment of the geometry and adjustment of the window, it still blows from it - then, and only then, the seal should be changed.
Window adjustments, done correctly, will save not only your health, but also your money.
At the time of writing this article, the author was repairing windows in a new building. The satisfied housewife said that she will now reduce the temperature of the radiators in the apartment to a minimum, and the monthly heating bill will immediately decrease. It turned out that earlier, when it was blowing strongly from the windows, she was forced to pay for heating the street - heat meters were already installed in the house. Over time, such metering devices will appear in all apartments, so the cost of calling a specialist, sooner or later, will pay off many times over. The service life of the seals and fittings of plastic windows, adjusted according to geometry (and therefore operating without unnecessary loads), also increases significantly.
Summary
Simple window adjustment with a key is within the capabilities of almost anyone. But this should only be done in case of minor faults. If your windows close very poorly, or there is a lot of wind coming out of them, it is better to contact an experienced specialist who will correctly adjust them according to their geometry just once. And you can, as they say, continue to sleep peacefully!
The plastic window does not open
There are different situations when a plastic window does not open. And their reasons are also different:
- The handle is stuck or it rotates freely.
- The sash is sagging or deformed.
When the handle jams, you don’t need to do anything yourself. The problem is due to the fact that the strapping mechanism or one of its parts has failed. The blocker may have been triggered. To eliminate the defect, you need to remove the glass unit. An unprofessional approach can ruin everything.
If the handle rotates freely, there are two scenarios:
- Rotates in different directions. There is only one way to solve the problem - replace the handle with a new one. After which the plastic window will open without problems.
- The handle is in good condition, but the command from it does not reach the trunnions. The reason is that the transmission mechanism, also known as the gearbox, is faulty. There is no need to change it yourself. This is a complex operation.
If the sash is sagging or deformed, then this is due to the adjustment, which involves the hinges of the plastic window.
What to do if it closes tightly?
PVC doors and windows are a complex mechanism consisting of many elements. If you do not take proper care of all the parts and ignore regular maintenance, problems may begin over time. The most common of them is tight movement. This is best noticeable when closing the window after ventilation mode: you simply cannot turn the handle all the way.
To prevent the window from jamming at the most inopportune moment - winter cold or summer heat, you should not delay solving the problem: start adjusting it immediately.
If tightly turning the handle is not associated with extraneous sounds, it is enough to lubricate the fittings (hinges, handle mechanism). As a lubricant, use machine oil or special silicone grease for PVC windows.
Advice! It is most convenient to use aerosol-type lubricants, but standard packaging with a long spout will also work.
Before spraying oil on the moving parts of the fittings, wipe them with a clean cloth to remove visible dirt. Dust particles trapped inside can cause unpleasant sounds and system breakdowns.
Important! If the window is already making sounds when turning the handle or opening and closing, contact a specialist: the fittings will need to be disassembled or cleaned, or even replaced with new ones.
How to adjust a plastic window so it doesn't blow
Usually, it starts to blow from the side of a plastic window if its sash sag or sag (gaps form between it and the frame). Sometimes a gap appears between the loops, through which it begins to blow.
If it's sagging
When open, the weight of the profiles and double-glazed windows puts a large load on the hinges. In this case, the upper one is loaded more, causing the metal profile to bend towards the room. In the lower loop, on the contrary, the metal is pressed in. It turns out that the upper corner on the side of the handle sags. Hence the problems with ventilation.
The problem is solved like this:
- it is necessary to remove the decorative protective strips from the hinges;
- open the window;
- tighten the sash to the frame using the adjusting screw of the upper hinge;
- lift the sash using the screw on the bottom hinge.
All screws rotate clockwise. Each 180º turn must be accompanied by a check - the window must be closed and the gap checked.
If you sat down
The situation is this: the sash is located vertically, but has moved away from the frame. The hinges were subject to the same loads, so the same deformation of the profiles occurred at these points.
How to adjust the plastic structure in this case:
- the decorative strip is removed from the bottom loop;
- the upper screw, which rotates clockwise, lifts the sash;
- the bar is installed in place.
Drafts around loops
Everything here is also simple. Simply adjustment is made using horizontal screws on each hinge. In this case, the displacement can be carried out within a few millimeters, depending on the model and manufacturer. It is necessary to make half a turn of each screw and check for the presence or absence of a draft.
Cleaning the fittings from accumulated dust
Once every 5-7 years, windows need deep cleaning to remove accumulated dirt in hard-to-reach places. Without cleaning them in a timely manner, sooner or later you will have to repair them, since their functioning will be impaired. Repairs are quite labor-intensive in terms of the weight of the structure, so it is advisable to carry out the work with assistants.
(function(w, d, n, s, t) { w[n] = w[n] || []; w[n].push(function() { Ya.Context.AdvManager.render({ blockId: "RA-510923-1", renderTo: "yandex_rtb_R-A-510923-1", async: true }); }); t = d.getElementsByTagName("script")[0]; s = d.createElement(" script"); s.type = "text/javascript"; s.src = "//an.yandex.ru/system/context.js"; s.async = true; t.parentNode.insertBefore(s, t) ; })(this, this.document, "yandexContextAsyncCallbacks");
Scheme for adjusting elements to keep them clean and tidy:
- remove the sash from its hinges, removing the overhead frame elements;
- remove the top axle;
- remove the sash from the lower hinges;
- carefully set aside.
Removal of elements must be done with an assistant.
The surface of the sash is carefully inspected and the screws attached to it are unscrewed. The mechanism parts are washed well, preferably using specialized solutions that are easy to apply with a brush. After this, the structure is dried well in the fresh air or with cold air from a hairdryer. Lubricant is applied to each driving mechanism. The fittings are assembled in the reverse order and installed in their original place.
Before assembling the window, all fittings must be lubricated.
Adjusting the vertical and horizontal position of the window
When adjusting a plastic window with your own hands, you need to do everything gradually. For example, it is recommended to shift it by 1 mm, check it and, if necessary, further adjust it.
Each hinge has two screws: one located in the top end, the second on the side. The first adjustment is made vertically, the second horizontally. A hexagon is used for this. The upper regulators are usually closed with plugs.
To adjust the plastic window vertically, you need to rotate the screws clockwise, during which the sash will begin to rise. Conversely, counterclockwise rotation results in lowering.
Horizontal adjustment is carried out with the window open. To do this, rotation is done clockwise. In this case, the sash will move towards the frame. By rotating the screw in the opposite direction, movement is achieved from the frame.
When should you not act on your own?
In some cases, self-adjustment is not recommended. It is advisable to contact professional installers if any of the following situations occur :
- The window does not work properly immediately after it is installed. In such cases, you should immediately file a claim with the installation company so that its representatives can adjust the fittings correctly.
- If obvious defects are detected on the fittings - deformations, thread breakage or peeling from the plastic surface.
- In case of physical wear of the mechanisms.
- If after adjustments the situation has not changed, and the window continues to blow or close poorly.
- In the absence of experience in repair work or lack of an appropriate set of tools.
Professional window adjusters will diagnose the structure, draw up an estimate for all types of work, adjust the position of the sashes and clamps, and then issue a warranty card to correct the defects.
General adjustment instructions
| Malfunction, problem | Causes | How to fix |
| The window does not open | Handle malfunction The sash is sagging | Replacement Adjusting the sash vertically and horizontally using adjusting screws on the hinges |
| The window does not close | Handle malfunction Loss of sash geometry Incorrect height adjustment | Replacement Place a pad under the strikers of the closing mechanism Adjust the position of the sash correctly |
| The handle doesn't work | It's broken, jammed, difficult to turn | Replacement Disconnect the lock Reduce the pressure and clean the handle |
| Micro-ventilation is impaired | Small gap | To adjust the gap and increase it, use a screw located on the scissors. When it rotates clockwise, the gap increases |
| Blowing through the window | The sash sagged and sagged | Raise the sash structure by rotating the top screws on the hinges Rotating the side screws |
| Transfer to winter-summer modes | Installing the trunnions in the winter or summer positions by rotating them to the required position |
Which parts of the windows need to be customized?
Modern windows in the higher price category are equipped with premium fittings, for example, Roto or Maco. These mechanisms can be adjusted and adjusted in almost any area:
- Handles and locking mechanisms.
- Trunnions and strikers.
- Loop hangers.
- Scissors for flap mechanisms.
- When operating sliding structures - runners and rollers.
Each of the listed elements is responsible for a specific function - the geometry of the sash, the density of the rebate, the pressing force when closing and other functions of the window structure.
Lubrication of PVC window mechanisms
Every self-respecting manufacturer of plastic windows offers its own lubricants. At the same time, there are separate lubricants for the mechanical part, and different ones for the rubber seals. They are not always available, so any silicone-based lubricants will do. Do not use water-based lubricants or those containing aggressive substances.
The best option for the physical state of the lubricant is a spray. It easily penetrates into any place under pressure.
Lubrication points:
- loops;
- pen;
- trunnions and strikers;
- scissors.
Lubricating the fittings is easy. There are technological holes in the end sides of the sash element, where the window closing mechanism is located. Lubricant is added to them. Moving and rotating elements located on top are lubricated in the usual way - on top of the contact planes.
Other preventative measures
In order for windows to serve for a long time without losing their characteristics, before the start of the new season they must be:
- thoroughly remove dust and dirt and then wash. First, remove dirt from the drainage channel with a toothpick, and with a hard-bristled brush from the fittings. Then the slopes, profiles, double-glazed windows and window sill are washed. The glass unit and profiles are washed from both sides: from the street and indoors. Detergents without abrasive materials and aggressive chemicals (alkali, weak acid solution, etc.) can be dissolved in water. Glass requires special removers. Wipe plastic with a soft sponge, and glass with paper or a rubber scraper;
- After drying, lubricate the shut-off valves and window seals. In the work “What and how to properly lubricate plastic windows?” shows where, with what and how PVC windows are lubricated;
- adjust the trunnions for the coming season.
The fittings for plastic windows from Rehau, Veko and other manufacturers are almost identical, and therefore the preparation for the start of the season is the same. If any difficulties arise in preventive maintenance or adjustment, you can always look at the manufacturer’s instructions, which describe how to properly handle and adjust their products.
Possible consequences of incorrect settings
The biggest trouble with incorrect adjustment is wide gaps through which it will leak. In the cold season, this is fraught with heat loss, which should not be allowed.
A distortion of the structure will lead to incorrect operation of the hinges, which, in turn, leads to their failure. This can also lead to damage to the window sill - traces of the affected profile will remain on it.
But you should not treat the adjustment as an operation with simple manipulations. Any movement can change the settings. And although the process itself is simple, it must be approached with great care.
Did you know that plastic windows can be adjusted this way? Perhaps you have already encountered such a process? Tell us in the comments. Save the article to bookmarks and share it on social networks.
Rules for drawing up estimates
When drawing up an estimate for PVC windows, it is necessary to take into account some nuances that will allow for comprehensive maintenance of the fittings:
Diagnostics and visual inspection of each element and mechanism.- Procedure for complex adjustment of fittings.
- Replacement of worn parts, hardware and other elements.
- Carry out repairs if a defect is detected.
- Lubrication of metal parts
- Performance monitoring upon completion of work.
The estimate indicates the prices for each type of operation, after which the total amount is displayed. As a rule, many companies offer comprehensive services for window structures and make significant discounts, but the volume is large.
What determines the price of services?
The cost of services for adjusting PVC window fittings depends on several important parameters :
- Number of window structures to be adjusted.
- Difficulty in carrying out the work.
- Degree of wear of mechanisms.
- Year of manufacture and type of fittings design.
- The presence of defects and the need for repairs.
- Urgency of work.
As a rule, the best prices are offered by the same company that previously installed the elements for filling the openings, as part of a periodic maintenance agreement. Often this form of cooperation is necessary to maintain a multi-year warranty.
Average prices for different settings
There are many competing companies on the market offering service, repair and adjustment of PVC window fittings. As a rule, the prices of each of them differ little from each other due to the large number of proposals :
- Standard service, without the need to dismantle the sash - from 300 rubles. per unit
- Complex work involving the removal of the moving part of the window, as a rule, for old-style elements - from 800 - 1000 rubles.
- Adjustment of one of the mechanisms - trunnions, handles, scissors or hinges - from 150 rubles. per unit
- Lubricating fittings after adjustment – from 100 – 150 rubles. behind the sash.
Prices may vary depending on the market situation and the internal policy of the installation organization.
Clamp on windows with eccentrics
When opening a window, look at its end. There you will find three eccentrics, which also have another name - trunnions. They regulate the pressing force of the plastic window. To change the sash pressure, slightly move each eccentric away from the surface on which it is located and turn it a few millimeters to the side. This can be done using pliers.
To make the pressure stronger, start turning the eccentrics to the left. By turning these elements to the right you will achieve the opposite effect. Making the pressure stronger is quite simple, so you can adjust the windows yourself. The main thing is that the pressure density is the same. To do this, make sure that all eccentrics are unscrewed equally.
Why and when do you need to adjust window mechanisms?
Even high-quality fittings from well-known brands of PVC windows and doors have an average service life of about 10 years, and a plastic profile lasts much longer. Over time, numerous parts wear out, weaken the clamping ability, and cease to ensure a tight fit of the structural parts, making their full operation impossible. Only if we periodically adjust plastic windows, do not forget to adjust them after summer for winter, will they function correctly, creating comfortable conditions in the premises.
Problems addressed by regulation:
- Sagging, difficult movement of structural components, clinging to the window frame when closing.
- Difficult transition from one position to another.
- Broken tightness of the glazing when closed, loose fit along the contour, blowing.
- Loosening, jamming when opening, jamming of locks, the need to install more modern models (of a different design, with burglary protection, a child key).
- The need to clean, lubricate, replace seals, worn or damaged parts.
The cause of problems in a new house is poor quality of installation, incorrect adjustment of PVC windows in height, horizontally or vertically, and construction debris getting between the parts. Defects in the operation of old glazing accumulate over time due to the natural subsidence of the walls of the house, improper use of windows, wear of locking mechanisms, seals, and lack of proper maintenance. Removing them in a timely manner on your own will save money on calling a technician, major glazing repairs, and heating the room.
How can you be sure that an adjustment is necessary?
| To the touch | Tactilely examine the entire length of the window opening. A strong draft can be felt with your hands. |
| Using a fire lighter or candle | Bring the fire source to the sash. Oscillation, deviation of the flame from the vertical position indicates the presence of blowing. |
| With a sheet of paper | A sheet of paper left in a tightly closed flap is difficult to pull out without tearing it. If it comes out easily, it means the clamp is weak and needs correction. |
The clamping density is determined by the position of the locking pins (eccentrics), which varies among different manufacturers. Regardless of location and quantity (at least one on the side and on top, taking into account the size of the opening), they demonstrate the degree of pressure in accordance with the season. When adjusting KBE windows, the mark in the middle position means normal pressure. Its displacement into the room usually indicates a weakened (summer) pressure, in the opposite direction - increased (winter). You should also make sure there is no sagging. Otherwise, the sash will rub against the bottom of the frame with a characteristic sound.
Possible problems
The most common problems that you can fix yourself may be those listed in the table. How to cope with the difficulties that arise and adjust the windows yourself is indicated for each situation.
| Problem | Solution |
| The handle has become unstable | To get rid of this problem, it is necessary to make some manipulations in the fastening. The first step is to slightly pry the top plate of the mechanism, which is usually located vertically on the side of the sash. This should be done with an object made of a fairly soft material, or with your fingers, because you can leave scratches on the plastic. After the plate is slightly raised, you need to turn the handle 90 degrees. After this, 2 bolts that hold the mechanism will be visible; they should be tightened to the maximum possible limit. A screwdriver with a sacral tip will help in this process. After such manipulations, the position of the handle must be checked, making sure that it is stationary. |
| The handle needs replacing or installing a fuse | In some cases, it may be necessary to change the handle on the window due to the fact that a part has broken off and is not suitable for use, but most often the handle is changed to a special one that has a safety lock. This is done in rooms where children live so that they cannot open the windows themselves. The procedure for changing the handle is very simple, you first need to unscrew the same bolts as indicated in the previous paragraph, and then remove all the contents from the sash. The new element is inserted in a similar position and then secured with bolts. |
| The handle mechanism gets stuck or does not fully accept one of the positions | This problem is quite extensive and there may be more than one reason for it. The first reason that leads to such a problem is the need to lubricate and clean the components of the handle mechanism. The second reason may be the incorrect level of downforce that is set on the sash. If the cause of such a breakdown is the need for cleaning and lubrication, then you should unscrew the bolts in the mechanism that holds the handle. After this, you need to start disassembling it so that the interior can be cleaned and lubricated. To do this, you will need a brush and oil; you can use a vacuum cleaner and remove all dust particles with it. Glass cleaner can also help with cleaning, but you need to make sure that the mechanism does not remain wet after it and that liquid does not get inside the profile. You can lubricate all components of the mechanism using technical oil, but it is better to use WD40, which has a special thin tube that allows you to distribute the liquid throughout the mechanism. It is advisable to resort to the use of such a lubricant whenever the operation of the window mechanisms is adjusted. If the handle does not reach the closed position of the window, then it is necessary to adjust the pressing force of the window sash and reduce it. To do this, you need to adjust the eccentrics, which are located on the eye shutter in the same place where the handle is located. Also important in this process are the loops that are located on the opposite side. |
| Handle mechanism jammed | When such a situation arises, there is no need to dismantle the handle or replace the fittings, and there is no need to even disassemble and remove the mechanism from the sash. This problem occurs because the locking mechanism does not work correctly, so the window cannot be positioned to open. In order to get rid of this problem, you need to loosen the lever located in the locking mechanism a little and move it. This lever is located on the side where the handle is attached, at the end. There are two options by which such a mechanism can be designed. This may look like a plate with a tongue, which in the open position of the window should be located at an angle in relation to the rubber bands. Another case is a clip located on the rubber seal. |