Instructions for whitewashing the stove
Before whitewashing the stove, you should decide on the material used.
After all, the preparation of the solution and the application process itself depend on this. To whitewash with lime, you need to follow a few simple steps:
- Carefully remove the old layer of whitewash, especially where there is heavy dirt. To do this, use a wire brush or dishwasher. If whitewashing is carried out for the first time, then first seal all the chips, cracks and seams between the bricks.
- Wet the stove with water. It is better to do this in parts, as the whitewash is applied. If possible, wash off the remaining soot.
- Fill existing cracks and restore chipped plaster.
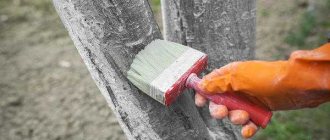
- Dilute the product with water until smooth and apply it to the oven surface using a brush or sponge. If necessary, apply a second coat. To avoid harmful effects of the material on your hands, you should use rubber gloves.
- Leave the material to dry.
Important! Putty for whitewashing the stove is used in the same way. Only to prepare the solution is to take part of the material and 2 parts of water.
When whitewashing with chalk, powdered material is used for the oven. It is purchased at hardware or construction stores. To prepare the mixture, 800 g of chalk are diluted in a liter of water and applied to the surface. The resulting solution takes on a gray tint, but do not be alarmed. Once the chalk dries, the stove will turn a beautiful white color.
To prepare a mixture of tooth powder you will need: 4 packs of product and egg yolks, as well as 200 ml of milk. Mix all the ingredients and after 10-15 minutes you can spread it on the heated stove. The consistency of the mixture resembles oil paint.
Regardless of what you use to whiten the stove in your home, when carrying out the procedure you must follow several rules to avoid stains on the surface:
- Pre-moisten the oven using a soft cloth or sponge;
- the solution is applied to a cold surface, and when using tooth powder - to a warm one;
- when whitewashing, use a wide paint brush or roller;
- the first layer is applied horizontally, and the second – vertically;
- preferably no direct sunlight;
- To avoid staining the door, cover it with paper.
When choosing how to whitewash a stove at your dacha, you can use proven methods or purchase a ready-made putty composition. The main thing is to choose the right tool for whitewashing and evenly distribute the product over the stove surface.
Is it possible to remove whitewash from an old stove? If so, how?
We have an old stove in our dacha, but it doesn’t look very good. We thought about removing the whitewash from it in order to see the original appearance of the brick. Do you think this is possible?
Of course available. You can wet it and scrape it off with a spatula or scraper.
Much faster with an ordinary drill and a special mechanical attachment for it.
There are also a lot of different brushes and devices. But the furthest thing has gone, of course, to grinders, for example eccentric type,
A machine like this will cope with the task faster than anyone else.
Stoves are whitewashed in different ways, most often the brick is plastered and then whitewashed over the plaster.
But there is an option in which whitewash is applied directly to the brick.
In both cases, removing whitewash is not difficult.
First, decide which method (method) the whitewash will be removed.
There is a dry method using grinders, or a drill, an angle grinder with attachments.
There will be less dust using the wet method.
If the wet method, then you need a bucket of water and a sponge, as well as spatulas or scrapers.
I advise you to remove the whitewash in squares, and not all at once.
We wet the area of the stove with water (plenty, the main thing is to soak the whitewash well with moisture) using a sponge.
Then we wait a little, the whitewash will pick up moisture and begin to swell, peeling off from the surface.
Next, we use spatulas to remove the whitewash from the base.
We hold the spatula at a slight angle to the surface.
Then the next section.
If the stove was whitewashed in several layers, then it is possible that the whitewash will have to be removed in several repeating stages.
Answers from experts
Natalya Klemyatich:
White caller ..they sell it in jars.. a glass of milk for 3 liters of water + 200 mg of primer and off you go.. Let it dry for 2 hours and coat again... Don’t skimp on the caller.. Good luck!!!!
n.:
There is a ready-made whitewash for trees in gardening stores, I think it will be ideal.
••Tatyana••:
They say they whiten it with regular tooth powder and the effect is good. (in the sense of whitening an already painted stove)
IMHO:
You cannot replace lime with anything; chalk gives a short-term effect.
EVA:
My mother whitened with white clay. I added a little blue and brewed starch so that it would not be smeared later.
Tatyana Ushakova:
My stove is generally covered with white vinyl wallpaper for painting. But they have been like this for 2 years now. and never painted it. I whiten only a small part directly near the firebox with water-based paints for ceilings (or wipe it off)
Agnia Malina:
There is such a creamy composition, I don’t remember the exact name, it’s either putty or putty. White and snow-white. Sold in bags of 5.10 kg, also in plastic buckets. In any hardware store. So my mother has been using it for a long time to whitewash the stove and ceiling. Dilute by eye with plain water. It fits perfectly on the surface, does not scratch the skin, and is easily washed off. If you need a different color, you can add caller to the finished solution; there are also a lot of different colors. Try it! )
Valery Shalakhov:
water based paint
Soggy,(this means❝wet❞):
Any heat-resistant paint. They are releasing a bunch of them now. There is a paint that covers engine blocks and the engine compartment (sold at auto parts stores). So it will stick 100% on the stove.
Alexander Amaretto:
Oh, God bless my memory, I haven’t seen a Russian stove for so many years! My grandfather (born 1895) did this: he took one part sand, three parts clay and one part lime (sour cream) and a glass of coarse (non-iodized) salt. I mixed all this thoroughly and left it for a day. I coated it with top and did not heat it for 2 days, but only coated it with this mixture using a large brush. Then he heated it over low heat (and this is the most important thing) for one day. That's it, for 1-3 years, it stood like new! Good luck!
Klava Golubkova:
Evgeniy, go to Yandex and ask your question.. get a real answer..
Andrey Yartsev:
well, in general, clay and sand are taken at the rate of 1/2...salt is also added 100 grams per 10 kg of sand clay mass; slaked lime is also added. In general, it is advisable to coat the oven while it is hot!!!! (well, this is if you have deep cracks and it really smokes in places))) Important! Before filling the cracks, clean them and moisten them with water!!! I restored the stove at my grandmother’s in the village using this method, but in general, buy a ready-made stove mixture (clay sand, quartz molding sand) - it costs about 200 rubles for a 25 kg bag. Fill it with water and go! Good luck)
Posts 1 page 30 of 45
Share109-11-2010 09:41:19
- Author: DAN
- Administrator
- From: St. Petersburg
- Posts: 1662
- Respect: +15
- Positive: +20
- Gender: Male
- Spent on the forum: 11 days 1 hour
- Last visit: 07-10-2019 16:33:45
This topic is for those who can share their experience of painting any surface (be it a wall, even a sauna stove) and for those who want to get advice on painting. The topic is important, I was convinced myself when it came to painting the bathhouse, and so that the advice would not get lost in the mass of other construction issues, I decided to stir up this topic.
Share210-11-2010 17:31:28
- Author: WIK
- Sort of a chef
- From: MOSCOW, RASSUDOVO
- Posts: 1717
- Respect: +10
- Positive: +23
- Time spent on the forum: 10 days 22 hours
- Last visit: 16-10-2019 19:30:46
I support Sergei. The question of painting is both easy (if you ran into a conscientious seller) and terrible if you imagine yourself to be a great specialist, went to the market and bought paint on the advice of the internet, and painted everything. And here. rain, snow, water, and for interior spaces - several months of “shuffling” with slippers and ultimately on the floor. Therefore, it makes sense to share our mistakes and shield our friends from them.
Share311-11-2010 02:14:01
- Author: Nikolay Prim
- Participant
- From: Nakhodka, Primorsky Krai.
- Posts: 148
- Respect: 0
- Positive: 0
- Gender: Male
- Skype: nikolai11148
- Time spent on the forum: 2 days 13 hours
- Last visit: 04/11/2012 01:41:07
Good afternoon Sergey, Victor and good mood to you. I noticed the topic. It is quite possible that she will roll. I'll take part. To begin with, I’ll just coat the stove I’ve made, but before that I’ll experiment with the chimney from the stove in the house. The temperature dropped below 0, but it’s okay, I’ll flood it, feel the pipe with my hand and blow it warm. Should dry for 1 hour. In a word, I’ll take a photo of everything and post it. Around the 15th-17th the temperature during the day will be up to 10 degrees and sunny, I will board up the windows and do everything through the pipe. Nikolay
Share415-11-2010 03:46:39
- Author: Nikolay Prim
- Participant
- From: Nakhodka, Primorsky Krai.
- Posts: 148
- Respect: 0
- Positive: 0
- Gender: Male
- Skype: nikolai11148
- Time spent on the forum: 2 days 13 hours
- Last visit: 04/11/2012 01:41:07
Good afternoon and the same mood Victor, Sergey. From my stove in the house I jumped into painting. I'll post a photo of the chimney later. Today I’ll take a close-up photo of the spray paint cans. I'm starting to like him. I simply tore the pipe away from everything with an iron brush and wiped it dry. The stove was slightly heated. The hand endures and dusted with paint. Look. I went through the stove with an iron brush, wiped it dry, then with white spirit. Well, there was a stink while it evaporated. Painted it. The view is nothing, certainly not a masterpiece. We are preparing a FAB for it. Today I will start insulating and repairing it. Along the way, I’ll warm up and see how the paint holds up, but it should hold up to 1193 degrees. Celsius. See you later, Nikolay
Share515-11-2010 10:09:01
- Author: DAN
- Administrator
- From: St. Petersburg
- Posts: 1662
- Respect: +15
- Positive: +20
- Gender: Male
- Spent on the forum: 11 days 1 hour
- Last visit: 07-10-2019 16:33:45
The stove was slightly heated. The hand endures and dusted with paint.
So did you paint on hot metal or something? Did you wash it with white spirit before the firebox?
Share616-11-2010 02:52:37
- Author: Nikolay Prim
- Participant
- From: Nakhodka, Primorsky Krai.
- Posts: 148
- Respect: 0
- Positive: 0
- Gender: Male
- Skype: nikolai11148
- Time spent on the forum: 2 days 13 hours
- Last visit: 04/11/2012 01:41:07
So did you paint on hot metal or something? Did you wash it with white spirit before the firebox?
Have a good day, Sergei, of course not. Now the stove in the house is preparing to eliminate the troubles that arose on my initiative (but good ones, it could have been worse). Electrodes have run out, etc. It was warm in the house (+3 outside). I took an iron brush and, as cleanly as possible, stripped where I could get the surface of the stove. Wipe with a rag. Looked around. You know, small shells with dust residues were discovered. The stove was a little warm. Then I had white spirit and solvent on hand. I thought that the first one was neutral to the dissolution of paints, the second one was more focused on the types of paints and you took White Spirit. With a rag, you could say, I thoroughly washed the surfaces, then wiped them thoroughly. It started to smell like spirit itself. I decided to speed up the process and lightly heated the stove. The evaporation process was in full swing. I had to open everything to the street for about 30-40 minutes, wait until it got some air. By this time, the stove had become somewhere around 60 degrees (as a mechanic I say, the bearings in the shaft line were always felt by hand). The palm does not endure for long. I waited a little longer and applied the thermometer. About 35-38 degrees. Covered with paint. The paint is light gray, it looks good (it was black, brown and gray). I wanted a red one, but there wasn’t any, and why bother organizing a corrida? It's good to gather dust. I used a little more than a can, and spent the other one on a pipe on the street. First a light layer, after 10-15 minutes a second one. Enough to spare. After all, I'm doing an experiment. The view is not bad. Yesterday my wife and I were at the dacha. The smell was still there. No problem, I fired up the stove fully (one kindling of firewood is enough to fully heat the kitchen, 2/3 of the container), 10-15 minutes, and it’s quite warm. They put a pot of water on and opened the doors for half an hour or more (I had already upholstered the front gable). The smell has become much less. The metal of the stove is not red, but the pan quickly boiled. The street was heated for about an hour. I examined everything carefully. Conclusion: 1. The paint rolls, that is, you can paint it. No swelling, rebound, peeling, bubbles, or darkening were detected. Convenient to paint in any position. The jet is finely dispersed. Painting from a distance of 25-30 cm. 2. White spirit evaporates for quite a long time, but this is understandable. Lots of micro-sinks. when we left (6 hours later) the smell was still there, but weak. My wife’s idea of wiping it with ALCOHOL before painting did not find proper understanding in my soul. All this is blasphemy. I'll be there today, let's see what's next. There is an idea to look at something for wiping the liquid, something that evaporates faster, but retains the degreasing properties. So far Sergey is like this. But I will continue the experiment until I fully understand the painting of the iron stove. I’ll paint FAB when I’m 90 percent confident, I’m convinced that this is the right way. Look, by this time I’ll read something else, or people will get into the topic and advise. I remember about the brush, but everything takes time. I'm posting pictures of the paint. I wanted the translation to be visible, but it didn’t work. And you can see what kind of paint it is. In English not strong. Along the way - what the pipe was like outside and what it became. I'll keep an eye on her. I’ll take my leave then, see you later, Nikolai.
What special paints are there for brick walls and how to apply them
If you decide to buy paint to paint a stove, it is best to choose paints that are resistant to high temperatures. Such paints will not burst or crack after a short period of time, but, on the contrary, will retain their original appearance for a long time.
You can also paint the stove with oil or enamel paints, which will allow the stove to enhance its thermal conductivity.
When choosing how to paint a brick stove, it is best not to paint it with paints containing aluminum or the like. Since if the stove is built incorrectly and the wall of the hearth of the stove itself does not comply with building codes, then its outer side can heat up from eighty degrees Celsius, and such heating can release from the paint itself such incredibly harmful substances as toxic fumes, which can poison from the inside human body and so on.
Well, paints that were made on the basis of drying oil may darken over time or completely lose their original color.
Today, in construction stores you can find special paints with increased heat resistance. These paints are ideal for frequently used stoves. But, unfortunately, their range of colors will not please a sophisticated painter, and if you could not find the shade you need, you can always paint the stove with a special primer or paint it with paint containing construction latex.
Dyeing process
Features of applying decorative composition
Before painting the inside of the bathhouse, you should select the tools used for this purpose. After all, the quality and appearance of the surface also depends on this.
There are two main options:
- Spray. Thanks to it, you can paint the surface as quickly and efficiently as possible. In addition, this method practically does not raise wood fibers, so the walls will not need to be thoroughly sanded after treatment.
- Brush. Despite the seeming archaism of this device, many experienced craftsmen advise using it, especially when applying the base layer.
Note! Using a paint brush allows you to avoid cracking of the decorative layer if there are dust particles on the surface being treated.
Paint brush
Work order
Painting the inside of a bathhouse begins with purchasing the necessary materials and equipment.
For ease of presentation, the process itself is divided into several stages:
- Prepare the area for work. Considering that you will have to paint not only the walls, but also the ceiling, you should make sure that there are stools, stepladders or scaffolding that allow you to gain access to any point in the room.
- Clean the surface. This phase is very important. You should sand the wood very carefully so that when you run your hand over it, you don’t get a splinter in your palm and feel a smooth surface. A vacuum cleaner or damp cloth will help get rid of dust and sawdust. For best results, you can treat the surface with white spirit.
- Apply a base coat of paint or varnish. Wait until it dries and sand the surface again with fine-grained sandpaper.
- Cover the wall with a second layer, for which it is better to use a sprayer. Before doing this, you need to cover the areas that will not be painted with paper and masking tape.
Before painting, you need to thoroughly clean the surface
Advice! The sprayer should be held level so that an angle of 90 degrees is maintained between the surface and the device. Distribute the flow of paint evenly, periodically changing the direction of the stream.
How can you whiten a stove?
Knowing how to whiten a stove, you can avoid further troubles, such as premature shedding of the material or its unsuitability for such work.
Lime
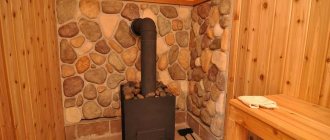
Lime is formed by annealing mountain limestone in mines. By adding water to the resulting solution, a white color is obtained, which is used for construction purposes. This whitewashing method is especially often used in the bathhouse.
The advantages of this method are as follows:
- inexpensive cost of materials;
- the solution has antimicrobial and moisture-resistant properties;
- can be applied to the old layer.
Important! Lime is an alkali, so precautions should be taken when using it
Shpakril
Putty is a paste for interior work. The only disadvantages include the high cost of the material. At the same time, it has a lot of advantages:
- moisture-resistant material;
- Sold ready-made, all you have to do is add water;
- characterized by increased whiteness;
- the surface will not get dirty;
- small cracks are covered.
Chalk is a natural material that is easily applied to the surface and easily washed off. The product produces a nice bright white color. The only disadvantage of chalk is its ability to leave marks, that is, every time you touch the stove, a white spot remains on your clothes.
Dental solution
Tooth powder is not a cheap option than whitening the stove in the house. At the same time, this method has a large number of adherents, since it has the following advantages:
- does not get dirty and does not leave marks on clothes;
- maintains an attractive appearance for a long time;
- the surface of the stove does not crack for a long time;
- You can drown on the first day after the procedure.
other methods
As an alternative, instead of the classic white color, you can use artistic painting. If you have the ability, then you should draw the selected picture yourself, otherwise stencils will come to the rescue. You can make them yourself or purchase them in a store. The template is pasted onto the surface and an outline is drawn, which is then painted with the necessary colors.
The base is the same whitewash with the addition of paints, for example, gouache, acrylic or water-dispersion. They tend not to crack at high temperatures and do not emit harmful substances. The image itself is applied with painting brushes. For large patterns, use cans of paint or a spray gun. After applying the design, it is not recommended to heat the stove for 2 days.
Solutions and mixtures for restoration
External defects on the stove can be corrected using several compounds; Some of them are mixed independently, others can be purchased ready-made. Each of the compositions has its own characteristics, but all of them will reliably seal the cracks and prevent carbon monoxide from entering the room.
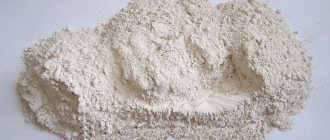
Fireclay putty
Chamotte is clay with fire-resistant properties, a professional option for stove restoration. Chamotte is sold in construction stores; it has valuable advantages. It is often chosen by owners when evaluating options for how to coat the stove to prevent it from cracking.
The main advantage is the combination of heat resistance and strength. After application and drying, the clay becomes vapor-tight and moisture-resistant
It is also important that fireclay is a natural, healthy material suitable for use in residential premises
To prepare the mixture for restoration, mix one part of M-500 cement, two parts of fireclay and seven parts of river sand. Water is added until a plastic consistency is obtained. The materials are pre-prepared: sand and cement are sifted, clay is soaked in water for several hours.
Fireclay putty recipe Source tproekt.com
Sand-clay mixture
An inexpensive solution for restoration is made from ordinary building clay and sand. The mixture is quickly prepared and serves as a quick solution to the problem of how to cover the stove so that it does not crack. The mixture is prepared according to the following recipe:
- To obtain a solution, the clay is poured with water at the rate of one part clay to three parts water.
- The clay is infused for 24 hours, then it is mixed and sifted through a sieve with a mesh size of 3x3 mm.
- The solution is allowed to settle and excess water is drained. The remaining solution should have the consistency of thick sour cream.
- River sand is added to the container in a 1 to 1 ratio and mixed with clay until smooth.
Then the mixture is brought to the desired condition - sand is added to it in parts; As a result, there are 2.5 parts of sand for one part of clay. If you plunge a shovel into the container and pull it out, the correct mixture remains in homogeneous clumps. After application and drying, the sand-clay layer remains flexible enough to withstand high temperatures.
Kneading claySource notperfect.ru
Ready-made adhesive mixtures for stoves and fireplaces
Construction stores offer glue for repairing fireplaces and stoves, eliminating the problem of covering up the stove. There are two options for glue, plastic and hard, with the following composition:
- The filler for all brands of glue is quartz sand.
- Binder: a mixture of fireclay and sand, or heat-resistant aluminosilicate cement and kaolin,
- Mineral plasticizer: fireclay fiber, liquid glass or soapstone flour (furnace or soapstone).
The main advantage of industrially produced glue is its uniform texture, which cannot be achieved at home. Different brands are characterized by different limits of heat resistance, as evidenced by their characteristics: the composition can be heat-resistant, heat-resistant or heat-resistant. The composition and temperature ranges are indicated in the instructions.
The glue is quickly prepared for use and sets quickly, so it is prepared in small portions. Plastic varieties are applied to cracks and cracks, while hard ones are intended for plastering the entire surface.
Grout adhesiveSource wp.com
Ash grout
Homemade grout allows you to save on purchasing factory mixtures, and the result is no less high quality. To prepare a solution of ash and salt for the stove, perform the following steps:
- Wood ash is sifted. If there is no ash, you can take coal slag.
- Quicklime is diluted with water at the rate of 2-3 kg of lime per bucket of cold water, as for whitewashing.
- Ash (6 liters by volume) is mixed with 1 kg of salt.
- Add slaked lime (4 l) to the mixture and mix everything thoroughly.
Painting the stove surface
Before painting the stove, you should make sure whether it needs to be restored? Restoring the surface of the stove with your own hands will not take much effort and time, but will protect it from cracks, damage and the negative effects of time.
Recommendations for performing the work:
- The outer part of the warm oven is treated with a brush with a special environmentally friendly varnish that is resistant to prolonged high temperatures and mechanical damage. To do this, you can use a mixture - varnish, prepared by yourself. Make a mixture of flour obtained from tap bricks, milk and 10 egg whites. It should be thick and viscous, then the surface will be a uniform red color.
- To give the surface a dark red matte hue, you can apply drying oil.
- If you want to get a shiny effect, you can coat the stove with oil or synthetic varnish.
- Shades of latex coloring composition will help satisfy color preferences.
A mixture of turpentine and varnish PF-283 can also be used as paint for the stove. Taking equal proportions of these substances, a transparent, slightly matte substance is obtained. It can be given the desired color. To do this, the dried gouache, ground into powder, is first carefully sifted, then added to the mixture, achieving the desired result.
Painting other oven elements
In addition to the surface, the oven also has other elements: a door, a lid, etc. Since they are made of iron or cast iron, it is quite possible for rust, soot, or stains to appear on them after whitewashing. For painting them, heat-resistant and heat-resistant enamel in the form of aerosols is recommended. The prepared surface is not primed, but painted immediately. Your stove should be the most beautiful, remember this!
Features of choosing paint for the stove
The degree of heat resistance required will depend on the type of oven. If it is a metal stove, then it can heat up more than 700-900°C: the temperature is higher in the combustion zone, but taking into account the design, the outer walls may not heat up so much. For the outer surface of the brick, increased values are not required - 300 °C is quite enough.
An important requirement is that the fireproof metal paint for the furnace must be suitable for interior painting. For sauna stoves, it is best that it also protects against high humidity
Terminology of thermal paints for metal
Fire-resistant, heat-resistant and heat-resistant paints are suitable for painting surfaces with elevated temperatures. Fire retardants should not be used. Although the name is similar, the purpose of this paint is completely different: when heated to a certain temperature (about 150°C), it bubbles, blocking the access of oxygen to the structure, thus preventing its destruction. Quite a useful effect, but not in the case of a stove.
- Heat-resistant paints, as a rule, have a range of application up to 700 degrees. These compounds can be used to paint metal elements of fireplaces and brick stoves, and metal heating stoves. It is not advisable to coat the body of metal sauna stoves with these paints, since in some places the temperature increases to 900 °C. For them, there are heat-resistant enamels that can withstand temperatures up to 1000 degrees.
- Fireproof paint for metal can withstand open fire. Their operating temperature is even higher; however, these compositions are unprofitable for household use, as they are quite expensive.
- There are also high-temperature paints that are used to paint heating system radiators. As a rule, they behave normally if they heat up to no more than 250 °C. They can only be used for brick kilns - they are perfect for tinting the surface or painting seams.
- There are also heat-resistant varnishes. They normally tolerate temperatures up to 300−350°C. If you treat a brick with this varnish, the surface will become brighter, acquire color and shine.
Application for different surfaces
In addition to temperature resistance, paint for a metal sauna stove must protect against high humidity. In this case, it will last longer.
Color selection
Heat-resistant paint is usually found in silver, gray and black. Other shades need to be looked for, but they also exist: red, white, blue and green. The coating can be glossy or matte.
Matte black thermal paint is commonly found, but some manufacturers have different shades and colors.
Manufacturing form
Heat-resistant spray paint typically has a volume of approximately 500 ml. Cans are usually packed in 0.4-5 kg. There is larger packaging in barrels and buckets.
Which is more convenient? It's a matter of habit. With skill, a more uniform layer comes out of the can. In this case, the consumption may be less than when using a brush or roller.
How to whiten
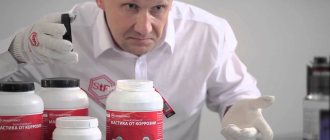
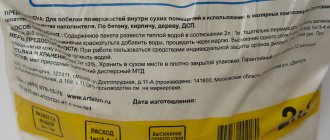
In stores you can find modern compositions for whitewashing stoves; they are made by different manufacturers, but they go under one name - putty. Before use, such a purchased composition must be diluted with water in a ratio of 1 to 2.
After treating the stove with it, its walls will have a well-groomed appearance for a long time and will not fade. Among the popular manufacturers, it is worth highlighting those whose products come at an affordable price and with a high quality composition.
| Brand | Volume, kg | Description | Price, in rubles |
| Master | 1 | For this product, you need to prepare the surface of the oven so that it is dry and dust-free. They can be used to repair small cracks and whitewash walls, ceilings and stoves. |
30
Nova 0.8 Can be used for plastered, wooden and concrete surfaces. 21
BRAVO 16 A water-dispersive composition of the product is used for painting rooms and preparing walls for wallpaper. 960
Diola-006 4 In its pure form is used for sealing cracks, places after removing nails and screws, and restoring chips. After dilution with water, it is used as paint.
115
Flamingo 5 Its moisture-resistant composition can be used for any premises; it is characterized by high plasticity. 110
The best way to whitewash the stove in the house is up to everyone to decide for themselves; you can choose the appropriate one from the given means.
Types of paint
Here is a list of some of the leaders in this type of product:
- Paint for sauna stoves made of metal “Termal” from Finnish, produced in black or silver from alkyd resin. The coating is guaranteed not to be damaged for 3 years. When the stove surfaces are heated to 200 0, the paint completely hardens within 60 minutes. Bottled in containers of 330 g.
- Hansa paint has high heat-resistant properties and is available in both aerosol cans and liquid form. Available in 16 shades of color. Does not lose its properties when heated to 800 0, can be applied to stainless steel.
- One of the best representatives of silicone enamel, which can withstand temperatures up to 600 0, is the domestic coating of the Kudo brand. Available in aerosol cans with a capacity of 520 mg.
- Paint produced only as a spray coating with heat resistance up to 650 0 - “Bosni”. During use it does not crack, does not change color and does not fade. It is used to cover glass, metal and ceramic surfaces. Packaged in 400 mg cans. For glass it is produced with heating temperatures up to 200 0.
- Hammerite paint protects steel surfaces and can be applied over rust. When preparing, it is not recommended to use gasoline or diesel fuel as solvents. Withstands heating up to 600 0 . Apply to the surface using a roller and brush in 1 layer, immediately painting the surface of the structure.
- ELCON enamel has high anti-corrosion and heat-resistant characteristics. Withstands heating up to 800 0 and sudden temperature changes. Available as aerosol paint in 0.5 liter cans and bottles.
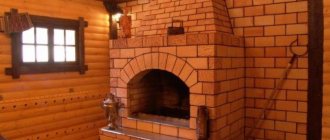
Options for whitewashing a Russian stove
To prepare the solution, you need 2 liters of milk and 1 kg of chalk. That is, the composition proportion is 2:1. Crush the chalk into dust, use a mortar. Sift through a fine sieve: there should be no stones or large fractions in the material. Pour in milk and immediately begin whitewashing.
Tip: at high wall temperatures, the composition may turn red. To avoid this, add 50 ml of blue to the prepared solution. This is about a quarter of a glass.
Protein and milk composition. To whiten the stove in this way, you will need 100 ml of milk, two chicken egg whites and 2 boxes of tooth powder. Mix the ingredients, you should get a mass similar in consistency to sour cream. Do not make large volumes of the product: the protein coagulates quickly.
Lime-salt composition. Everything is simple here: you will need 1 kg of lime and 40 g of salt (two heaped tablespoons). Prepare the solution as for regular whitewashing, dissolve the salt. After finishing work, light the oven. When heated, the salt melts and covers the surface with a transparent and even layer.
The modern method is putty. If there is a hardware store nearby, buy a jar of putty. Dilute with water in a ratio of 1:2 and start whitewashing. Experienced craftsmen claim that this treatment of the wall surface is durable, does not stain clothes and does not fade.
A stove so indispensable in a private home for its practicality of use, independence from gas and electricity, still has its drawbacks. We will not list them all, but according to the thematic feature of our article, one of them is the release of exhaust gases through fittings, cracks, etc., which as a result leads to the deposition of soot on its walls. At the same time, the stove can get dirty; the stove also loses its attractive appearance and stands out from the interior of the house. The solution to this problem is to whitewash the stove.
In fact, whitewashing a stove is not such a complicated procedure; it is similar to whitewashing a ceiling. The difference is that it is usually even more convenient to whitewash the stove, but with the peculiarity of applying a thicker layer of whitewash to certain parts of the stove.
The first step is to remove part of the surface layer where most of the soot has settled. If we don’t remove the soot and start whitening, it will begin to show through, and we won’t be able to whitewash this area to its original whiteness. It is best to remove the top layer with a steel wool for washing dishes or a metal brush, but this must be done more carefully with a brush, since it is harsher and its use can lead to deep scratches on the stove.
Next, you need to wet the oven with water. Applying whitewash to a dry oven surface will be difficult, as the whitewash will roll into balls and be poorly absorbed. The oven can be soaked with water in parts, in accordance with the speed of whitewashing and the areas intended for whitewashing. At the same time, try to wash off any remaining soot if possible.
Now you need to inspect the stove and if there are cracks, or the plaster has crumbled somewhere, then it needs to be restored. You can use a brush to apply the putty. Its advantage in use is that it follows complex surface contours, filling in depressions and chips with hair putty. Or use a more traditional putty spatula. For whitewashing and puttying, you can use putty. More detailed information about putty can be found in the article “Shpakryl”.
We dilute the whitewash solution.
How to apply the composition to a surface according to all the rules ↑
Instructions on how to whitewash walls with lime vary widely. The thing is that each master has his own recipe for a lime mixture, his own tool, and therefore his own technique. But you can try to combine the fundamental points into one algorithm. The result is a universal method, which everyone has the right to supplement or slightly adjust depending on the situation.
A roller is suitable for the ceiling
If the task is to quickly whitewash the walls and the decorative side of the issue does not really concern you, you can skip the preparation stage altogether. In fact, you can whitewash directly on top of other coatings without worrying that the result will not live up to expectations. But if the walls are covered with adhesive paint, then you need to remove it first.
If speed is not your priority, then it is better to prepare the surface for applying lime mortar. This way the result will be more accurate. The old whitewash is washed off, the swollen areas on the plaster are removed, sanded, and puttied. The same applies to cracks, if any.
Preparing the ceiling for whitewashing
Plain water is used as a primer. The surface is slightly wetted for better contact. And if the mixture contains one or more of the additives listed above, then adhesion will be even better.
The worker must wear a protective suit, gloves, goggles and a mask for personal protection.
The application process is not particularly difficult. A brush or paint brush is dipped into a container of whitewash and the solution is applied to the walls or ceiling in a thin layer. For ceilings, it is better to use a tool with a long handle. You can make it yourself. This will make your work easier and eliminate the need to climb on unstable structures made from tables and chairs.
Direction of movement of the brush or roller
Apply whitewash in several layers - 2-3. Each layer must be applied perpendicular to the previous one. This way the coating will be more uniform and there will be no streaks or thickening. There are often unbleached areas in the corners. In these places it is better to go through the brush again.
It is necessary to maintain a time interval between applying layers. The previous layer must dry completely. This will happen much faster if the layers are thin. The thinnest and most uniform layer will be obtained when using an electric spray gun. The lime mixture is poured into the tank and sprayed onto the surface in tiny drops. This eliminates the occurrence of divorces.
Spray gun - a solution to many problems
Despite the fact that the process of whitewashing walls and ceilings with lime is not difficult, for those who are faced with this for the first time, it may seem like an impossible task. Especially when it comes to high ceilings or extensive work over large areas. It's never too late to turn to a master - a professional in his field. He can easily do this job efficiently and much faster than a beginner.
Methods for preparing solutions for whitewashing
The first and oldest method is milky-chalk whitewash. Even from the name it is clear that milk and chalk are used to prepare the mixture. The chalk must be finely crushed in a mortar and sifted through a sieve. Sifting prevents foreign particles from getting into the solution, so this step should not be ignored. Pour skim cow's milk into the resulting powder. To avoid yellowness from chalk, add blue or any blue dye, such as ink, to the solution. We use very little dye, otherwise the whitewash will have a blue tint. The thickness of the solution should be quite liquid. Recommended ratios: take 1.5-2 liters of milk per 1 kg of chalk. After mixing, you can immediately begin whitewashing.
The second method, no less well known, is whitewashing using tooth powder. You will need 2 boxes of tooth powder, 2 chicken eggs and half a glass of milk. Separate the whites from the yolks, mix them with milk and gradually add tooth powder. Stir everything carefully, let it sit for 10 minutes and start whitewashing. The mixture acquires the consistency of sour cream, so it is convenient to use a brush for whitewashing. After painting like this, a Russian stove turns out even and smooth. The surface dries quickly and clothes do not get dirty from it.
Slaked lime for whitewashing
The fourth method is whitewashing using putty. Shpakril is a paste-like mass, which is intended for interior work. In order to prepare whitewash in a bucket, you need to mix water and putty in a 2:1 ratio. Then stir well so that there are no lumps, and you can get to work.
Putty for whitewashing
How to prepare whitewash yourself?
There are three common methods for preparing a solution for whitewashing a stove, each of which has been used for decades.
Mortar
Whitewashing a stove with lime has been known for a long time; if you dilute 1 liter of the mixture from it, it is enough for 2 m2. The preparation of such a composition is as follows: take 40 grams of salt and dissolve it in water, then add 1 kg of lime to it.
Salt acts as a fixative; after applying such whitewash, the oven must be heated so that a smooth transparent layer forms on its surface. It is better to dilute this product with low-fat milk instead of water.
Chalk based whitewash
The chalk should be prepared: finely crush and sift, you need to take about 1 kg of this component, then pour 2 liters of milk and 50 ml of blue into it.
Some people neglect such scrupulous preparation and end up with a solution with various inclusions; after application to the oven, under constant exposure to high temperatures it begins to change color from white to yellow.
It is the blue that prevents such a transformation of the color of the stove. The prepared milk-chalk mixture must be used immediately so that it does not harden.
Tooth powder solution
This unusual product will give the stove a pure white tint and keep it for a long time. To prepare the composition, you need to take 2 boxes of tooth powder, half a glass of milk, 2 eggs. Any dairy product can be used, boiled or unboiled.
Only the whites are taken from the eggs, which are mixed with milk and powder; after standing for 10 minutes, the mixture can be used. Its consistency should resemble paint. After staining, the oven can be used the same day, but you should note that the smell of tooth powder will disturb you during the day.
Whitewashing the stove with lime mortar
The first place to begin the procedure for treating a stove with lime mortar is preparing the surface of the stove itself. We will not consider the procedure for puttying and priming a new stove; there are separate topics for this, but let’s move straight to preparation for whitewashing.
The furnace is inspected in an attempt to find areas covered with soot. If there are any, then you must first completely clean or wash them, otherwise after whitewashing blackness will appear in these places. Washing is used if the soot has not yet had time to eat into the clay well. If the furnace has been in operation for several years, then the best way to clean it from soot is to use a metal brush. Just be careful not to cause excessive damage to the plaster.
It is necessary to carefully inspect the stove for cracks and chips on the surface that appeared during operation. If such elements are found, then it is necessary to prepare a clay solution and cover them up, and small cracks, the so-called cobwebs, can be eliminated simply by wetting the clay that makes up the stove putty.
After preparing the surface of the stove, you need to prepare a lime mortar that will be used to whitewash the Russian stove with your own hands. To do this, take quicklime and pour it into a metal container; an old enameled basin or galvanized bucket is quite suitable for this. Before starting the extinguishing procedure, it is necessary to go out into fresh air or be in a well-ventilated area. If a universal plastic mass is needed for whitewashing, then dilute the existing lime with salt water in a ratio of approximately 1 to 4 and mix thoroughly. If you just need to lightly whitewash the stove over the existing whitewash, then you can dilute the lime with salt water 1 to 1. After you have a homogeneous mass in the container, you need to leave it for an hour in order to completely eliminate the active reaction of the mixture during its further use. After the chemical reaction has stopped, the water is allowed to evaporate, and the lime, after removing the water, is preferably crushed into a fine fraction for ease of further use.
The resulting slaked mixture is diluted with water or milk; when diluting with water, it is advisable to add 1-2 egg whites so that the mixture sticks better to the brick. Dilution is carried out until the consistency of thick sour cream is obtained; this is the mixture that is better suited for bleaching the stove, but for a more even coating it is advisable to pass the mixture through a large sieve to avoid lumps.
When the solution is ready, you can begin the whitewashing procedure itself. To do this, purchase a medium-hard flute brush and carefully apply a thick whitewash solution from top to bottom. In order to check how it will fit on the stove, you need to first coat the area and let it dry completely; if everything is fine, then you can continue whitewashing.
After the procedure for applying the lime composition to the surface of the stove is completed, it is advisable to leave it to dry for 1-2 days. If the result of drying is not a perfectly white stove, then it is better to repeat the whitewashing procedure to create a stronger and thicker light layer on the surface of the stove.
HomeSite map
Home » Heating and ventilation in the country.
Ceiling preparation
You cannot whitewash a ceiling using an old coating: when wet, the previous layers of whitewash will begin to peel off and stick to the brush, making the process difficult. In addition, the surface will not be perfectly smooth, which is completely undesirable. When cleaning the ceiling, you must take everything out of the room or cover it with polyethylene, otherwise you will have to wash everything from lime and plaster.
Step 1: Surface Cleaning
Cleaning the ceiling with a spatula
For cleaning you will need:
- bucket with water;
- sponge;
- medium-sized metal spatula;
- clean rags;
- ladder.
If you clean a dry ceiling, a lot of dust will rise, and the process itself will take a long time; It is much faster and more convenient to remove the whitewash after moistening. You should not immediately wet the entire area, as the surface dries out very quickly; it is better to divide the ceiling into small sections and moisten as you go.
After wetting the whitewash, you need to wait a few minutes until the layers are saturated with water to the base, then the coating can be very easily removed with a spatula. Finally, wipe off any remaining chalk or lime with a clean, damp cloth until no traces remain.
Step 2. Sealing joints and cracks
For further preparation you will additionally need:
- serpyanka;
- putty;
- sandpaper;
- primer;
- brush or roller;
- level.
There are always joints between the ceilings, which gradually diverge over time. To prevent them from appearing on the ceiling, they are embroidered, filled with putty mixture, and covered with sickle tape on top. Putty is again applied over the serpyanka and thoroughly rubbed with a spatula, making the surface even.
While the joints are drying, the ceiling is carefully inspected and defects are eliminated. Small cracks are simply rubbed with mortar, recesses and chips are puttied.
Step 3: Remove stains
Very often stains appear on the ceiling that show through the finish. It can be quite difficult to remove them, but this must be done at the preparation stage, otherwise after a while they will again be visible through the whitewash layer. Stains from water leaks are removed using bleach or bleach: dip a sponge in the liquid and press it onto the stain until it lightens. Of course, you need to wear rubber gloves to protect your skin.
How to clean a ceiling
To remove rust stains, you will need copper sulfate. Prepare a saturated solution of bright blue color, spread the stain well, let it dry and repeat everything again. If necessary, re-process until the marks fade. After this, the problem areas are well primed and dried.
Step 4. Alignment
Putty is best used to eliminate small defects on the ceiling: cracks and irregularities
When all noticeable defects have been removed, a level is applied to the ceiling surface in different places to determine the magnitude of the differences in height. If there are recessed areas, they are puttied separately, and when the solution dries, the entire ceiling is covered with putty. Usually a finishing putty is used, which is applied in 2 layers 1-2 mm thick.
To work, take two spatulas - a narrow and a wide one; when applying, hold the spatula at a slight angle to the ceiling. The resulting sagging or stripes are removed after the mixture has dried with sandpaper. It is necessary to sand the entire treated area to give the surface maximum smoothness. Finally, the ceiling is wiped with a dry cloth to remove dust and primed.
Primer
Preparing the oven for whitewashing
The first stage is surface preparation. First of all, the walls of the new oven are covered with a layer of plaster, then coated with clay. If it is old and the plaster is falling off in places, you need to re-plaster these places. You should choose a special plaster that is heat-resistant; you can buy it or make it yourself.
After two days, the stove is heated at least three times. This is necessary so that the clay layer becomes as strong as possible. But at first you should not heat the oven too much: its walls should become slightly warm.
Before whitewashing the stove, it must be covered with a layer of plaster.
If the old plaster holds up well, it only needs to be cleaned of dirt and soot. Soot stains can be easily removed with a wire brush or dish scrubber. To remove greasy marks from the surface, use a caustic solution (2%). Rust stains are removed with a solution of copper sulfate in a proportion of 100 g of powder and 1 liter of water.
Which one is better to use?
How to paint a metal stove in a bathhouse? To do this, be sure to buy heat-resistant or organosilicon enamels and varnishes that can withstand heating up to 600 0 . The layer must maintain its solidity and prevent the formation of rust on the structural steel from which inexpensive bath “units” are made.
As a rule, dark colors are used, even black. It increases the heat transfer level of the furnace. Aluminum based paint is not recommended. The most in demand are organosilicon enamels from Russian and foreign manufacturers. It contains:
- organic resin;
- aluminum powder;
- organic radicals;
- silicon base and oxygen.
Now let's look at specific brands:
- The leader among domestic brands is Cetra. Available for different heating temperatures. Black enamel can withstand heating temperatures up to 900 0.
- Another heat-resistant paint, produced in cans and having good properties at a low price, is heat-resistant enamel of the Kudo brand.
- Among foreign manufacturers, we can highlight the Finnish “Thermal” from.
How to paint a metal stove in a bathhouse from the inside? For this it is better to use fireproof paint. Its only disadvantage is its high price.
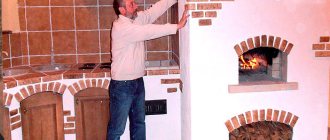
How to whitewash a stove with your own hands
First, you need to conduct a visual inspection of the stove; if there are deep cracks and chips on it, then they must first be covered in the old fashioned way with clay or specially purchased putty. It will not be possible to beautifully whitewash the stove without preparatory work; you need to carefully eliminate all defects so that your efforts do not go in vain.
Tools for work
Before whitewashing the stove, you should clean its surface with a broom or brush; for old exhibits, you can use a metal brush, but the main thing is not to damage the plastered surface with it. Then you need to determine the method of applying whitewash, for this you can use:
- A brush is chosen by those who have painted any surface more than once and are confident that they will do everything smoothly and without streaks. Before painting, it is advisable to soak the brush in water so that no hairs remain on the surface of the stove during whitewashing.
- A sponge is an alternative method; it does not give a clearly even color; it is used only for small stoves, since it will take a lot of time to obtain the desired painting density.
- Roller - suitable for both beginners and professionals; it covers a larger area with one stroke than with a regular brush. Applying the selected composition with a roller is very simple; the main thing is to move along the surface in the direction of the window to create uniform stripes.
- Spray gun - it is used for large stoves. It is easier to handle with two people: one person will maintain the required pressure in the device, and the second will monitor the uniform application of the composition filled into it. Before using it, you need to check the spray gun, and then constantly hold the spray gun at a right angle to the oven wall, while maintaining an optimal distance of 30 cm from it.
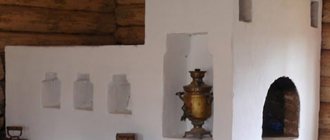
The Russian stove is an integral attribute of almost every private home. The easiest way to decorate a stove is whitewashing. It has long been believed that whitewashing was done well if after it the clothes did not get dirty from the oven. Why the actual whitewash and white color? It used to be believed that white color provides protection from the evil eye and various misfortunes, and also preserves the family hearth. Once upon a time, peasants considered it a great sin to put any drawings on a Russian stove or to dirty it. Such work was carried out, as a rule, on certain days. It was necessary to carry out whitewashing on the waxing moon and in no case on Saturday and Monday.
Whitewashing equipment
You can whitewash a Russian stove using rollers, brushes and spray guns. The cheapest and easiest way is to use a brush. Before starting work, you need to soak your brushes in water for several hours. This will help eliminate the appearance of hairs on the surface.
If you are not sure that you can whiten the surface evenly with a brush, then use a roller. Apply the solution with a roller in the direction away from the window. You can repeat the whitewashing if necessary.
Whitewashing the stove
The spray gun is most often used if the surface has a considerable area. In this case, it is best to whitewash together, one takes control of the fishing rod, and the second maintains the required pressure in the spray gun. Before painting, be sure to adjust the sprayer so you can get a more even application. And do not forget that the angle of inclination of the spray gun should be 90 degrees to the surface to be finished and the gap should be about 30 cm.
Painting metal: tools
You won't be able to get by with just one brush. Because you cannot paint an iron stove without cleaning and degreasing its surface.
Therefore, arm yourself with protective equipment, a drill with a metal brush, degreasing compounds (the same acetone, for example), place the stove on plastic film and start the process.
Oven repair using grout
- You can buy and make it yourself.
- When preparing the mixture, the crumbly clay is transferred to a basin. Then fill it with water and leave it alone for ten hours. Sand is added to the mixture. In a ratio of one to four.
Lastly, one kilogram of salt is added and the mixture is mixed thoroughly.
Clay for stove repair
- A component such as clay is present in all mixtures for sealing stove cracks.
- When heated, it becomes hard as stone.
- Dry clay crumbles when heated.
- When heated, oily clay begins to crack and dry out.
- The proportions of solutions are always different.
- A solution consisting of sand and clay is successful in repairing stoves.
Furnace Maintenance
The oven can break down at any time. It is better to prevent bad consequences and inspect the stove for integrity. According to SNiP, dacha heating devices need to be inspected at least twice a year.
If the stove is located inside a year-round residential building, then it is inspected at least once every three months. Unfortunately, the furnace is not inspected at all. It is better to prevent than to suffer the consequences.
The most dangerous thing in a stove is the cracks. These cracks are not visible to the naked eye. Carbon monoxide passes through them, which can harm the owners and the house as a whole.