There are many ways to decorate stoves:
- Plastering
- Coloring
- Applying a relief and simple pattern
- Tiling
Today we will talk about how to paint a stove in a house, country house or bathhouse so that it is beautiful and, most importantly, safe.
Overtopping - consequences
There are cases when many cracks appear on the outer walls of a plastered stove over time. This happens due to the fact that during operation of the furnace, overheating sometimes occurs.
Uneven heat distribution inside the furnace masonry leads to the fact that, expanding from high temperature, the bricks move to the side. After cooling, they no longer return to their original place.
This is how the external configuration of the furnace changes over and over again. It is almost invisible to the eye, but leads to cracking of the seams and the outer plaster layer.
Metal screed - quick “treatment”
What to do in this situation? Is it necessary to move the oven?
In the future, of course, you can move it, but for now let's make repairs that won't take much time and will allow your stove to warm your home for a long time.
Cracks in the exterior decoration may indicate that carbon monoxide is penetrating into the room through them, and this is already dangerous. Of course, you can cover the cracks with clay and paint the stove, but first it needs to be strengthened.
Since the outer masonry of the stove primarily serves as a frame, it is necessary to strengthen it. Let's tie it with wire. This is done like this:
- 15 - 20 mm deep, are made in the outer brickwork .
- The grooves should encircle the stove in such a way that it can be wrapped with wire recessed into the groove.
- Once the wire is wound, it must be tensioned.
- This is done using a beard or metal rod of a suitable diameter by simply twisting it in several places.
- The grooves with the stretched wire are covered with clay mortar.
- The surface is plastered with a solution of clay and asbestos.
Our advice: carry out plastering on a well-heated stove.
Chalk painting - basic methods and disadvantages
After the plaster has dried, the stove can be painted or whitewashed with lime. To the question of how to paint the stove after plastering, we answer:
- After plastering, stoves are painted with chalk or lime paints , usually white.
Our advice: to prevent lime whitewash from becoming dirty in the future, dilute the lime mortar with water and salt in a ratio of 50 - 100 g per bucket.
- To avoid a yellow tint in chalk paint, water is added to it with the addition of blue.
- Do-it-yourself painting is done in two layers. When re-painting, wait until the first layer has dried well.
Prepare chalk paint as follows:
- Pieces of chalk are placed in a container, filled with water so that it completely covers the chalk, and left for an hour.
- In another container, a mixture of water and animal glue is diluted. Ratio 1:25.
- The compositions are mixed and the desired thickness is achieved.
Our tip: drip chalk paint onto a piece of glass placed vertically. With normal consistency, the drop should slide down 20 - 30 mm .
- If you want to give the paint an original color, you can use various color pigments. The main thing is that they do not lose their original color when heated. Read the instructions.
- You can use blue diluted in water. For 10 kg of chalk you will need 0.06 kg of blue .
The disadvantage of this type of painting is that when applying it it is very difficult to achieve uniformity and the absence of stripes. A saturated solution is prone to bubble formation, and the paint may fall off as it dries.
Lime - proportions and methods
For painting with lime, the solution is prepared as follows:
- 1 kg of slaked lime is poured into 1.5 liters of water .
- To obtain a better quality whitewash, add a teaspoon of drying oil and 5 g of table salt to this solution.
- These additives will add strength and water resistance to whitewash.
- You can add 20 - 25 g of blue to the solution to give it a more saturated color.
- Unlike chalk whitewash, the second layer of lime whitewash is applied on top of the still wet first layer.
Our information: the most durable whitewash is made from freshly slaked lime. It is worth remembering that chalk whitewash should not be applied to lime whitewash, and vice versa. If your stove had a chalk whitewash, then the chalk layer should be cleaned off before applying the lime whitewash.
Choosing paint for the stove
The operating temperature for standard metal paint does not exceed 40-50 ℃, so you cannot paint surfaces that are too hot - it will bubble up, lose its original color and may begin to smoke and smell unpleasant. Therefore, in this case, you need to use only special heat-resistant paint for stoves.
Which of the proposed paint options to choose will depend on the area of its application. Thus, a metal sauna stove can heat up to 600-800 ℃ or more - at the epicenter of combustion the temperature is even higher. But its outer walls may not heat up so much - it all depends on the design. Therefore, you need to know how to properly install a stove in a bathhouse. If we are talking about a brick oven, then its surface does not warm up above 200 ℃.
Please note that heat-resistant paint must be suitable for interior use. And for sauna stoves you need paint with moisture protection.
Do I need to paint or is there an alternative?
It is recommended to paint the metal before laying the heat-resistant brick screen and cover the inside of the tank. Instead of painting, bluing is used (details below) or other methods are used:
- Eco-friendly surface treatment with silver is quite effective;
- A budget option is red lead, used in metallurgy;
- A heat-resistant mixture of lime and cement provides good protection against oxidation.
It is recommended to paint the metal before laying the heat-resistant brick screen and cover the inside of the tank.
A little about the types of heat-resistant paints
Painting very hot surfaces of metal furnaces can only be done with heat-resistant, heat-resistant and fire-resistant paints. But fire retardants are not suitable in this case - they are used for other purposes. When heated to 200 ℃, fire-retardant paint swells and blocks the access of oxygen to the structure, protecting it from destruction in fire. Let's take a closer look at the types of paints.
So, heat-resistant paint for stoves is used at a temperature threshold of 600 ℃. Such compositions are suitable for painting metal elements of stoves and fireplaces, as well as for metal heating appliances. But for sauna stoves they use several different types of materials - heat-resistant enamel, which is designed to heat the surface to 800-1000 ℃.
Fireproof paint for metal products can withstand exposure to open flames. Therefore, its temperature threshold is even higher. However, due to the very high cost, it is not advisable to use such compositions at home.
Another type of paint is high-temperature. Their area of application is painting heating batteries and a number of engine components. As a rule, such compositions are operated under heating conditions no higher than 200 ℃. High-temperature paint for brick stoves can only be used if it is necessary to tint the surface or paint the seams. Metal stoves cannot be painted with it.
For brick stoves, you can also use heat-resistant varnish. Its operating temperature is 250-300℃. After treating the surface with this varnish, it becomes shiny and brighter.
How to choose the right one
To choose the right paint for the stove, you need to carefully consider the label, which says what surface it can be used for, for example, heat-resistant paint for metal products. Often this information is printed in large font and is difficult to miss. In cases where the scope of application of paint and varnish products is wide, this is also written on the packaging, but in small print. Be that as it may, such information must be indicated on the packaging, as well as the name of the manufacturer. If this data is not available, there is no need to purchase such a product. It is possible that this is a counterfeit product that may pose a threat to your health.
For metal sauna stoves, use only moisture-resistant compounds, otherwise they will not last long on the surface.
Packaging
You can purchase heat-resistant paints in various packaging - these can be spray cans or jars. From cans, paint is simply sprayed over the surface, and from a can, paint is used with brushes, rollers or special sprayers.
The volume of the cylinder is usually 500 ml. Cans are produced in 400 g, 800 g, 2.5 kg and 5 kg. There are also large buckets of 5-15 kg and barrels.
Exactly how to apply thermal paint is everyone’s personal choice. For some, it will be more convenient to use a brush or roller, while others will opt for a spray can. In the latter case, the material consumption will be significantly lower, and the paint will apply more evenly and evenly.
Which fireproof paint to choose for the stove
Paint for metal stoves must be selected with a temperature threshold of 600 ℃ or more. Here are a few of the most famous brands with a brief description of each.
Heat-resistant enamel of the CERTA brand, produced by the domestic manufacturer Spectrum. It is designed for use in the temperature range of 65-900 ℃, and its application can be carried out even in frosty temperatures of -30 ℃. The consumer is offered a total of 26 shades of paint, including turquoise, blue and yellow. True, not all colors withstand equally high temperatures. Thus, the most heat-resistant color is black (up to 900 ℃). Behind it are white, gold, brown, copper, red-brown, green, blue, cyan and turquoise (all of them can withstand up to 750 ℃). All other shades can be used at temperatures not exceeding 400-500 ℃. This paint is produced in cylinders, cans and buckets of various sizes.
Termal paint from the Finnish manufacturer Tikkurila. It is made on the basis of alkyd resins and is available in black and silver. It is able to withstand the heating of the metal at the stage when it turns red. When using this paint on sauna stoves, it does not crack or peel for about 3 years. Please note that if you heat the painted surface to 230℃, it will dry in 1 hour. This is a prerequisite for its polymerization.
Hansa brand heat-resistant metal stove paint comes in 16 colors and can be used in temperatures up to 800℃ to paint stainless steel. It goes on sale in barrels, cans and cans.
Heat-resistant paint of the Kudo brand, produced in Russia, is a silicone enamel for metal products. It is designed to heat the surface up to 600 ℃ and is available in 20 shades, including white, black, red and silver. Sold in 520 ml bottles.
Aerosol paint Bosny. Available in two versions - for heating up to 650 ℃ and up to 200 ℃. It fits well, does not change color for a long time and does not crack. This brand of thermal paint is used for painting metal, plastic, ceramics and glass, wood and fabrics. Pay attention to this brand, since glass paint is rare to find. The container capacity is 400 ml.
Hammerite brand heat-resistant metal paint has one feature. It can even be applied over rust without first cleaning the surface. However, beware of its contact with diesel fuel, gasoline and grease. The paint can withstand heating up to 600 ℃ and is available in 250 ml cans. It is applied with a brush.
Anti-corrosion heat-resistant ELCON enamel can withstand temperatures up to 800 ℃, including sudden changes. Used for painting concrete, brick and metal. Available in cans in a large number of colors. There is also an aerosol version of ELCON paint in 520 ml cans - it is designed to heat up to 700 ℃.
Paint for metal and other surfaces KO-8111 “Termika” can withstand up to 600 ℃. In addition, it has a protective effect against stray currents, salts, chlorine, solutions, oils and aggressive substances. Used for painting fireplaces and stoves. In baths, it is better to use the KO-8101 brand and KO-8104 primer from the same manufacturer. In addition to heat resistance, this paint is also moisture resistant.
Rust-Oleum heat-resistant paint is designed for very high heat - up to 1093 ℃. In addition, it protects against gasoline and oils. Release form: aerosol can. It comes in matte white, gray, black and transparent.
All of the above options are successfully used for painting brick and metal heating stoves and boilers. And some are also suitable for sauna stoves.
Varnish coating
For stoves where the brickwork is new, without cracks, there is a desire to emphasize the naturalness of the stone. PF 283 varnish will help with this; before application it is diluted with turpentine 1:1.
The resulting glossy layer has full strength characteristics and is not afraid of temperature fluctuations. By adding gouache to the varnish, you can add the desired shade without painting over the natural structure of the brick.
Preparing the surface for painting
Before painting a metal stove, it is important to properly prepare the surface. In some cases, no prior preparation is required, but in others, you must follow the instructions on the label.
Typically, preparation includes:
- Cleaning the surface from traces of oils and grease, old coating, water-soluble salts and other things.
- Removing rust down to gray metal using sandpaper, a grinder or drill attachment, or a sandblaster. Sometimes the surface can be coated with rust converters, but this must be indicated on the paint package. Upon completion of treatment, the surface must be washed and dried. Rust must be removed completely, down to the smallest specks.
- Degreasing the surface with xylene or solvent immediately before painting. Further coloring should be carried out no later than 6 hours after treatment outdoors or 24 hours indoors.
In each case, the required number of paint layers and their direction are purely individual. If more than one layer is required, they are applied in different directions so that the paint goes on more evenly.
The temperature and drying conditions of the paint, as well as the gap between application of layers, are always indicated on the label. Following the manufacturer's recommendations will allow you to obtain a coating that will last the specified period.
Offers from manufacturers
| Brand KM | Manufacturer country | Technical specifications | Price, rubles |
| Tikkurila Luja | Finland | Interacts with any base. The coating is matte. Tolerance of detergents containing alcohol. | 1700 |
| Lacra Super resistant | Russia | Wood, plaster, brick are painted. Drying speed for 1 coating layer is 60 minutes, 2 layers – 120 minutes. The coating is water-resistant and wear-resistant. | 1100 |
| Parade F20 | Russia | The paint layer is wear-resistant, tolerates water, and maintains color brightness well. The first coat dries in 1 hour. Polymerization occurs after 2 hours. CM cannot be applied if the humidity is high and the temperature is below 10°C. | 1900 |
| DUFA D1A WANDFARBE | Ukraine | The coating is matte. Complete polymerization after 4 hours. Operating temperature during application is 20°C. | 1200 |
| DULUX BINDO 20 | Russia | Increased wear resistance. Tolerance to water exposure. It is enough to paint 2 times. Drying speed – 60 minutes. A month after decoration, the surface is washed with detergents. | 3900 for 10 liters of containers |
| Tex Universal | Russia | The coating is deep matte. Drying speed 3 hours. The covering layer is wear-resistant, moisture-resistant, and can be washed with non-abrasive agents. | 1100 |
| Tikkutila Remontti Jassia | Finland | The coating is semi-matte, washable and moisture resistant. Drying speed of one layer is 120 minutes. | 1600 for 2.7 liters |
| VGT VDAK 1180 | Russia | A matte layer is formed that is water-resistant and wear-resistant. The surface “breathes”. Color brightness is maintained when exposed to UV rays of the sun. The time interval between applying layers is 60 minutes. Polymerization occurs within a day. | 360 for 7 kg |
| Marshall | Homeland - Türkiye. | The material is easy to work with. Drying speed – 4 hours. Stable layer with high wear resistance. | 580 for 2.5 liters |
| Dali | Denmark | The coating repels water and dirt. Resists direct rays of the sun. Each layer dries in 60 minutes, the structure is ready for use in 120 minutes. Work takes place at temperatures above 10°C. | 1200 for 5 liters |
Choosing paint for a brick stove in a bathhouse
The outer surface of a brick sauna stove does not heat up too much, as a rule, no higher than 70-80℃. Near the cast elements, a brick sauna stove may heat up a little more, but in any case not higher than 200 ℃.
In this case, the following brands of paint are suitable:
- Ecoterra heat-resistant paint is designed to heat up to 400 ℃ and is used on concrete and ceramic surfaces. The paint is matte, red-brown.
- A brick sauna stove can be painted with anti-corrosion heat-resistant ELCON enamel. It can heat up to 700℃. The same company also produces heat-resistant varnish of the KO-85 brand, which is intended for surfaces with a temperature of no more than 250 ℃. It is successfully used for decorative finishing of the surface of a brick oven.
- Heat-resistant paint Certa is also suitable for painting sauna brick stoves.
- Bosny heat-resistant aerosol is ideal for glass and ceramic surfaces, including brick.
- KO-8101 paint is equally applicable for both metal and brick stoves.
It is worth noting that in addition to painting, there are a number of other ways to decorate a brick oven externally. To refine the brickwork, it can be plastered and whitewashed with chalk or lime. If, after plastering, the surface is puttied and covered with water-based emulsion, it will be more beautiful and will not stain clothes. The unpleasant odor of the water-based emulsion will completely disappear after drying completely and reappear. In addition, it allows you to tint the stove in any shade or apply any decorative painting in the future.
For metal elements, paint must be selected with a heating temperature of up to 800 ℃ or more, that is, the same as for a metal furnace. Before painting, parts must be cleaned of dirt, rust and old paint. Painting tape is placed on top of the brick around the steel elements and you are ready to go. Please note that when working with aerosols, the spray surface will be larger, so the area of protected areas must be increased so as not to subsequently repaint the oven itself.
What is the best way to paint a potbelly stove?
A potbelly stove is one of the most popular heating units. Such stoves are installed in many country and country houses. Over time, the stove loses its original appearance, and there is a need to restore its aesthetic characteristics.
It is recommended to apply the solution to the potbelly stove in a thin layer.
A potbelly stove can be painted using different finishing materials. Choose the option that suits you best according to your personal preferences and available budget.
Lime painting: preparatory stage
Rice. 1. Potbelly stove made of metal.
A potbelly stove can be made of metal. This design is shown in Fig. 1. The oven can also be made of brick. Stoves can be painted using different finishing materials. Thus, for finishing brick structures, an affordable and fairly high-quality material called lime is often used. To paint a potbelly stove yourself, prepare the following required materials, fixtures and tools:
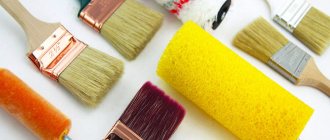
- Brushes and rollers;
- Bucket;
- Solvent (can be replaced with alcohol);
- Enamel in aerosol;
- Lime;
- Water;
- Dyes;
- Glue.
Construction of a potbelly stove made of metal.
Before painting the potbelly stove, you need to prepare a solution suitable for this. Take a bucket or other container, add lime and fill it with the same amount of water. After this, mix the mixture thoroughly and add animal glue to it.
You can purchase this glue at a store that specializes in selling various painting supplies. You will need relatively little glue - about 100 g per 10 liters of solution.
Before you add glue to the lime mortar, be sure to dilute it in a separate container (an ordinary bucket will do) with a small amount of water.
To understand whether a lime-based solution is ready, you need to do the following: take a small piece of glass, fix it vertically and apply a little solution. If the paint spreads no more than 3 cm, then everything was done correctly, you can begin finishing the stove.
If you want to paint your potbelly stove not white, but some other color, then you will need to add a little dye to the solution. Potassium permanganate, blue or synthetic paints can be used as a dye. The specific option is selected depending on what shade you want to get.
Step-by-step instructions for painting a stove with a lime-based solution
Before painting a potbelly stove, its surface must be thoroughly cleaned of dust and dirt. Cracked plaster needs to be cleaned. With this kind of preparation you can achieve the perfect result. The surface will be painted with the highest quality, and the result will please the eye for a long time.
Lime is applied to the surface in 2 layers. For work, you can use a whitewash brush or a roller with medium-length bristles.
Do not apply the solution in a very thick layer, because in this case, you will not be able to create a uniform and highest quality surface.
Rice. 2. Tribo charging circuit.
To avoid streaking, add a small amount of salt to the lime before starting work. During the painting process, move the brush exclusively horizontally or vertically.
After applying the first layer, leave the oven for a while to allow the solution to dry completely. After this, you will need to paint the potbelly stove a second time in the same way. The second layer should be made thinner than the first.
After you have completely covered the potbelly stove with lime solution, you can safely proceed to a new stage, during which you need to finish the cast iron parts of this heating unit - handles and doors. Neither lime mortar nor ordinary paint is suitable for this work. Cast iron stove elements can be treated exclusively with special enamels in aerosol form that are resistant to high temperatures. Such enamels do not crack and retain their original appearance for a long time.
Before you begin applying enamel, you should degrease the handles and doors. This can be done using a solvent or alcohol. There is no need to prime the surface before applying enamel, because... the primer will still not withstand high oven temperatures in the future. This means that you can immediately proceed to the painting process.
First, you should thoroughly shake the can of enamel, and then spray the aerosol at a distance of about 25-27 cm onto the cast iron parts of the stove. Wait until the paint dries and you can start using the potbelly stove for its intended purpose. For work it is very convenient to use a special sprayer, the diagram of which is shown in Fig. 2.
Preparing to paint the potbelly stove
Scheme of a potbelly stove with a water heating tank.
If the potbelly stove installed in your home has not been finished with plaster, it must be painted.
Not every paint is suitable for performing such work, because during operation the unit heats up to a fairly high temperature, and not every finishing material is able to withstand such conditions.
In this case, you can only use heat-resistant silicon-organic based paints. Then the beautiful appearance of the potbelly stove will remain for a long time. To paint a potbelly stove yourself, you will need the following materials, tools and equipment:
- Container for preparing the solution.
- Drying oil.
- Hammer.
- Dye.
- Tassels.
- Red brick.
- Solvent for enamel.
- Milk and egg white.
Before starting work, it will be necessary to thoroughly clean the surface of the unit from dirt, various deposits and dust, and repair cracks, chips and irregularities. Putty will help you with this. Keep in mind that ordinary putty will not work for this type of work. You will need to prepare the solution yourself.
Take a hammer, a red brick and crush it into small pieces until it turns into flour. Pour the resulting flour into a container, add 10 egg whites and beat thoroughly. The result will be a fairly thick mixture, which will need to be used to seal all the chips and cracks on the surface of the stove.
To do this, use a hard brush.
Treat this step responsibly and you will get a smooth surface without defects. This putty guarantees reliable removal of defects. It is characterized by high resistance to heat and abrasion.
Before painting, treat the entire surface with drying oil. This will reduce the consumption of heat-resistant enamel and ensure better paint application. The drying oil layer should be thick enough, because... the brick will absorb a significant amount of this material.
Painting procedure
Now you can start painting the potbelly stove. Before applying heat-resistant silicon-organic enamel, make sure that the prepared solution is not too thick. If you coat the surface with a viscous compound, it will not absorb well into the surface.
In addition, such paint is quite difficult to work with. Therefore, first dilute it using a solvent specially created for organic materials. If you do not have such a solvent, you can dilute the paint using ordinary turpentine.
When the required thickness has been achieved, begin painting the potbelly stove. The paint should be applied in a fairly thin layer and wait until it dries completely. Then you need to apply a second layer. If the enamel lays down in an even layer through which the brick cannot be seen, you can complete painting at this stage. If the bricks are still visible, then you will need to apply an additional layer, and only after that paint the cast iron structural elements.
Important recommendations and useful tips
Diagram of a cast iron stove.
For painting brick stove structures, it is more preferable to use enamel paints rather than oil paints, because... they are characterized by much higher heat transfer. In this case, it is recommended to give preference to dark shades. Do not use glossy paints for this type of work, as... their heat transfer is extremely low.
To prevent the yellowing effect, add a little blue to the solution. If you wish, you can decorate the stove with various patterns. The most convenient way to do this is with the help of special stencils, which allow you to apply sophisticated and sophisticated patterns to the surface.
Do them after the stove is completely painted. For applying patterns, a composition consisting of gouache, clean water and egg white is best suited.
Mix the components thoroughly and use the resulting solution to apply beautiful and original patterns.
In the absence of lime, a chalk-based composition can be used to paint the potbelly stove. The result is an equally high-quality and attractive result. This solution is prepared in exactly the same way as a lime-based mixture.
When choosing a paint, you must pay attention to whether it is resistant to high temperatures and whether it will not emit toxic fumes when heated.
To prepare leveling putty, you can use not only brick flour and eggs. If desired, the egg white can be replaced with high-quality latex paint. Buy any paints and materials only from trusted places.
Be sure to ask the seller for certificates for the products presented. This will allow you to avoid unnecessary costs and disappointments after finishing your potbelly stove. To apply paint, it is recommended to use good brushes with natural bristles.
This tool ensures a thin, uniform and highest quality application of the finishing material.
Thus, the potbelly stove can be painted using chalk, lime or special factory paint. These are the main and most common finishing options for such structures. Think, choose the most suitable option for you and get to work. Good luck!
Source: https://1popechi.ru/burzhujka/chem-pokrasit-burzhujku.html
