Today, underfloor heating has become a very popular way to heat interior space. Before installing a heated floor under a parquet board, it is necessary to take into account some nuances, especially when wood materials are used as flooring. To make it pleasant to stay in a house or apartment, and for the cladding to last a long time, it is important to choose and install the heated floor structure correctly.
Warm floor under parquet boards: features of the device
The feasibility of choosing a heated floor
The parquet looks very aesthetically pleasing. It is pleasant to the touch. But for many, the natural warmth of wood is not enough and they want to install additional heating. I would like to dwell on this point in more detail. There are plenty of opponents to installing heated floors under parquet. Several arguments are given in support of this position:
- Wooden finishing materials are sensitive to climatic factors. As a result, they can dry out, begin to creak and become covered with cracks. Warm floors can also have a negative effect on wood.
- Many people do not see much point in installing additional heating, due to the fact that parquet flooring, which is installed correctly, saves heat in the room well.
- Installing an underfloor heating system at the same time as parquet is a rather difficult task, since any miscalculations can lead to damage to the heating elements.
But there are enough supporters of installing a warm structure. They justify their position by the fact that if certain recommendations are taken into account, the performance characteristics of wooden cladding will not be harmed. And parquet manufacturers admit that the material they produce is compatible with floor heating. But on the packaging of the material there must be a marking that allows the installation of heated floors under parquet. In the absence of such a sign, the risk of damage to the floor covering is very high.
The packaging of the material must contain a marking allowing the installation of heated floors under parquet
Of course, heated floors will be an excellent solution in children's rooms and bedrooms. When choosing parquet for a heated floor , it is recommended to take into account some nuances:
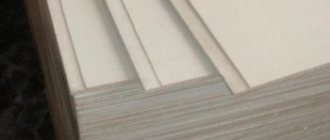
- Due to their low thermal conductivity, wooden materials do not readily transmit heat from heaters. Therefore, parquet or parquet boards for heated floors have some limitations in size. The thickness of the coating should vary between 12-15 mm (very thin planks are deformed by temperature).
- More preferable are materials made from wood species that are less susceptible to deformation as a result of external influences, for example, walnut, ash or oak.
- The temperature on the floor surface should be less than 26 degrees. In this case, heating should be carried out evenly.
Expert opinion
Afanasyev E.V.
Chief editor of the pol-exp.com project Engineer.
In order for the heated coating to function for a long time and reliably, it is equally important to be responsible for the installation of the structure. Thus, attaching a plywood backing to a concrete screed (it often acts as an underlay for parquet) should not be done with self-tapping screws. For installation, you can use glue (most often a two-component composition based on polyurethane is chosen), despite the fact that the reliability of this design is lower than when using hardware. Floating fixation of the boards, compensating for thermal expansion and contraction, will help prevent possible deformations of the wood.
It is best to attach a plywood backing to a concrete screed using glue.
Insulation of film sections
Next, in order to avoid possible short circuits and damage to the system, it is necessary to insulate the places where the cut was made.
For these purposes, bitumen mastic or bitumen-based tape is used. The process is carried out as follows:
- Cut off the required rectangular piece of insulation.
- The size of the segment should be slightly larger than the isolated area.
- We make a small hole in the film itself, which will serve for fixation by pressing it into the insulation.
- We isolate and fix it, after which we seal it with tape on top.
It is worth noting that at this stage we leave the places where the wiring will be connected open, since we will still have to install clamps and wires.
Types of heated floors
| Photo | Name | Rating | Price | |
| #1 | Infrared | ⭐ 99 / 100 | More details | |
| #2 | Cable | ⭐ 98 / 100 | More details | |
| #3 | Water | ⭐ 97 / 100 | More details |
Infrared
This design is called film, as it consists of a film made of polymer with graphite heaters sewn into it. Infrared heated floors under parquet boards are distinguished by their simplicity of design. The film is placed on the base and the heater is connected to the power supply. Operating principle: converting the energy of electric current into infrared radiation.
Infrared heated floor
pros
- high heating rate of the floor covering;
- due to its flexibility, the film can be installed on bases of any shape, including steps;
- when using heated floors, the risk of harm to human health is eliminated;
- the system continues to operate even if some part of it is damaged;
- the film can be easily cut if necessary;
- the thinness of the heated floor allows it to be used in any room;
- The service life of a heated floor is 2-3 decades.
Minuses
- If the film is laid under varnished parquet, the temperature on its surface should not exceed 21 degrees Celsius, otherwise deformation of the cladding is possible.
- The disadvantage of infrared heated floors is some limitation on the permissible pressure. In this regard, the film should not be placed where massive interior items will subsequently be installed.
Tips for installing infrared heated floors
Prices for infrared heated floors
infrared heated floor
Cable
Today, floor-mounted electrical systems are in great demand among consumers. The heating element in it is a special heat cable. However, laying parquet on a heated floor of this type is done quite rarely.
pros
- affordable price;
- long service life;
- setting and maintaining the required temperature;
- easy installation.
Minuses
- heavy load on the wooden covering;
- significant electricity consumption;
- the difficulty of carrying out repair work in case of system breakdowns.
Cable floor electrical system
Prices for cable heated floors
cable heated floor
Water
Such heating systems are installed no less often. It consists of flexible plastic tubes filled with water supplied from a boiler or central water supply. How a water heated floor under a parquet board : when the heating is turned on, the liquid heats up, but the temperature rises gradually. As a result, sudden temperature changes that lead to wood deformation are eliminated. But installing a water heated floor is labor-intensive.
pros
- uniform heat distribution;
- saving energy consumption;
- does not dry out the air in the room.
Minuses
- complexity of installation;
- high initial costs;
- the likelihood of a leak and the difficulty of eliminating it;
- cannot be installed in apartments.
Water heated floor installation
When deciding which heated floor under a parquet board is better, you have to keep in mind that both cable and water heated floors are filled with a concrete screed, which protects the system from damage and increases the efficiency of its operation. In this regard, any shortcomings made in the work may affect the functioning of the entire heating. When using infrared heated floors, screeding is not required. It can only be used as a base for placing the film.
Prices for water heated floors
water heated floor
All of the listed heating systems operate on the same principle: at the first stage, the floor covering is heated. Already from it comes thermal energy that spreads throughout the room.
Tools and installation methods
To properly lay boards without plywood, tools are used that will not damage the material during installation:
- a hammer with a rubber tip or a mallet;
- tape measure at least 5 m long;
- two-meter level;
- jigsaw;
- wedges for leveling deviations in level and a bar for better joining of parts;
- carpenter's knife for adjusting the edges of panels;
- drill with a variety of cutting attachments.
Before laying, be sure to measure the humidity of the material and the base on which installation is being carried out. The results obtained should not exceed the parameters specified in the instructions. Before installation, you will need to make a project and determine how to correctly position the panels in the room. Thanks to the correct placement of the texture, you can visually align the room.
- In a square room, the boards are laid out in the direction of the light, that is, towards the window.
- When laying the coating diagonally, an original pattern is obtained, but the consumption of building materials increases.
- Usually the material is installed from the door in the direction of the step.
Laying diagonally
Installation instructions for infrared heated floors and parquet boards
Work technology:
Step 1 . First, a warm floor is installed under the parquet board . A foiled polyethylene foam backing (which also plays the role of thermal insulation) 3 mm thick is laid out on the floor. The foil will reflect IR rays in the required direction.
Lay out the foil polyethylene foam backing
Step 2 . The film heater is spread out. Such a warm floor can be very easily adjusted to the size of the room (using scissors). Clamping electrical contacts with wiring are installed along the edges. They are isolated.
We spread the film heater and adjust it to the size of the room
Step 3 . The film strips are connected to each other (in parallel) and brought to the thermostat.
We connect the film strips together
Step 4 . A vapor-waterproofing membrane is placed on the heater.
We lay a vapor-waterproofing membrane
Step 5 . Now you can begin installing the parquet flooring. An expansion gap of 10 mm must be left around the entire perimeter. This will allow the coating to slightly change its size under the influence of temperature. For convenience, wedges are installed.
Important! It is recommended to lay the parquet board along the direction of the sun's rays (perpendicular to the window opening).
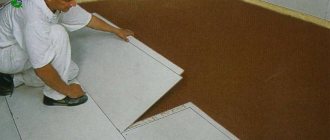
Laying is carried out using the floating method, without the use of adhesives.
You can calculate the number of rows of boards by measuring the width of the room, subtracting the size of the gaps (20 mm) from the resulting value and dividing the remainder by the width of one board. At the same time, it will become clear to what width the boards of the last row will have to be cut. If after trimming they become narrower than 70 mm, it is recommended to trim both the first and last rows.
The tenon of the boards of the first row is cut off.
Cut off the tenon from the boards of the first row
Step 6 . The parquet board is laid taking into account the compensation gap. To form it, wedges are installed between the wall and the covering.
Laying parquet boards
Step 7 . When installing the second row, it is necessary to offset (by about a third) the lamellas. To do this, you will have to cut the outer boards to width. The elements are fixed using a locking connection. Using a hammer and a block, the connection is tapped (first the end, then the longitudinal).
Step 8 . The same sequence is performed before installing the last row. The tamping of these boards (cut to accommodate the expansion gap) is carried out with a mounting bracket.
Parquet boards are installed on the heated floor. When the coating is installed taking into account all the requirements, it will serve for a long time.
Arranging a place for a thermostat
The next step is to prepare the place where the heated floor thermostat will be installed, which performs the following functions:
- Temperature level control and adjustment.
- Programming on and off.
- Setting temperature support and heating.
Since we decided on the location during the coating preparation phase, we now need to make a recess in the wall to install the regulator, and connect wiring to it for further connection.
Next, prepare a diagram for laying and placing the wires of the floor itself.
Installing a water system under parquet boards
Since this design has one significant drawback - the possibility of leaks cannot be completely excluded, its installation must be taken with great responsibility.
Stages of work:
Step 1 . Insulation - polyethylene film - is laid on a flat base.
Lay down plastic film
Step 2 . To minimize heat loss downwards, thermal insulation is laid. For this purpose, it is better to use polystyrene foam with a thickness of 5-10 mm.
Installing expanded polystyrene
Step 3 . To compensate for the thermal expansion of the screed (which can cause it to crack), a damper tape made of foam polyethylene is attached around the perimeter of the room.
Installing a damper tape made of foamed polyethylene
Despite the fact that the tape is self-adhesive, it is recommended to secure it with mushroom dowels (you can attach it to drywall or wood with a stapler).
Step 4 . A reinforcing mesh (metal thickness - 4 mm) must be laid on the thermal insulation. It will be needed not only to strengthen the structure, but also to secure the pipe.
Laying the reinforcing mesh
Step 5 . Pipes are being laid. To install a heated floor, a pipeline with a diameter of 1.6 cm is sufficient. The most popular methods of laying out the pipe are spiral or loop.
Laying pipes
Laying in a spiral allows for uniform heating of the floor. That's why it is used more often. Process diagram: first, the pipes are laid out around the perimeter, and gradually, in a spiral (in increments of 30 cm), they are wrapped towards the center. Having reached the center, work continues in the opposite direction. The pipe must be returned to its original point. As a result, there will be 15 cm between the pipes.
To fasten the pipes to the mesh, nylon ties are used (if mats with bosses are used as insulation, then the pipes are fixed between these protrusions).
Layout options for heated floor pipes
Important! The length of one pipeline circuit should not exceed 120 linear meters.
Step 6 . The pipes are connected to the collector. The system must be checked for operability and tightness. Before pouring the screed and installing the floor covering, testing (pressure testing) is carried out for two days.
Connecting the pipes to the collector
Step 7 . A cement-sand screed is made (on the beacons). For greater reliability of the structure, it is recommended to lay another reinforcing mesh on the pipes. The screed is made of concrete grades M200 or M300. Its thickness should be such that there is a distance of at least 5-8 cm from the pipes to the surface of the new floor.
Making a cement-sand screed
Step 8 . Installation of the floor covering can be carried out 4 weeks after the concrete has gained strength.
Step 9 . Plywood is laid on the concrete base. For fastening, it is better to use polyurethane glue rather than self-tapping screws, so as not to accidentally damage the pipeline.
Polyurethane adhesive for fastening plywood and parquet
Step 10. The parquet boards are laid using a floating method.
Arrangement of insulating materials
First of all, after leveling the floor, waterproofing is installed to avoid exposure to moisture from the lower tier of the floor. About how to perform waterproofing in a separate material.
Next, it is necessary to provide thermal insulation that will prevent heat loss. Therefore, it is advisable to choose a reflective material. This will significantly reduce energy costs while increasing heating efficiency.
You can use almost any material, preferably rolled material; it must be laid with the metallized side up. Taking into account the opinions of experts on the choice of substrate, the best option is special foamed polyethylene (isolon) with a thickness of 2 millimeters or more.
In addition, you can also use non-reflective insulation, for example, cork. These will be slightly less effective, but cheaper.
The only thing is that it is not recommended to use foil-based insulation, since they are extremely ineffective in this case.
During installation, it is recommended to seal the joints with metallized tape.
Instructions for installing cable heating under parquet boards
An electric heated floor can act as an independent heat source or be used as additional heating.
System installation technology:
Step 1 . On a flat floor (the quality of the surface in this case is of great importance, since kinks in the cable provoke its breakdown) hydro- and thermal insulation (polyethylene film and polystyrene foam) are laid. A damper tape is attached around the perimeter of the room (as in the previous paragraph).
Laying thermal insulation
Step 2 . A reinforcing mesh is laid on the insulation.
Step 3 . A thermostat is mounted on the wall (at a height of 30-50 cm from the floor). A groove is cut down from it for laying the cable.
Attaching the thermostat
Step 4 . A heating cable can be used as the main element of the heating system, but it is more convenient to lay mats, which are a fiberglass sheet with a cable fixed on it at a certain pitch. If you still choose a separate cable, its installation can be done on a special tape secured in the screed with self-tapping screws, but in our case it is attached to the reinforcing mesh using clips.
Laying the cable
The table will help you correctly calculate the heating system:
Heating system calculation table
Step 5 . A thermostat is placed in a corrugated pipe between the heating lines at a distance of 50 cm from the wall.
Place the thermostat at a distance of 50 cm from the wall
Step 6 . The heated floor is connected to the electrical network, and the design is tested.
Step 7 . If the system is functioning normally, a concrete screed 5-6 cm thick is poured and leveled.
Filling the floor with concrete screed
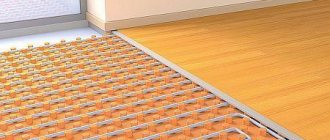
The result is a pie like this:
Installation of heated floors
Step 8 . After the concrete has hardened (after 28 days), a topcoat of parquet boards can be installed (on a substrate made of foam, cork or plywood). Again the floating method should be used.
The “warm floor + parquet board” system has the right to be used. With proper design, an optimal microclimate will be created in the room.
Necessary materials for work
Basically, all the necessary materials are included with the film itself, and these are:
- Directly the thermal film itself (sold in rolls).
- Insulation kit and clamps.
- Wires.
- Thermostat.
- Temperature sensor.
It is also recommended to additionally purchase:
- Polyethylene film or rolled waterproofing material.
- Masking tape (preferably double-sided).
- Thermal reflective material.
As you can see, there are quite a few materials. But it is important to choose the right foil backing.
It is also worth paying attention to the tool, which is also few:
- Scissors.
- Pliers.
- Construction knife.
- Hammer.
- Pencil, tape measure and ruler.
Laying features
How to lay parquet planks? The technology is presented in 3 methods:
- "floating" masonry;
- "glue" method;
- use of lag.
"Floating" installation
Parquet dies are connected using the tenon-to-base principle. Fastening to the base with self-tapping screws or glue is not intended.
The segments are fastened together using a locking connection. The material is laid out on the substrate.
Visual guide
Step-by-step DIY installation instructions include the following:
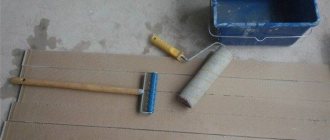
- Installation of a waterproofing layer. Film is used (thickness - 200 microns). The strips must be laid out overlapping. Reserve – 150-200 mm. Fastening is carried out using transparent adhesive tape.
- Performing an overlap against the wall. Width – up to 150 mm. The substrate is arranged using cork material. You can replace it with foamed polyethylene. It is laid out on a waterproofing film.
- Calculation of the number of rows of parquet boards.
- Ensuring tight contact of the material with the wall. A special tool is used to cut off the tenon, leave a gap (1-1.5 cm), and drive in a peg.
- Laying rows. The board is hammered through a block made of wood.
- Laying the baseboard. Fastening must be done using clamps. The indentation of the first ones is 150-200 mm from the corner, the remaining ones are in increments of 400-500 mm.
The main difficulty is installing the structure where the heating riser pipes are located. Pre-cut parquet segments are laid behind the pipes. The dies are fixed with glue. For aesthetic purposes, plugs are installed in pipe areas, the shade of which matches the color of the panel.
Installation with glue
The method is suitable for owners of concrete floors.
How to lay the covering? It is important to choose the right glue. It must be suitable for the specific type of coating
Technology of modern laying of parquet boards:
- Prime the base, impregnate with waterproofing (deep penetration), dry well.
- Provide compensation gap. Install wooden inserts at a distance of 40-50 cm from each other.
- Adjust the length of the last parquet board in the row.
- “Arm yourself” with a notched trowel and spread the glue over the floor.
- Lay the parquet material, joining it together with lock joints.
- Provide additional fixation with self-tapping screws. Drill holes (step – 30-35 cm).
- Install a parquet board in the second row (shifted by half or a third relative to the already installed row). Join along the length, connect with the elements of the first row, secure with self-tapping screws.
- Dry the coating for 48-72 hours, avoiding stress.
- Treat the seams with clear acrylic sealant.
- After the sealant has dried, remove the inserts, install the baseboard and interior thresholds.
Expansion gap
Laying on joists
Laying parquet boards is intended to create floors on an uneven base. The logs are installed aligned on one flat plane. Dry pine bars are used to make them. The thickness of the lag can vary within 5-10 cm.
How are logs used?
Step by step installation guide:
- Determine the direction of the lag location. They are not laid diagonally, but perpendicular to the parquet boards, which are placed in the direction of the light flow.
- Lay waterproofing and place it on the walls (200 mm). Glue the strips with tape.
- Lay the main, outer, logs, align them in all directions. Pull the cord, using it as a guide to place the remaining logs. The optimal distance between them is maintained at 35-40 cm, with a maximum of half a meter. They need to be laid using linings made of wood or plastic for leveling. If one of the lags protrudes above the general level, it must be processed at the level of the others, removing the required layer of wood with a plane.
- Place the parquet board with its ridge against the wall at a distance of 10 mm from it. Attach to the joist with nails. Nails are driven into the lower base at an angle of 45 degrees. “Arm yourself” with a doboynik and “drown” the caps. The permissible gap between the boards is 0.5 mm.
- Trim the last board to width. After installation, it should not reach the wall by about 10-15 mm.
- Place the plinth on the installed floor and secure it.
Scheme for laying tiles under parquet
The choice of installation scheme is carried out in accordance with the design of the room and its features.
- Deck (parts are placed staggered).
- Straight herringbone is a classic for laying parquet. It can be easily imitated using tiles. The second option is a diagonal herringbone; if you vary 2 types of tiles of similar tones when executing it, the result will be amazing. A similar technique is used when laying a double or triple Christmas tree.
- Checkers (chess). Alternating squares, reminiscent of a chessboard.
- Pavlovsk weaving is formed from the same squares, but the squares themselves are created from elongated tiles, resulting in a weaving effect.
- Versailles is identical to Pavlovian wicker, but tiles of contrasting colors are inserted between the squares, creating a framing effect.
- The St. Petersburg method is similar to chess, only each square has a lighter-colored edging.
- The frames are chessboards of different sizes, framed by intersecting elements.
- The well is built on the frame of a square with rectangular parts.
These are the main methods. You can come up with styling schemes yourself by combining different elements and colors. This way you can become the owner of a unique floor, from which the palace spirit of chic will emanate, especially if you include jewelry made of gems and other semi-precious stones in the composition.
The simplest and most popular way of laying porcelain tiles under parquet. Creates a unique movement effect.
Porcelain tiles are laid staggered diagonally at an angle of 45 ℃.
The classic way to lay parquet. Porcelain tiles are laid diagonally with rotation in different directions.
A variation of the Christmas tree with diagonal placement.
Chevron and zigzag styling methods
Herringbone is sometimes referred to as a popular chevron pattern consisting of V-shaped elements or zigzag lines.
Chevron is one of the main trends in the design of finishing ceramics in 2016. A separate article on our blog is devoted to this extensive topic.
For laying with a chevron pattern, not only rectangular tiles are used, but also elements in the form of rhombuses and parallelograms, as well as tiles in the shape of the letter V.