Warm floors without screed are recommended for rooms where pouring a concrete screed is not possible. Such floors are installed in houses with wooden partitions (since they may not withstand the weight of the mortar), or in the presence of low ceilings (a thick layer of screed will make them even lower).
The main advantages of these heated floors are lightness, quick installation, and the fact that they do not take up the height of the usable area. In addition, such floors are cheaper without pouring concrete.
For your information! The advantage of this design is that the height of the pie is only 50 mm, in contrast to a concrete screed, which has a minimum height of 80 mm.
Warm floor without concrete screed
Warm water floor pipes are usually placed in a concrete floor screed. In a private wooden house, and in other houses with wooden floors, it is advisable to make a warm floor with a water heating circuit without a concrete screed. This type of floor is often called a dry heated floor.
Elements of a dry heated floor are lightweight and do not create significant loads on wooden floor beams. A dry heated floor has a low height. When installing the floor, there are no wet processes for pouring the concrete screed; there is no need to wait for 28 days for the concrete screed to harden and dry.
For these reasons, it is advantageous to use dry heated floors both in new construction and in existing houses with wooden beams and wooden floors.
You can read about other advantages and features of heated floors in a private house in the article “Do I need heated floors in a private house? ”
A feature of a dry heated floor, compared to a floor with a concrete screed, is its lower thermal power.
The amount of heat transferred into the room does not exceed 60-80 W/m2 of floor area.
The heat storage capacity of a dry heated floor is also low. Due to its low weight, a dry heated floor warms up faster and reacts to changes in coolant temperature.
The design of a dry heated floor in a wooden house is shown in the figure:
In the picture: 1 Pipes of “warm floor”. 2 Reflector – heat distributor, galvanized corrugated sheet. 3 Beams. 4 Insulation (expanded polystyrene, density - no less than 25 kg/m3; thickness - no less than 50 mm or mineral wool boards); 5 Vapor barrier - glassine, polyethylene. 6 Subfloor compatible with “warm floors”. 7 Finishing the ceiling. 8 Damper tape with a thickness of at least 5 mm. 9 Skirting board. 10 Floor panel on cranial bars.
If a dry heated floor is installed on an interfloor floor, then attention should be paid to soundproofing the floor from impact and airborne noise. For information on protecting floors from noise, read the articles “Attic floor on wooden beams” and “Floating floor - soundproofing of interfloor floors” . To protect against impact noise, the subfloor, pos. 6, must rest on the beams, pos. 3, through elastic pads.
As a subfloor, pos. 6., it is convenient to use cement-bonded particle boards (CSP) or gypsum-bonded particleboards, moisture-resistant (GSPV). The relatively large mass and thermal conductivity of the subfloor made from such slabs will ensure more uniform heating of the surface, promote heat accumulation, and improve the protection of the floor from impact noise.
In addition, DSP and GSPV do not contain harmful substances, unlike oriented strand board (OSB) and particle board (chipboard) and plywood - read: “Formaldehyde in the house.” It should be borne in mind that when heated, the release of deadly formaldehyde from OSB, chipboard and plywood increases.
A reflector-distributor made of galvanized corrugated sheets allows you to evenly distribute heat over the entire surface of the floor.
The depth of the flooring profile should be equal to the diameter of the underfloor heating pipes.
When installing a heated floor in the basement, a vapor barrier film should be laid on top of the insulation layer.
The construction market offers dry floor heating systems with water or electric heating from different manufacturers. Such systems have better technical parameters, but they are also more expensive.
Base design
Correct arrangement and insulation of the base along the perimeter of the building allows you to increase the degree of floor insulation with a pile foundation. The purpose of the plinth is that it insulates the space under the bathhouse and does not allow cold air to enter there, and also helps to improve the aesthetics of the appearance of the building.
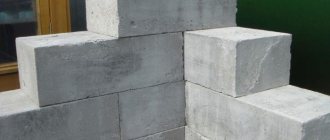
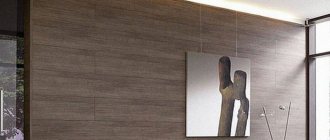
Cladding with DSP and panels with imitation masonry
The cladding is made using thermal insulation boards and decorative panels that imitate various materials - wood, stone, brick. Slab insulation materials (foam plastic, penoplex) are used as thermal insulation materials.
Base design options
Dry warm water floor on polystyrene foam boards
Another lightweight design of a dry heated floor is shown in the following figure:
1 – floor covering; 2 – prefabricated dry screed for the floor from gypsum fiber board sheets (see link to the article above); 3 – vapor barrier (polyethylene film 100-200 microns thick); 4 – heat-distributing metal plates with a heating pipe for a heated floor; 5 – polystyrene foam boards; 6 – subfloor; 7 – damper tape.
This floor can be installed on any flat surface, even over an existing floor when reconstructing a room.
The procedure for installing a “dry” heated floor is as follows:
- A hydro-vapor barrier is laid on the subfloor - a polyethylene film 200 microns thick, with an overlap at the joints of at least 10 cm and the joints are taped.
- A damper tape is installed on the walls around the perimeter of the room.
- Profiled polystyrene foam boards are laid on the floor.
- Heat-distributing metal plates are inserted into the profiles of polystyrene foam boards in straight sections.
- The heating pipe of the heated floor is placed in the prepared recesses.
- The entire laid system is again covered with a polyethylene film with a thickness of 100-200 microns.
- A dry prefabricated screed is mounted on top. The installation of a floor with a dry prefabricated screed is described in detail in the article at the link.
To install the screed, as in previous cases, it is better to use cement-bonded particle boards (CSP) or gypsum-bonded particleboards that are moisture-resistant (GSPV).
| Heat distribution plate made of galvanized iron or aluminum. The width of the plate is selected depending on the pitch of laying the heating pipe |
A factory-made dry heated floor system includes a set of materials: profiled polystyrene foam boards and heat distribution plates made of aluminum or galvanized steel. Sets of materials for installing dry heated floors of various modifications and manufacturers can be found on the construction market.
This system is by far the easiest floor heating solution. But the floor height will be slightly higher than that of a wooden system.
You can make profiled insulation boards for dry heated floors yourself.
To do this, smooth thermal insulation boards (expanded polystyrene, penoplex, etc.) are laid on the subfloor. A route for laying heating materials is drawn on the surface of the slabs. Then, using a special thermal knife, U-shaped channels are cut along these lines, into which thermal distribution plates are laid, and then loops of heating pipes.
How to make profiled insulation boards yourself, watch this video:
Laying algorithm
The rough surface is covered with an even layer of waterproofing, overlapping the wall:
- Reinforcing mesh is installed;
- The cable is mounted to the mesh using clamps and nylon ties;
- The heating cable is tested;
- Another layer of reinforcing mesh is installed;
- The surface is covered with a layer of OSB or plywood.
Other types of heating elements are laid in a similar pattern. It only makes sense to cover the floor with ceramic tiles in rooms with a heating mat installed. For other types, the weight of the ceramic tile may be excessive, which can lead to failure of the heating element section.
Dry heated floor on slats
Instead of profiled polystyrene foam boards, various molded materials can be used as the base of a dry heated floor:
edged boards, as well as slats cut from various structural boards: cement (CSP) and gypsum particleboard (GSPv), gypsum fiber (GVLv), etc.
As mentioned above, you should not use oriented strand boards (OSB) and chipboards (chipboards), as well as plywood, for flooring. When heated, these materials constantly release life-threatening formaldehyde gas .
The slats must be at least 20 mm thick and have a moisture content of no more than 10%. In the figure: 2 - floor covering (TsSP, GSPV, GVLV slabs); 5 – support rails; 8 – insulation.
The width of the slats is selected depending on the pitch of laying the heating pipe in the floor: 130 - 280 mm, the spread (gap for the pipe) between the slats should be exactly 20 mm (for pipe d=16). Where the pipe turns, the support rails must be rounded.
The slats of the support layer can be laid either directly on the joists (across the joists) or on a rough wooden floor. Laying directly on joists will reduce the height of the floor.
When laying support slats directly on the joists, the distance between the joists should be no more than 600 mm if the finishing floor covering is parquet, laminate, linoleum or carpet, and at least 300 mm apart if the floor is made of ceramic tiles.
To ensure uniform heating of the entire floor surface, the heat distribution plates must be located under 80% of the heated floor area.
Cabling
This option is very similar in concept to a water floor. A special cable is installed directly under the floor covering in several ways:
- Two-core;
- Single-core;
- Three single-core.
The heat distribution and heating speed depend on the type.
Warm water floor in a prefabricated dry floor screed
A warm water floor can be placed in a prefabricated dry floor screed. The design of a floor with such a screed is described in the article “Floor with a dry prefabricated screed .
Water-heated floor without concrete screed in a wooden house.
To install a dry heated floor, a prefabricated dry screed is made from three layers of gypsum fiber (GVL) or plasterboard (GKL) sheets.
The heated floor pipe is located in the middle layer. The pipe laying route is applied to the surface of the lower layer of slabs laid in the floor. Next comes the strips of slab material. They are screwed using self-tapping screws to the first layer of gypsum plasterboard so that grooves are formed for the heated floor pipe with a depth equal to the diameter of the pipe.
Heat distribution plates and a heating circuit pipe are placed in the grooves. Then the top layer of sheets is laid, and then the finishing coating (for example, laminate). As the top layer of the screed, it is better to use cement-bonded particle boards (CSP) or gypsum-bonded particleboards that are moisture-resistant (GSPV).
Peculiarities
This system is easy to install. You can lay the warm mat directly on the floor joists; you don’t need a screed for the electric floor to work properly. However, the system also has negative sides:
- Consumption of large amounts of energy;
- Slow heating of the floor;
- Rapid failure of sections.
An electric heated floor for use in a frame house is suitable for any type of foundation and is mounted directly under the finishing coating. Its repair is quite simple: when a section fails, it is simply replaced with a new one. The absence of a screed allows access to the heating element at any time.
Users were equally divided in their sympathies. For some, the indicator is the heating rate and variability in the choice of power sources, for others the main argument is the relative cheapness and ease of installation. It is impossible to clearly identify a leader in this dispute. For a specific house project, one of the types described above is suitable.
Floor without heat distribution plates
All design options for a dry heated floor can be made without laying heat distribution plates. The heating pipe is placed in the grooves, securing the pipe with clamps made from pieces of plastic tape and self-tapping screws.
In a prefabricated dry floor screed, the groove with the pipe is filled flush with gypsum mortar.
Due to the absence of a metal reflector - a heat distributor, the disadvantage of such a simple design of a dry heated floor will be some unevenness in the temperature of the floor surface. The floor will be underheated in the spaces between the pipes, and the thermal power will be lower - no more than 50-60 W/m2.
Products for construction and repair
⇆
In floors without heat distribution plates, it is recommended to reduce the pipe pitch to 150 mm. It is highly desirable to increase the flow through the pipes to a temperature difference of dt=5 °C, instead of dt=10 °C in the usual case.
This option is quite suitable for a comfortable heated floor, which slightly warms the surface and provides a pleasant feeling when a person is on the floor. Radiators provide the bulk of the heat in winter.
Heated floor pipe laying schemes
Laying pipes according to the “Double Snake” or “Snail” schemes ensures more uniform heating of the heated floor surface.
For installation in a dry water heated floor, pipes made of cross-linked (PE-X) or heat-resistant (PE-RT) polyethylene are best suited.
If the house has a cast iron or steel boiler, a boiler with a steel heat exchanger or steel radiators, then to protect them from corrosion it is necessary to use a polyethylene pipe protected from the penetration of oxygen, with the addition of EVOH in the marking. If all metal parts of the heating system are made of copper or stainless steel alloys, then there is no need to use such pipes.
I recommend using metal-plastic pipes specifically designed for heated floors. Such pipes are cheaper.
Warm floors are most often made from pipes with an outer diameter of 16 mm. As a rule, this pipe diameter is enough to heat up to 20 m2 of floor area. The longest side of the area on which the pipe is laid should not be more than 8 m. If the dimensions of the room exceed the specified values, then the floor is divided into parts, in each of which a separate circuit, a pipe loop, is laid. It is recommended to lay the pipe in the loop in increments of no more than 200 mm.
Foundation requirements
The foundation surface must be checked for evenness. The height difference should not exceed 1 cm per 1 linear meter. Otherwise, it is necessary to additionally use a cement-sand screed.
During the process of pouring concrete for the foundation, when it has not yet hardened, anchor fastenings for the beams must be installed in increments of up to 2 m.
Before continuing construction work, care should also be taken to properly waterproof the foundation. This will ensure its durability, protect it from gradual destruction, and protect the first floor and basements (if any) from fungus, dampness and insect breeding.
You can waterproof the foundation using a variety of options for rolled, coating, sheet and sprayed materials. You can also use concrete with special hydrophobic additives that increase the degree of water repellency.
Concrete gains full strength by 28 days of hardening under normal conditions. However, laying the floor can begin about a week after pouring, when the foundation already has about 60-70% of its final strength.
If laying the floor is carried out before installing the walls and erecting the ceiling of the next floor, then the work must be carried out in dry weather, and also making sure that the foundation is dry from precipitation.
Pump-mixing unit and underfloor heating manifold
The mixing unit with circulation pump is on the left.
On the right, a manifold of underfloor heating pipes is connected to the mixing unit. Each room with a “warm floor” is at least one circuit (one pipe loop). All these circuits must somehow be combined into one and connected to a boiler or other heat source. Both ends of the pipe of each heated floor circuit are connected to the manifold.
The underfloor heating collector must perform three tasks:
- Turn off and shut off the water supply to each individual underfloor heating loop.
- Adjust the coolant flow in the floor heating loop depending on the air temperature in the room or the temperature of the floor surface.
- Adjust the hydraulic resistance of the heated floor loop in order to balance it and make it the same in all circuits connected to the manifold.
To accomplish these tasks, there are manually operated shut-off valves on the supply side of the manifold. Control valves with a servo drive are installed on the return side. The valve is controlled through a servo drive by a thermostat, which regulates the supply of coolant to the heated floor circuit depending on the temperature of the floor surface and the air temperature in the room. With the same valve, using a special key, the hydraulic resistance of the heated floor loop is adjusted.
Heated floor pump-mixing unit
The maximum temperature of the coolant in the underfloor heating system should not be higher than 45-55 oC. For a heating system with radiators, the water temperature must be higher. Heating boilers are also designed to operate with a higher coolant temperature.
The pump-mixing unit performs the following functions:
- It lowers the temperature of the coolant that comes from the boiler through a direct pipeline by supplying it with cooler water from the return (admixture).
- Provides circulation of coolant in the loops of underfloor heating pipes. The underfloor heating system has high hydraulic resistance, which requires the installation of a separate pump to overcome.
- Protects floors from overheating - if overheated coolant enters the floors, the circulation pump will stop.
The maximum temperature of the heating water supplied to the underfloor heating pipes is set by the valve at the inlet of the mixing block.
How to care
Caring for aloe at home is as follows:
- The plant must be provided with the lighting it needs. It loves bright light very much, so the flower pot is placed on a south or south-east window sill, but in such a way as to avoid direct sunlight. In winter, it is advisable to use artificial lighting;
- you need to observe the temperature regime. In summer, the flower grows at room temperature, and in winter, when aloe is dormant, it needs to be provided with a temperature no higher than +14 degrees. In summer, the plant is taken out into the fresh air;
- It is necessary to water the succulent as the soil in the pot dries out. For irrigation, use settled water at room temperature. Water strictly at the root. In winter, the amount of watering is reduced;
- the flower requires feeding. Fertilizers are applied from early spring to late autumn. Then feeding is stopped. Purchased compounds for indoor plants are used as fertilizer;
- In order for the plant to always please the eye, aloe must be replanted into a larger pot once every 3-4 years. A drainage is placed at the bottom of the pot, then the flower is carefully removed from the old pot, the soil is shaken off the roots and lowered into the pot. Then they are covered with soil and watered.
Automatic temperature control in the house
In the homes of thrifty Europeans, heating systems are necessarily initially designed, and then immediately built with an automatic temperature control system in the house. A German or a Pole knows and understands that without automation it is impossible to ensure economical gas consumption and an acceptable level of thermal comfort in the house.
In Russia, owners often begin to realize the need for automatic temperature control after the house is built, the heating system is already installed and working, and gas bills begin to arrive.
It turns out that outside the house the air temperature, direction and strength of the wind are constantly changing. Day and night, the outside air temperature, even during the day, often changes by ten degrees. The house sometimes blows through, sometimes not, the wind is changeable. The sun is inconsistent, sometimes it heats the house, sometimes it doesn’t. Heat loss at home constantly fluctuates by different amounts. In order not to bother with all this leapfrog several times a day, the owner of the house manually sets the temperature on the boiler to a higher temperature, so that the temperature in the house is warmer, with a margin. And at the end of the month he looks longingly at the gas bill and scratches his turnips.
The owner learns that in order to equip the house with automatic temperature control, it is necessary to throw out some things, replace and redo the heating system, and install additional equipment. And for this you will have to drill, chisel, and lay again. That all this automation would have been much cheaper if it had been installed immediately during the construction of the house.
In a house with a dry heated floor, it is necessary to have
three automatic temperature control systems: a heated floor based on the air temperature in the room with a limitation of the floor temperature;
radiators based on room temperature; boiler based on outside air temperature. As you know, a warm floor can be either “comfortable” or “heating”.
"Comfortable" heated floor
slightly warms the surface and provides a pleasant feeling when a person is on the floor. The main heat supply to the room is provided by radiators. For a comfortable heated floor, it is necessary to maintain a constant temperature of the coolant.
"Heating" heated floor,
In addition to comfort, it provides complete heating of the room.
The relatively small thermal power of a dry heated floor makes it most often suitable only for comfortable heating.
The room temperature sensor is located in the thermostat housing.
In a house with a comfortable dry heated floor, it is necessary to have three automatic control systems to control the temperature .
One system that regulates the operation of a warm floor must be controlled by the air temperature in the room until the temperature of the floor surface reaches a comfortable level. That is, in the off-season the house will be heated with the heat of the heated floor.
the automatic radiator control system comes into effect . Radiators will heat the air in the room, adding their heat to the heat that will constantly come from the heated floor.
The heating mode of the coolant by the boiler must be regulated by another automatic system that responds to the outside air temperature .
Considering that the underfloor heating system has a high inertia (it heats up slowly and cools down slowly), it is recommended to use weather automation to control its operation. Then the temperature of the coolant supplied to the system will be adapted to the outside temperature. Due to this, along with changes in outside temperature, the temperature of the coolant circulating in the floor changes.
When adjusted using a room thermostat, the temperature of the coolant in the system will not change until it begins to rise in the room (due to warming outside). Only after this the temperature of the coolant will begin to decrease, but due to the inertia of the system, the room will already become hot (i.e., waste of energy).
Therefore, in order for home heating to be economical, a weather controller must be used in the underfloor heating system to control it.
To regulate the temperature of the heated floor, it is necessary to select and install a manifold equipped with servo drives on the control valves.
A servo drive is a device that, when electrical current is supplied to it from the thermostat, acts on the valve, opening or closing it. The servo acts as a switch, completely opening or closing the valve. The surface temperature of the heated floor will be maintained with an accuracy of +/- 0.5 - 1 °C.
System design
- A boiler used for heating. If the choice fell on water floors, then it is possible to use a solid fuel, electric or gas equipped boiler. They are practical and quite comfortable. Their use implies the absence of a constant supply of fuel, which is used in wood and solid fuel boilers.
- If you plan to create a truly warm house, then it is recommended to use combined systems that will allow you to heat both the radiators and the floor layer. Its temperature regime may differ, since the temperature in radiators can reach 60°C, but for wooden coverings the maximum is 30°C. If this condition is not met, the tree will crack quite quickly.
Thermostats for heated floors
A thermostat is a device that measures the temperature of something, compares this temperature with a predetermined temperature and, depending on the result of the comparison, commands the servo drive to turn the control valve on or off. Thus, by turning on or off the heat supply, the thermostat maintains the temperature of something with minimal deviations from the set value, usually with an accuracy of +\- 0.5 oC.
To measure temperature, the thermostat may have a temperature sensor built into the body of the device. The temperature sensor can also be remote. The remote sensor is connected to the thermostat by wires.
The thermostat always has buttons or wheels with which you set the temperature, the stability of which it must ensure. All thermostats have an indication of the current state - “heating on” or “heating off”.
The thermostat, depending on the method of connection with the actuator, can be wired or wireless.
The lowest budget option is a wired thermostat. The device itself is installed in a room in which it must maintain temperature. A heated floor collector with servo drives can be installed in another place, for example, in a boiler room. These devices are connected to each other by thin wires.
The wireless thermostat transmits a control command to the collector servo drive via a radio channel. To do this, there is a radio transmitter in the thermostat housing, and a radio receiving unit is installed near the collector. Installing a wireless thermostat can be beneficial when automation work is carried out in an already built house - there is no need to lay wires and disturb the finishing of the premises.
To regulate the air temperature and the temperature of the heated floor in accordance with the algorithm - we regulate the air temperature in the room, but do not allow the floor to heat up above the set temperature, you need a thermostat that has the appropriate functions.
Thermostat for underfloor heating:
- Must work with two temperature sensors: a built-in air temperature sensor and an external heated floor temperature sensor.
- The thermostat should have the ability to set the air temperature and the heated floor temperature separately.
- There must be a control algorithm based on air temperature with a limitation on the surface temperature of the heated floor.
One thermostat can control several actuators mounted on one manifold. The thermostat and servo drives are connected through a special unit - a switching module.
More Articles on this topic:
⇒ Do you need a heated floor in a private house ⇒ Do-it-yourself floor with a dry prefabricated screed
More articles on this topic
- Insulated, thermally insulated foundation is the best for a home
- Ventilation in a private house - natural or forced?
- Calculation of the thickness of the insulation of the floor or attic
- Roof of a private house - types, shapes, designs
- Correct wooden house made of construction timber
- Facade paint for exterior use
- Calculation of wall heat transfer resistance
- Eaves overhang of the roof of a private house
Selection of structural elements and materials
The reliability, durability and thermal efficiency of the floor largely depend on the materials used. Let's consider acceptable options and indicate unacceptable solutions.
Attention to the quality of floor beams
In frame house construction, wood is mainly used for tying screw piles. Usually softwood lumber is used: larch, pine and spruce.
Useful: Wood impregnations: effective compositions for interior and exterior work
The main requirement is the use of dried materials. The moisture content of the timber should not exceed 12%, otherwise deformation of the structural parts may occur after their installation.
Arrangement of the grillage is possible in several ways:
- Laying a monolithic beam measuring 20*15 cm. When constructing a two-story house, you can use a beam 20*20 cm.
- Grillage made from assembled boards. A budget option. Each beam is formed from two to three boards. The output should be a beam with a cross section of 20*15 cm.
When the boards are securely fixed, the “batch” method is not inferior in strength to strapping made from solid beams.
Bottom trim options
When choosing material for the base, you must remember that it is not advisable to overload screw piles. Therefore, the skin should be strong enough, but not heavy. Its main task is protection from wind and moisture.
What's suitable? Here are several options:
- OSB. An affordable material that has good strength, but is vulnerable to water. Before installation, it requires treatment with a composition designed to protect wood. The weak point is the joints of the slabs. They must be coated with acrylic sealant.
- Chipboard. Easy to process, but like OSB it is vulnerable to moisture. Inferior to the previous material in terms of environmental friendliness.
- Multilayer plywood. It is permissible to use only moisture-resistant sheets marked FK or FSF. The composition contains formaldehyde resins - they increase the resistance of the material to aggressive environments.
Very often, ordinary flooring made of boards with a cross section of 5*10 cm is used to install a subfloor. This option cannot be called economical, but its strength and environmental friendliness are beyond doubt. The main requirement is pre-treatment of the wood.
Insulation is the basis of floor insulation
When choosing a thermal insulation material, the main focus is on the possibility of its operation in a humid environment. The most rational solutions:
- Mineral wool. The best solution is basalt fiber mats. Pros: environmentally friendly, non-flammable, low thermal conductivity, resistance to deformation, minimal water absorption - 2%. Over time, stone wool shrinks by only 5% - with proper installation, cold bridges do not form at the joints with the joists.
- Extruded polystyrene foam. Leader in insulating properties. Additional advantages: elasticity and resistance to deformation, lack of water absorption, biostability, ease of installation. Disadvantages: high cost and flammability.
- Expanded clay. A budget alternative to sheet insulation. It is somewhat inferior in thermal insulation characteristics to mineral wool and expanded polystyrene. An important plus is fire safety.
Foam plastic is sometimes used to insulate the floor in a frame house on screw piles. Main advantages: good thermal protection and low cost. However, upon contact with moisture and under the influence of low temperatures, the material loses its structural integrity. This solution is applicable in warm regions.