The finishing touch of any comprehensive renovation in an apartment, which gives the finish a complete look, is the installation of a ceiling plinth. After performing complex technological operations while renovating an apartment or house on your own, gluing this decorative element seems like a piece of cake for many unprofessional builders. But life is a cruel thing. Indeed, it is not difficult to connect and secure the plinth on flat areas. Even a first grader can do the job. Problems begin at the junction of the walls, where most home craftsmen are unable to correctly connect the baseboard strips, which, by the way, the author personally encountered. No need to be upset. Not only those new to the construction business, but also some experienced professionals do not know how to join ceiling plinths in the corners.
Let’s close the knowledge gap and tell you what a ceiling plinth is, how to measure it, cut it, and then glue or nail it on the internal and external corners of the apartment.
What is a ceiling plinth
A ceiling plinth, also known as a fillet or baguette, is an element of apartment decor that is used to cover deficiencies in the finishing at the junction of the wall and the ceiling. They are used, as a rule, when covering one of the adjacent surfaces with wallpaper, although there are design options with a baguette when the walls and ceiling are painted.
Functions
The ceiling plinth has two main functions:
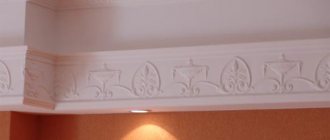
- decorative From the variety of types of baguette, you can always choose the option when the fillet becomes an independent element of wall decor, a kind of “highlight”, giving them a stylish and often unique look;
- aesthetic. When gluing walls or ceilings, it is not always possible to beautifully design the connection line with the adjacent surface. The plinth makes the transition from wall to ceiling complete: beautiful and graceful.
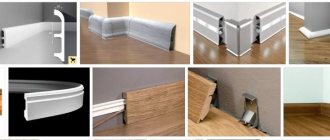
What is it made from?
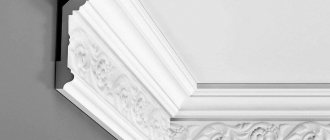
The first ceiling plinths were made from gypsum. Its various parts were cast in specially prepared molds, obtaining intricate reliefs and different sizes. Gypsum baguettes are still poured today. But due to the high price of the product, heavy weight and fragility (difficult to install), it was practically abandoned in apartments and private houses. Therefore, gypsum fillets are cast mainly in small batches for restoration work or luxury cottages. Other materials are used for residential premises.
Polystyrene foam (this material is sometimes mistakenly called polystyrene). Foam baguettes are a budget finishing option. The advantages include:
- quick and easy installation;
- flexibility, which allows the material to be glued to uneven walls;
- light weight - holds almost any glue;
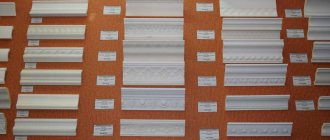
- a wide range that allows you to choose a model to suit any style of room decoration;
- Possibility to paint with acrylic paints (refresh, if necessary, with white paint).
There are also weaknesses, which are acceptable for a material with a low price:
- very fragile - it breaks due to unsuccessful movements without the possibility of recovery and is scratched. In such cases, it is necessary to remove the damaged areas and glue a piece of plinth;
- cannot be dismantled after the glue sets - it crumbles.
Polyurethane. The material has a modern, beautiful look. It is elastic and flexible, at the same time very durable and not afraid of moisture. Ideal for convex or concave walls.
The disadvantages include:
- high price;
- predisposition to deformation (curvature and cracking) under the influence of sudden temperature changes.
Polyvinyl chloride (PVC). Plastic skirting boards have a number of advantages that consumers like:
- the lowest price among the considered range of goods;
- easy installation;
- moisture resistance;
- resistance to burnout;
- elasticity - cannot be attached to rounded walls, but it hides surface imperfections satisfactorily;
- Manufacturers began to produce connecting corners, which eliminates the problem of difficult cutting of material for connecting in the corners.
Among the weaknesses:
- Over time, the material loses its presentable appearance - it turns yellow;
- minor impacts cause dents;
- plastic actively attracts dust - it has increased electrostaticity.
Rubber. The soft and flexible material is used mainly as an addition to a stretch ceiling - it closes the gap between the canvas and the wall.
Extruded polystyrene. Durable and flexible material is used mainly on non-standard surfaces. Among the advantages:
- affordable cost of the product;
- a large assortment that allows you to choose the required type of baguette for your interior;
- soft edges;
- Possibility of painting.
Among the disadvantages:
- the surface is easily damaged by sharp objects;
- Some types of glue dissolve the material, and therefore special care is required when choosing an adhesive composition.
Tree. In terms of elegance and effect, wooden fillets are not inferior to gypsum stucco. At the same time, unlike the latter, they have increased strength and reliability. Valued for:
- durability;
- environmental cleanliness;
- rich, luxurious appearance;
- easy care;
- possibility to paint.
Among the disadvantages it should be noted:
- high cost;
- strict requirements for temperature and humidity: with sudden changes in temperature or high humidity, they are prone to severe deformation;
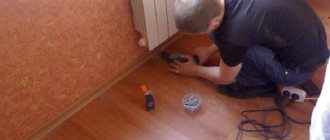
- complex fastening to the wall: they do not sit on glue, but only on self-tapping screws (dowel-screws for concrete or brick walls) or in a combination of self-tapping screws + glue.
The nuances of cutting skirting boards depending on the material
The different densities and strengths of the material do not allow the use of the same cutting tool for all occasions. What and how to cut the ceiling plinth in the corners, taking into account the material it is made of?
Knife. It is most convenient to use a construction knife or a sharp kitchen knife to cut foam baseboards, as well as products made of PVC, polystyrene, rubber and flexible polyurethane.
Hacksaw for metal. A cutting tool with a fine tooth, like a metal cutting blade, is used to trim corners on moldings made of plaster, polyvinyl chloride, polystyrene and rigid polyurethane.
Wood saw. You can saw down the corner of a wooden fillet with a fine-toothed wood hacksaw, resulting in an even, burr-free cut.
Saws are used when working with a miter box, where a knife is useless. When using other devices, it is more convenient to cut off the corner of the baguette with a knife.
Using decorative corners
This refers to special corner adapters, which are usually equipped with polyurethane and polystyrene friezes. Decorative corners are glued to the very corner, and baguettes are adjacent to them on both sides. In this case, adjustment is either not required at all, or is carried out with a simple stationery knife.
Methods for forming corners of ceiling plinths
In modern apartments there are two types of corners: internal, which predominates, and external, if the corridor makes a turn.
There are two ways to connect the fillet at the corners:
- trim the corners of the baseboard;
- use a connecting corner, which, by the way, is not always possible, since the ready-made connection is not available for all types of materials from which the baguette is made.
At angles of 90o, work is carried out using wort. If there is a deviation of a couple of degrees in any direction (obtuse or acute angle), it will not be possible to work according to the template - there will be gaps. How to join the ceiling plinth in the corners in this case? There are several simple ways to do this: use a template made of paper or cardboard, use a laser level, or, as a last resort, use the old-fashioned method, in which you only need a ruler and a pencil. The last method is a little complicated at first glance, but it gives an excellent result.
Basic Rules
When combining two plinth panels in the corner, you must adhere to some rules, which allows you to get a beautifully designed joint between the wall and the ceiling.
- Baguettes with relief patterns must be combined according to the pattern.
- A colored ornament also requires joining of pattern elements. In both cases, a mirror is needed to find the optimal connection points.
- The quality of the fillet connection in the corner depends on the quality of preparation of the walls and ceiling. If the wall is blocked in relation to the ceiling or vice versa, you cannot expect a quality connection.
The same result applies to an uneven wall. Here are several solutions to the problem:
- seal visible gaps with silicone or acrylic sealant;
- seal the cracks with putty and then paint the baguette with water-based paint;
- Buying a simple profile, flexible enough and not very wide, will allow you to hide wall defects.
Tips for cutting corners using a miter box
Let's supplement the instructions on how to use a miter box with a few simple rules, the implementation of which allows you to correctly cut the corner of the baseboard.
- When starting work, you should not panic if after the first cuts the ends do not fit together perfectly. You need to be prepared for the fact that you will have to adjust the first strips of the plinth more than once.
- Beginners often get confused about the sizes of corner strips. To prevent this from happening, the measurement is done as follows: the length of the fillet for the internal corner starts directly from the adjacent wall, for the external corner - from the edge of the corner plus the width of the baseboard, since the upper corner will protrude into the room.
- Before placing fillets on glue, even if you are absolutely sure of the correct cut, you need to check how accurate the joint is. To do this, attach the touching ends to each other directly in the corner.
- Builders have not yet learned how to make an angle exactly 90o. Therefore, there will always be small gaps. They can be sealed with gypsum putty or sealant.
- If the walls are not blocked (they stand vertically), the moldings can be adjusted at the bottom, even if the angle is acute or obtuse.
Required materials and tools
To install a ceiling molding you need to buy:
- baseboard;
- glue (screws for wooden fillets);
- connecting corner, if you do not plan to cut the corners;
- putty (not needed for smooth walls);
- water-based paint for painting the baguette, if required by the interior design.
Tools and equipment you will need:
- stepladder or strong table (chair);
- miter box for cutting 45o corners at the baseboard;
- cutting tool (construction knife, hacksaw or wood saw);
- construction pencil;
- roulette;
- a hammer drill or electric drill when working with wooden baguettes;
- putty knife.
Briefly about the main thing.
Ceiling plinth is an important element of finishing the ceiling surface, which simultaneously plays a decorative role and masks visible defects in the interface between the floor slab and the vertical structures of the room. This element is made of polystyrene foam, PVC, wood or gypsum. When cutting, you will need a special portable bench - a miter box, or a cross-cutting machine. In the absence of such a tool, a miter box template with diagonals at 45 degrees can be drawn on paper.
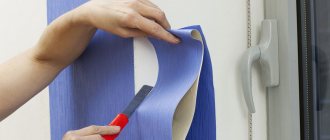
Preparatory work
Before you start attaching the plinth, you need to do some simple preparatory work:
- free up space near the walls so that there is free access to the corners and perimeter of the room near the ceiling;
- clean the ceiling and wall in the area adjacent to the fillet from dust and dirty spots;
- prime the painted or putty areas where the baguette fits;
- purchase basic and auxiliary materials;
- complete a set of tools and accessories. If necessary, a simple trimming tool is made. You can see how to make a classic version at home in the work “How to use a miter box for a baseboard”;
- determine the angles from which work will begin. This is especially important if the baseboard is figured. After all, the baguette can be joined according to the pattern only in three corners. In the latter, doing this is problematic, if possible at all. Therefore, the beginning of work should be in the most visible place, completion in a darkened place or behind curtains.
Important: experts advise that if the surface of the plinth is smooth, first glue it in the corners, and then complete the work on the wall - this makes it easier to adjust the corner joints. If for some reason this scheme is not suitable, then it is better to adjust the length of the corner fillet after cutting the ends for the connection in the corner. Cutting off the excess at right angles is not difficult.
Making your own devices
Beginner home craftsmen often do not know how to cut the ceiling plinth in the corners with their own hands without special tools. There is only one way out in this situation: make them yourself. At the same time, it is not necessary to copy the classic miter box.
1. Take two boards and connect them at an angle of 90o with self-tapping screws and glue. The result is an imitation of the connection between the wall and the ceiling. Two pairs of sawing slits are cut into the boards at an angle of 45o and one at a right angle. The fillet fits into such a device in the same way as it will be fixed on the wall (see photo). It is difficult to cut anything other than a baseboard into a corner fixture. Therefore, it is made only for baguette.
2. On a workbench, using a ruler and a construction pencil, draw two parallel lines. The distance between them should be greater than the width of the fillet. At the end, on the right, there is a central point between the lines and cutting lines for angles of 45 and 90o are drawn through it, which is clearly visible in the photo. For people with a left working hand, everything is done in a mirror image. If it is not possible to make such a drawing on a hard surface, you can use cardboard or plain writing paper.
Using such a device is a bit difficult, but if you want, you can get the right cut. To do this, the plinth is laid on the diagram in the same position as it will be attached to the wall, and is held with the left hand. The right hand is used to cut the corner along the cutting line. What is important here is not how to hold the plinth while using the saw, but how to correctly lay the baguette so that the ends are cut for the left and right fillets.
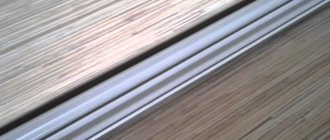
Docking on straight sections
The most difficult areas when decorating the ceiling perimeter with a frieze are the corner areas. Having passed the first corner, they usually begin to move in both directions at once, gluing plank after plank one by one. If the entire frieze fits when joined directly, no problems arise: using a miter box, cutting both edges at an angle of 90 degrees, they are connected with assembly glue. The main thing is to achieve maximum invisibility of the joint.
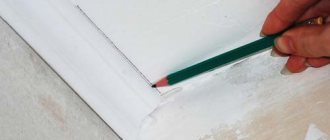
A slight difficulty arises when the installation work approaches the next corner and the frieze needs to be cut to length. This must be done with a certain margin for cutting the corner. Experienced craftsmen recommend leaving a margin of at least 10-15 cm, taking into account possible errors during design (sometimes it doesn’t work out the first time). After the corner of the frieze is trimmed and checked, the plank is applied dry to the area remaining from the corner with a straight cut towards the nearest baguette. Having marked the required length with a simple pencil, cut off the excess at an angle of 90 degrees, and glue the manufactured and adjusted section.
How to glue a plinth in a corner
How to glue skirting boards to the ceiling in the corners after cutting the end? The technology for attaching a baguette is discussed in detail in the work “How to glue a foam plastic ceiling plinth.” Let us recall the main provisions:
- An adhesive is applied to the fillet cut to size on the reverse side. If it is contact adhesive, application is also carried out on the wall and ceiling. But the process can be simplified: spread it on the baseboard, press it against the wall for a few seconds, and then take it away and let the adhesive mass sit;
- the baguette with glue is pressed against the wall and held there for several minutes until the adhesive sets;
- after attaching the plinth, the joints are sealed with acrylic or silicone sealant along the entire perimeter of the ceiling;
- The sealing areas are sanded with sandpaper.
Design of non-standard corner points of the room
Non-standard corner points are unusual cases.
But there is a way out here too!
The molding must be cut into several small pieces.
The length of the cut pieces depends on the curvature of the angle.
The angle will be better and the fold line smoother if the baguette is cut into very small parts.
To avoid confusion, the order of each detail must be marked with a pencil.
Next, the adjustment of each cut piece begins.
By the time the small parts are glued, the straight plinth should already be glued to the base of the corner.
In order for the non-standard corner point to have a decent appearance, after gluing small parts, they must be cleaned and treated with sealant.