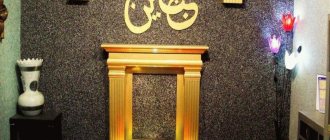
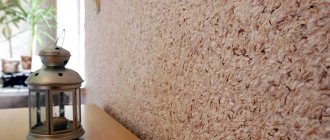
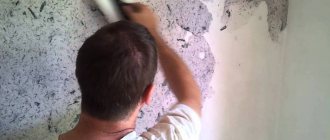
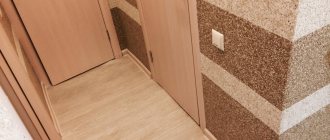
Wall decoration in an apartment or office is one of the “pain points” of modern renovation. The variety of methods can confuse the designer, and craftsmen have difficulty keeping up with the latest innovations in the field of building materials. How to achieve beautiful and high-quality wall coverings without much effort and with minimal financial and labor costs? An excellent option is liquid wallpaper.
| Photo from Medium.com |
Advantages and disadvantages of liquid wallpaper
The type of decorative plaster that will be discussed in this article got its name thanks to cellulose, which forms the basis of liquid wallpaper. By the way, it is the composition that forms the main advantages that characterize the presented coating:
- When applying liquid wallpaper to a wall, there is no need to carry out a whole list of labor-intensive operations that are typical for traditional paper wallpaper - taking measurements, cutting the roll into pieces of given sizes, applying glue, smoothing the canvas over the wall surface, etc.;
- when applying the presented coating, a minimum of free space is used (there is no need to spread the wallpaper throughout the room and perform various manipulations with it, smearing the entire room with glue);
- to finish the room, a minimum set of tools is used - a small container for diluting the cotton mixture, a spatula, a trowel and a grouting board (in some cases a special sprayer is used);
- the complete absence of joints on the walls and the ability to hide some defects of the surface being decorated (depressions, small cracks, etc.);
- liquid wallpaper allows the walls to breathe;
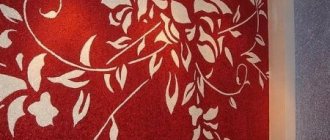
- by combining different colors, you can create entire works of art on the surface of the walls;
- liquid wallpaper, once applied to a wall, will serve its owners for more than 10 years;
- liquid wallpaper can easily be repaired by hiding the “marks” left by the claws of pets, or by a young artist exploring the world;
- possibility of reuse of source material;
- minimum maintenance (in order to keep liquid wallpaper clean, it is enough to vacuum its surface).
As you can see, liquid wallpaper has a lot of advantages, but this does not mean that they do not have disadvantages. The first of them is the high cost of the material. The second disadvantage can be considered their inability to wash. If the surface is heavily soiled, you just need to cut out the damaged fragment, soak it in water and apply the resulting mixture to the wall using standard technology. Also, to replace a damaged fragment, previously unused remains of the material can be diluted in water (if they are preserved, of course).
BricklayerFORUMHOUSE user
Liquid wallpaper is attractive because it is easy to restore in areas of damage. The damaged area is moistened and rubbed with a spatula again. In some cases, it is simply removed and a fresh coat is applied. After complete drying there are no traces of the work done.
Summarize
Having collected all the pros and cons of liquid wallpaper, we can say that liquid wallpaper is a coating of a new generation of finishing materials, which has many advantages, and all the disadvantages boil down to the fact that they cannot be used in rooms with high humidity.
Many positive reviews prove this; to be sure of this, we advise you to talk to repairmen who have already used liquid wallpaper in decoration. Any good master values his reputation and will recommend only high-quality materials.
Good luck with your renovation!
Preparing walls before applying liquid wallpaper
Despite the fact that liquid wallpaper can hide some surface imperfections (small depressions and protrusions), preparing the walls before applying this material requires special attention. The thing is that noticeable differences in the surface, the presence of several layers of paint on the walls, metal inclusions (screw heads, fragments of reinforcement, etc.), a layer of old wallpaper - all this can negate your efforts to create an aesthetic and decorative surface . Stains from water leaks, rust from metal, paint from old wallpaper - these elements hidden under the surface of cellulose plaster will sooner or later reveal themselves. And you will certainly not be pleased with the appearance of the final result.
This is what an experienced practitioner and regular on our forum thinks about this.
Just Palych FORUMHOUSE user
According to the technology, it is necessary to putty, and then primer. This is done in order to increase the thickness of the contact of the wallpaper with the surface. As they explained to me, if you do not remove all the old wallpaper, then when applying liquid wallpaper, yellowness from the glue will appear. I have one wall with drywall. So, although I completely removed the old wallpaper, the liquid wallpaper turned a little yellow. It was necessary to go through the primer a couple more times.
Liquid wallpaper can be safely applied to the following surfaces:
- concrete;
- walls covered with putty;
- brick plastered surfaces;
- wooden surfaces (including MDF, plywood, and fiberboard);
- painted walls;
- drywall.
Liquid wallpaper can be applied to all of the above surfaces. However, in order to ensure that the final result does not disappoint you, you must adhere to general recommendations regarding surface preparation. We present them to your attention:
- layers of old paint, wallpaper and wallpaper paste must be destroyed without a trace;
- nails, screws and other metal elements must be completely removed (“only those that are responsible for fastening materials and will perform their main function after repair can be spared”).
- the surface of the wall must be leveled with putty, sanded with sandpaper and primed with a deep penetration compound;
- at the final stage of preparation, the surface should be treated with a special putty intended for liquid wallpaper (as an alternative, light water-based paint can be used).
Eighth MarchUser FORUMHOUSE
I coated the walls twice with a primer made from the most inexpensive white water-based paint and PVA glue. It wasn’t even glue, but some kind of PVA-based liquid, I don’t even remember the name. The ratio is 2 to 1.
The heads of nails, screws and other metal elements should be coated with light oil paint. Water-based solutions are not suitable for these purposes, since they can only temporarily stop the penetration of rust into the layer of liquid wallpaper.
It is also not recommended to use nitro enamels and oil paints when painting walls. After all, after this the wall will not be able to “breathe”. Such materials can only be applied to individual metal elements (or in places where there are strong water leaks), and even then in small quantities.
In order for the liquid wallpaper to have good adhesion to the painted surface, you can add a little PVA glue to the water-based paint.
Remember, all walls on which you plan to apply liquid wallpaper of the same texture must be painted in a uniform light shade. Only in this case will you be able to obtain a uniform coating pattern over the entire area of its application.
YosarianForumHouse User
I had two types of finishing putty on one wall, which differed in tone. So, they had to be leveled with paint (of course, we shouldn’t have used different mixtures, but it just so happened).
Features of concrete surface preparation
If you are dealing with a concrete or plastered surface, then in this case the surface is leveled with gypsum putty. After drying, several layers of penetrating primer and at least three layers of water-based paint should be applied to the wall. This abundance of operations is associated with the high water absorption capacity of concrete surfaces.
The same recommendations will be relevant for old surfaces (for example, for the walls of “Khrushchev” high-rise buildings). After all, no one knows what they are made of, and what compositions may subsequently appear on the surface of liquid wallpaper.
Preparing old walls is the only case in which it is recommended to use alkyd enamels instead of water-based paint. Their composition is capable of creating an excellent protective layer, replacing a conventional primer.
Disadvantages of the material: is it possible to combat them?
The material also has certain disadvantages:
- Relatively high price. Plastic wall decoration cannot be called cheap. However, recently more and more high-quality materials are appearing on sale, which are relatively inexpensive. This applies to the simplest variations.
- Risk of stains. The finish is highly sensitive to the cleanliness and shade of the substrate. It does not need to be leveled, but it must be cleaned. Also, the base should have a uniform color. Otherwise, streaks will appear on the liquid wallpaper after some time.
- Sensitivity to moisture. When exposed to water, the composition becomes soft. Therefore, the substance is not suitable for rooms with high humidity.
Also, liquid wallpaper is not used for rooms in which the surfaces get very dirty - this applies to kitchens, corridors and children's rooms.
The coating cannot be washed, and dry cleaning is not enough. To offset this disadvantage, the surface can be varnished.
In comparative tests, liquid wallpaper beats decorative plaster
Preparation of drywall surfaces
When preparing drywall for applying liquid wallpaper, it is necessary to putty the entire area of the surface to be decorated. Some people limit themselves to simply processing the joints between sheets of drywall. As a result, light stripes may appear on the outer surface of the wallpaper, which will be impossible to get rid of.
In general, the sequence of preparing drywall looks standard: applying putty, priming and processing with light water-dispersion paint (add one part of PVA glue to three parts of enamel). Do not forget about self-tapping screws that are prone to corrosion. Their caps should be coated with oil paint and an additional layer of putty.
The surface of the walls on which water stains have been noticed must be treated with oil paint. This applies to any surfaces that are used for applying liquid wallpaper (plasterboard, plaster, concrete, etc.).
Preparing liquid wallpaper for application
The process of preparing liquid wallpaper lasts from 10 to 12 hours. Therefore, it is necessary to start preparing them in advance (you can even immediately after priming the walls).
A package of liquid wallpaper may contain several components at once. After pouring all the ingredients (except for decorative additives) into one large container, its contents should be mixed without adding water. Before mixing with water, it is advisable to fluff the mixture with your hands. This is done in order to get rid of stuck together lumps.
Decorative fillers (dyes, glitter, etc.), stored in separate packaging, should be dissolved in water before the main ingredients (dry glue mixed with cellulose and silk base) are added to it. This is always done to create a more even texture.
What it is
Liquid wallpaper is a material that is used for finishing wall and ceiling surfaces. They are more similar to plaster, but different in composition. They include cellulose fiber, silk, cotton, dry glue, antiseptics, as well as various decorative impurities.
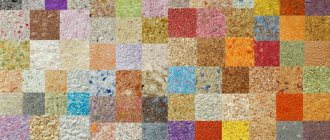
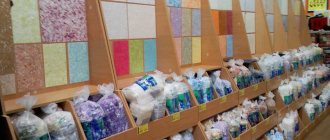
Decorative impurities are quite varied. In fact, they create such wide variety. Glitters, silk fibers, velor, silk, beads and rhinestones, as well as various dyes are used as decoration.
Decor Source moyastena.ru
Color palette and structure Source kursremonta.ru
Instructions for mixing liquid wallpaper
When diluting liquid wallpaper with water, the following important points should be taken into account:
- First, water is poured into the container for diluting the wallpaper, and then the remaining components are added.
- You should stir the contents of only one package at a time (it is better not to mix the contents of two packages during one batch).
- After the wallpaper package is opened, it is necessary to completely dissolve all its contents in water. It is not recommended to store the mixture dry after the sealed packaging has been opened.
- The water in which liquid wallpaper is planned to be diluted should have a temperature of 30°...35°C.
- Stir the wallpaper only with your hands. You should not use tools for this that can damage the structure of the wallpaper.
If you were not able to completely use up the packaging included in one batch, you can make a kind of cake from the leftovers, dry it and store it (packing it, for example, in a plastic bag). Subsequently, the remains can be diluted with water, a little glue (KMS) can be added there and used for its intended purpose (for example, to replace a damaged piece of wallpaper).
Wallpaper mixed with water needs to sit for 6…12 hours (depending on the manufacturer’s requirements). After this, the mixture will be completely ready to be applied to the work surface.
Eighth MarchUser FORUMHOUSE
In a large plastic black bucket (the kind sold in hardware stores) I mixed liquid wallpaper, 1 packet at a time (water according to the instructions on the bag). She transferred the mixed mass into the original bag in which it was sold. I calculated the batch for 1 wall according to the indicated bag consumption per number of square meters. Usually 2 packets at a time. I left it to swell for at least 12 hours (you can do it for a day). Mix well before applying.
Classification of material by composition
Before choosing liquid wallpaper, you need to understand their varieties, since each of them has special performance properties. The composition of the material determines its quality and service life of the coating.
Cellulose based
The most budget-friendly material is cellulose-based. This is due not only to the cheap raw materials for their production, but also to the shorter service life of the coating, since under the influence of the sun the coating fades and is afraid of moisture and mechanical damage. It is advisable to use such wallpaper in children's rooms, as they are best restored after damage.
Based on silk fibers
From the name it is clear that the main component in this composition is natural silk fibers. This is the most expensive type of material, which, due to the high strength of the coating, is often called “silk plaster”. The front layer of this coating has an original pattern and shine, it does not fade under the influence of direct sunlight, and looks expensive and luxurious. This coating is resistant to abrasion and moisture.
Cotton based
This material contains cotton fibers, but the opinion about its environmental friendliness, which exceeds other analogues of liquid wallpaper, is exaggerated in the sense that silk and cellulose are also of natural origin, and therefore no less environmentally friendly and safe. But the abrasion resistance of cotton coverings is higher than that of all others. At the same time, it is quite difficult to restore the damaged area without leaving a trace.
Applying wallpaper to the wall
To apply liquid wallpaper to the wall surface, we will need the following tools: a spatula, a plaster float and a trowel. If you plan to apply a layer of acrylic varnish on top of the wallpaper, which will give the surface additional strength, then for these purposes you should use a pneumatic gun (spray gun).
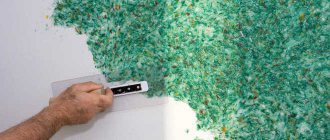
The solution is applied to the wall with a plastic grout board or trowel. When distributing wallpaper over the wall surface, the tool should be held at an angle of 10°...15°. In this case, you should get a uniform coating with a thickness of 2...3 mm.
If the liquid wallpaper turns out to be too thick and does not stick well to the surface, then the solution can be diluted slightly with water (no more than 500 mg per serving).
Wallpaper is applied to the wall in separate fragments, the area of which is approximately 1 m². After application, each fragment is leveled with a grater pre-moistened in water.
The surface dries in 2–3 days. After this period, the wallpaper can be varnished. Using liquid wallpaper, combining different colors, you can decorate the wall with bright and exclusive patterns. But for this, a preliminary sketch of the future drawing must be applied to the wall with a pencil. In this case, the quality of the final result will directly depend on your creative abilities.
And finally, we’ll tell you how to remove liquid wallpaper from the wall that has served its purpose. To begin with, the old wallpaper must be moistened with hot water. This can be done using a rag, roller, sponge or ordinary broom. If the wallpaper was applied to the wall in a thick layer, this procedure can be done several times. Water will quickly absorb into the surface and make the structure of the wallpaper softer. As a result, after a few minutes, using an ordinary spatula, you can easily remove the outdated decorative layer.
You can familiarize yourself with practical recommendations regarding the creation of finishing solutions based on liquid wallpaper in a special section of our forum. You can learn more about the technology for preparing surfaces for decorative coatings by visiting the topic “Preparation of walls for decorative plaster.” Those who want to get acquainted with the technology for creating equally popular finishing solutions can read the article about Venetian plaster. And for video lovers, we have material dedicated to modern interior remodeling.
