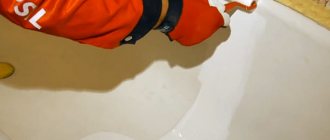
Polishing a bathtub is a labor-intensive process. If the owners decide to take this step, it means that the material has become very dirty, it has lost its previous shape, or it is necessary to change the color instead of buying new utensils. This article will talk about how to polish a bathroom using improvised means.
Polishes
To rid the surface of microcracks, you need to know how to polish it. Using sandpaper with different grain sizes, remove a thin layer of material. Next, use a wax polish, which is applied to the acrylic surface and rubbed with a soft cloth. You can purchase a ready-made repair kit or assemble it yourself.
Ready-made repair kits
Restoring a bathtub at home is carried out using sets of materials and tools that are purchased in specialized stores.
Repair kits intended for repairing sinks, bathtubs, and trays on the floor of a shower room are presented in the table:
| Set or company name | Cost, rub. |
| "Ecolor" | 600 |
| "Remacril" | 1 000 |
| "For removing chips and cracks" | 1 500 |
| Gramer (Germany) | 1 495 |
| HG | 305 |
| Riho REP400 (Czech Republic) | 6 157 |
| Gutsant | 6 157 |
| "Alfadush.ru" | 2 000 |
| Spray Unicum | 287 |
| Roca BeCool ZRU9302788 (Spain) | 1 576 |
| Prosept Bath Acryl Gel | 128 |
| "Cinderella" | 53 |
When using the kit, you must follow the requirements of the attached instructions:
- thoroughly clean the damaged area;
- wash and degrease the surface;
- Treat deep scratches and chips with putty;
- clean the repair area with fine-grained sandpaper;
- apply a layer of acrylic mass;
- polish after drying.
Other kits are also available for:
- combating through holes;
- eliminating chips;
- eliminating roughness and scratches.
The most complex damage is considered to be through cracks. They occur as a result of impacts with heavy objects, excessive loads during water procedures, or improper installation of an acrylic bathtub.
Before using polishing products, the product must be installed correctly. A reinforcing set is used for repairs. The holes are covered with a special tape, onto which several layers of acrylic mass are applied. The work must be carried out by an experienced craftsman.
Using the following kit you can get rid of chips on the front of the bathtub. First, free the container from stress points by drilling holes along the edges of the cracks. The repair kit materials slightly dissolve sharp edges and improve the appearance of the product.
Roughness or scratches of varying depths often appear on the surface of acrylic sanitary ware due to untimely removal of sand, walking in shoes, falling objects, and cleaning surfaces of different shapes and sizes with detergents containing aggressive chemical components.
They are removed using a special repair kit, which includes:
- sandpaper with grains of various sizes;
- acrylic powder;
- hardener;
- epoxy adhesive;
- polishing paste.
Each component is used as needed.
There is a set for grinding and polishing acrylic products. It is used to remove roughness and yellowness that appears from poor-quality water. A cheap set contains polishing paste and sanding paper.
Independent selection of composition
Do-it-yourself polishing of acrylic sinks and bathtubs is possible using the following means:
- sandpaper with grit 150-2500;
- polish for acrylic surfaces;
- special napkins;
- gloves;
- devices for mixing the composition.
These funds are enough for minor repairs.
Household chemicals from the store
If time is lost, or when buying a new apartment you inherited a bathtub that is not in the best condition, then you should use special cleaning compounds. In order not to worsen the condition of the enamel, be careful about your upcoming purchase.
In no case should the composition contain:
- Abrasive substances that can damage the shiny top layer.
- Aggressive acids. Products with oxalic, sulfamic or citric acid are applied locally in areas of rust formation.
Otherwise, the plumbing will lose its shine, cracks will appear, and then rust;
- Chlorine. Unless we are talking about fighting mold, for which radical measures are suitable.
What then should you use?
Recommendations before starting work
Before polishing the bathtub, you should buy from a hardware store:
- cleaning products (vinegar, car cleaner, chlorine-containing bleach);
- wax-based polishes, silver polish;
- products for chrome surfaces;
- sandpaper;
- sponges, rags, soft fabrics;
- ready repair kit.
After purchasing care products, you can begin to eliminate the shortcomings.
How is the preparation going?
- Using chemicals, it is necessary to remove all dirt and scale from the surface. To do this, apply any cleaning agent to the sponge and wash the entire area;
- Once all the dirt has been removed, use plain water and a clean sponge to wash away any remaining soap solutions;
- Dry it thoroughly using towels or a hair dryer;
- To make the bowl soft and rough, use a palm sander. Work with the tool carefully so as not to damage the utensils;
- The tiles and walls must be covered with a special film (or paper) so that the paint does not get on them;
- Place adhesive material into a spray bottle (sold at any hardware store, ask the seller which one is better);
- Spray layers should be applied evenly. After completing the procedure, you need to wait 5 - 10 minutes until the layer dries.
Repairing damage followed by polishing
Bathroom renovation work is carried out in several stages:
- The product is thoroughly cleaned of stains. Surfaces with a more even tone are easier to polish. At this stage it is better to use toothpaste. Even small stains left after work will make polishing impossible.
- Carefully remove scratches with fine sandpaper, being careful not to damage the acrylic container. You can polish the bathtub only after the signs of damage have been completely removed.
- The polish is applied to the surface and rubbed in a circular motion. It is not recommended to use power tools: they leave behind large-diameter through holes that cannot be eliminated.
- After polishing is completed, the bath is rinsed with soap and water. If this is not done, polish streaks will appear on the surface. In the future, they will lead to new coverage violations.
The renewed bath is left for several days to dry completely. The service life of new coating layers is up to 5 years. The cost of the work is 4,500-8,000 rubles.
You can carry out repairs in another way - change the liner. This is the most expensive but effective method.
To do this you need:
- purchase a liner according to the size of the bathtub, detergent, polyurethane foam and sealant;
- wash the old bowl;
- remove the row of tiles in contact with the bathtub;
- Cover the inner surface of the product with polyurethane foam;
- insert a new liner;
- Treat joints with sealant;
- return the tiles to their place;
- Fill the repaired container with water (under its weight, the liner will take the desired shape).
This is interesting: Bathroom enamel - choice and coating
After a day, the plumbing can be used. The service life of the liner is 15 years. However, such a spare part has standard dimensions. If you make a special order, the cost of the work will increase.
Some useful tips for caring for your bathroom:
- wash with soap and other products with hot water;
- wipe dry from deposits;
- do not use abrasives or metal brushes;
- do not use Domestos or Komet products;
- Do not place basins, stools or other things inside the container that could damage the coating.
To eliminate minor scratches and chips, it is advisable to have care products and sandpaper in the house.
Restoring enamel with your own hands is much cheaper than purchasing a new bowl. If you are afraid of ruining the coating, invite a specialist.
Fake poured acrylic
has been producing products for several years with the same label design. This means that any product whose label is similar to the Stakryl label is a fake.
Responsible manufacturers who have proven themselves in the market are trying to improve the quality of their products. But unscrupulous competitors use tricks to lure customers. For example, they can buy up products, bottle them again and sell them under a fictitious brand. After some time, when the brand becomes famous, products begin to be made from low-quality raw materials.
Some scammers buy a product with a hardener in large quantities and dilute it with a solvent. This enamel is less durable; it cracks after a couple of months after the bath starts using. In this case, you have to call a repairman and carry out the restoration work again.
Unscrupulous manufacturers dilute acrylic with a solvent and get more products, but their quality deteriorates sharply. This acrylic does not adhere well to the surface of the bowl. Similar counterfeits are sold in all regions of Russia. The label on such a bottle is of the wrong color, and the bottle itself is made of second-grade plastic.
Before buying enamel, it is recommended to study the history of the brand. Large ones, Plastol, Ekovanna and YarLi, which have been operating on the market for several years, have long won the trust of consumers. They produce the best pourable acrylic. Their products are of high quality; acrylic of these brands is resistant to cracking and yellowing. The downside of popularity is the fact that the enamels of these brands are most often counterfeited.
The labels of genuine products are evenly colored, glued evenly, do not have blisters, and the lids are always marked. The containers themselves are made of high quality PVC, which has a rich color
The buyer should also pay attention to the seal located on the surface of the lid. If the integrity of the seal is broken, such acrylic cannot be used.
A good restoration product has markings on the lid made using laser lithography. Enamels “Ekovanna” and “Stakryl” are produced with adhesive labels on the lids
It is important to pay attention to all packaging details, which should be the same as on the manufacturer’s website. The bottle of genuine acrylic always bears the brand logo
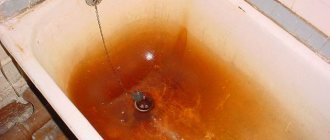
Causes of damage
A steel bathtub has a fairly long service life, during which it retains its performance qualities, but the appearance of the product after 5-7 years of service is strikingly different from a new one. There are 3 main factors that influence the condition of a steel washing container: the quality of the device itself, the quality of tap water, and also violation of the recommendations for using and caring for the bathtub.
Chip from falling object
The most common causes of defects on the enamel surface are:
- Use aggressive detergents containing strong acids to clean the product. Such compositions corrode the enamel surface, as a result of which it becomes rough, brittle, and more easily absorbs dirt.
- Washing the bathtub with brushes and sponges not intended for steel products, which leave deep scratches.
- Violation of the recommended temperature regime when using the washing container.
- Impacts and falls of heavy objects from a height, which cause chips of the enamel.
- Draining household and food dyes into the bathtub, which are absorbed into the enamel, leaving stains that are difficult to wash off.
Important! The factory enamel that covers the steel bathtub is quite strong, smooth, and shiny. During the production process, it undergoes a firing procedure, as a result of which it becomes “baked”. Chips on it appear due to the small thickness of the walls of the washing container, which are easily deformed under any impact. Experienced craftsmen recommend purchasing products with a metal thickness of at least 4 mm, since they have a much lower risk of damaging the enamel.
Restoration with acrylic liner
This method is recommended for free-standing bathtubs, or those whose edges will not be sealed under a layer of tiles. Otherwise, you can still free them by dismantling the adjacent finishing.
An acrylic liner is made for each bath separately, after careful measurements by an experienced craftsman. Such a bathtub is attached to the old one using fastenings at the edges, which requires free access.
The positive qualities of this type of restoration include long-term preservation of the hot temperature of the water in the bath due to the formation of a light one surface layer. After installing the liner, you can take a bath after 14 hours. There is no peeling of parts of the coating and care is sufficient with powders with abrasive materials, which.
Spot repair
The easiest way is to carry out spot repairs of scratches and cracks at home, without waiting for pockets of rust to appear and the area of damage to increase. To do this you will need BF-2 glue, dry whitewash, sandpaper, alcohol to degrease the surface and a rust converter.
This is interesting: DIY bathtub to restore the appearance of the bathtub
Crack sealing is performed as follows:
- First of all, you need to lightly clean the chip or crack with fine-grained sandpaper.
- If pockets of corrosion have already formed around the damage, the surface must be treated with a rust converter.
- Then the crack or chip is degreased with alcohol, gasoline or solvent and dried thoroughly.
- BF-1 glue is applied to the surface of the crack in a thin layer, and then dry white is poured onto it.
- After the first layer has dried, apply a new layer of glue and also add dry whitewash.
- The operation is repeated until the chip is equal in height to the enamel surface.
- For BF-2 glue to completely dry, it takes up to 100 hours, during which it is better to limit the contact of the bath with water.
Damage can be repaired using epoxy enamel and white porcelain crushed into powder. The challenge with this method is choosing the perfect shade of porcelain to match the color of the bathtub.
Rules of care
If the plumbing is new, then it is easier to carry out simple procedures constantly than to look for the best cleaning method in the future.
The main thing is not to let the situation get worse. Daily, timely care of your cast-iron bathtub will save you from many problems, additional costs and save time for more enjoyable things.
You can preserve the snow-white appearance of your bathtub for as long as possible by following simple rules:
- Give preference to soft sponges and brushes with non-metallic bristles. Hard pile, damaging the surface, forms scratches in which dirt accumulates.
- Use a soft cloth to remove soap stains and toothpaste residues after each hygiene procedure.
- Wipe dry any splashes of water on the surface.
- Metal objects have no place on the edge of the bathroom; when exposed to moisture, they contribute to the formation of rust.
- Treat the bath with liquid soap once every three to four days. If contamination is not amenable, use household detergent.
- Pay attention to ventilation. Install an electric option. Leave the door of the room open to allow fresh air to flow in and rid the room of moisture.
- Monitor the condition of your plumbing in order to eliminate leaks in a timely manner and prevent the harmful effects of constant humidity on the surface.
Deep scratches and burns
Repair compounds allow you to eliminate scratches on a complex acrylic bathtub with a depth of 1 - 2 mm. In fact, it is a putty with a high acrylic content based on a polymer resin.
It is useless to grind a surface with a deep scratch, as this threatens to wear off the entire layer. Therefore, the classic technology of surface putty is used, but a special composition is used, the structure of which, after hardening, closely resembles an acrylic sheet.
Repair kit for acrylic restoration.
Before covering up a scratch on an acrylic bathtub yourself, you need to buy a repair compound and perform the standard surface preparation described in the previous paragraph (wash, dry, degrease). To repair an acrylic sanitary bowl, you need to follow the following steps:
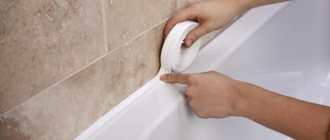
- The perimeter of the defective area is covered with masking tape;
Applying masking tape. - 1200 grit sandpaper is used to roughen the surface for better adhesion to the putty;
- the bathtub bowl is dusted with a vacuum cleaner and degreased with a sanitary napkin containing alcohol;
- the components are mixed in the proportion specified by the manufacturer;
- the mixture is applied with a rubber spatula until scratches and burnt areas are completely filled;
- After half an hour, the masking tape is removed, after a day, sanding with 2500 grit sandpaper and polishing is performed.
This is interesting: An acrylic bathtub liner is the best option for restoring an old bathroom
Attention: Cramer polishing paste is not suitable for acrylic bathtubs with a dirt-repellent coating.
Why restore your bathtub yourself?
Restoring the enamel or completely restoring an old bathtub will be much cheaper than buying, delivering and installing a new one and disposing of the old one. We don’t argue - this is not the easiest job, but it is quite within the capabilities of an unprepared person. The main thing is to take your time and do exactly according to the instructions, then everything will definitely work out.
If you are afraid of ruining something, call the specialists. Finding such masters is not a problem: websites and newspapers are full of advertisements. In addition, probably someone I know has already done a similar procedure. But remember: the cost of the technician’s working time will be added to the cost of the consumables that we calculated for each option.
For example, one of the companies offers a bathtub restoration service for only 4,500 rubles. It seems like a small overpayment for the saved time and quality. But this cost does not include preparatory work: cleaning the bathtub, dismantling and reinstalling the drain, removing paint and enamel and a bunch of other little things. In total - about 8,000 rubles. There is a difference.
Cracks
A crack is much more dangerous than a scratch, since it is a through defect. Firstly, the consequences are much more serious - leaks on the bathroom floor, flooding of the lower apartment. Secondly, they tend to spread further under the influence of loads from the user’s weight and water. Therefore, the restoration technology is somewhat different from repairing scratched areas:
- after sanding the surface, it is necessary to create zones of uniform pressure along the edges of the crack;
- To do this, two holes are drilled with the center of each of them at opposite edges of the crack;
Drilling holes along the edges of the crack. - The holes should not be through, they should not be deeper than the crack itself;
Making a through hole. - the crack is expanded, again only to the depth of the crack itself;
- degreased;
- the repair compound is applied and sanded.
Choosing safe chemistry
To understand how to clean a cast-iron bathtub from your arsenal of household chemicals, carefully study all the inscriptions on the labels. A lot of useful information is written in small print.
For example, on the packaging of the popular Comet powder there is an instruction not to use on worn, scratched and rough surfaces.
What should really be included in the cleaning composition:
- surfactants (surfactants);
- bactericidal additives.
The presence of dyes and fragrances will not affect health or damage the enamel. Using the product for the first time, apply it to a small area, and only after leaving it for a certain time, use it completely.
Unlike powders, creams and gels of a safe composition can be used every day. Their viscous base softens friction.
Snow-white splendor
Of course, the sight of a bathroom should evoke only pleasant emotions. How to achieve this with an unsightly gray hot tub? If the housewife has thought at least once about how to whiten an old cast-iron bathtub, then the following information will tell you about practical and inexpensive methods.
After filling the bath to the very top with warm water, add 100 ml of white. And after stirring, leave for three hours, or better yet, overnight. After the control time has passed, drain the water and rinse the bathtub from the shower.
A more complex composition of the bleaching agent is suitable for solving long-standing problems:
- Prepare a solution of ammonia and hydrogen peroxide in a one to one ratio;
- Rub the prepared mixture over the bathtub with a sponge soaked in lemon juice;
- Wipe particularly dirty surfaces with a solution of vinegar and salt. Leave the bath in this state for 40 minutes;
- Then pour water and add half a liter of bite to it and leave for about 20 minutes;
- The last action can be repeated as many times as necessary.
The given tips are not the only correct ones; other combinations of active substances are possible.
But when using any of the methods you choose, do not forget to protect the skin of your hands and respiratory organs. And also check the composition in a separate area of the bath to determine the negative effect on the enamel.
Rust away!
Several effective and proven recipes on how to clean a cast-iron bathtub from rust using improvised means:
- A mixture of table salt and turpentine. A paste of 100 grams of salt and 35 ml of turpentine will help get rid of rust.
- Ammonia with hydrogen peroxide. In a clean, dry half-liter container, mix ammonia (100 grams), adding hydrogen peroxide (50 grams) in a thin stream. After shaking the solution, apply it to a clean sponge and treat the necessary areas. Wait 15 minutes and rinse with running water;
- Wine vinegar and table salt. In a glass bowl, mix 100 ml of vinegar and two tablespoons of salt. Heat to 65 degrees in the microwave. Wet a soft cloth and always use rubber gloves to wipe off any rust stains. Rinse with water and wait about 20 minutes.
Types of enamels for painting
This method is classic and has been successfully used to restore the enamel coating of bathtubs on a budget. There are two options for enamels: professional and regular. The first is used by specialists with extensive experience in enameling. This is due to the fact that the composition of the mixture is highly fluid and to apply a layer of a certain thickness it will be necessary to paint in several layers. At each stage, a layer of the same thickness is created without drips or streaks. If you have experience, it is possible to perform partial restoration of the old coating with high accuracy. Regular enamel is thicker and the entire coating is painted at one time, but with minor errors.
Coating
Full or partial restoration of enamel
This issue is considered in each case individually, since it is necessary to take into account the condition of the enamel, service life and the amount of damage. If small chips were received during the delivery or installation of a new bathtub, then local treatment can be performed. But even in this case, problems may arise with selecting the color tone and creating a certain coating thickness. That is, traces of restoration will be, albeit slightly, noticeable. After removing the rust stains, the contrast will be more pronounced because the enamel has acquired a yellowish tint. Therefore, if quick measures are taken to preserve the metal, partial processing and finishing can be done, but to obtain the quality of the coating, complete restoration is done.