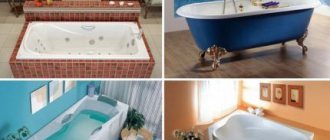
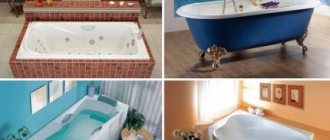
Stationary options
The structures are distinguished by their rigidity, they are excellent as a basis for facing with ceramics and mosaics . The main problem is the insufficient strength of the upper edge, which is installed under the side. It is solved by connecting two profiles using self-tapping screws.
In stationary versions, a recess is provided for the feet to comfortably stand when washing or cleaning the inner surface of the bathtub. This way your feet don’t rest against the screen, and you can move close to the front wall.
Recess options:
- flat cutout at foot height at the bottom of the screen;
- wall surface, beveled inward vertically;
- a niche, the bevel of which goes from the central horizontal line downwards.
To make a stationary screen, brick, plastic, MDF, and plasterboard are used.
Brick
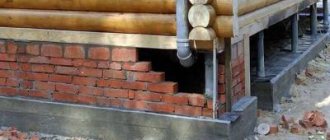
The traditional type of masonry is red ceramic brick, but the screen can be made from foam concrete blocks. Aerated concrete is not used, because the material quickly absorbs moisture, and the bathroom is a damp room. When moving a bathtub, brick screens cannot be removed; they are simply dismantled.
Features of a stationary ceramic brick screen:
- To access the water seal, a window is made in the required part of the screen, the insert into it is made rotating on canopies, removable with magnets.
- The size of the inspection opening is a multiple of the size of the tile, so as not to cut - this version of the door does not stand out against the general background.
- They use internal loops that are not visible from the outside.
For masonry, take cement-sand mortar (1:3) or ready-made masonry mixture in bags in powder form.
MDF or plastic
The supporting frame is made of a metal profile from a plasterboard fastening system - galvanized elements do not deteriorate from moisture. They use metal with a polymer coating that protects against rust. Wood can be used, but it is pre-treated with antiseptics or soaked 3 times with drying oil.
Features of MDF lining:
- Finely dispersed fractional products contain resins, so they resist destruction from moisture.
- PVC lining is assembled piece by piece or solid sheets of plastic are used.
- Silicone or acrylic sealant is used to seal cracks.
Plastic panels can be disassembled if they are secured with self-tapping screws. When the lining is placed on glue, dismantling without destruction is impossible. They use starting strips for PVC, and after installing MDF, they use overhead corners.
Drywall
A classic option for constructing partitions, in particular, screens for a bathtub.
The installation principle does not differ from standard technology, with the exception of a few nuances:
- Access to the drain pipes can be achieved through removable elements.
- The frame is attached to the floor, side walls, and the top is lined with a double profile.
- When choosing the installation depth, take into account the thickness of the tile so that the screen is flush with the side of the bath; accordingly, the profiles are mounted taking into account the thickness of the plasterboard sheet.
In addition to tiles, porcelain stoneware and natural stone are used as cladding. For this purpose, glue with moisture-resistant properties is used. The finishing can be made of plastic lining, wooden panels, oilcloth, washable wallpaper.
Use of plastic
You can close the bathtub from below with a homemade screen. It is assembled from ceiling or wall plastic panels. Installation can be carried out by a person with minimal technical knowledge.
Guides for plastic are installed around the perimeter. They are fixed with self-tapping screws. Plastic panels are inserted into the guides. The elements fit together into a groove.
The plastic screen is resistant to the negative effects of moisture and is easy to clean. The surface is cleaned of dirt with a damp cloth. Do not use abrasive substances for cleaning.
You can close the bathtub from below yourself in different ways. When choosing, take into account the need for additional space and the availability of free access to communications. For installation, materials are selected that are not susceptible to the negative influence of a humid environment. Have you closed the bathtub from below yourself? Which method was used? Leave comments, bookmark the article and share it on social networks.
In the video below, the author of the video will tell you how to properly make a screen for a bathtub.
Curtain instead of screen
Such screens are made from soft materials that do not deteriorate from moisture and do not fade over time. Nylon, polyester fabrics, and different types of oilcloths are used. The faux leather stock looks beautiful.
Soft screen mounting options:
- On a string. Used if the top with a stretched string can be hidden under the side of the bathtub.
- On a steel frame. Metal rods come in round, rectangular or oval sections. The elements are rigid and do not sag.
- Baguettes in combination with nuts . They are used for quick fastening; they are sold ready-made in the store.
Curtains are installed if the bathtub has a non-standard shape and a complex perimeter. Decorative curtains have to be removed for washing.
Ways to close the space under plumbing fixtures
You can make a protective screen from the bottom of the bathroom from various materials. In this case, choose a stationary structure or a removable one. It is important to take into account that after installation there must be access to communications. This is necessary for pipeline repairs. Removable elements allow you to quickly gain unhindered access to them.
Manufacturers produce ready-made screens to cover the bathtub from below. They are made from moisture-resistant materials. This protects the panels from rotting when exposed to water.
Ready-made screens are produced in standard bath sizes. Installation of such an element is not difficult. The task can be completed by a person who does not have specialized knowledge and skills in construction. The parts are installed in accordance with the instructions supplied by the manufacturer.
You can make a stationary structure yourself. Tools will be required. Their list is different and is selected separately for each case. Before starting work, select the material with which you need to cover the bathtub from below. There are several options available for manufacturing.
Bath podium
It is both a base on which the bathtub rests and a decorative screen. They are made from brick, foam blocks and tongue-and-groove slabs.
Features of making the podium:
- Before laying, the sewer pipe is waterproofed and properly insulated, paying attention to the joints - the podium can only be disassembled together with the dismantling of the bathtub.
- A stamped metal mesh is placed in the seams to increase reliability and prevent cracks.
- Make a beveled front wall or create steps.
Valera
The voice of the construction guru
Ask a Question
The podium is also made from a metal pipe, usually square (easier to join). This option is sheathed with finishing panels of different types. Sometimes there are options made from impregnated wooden blocks.
Functionality
The screen has become not just a decorative tool that allows you to hide a network of pipes, but also a way to use space economically. Especially when it comes to small apartments, where there is always not enough space to store things. Screens are equipped with shelves, niches and grilles. They have doors.
By following the instructions for creating a screen, you can decorate your bathtub and get an original decorative element
Screen manufacturing instructions
A common option is to install a screen made of moisture-resistant green plasterboard. You can use gray panels that are fire-resistant and water-resistant, but such material is much more expensive.
Preparation of materials and tools
Measure the parameters of the workspace for installation in order to make a schematic drawing. The sketch is necessary to calculate the lining and frame material. The optimal distance between the posts is 30 - 40 cm , taking into account that there is a risk of damage by feet. Pay attention to the location of the hatch in order to conveniently reach communications and not disturb the tile pattern.
List of materials to cover the bottom of the bath:
- galvanized profile, plasterboard, tiles;
- flea screws, dowels for fixing in the floor and on the walls;
- serpyanka mesh, glue for g/cardboard seams, primer;
- tile adhesive, grout for joints.
Prepare tools :
- drill, screwdriver, hammer drill;
- hot-melt knife, hammer, screwdriver, pliers;
- 3 m tape measure, carpenter's square, bubble level;
- spatula with a smooth edge and serrated.
Before constructing the screen, the bottom of the bathtub is insulated with foam. The product is mounted on legs and leveled. If the bowl is acrylic, provide additional supports in the center.
Installation process
A mark is made on the wall located next to the bathroom. In this case, 1 cm deviates from the extreme point of the side - this is the outer plane of the decorative screen. When marking, use a square, level or plumb line.
The further process step by step:
- Calculate the thickness of the structure (profile, drywall, adhesive layer, tile).
- At this interval from the first point an internal mark is placed.
- The point is lowered to the floor using a plumb line, and a vertical line is drawn along the wall.
- Cut the racks from the profile to size from the floor to the side of the bathtub, horizontal profile for the top and bottom.
- Fasten the end strip to the wall with dowels, use a hammer drill and a screwdriver.
- A longitudinal strip is fixed on the floor with dowels, the top one is joined from two parts and lightly fixed with foam.
- Place all the vertical posts, fasten them together with fleas, and install the bottom into a horizontal profile.
Measure the seats for the pieces of drywall and cut out the corresponding parts. The material is secured to the frame with metal screws, and the caps are recessed. After installing all parts, the seams are covered with serpyanka on putty.
Final work
Finally, you need to finish the surface of the screen with tiles . The surface of the drywall is primed and waited for drying. The glue is diluted according to the instructions on the package so that it does not remain.
Using a spatula with a serrated edge, apply a layer of glue to the surface; glue is also placed on the tile and leveled. Press the elements against the drywall, adjust the position using a level and a rule. Restrictive crosses are installed between the elements so that the seams are the same. The tiles dry on the wall for about 48 hours.
They proceed to sealing the seams with a special grout. The composition is stirred and applied along the length of the seams using a rubber spatula. Excess is removed with a foam sponge. After drying (about a day), wipe the seams with a damp cloth and wash the surface of the tiles.
Final stage
Lastly, the plumbing fixtures are installed and the podium surface is tiled. The tiles do not harm the environment, they are hygienic and easy to care for. Lay the tiles on brickwork or plasterboard screen. At this stage, the plane is regularly checked with a level, crosses are placed at the joints, so that the seams are of the same thickness.
When the glue dries, the joints are filled with fugue to increase water resistance. To prevent water from entering the structure, the gap between the bathtub and the podium along the perimeter is sealed with silicone sealant. Excess of this substance is carefully removed.
Material selection
When choosing a material, the following characteristics should be taken into account:
- Mechanical strength is highest for PVC products, lowest for polyester. Vinyl products are prone to color or pattern fading, but if there is no direct sunlight in the room, this problem is not relevant
- Moisture resistance – the main task of the curtain is to protect the rest of the room from water. Textile products perform worse than others in this regard. Despite the fact that they have a special impregnation, it is washed out over time and the material begins to get wet
- The shape and location of the bathtub, and the associated method of fastening. As a rule, for the “bath in a niche” option, when the ends of the device rest against opposite walls, and from here the curtain will be attached in the same way, the question is not very relevant. But if the bathtub is corner or has another curved shape, you will have to choose: either use an upper suspension to attach the curved cornice, or choose the lightest possible material for the curtain. And, in any case, this material must have sufficient flexibility to accurately follow the contour of the cornice
- Compliance with the overall stylistic decision of the bathroom
Original curtain design for connoisseurs of black humor
Curtain mounting methods:
- A round cornice, usually in the form of a telescopic pipe with spacer mounts in opposite walls
- String cornice – mounted on brackets, used only in the “bathtub in a niche” option
- Round curved cornice
- Rail type cornice - both straight and curved
The last two types are attached to the walls along the contour of the bathtub and may have hanging mounts.
In any case, when choosing the appropriate material, you should remember that the curtain for the bath takes up a fairly large area in the bathroom. Therefore, depending on how well the choice was made, it can either decorate the interior or ruin it.
However, given the simplicity of the product, failure is not a reason for disappointment - after all, a failed curtain can be replaced within a few minutes. The main thing is that the new solution should be more organic.
Gallery
Brick construction
Brick, for which finishing is required, is laid out in half-brick masonry, decorated with ceramic tiles, mosaics or other materials.
- the rules of bricklaying apply - subsequent rows are shifted by half a brick;
- a window is made near the water drain, which is closed with a special plastic door;
- a 2 cm high gap is kept under the edge of the bathtub, which is then sealed with polyurethane foam;
- It is advisable to make a recess for the legs in the middle of the structure.
An advantage can be considered the presence of space for finishing design.
If the cladding is made of mirror panels, this will help visually expand the space.
The disadvantage of the design is that it is fundamental - if complex repairs of sewer units are necessary, the brickwork will have to be dismantled. In addition, the construction process is labor-intensive and requires professional tools and specific knowledge.
About installing a drawer
To ensure that the structure fits easily into the body, it is made two centimeters narrower. You can't do without guides. Some are equipped with simple roller samboxes and tandemboxes (the system is more advanced and has a self-closer). The fittings will not be noticeable and there will be no need to process their ends if the sides are placed between the front and back walls. The bottom of the box is made of fiberboard. The fragments are connected with nails (20 mm). For reinforcement, you can use 1.6 x 0.4 cm self-tapping screws.
Tips and tricks for arrangement
In a small room, every corner needs to be used. The door can be converted into a hanger for towels and clothes. It is enough to screw the hooks or crossbar to it. You can even attach a small shelf for small items. It is advisable to choose a sink with a bedside table where cleaning products, rags, sponges and other things will be stored. If this is not possible, it is recommended to buy a basket where you can store household chemicals or put dirty things. The space under the sink should be used to the maximum because it is functional and adds coziness to the room. All bathroom cabinets should have 2 or 3 tiers to save space. The wall above the toilet, as a rule, is not used in any way, since there is a risk of hitting your head on objects.
However, you can attach a small shelf to it for storing cosmetics, towels and toilet paper. It’s convenient to hang towels on hooks in the wall, so they don’t take up much space and are easy to take. However, if there is no space on the walls, you can use baskets and racks. Towels easily fold into “rolls” and other shapes. You can make a beautiful composition out of them. This arrangement saves a lot of space. Every home has things that are used very rarely: spare towels, household cleaning chemicals, a first aid kit, etc. You can store them on high shelves when there is no more space left on the floor and walls. They will not clutter up the space, and storage will become more convenient.
A mirror in the bathroom is an important attribute. In stores you can find models with opening shelves. The mirror plays the role of a door. Inside you can place cosmetics and household chemicals. A good solution would be to screw shelves on the sides of the mirror. To prevent cosmetics from lying everywhere, it is best to purchase an organizer or make one yourself. You can place shelves in the corner of the room. They won’t fit many items, but it’s better to add several levels for greater functionality. Placing furniture in the bathroom can be challenging due to the small space. Periodically, it is worth doing general cleaning and throwing away unnecessary things.
What should a good curtain be like?
For all types of bathtubs, curtains are a must-have accessory, otherwise the floor and walls in the room will constantly be wet.
Curtains in the bathroom help to preserve the renovation for a long time, protect the bathtub from fungus and mold, and make the room cozy and beautiful. In order for a product to cope with its purpose, you need to choose it wisely.
Classic curtains
Classic models are very similar to window curtains - a curtain made of a special material is attached with rings to a flat or tubular cornice.
But there are also some differences from ordinary curtains: such a cornice is attached to the spacer between two parallel walls, and only material that has been previously impregnated with a special waterproofing substance can be used as a curtain.
Classic curtains can be created with your own hands without much difficulty.
Flexible curtains for the bathroom are made from the following materials:
- polyethylene;
- linen or cotton with impregnation;
- vinyl;
- polyester.
The cornice can have a straight or curved shape, depending on the configuration of the bathtub. A tubular cornice-spacer is suitable for a straight bathtub.
If the bathtub bowl is curved, then the supporting structure is the ceiling profile, which can be of any shape. However, such products have both advantages and disadvantages.
The most important advantages are:
- Low cost. Such curtains do not need to be cleaned of dirt, but simply replaced with new ones if necessary.
- Quick interior update. By changing the curtains, you can transform your bathroom in a matter of minutes.
Like any inexpensive accessory, cheap canvases have their drawbacks:
- Short service life. Even if you take good care of the product, it will not last longer than a couple of years.
- Rapid contamination. Inexpensive materials become covered with rust stains, deposits of mineral salts, and colonies of mold fungi appear on them. At the same time, when washing or cleaning, there is a possibility that the product will lose its presentable appearance.
Classic curtains are sold in supermarkets, construction markets and specialized boutiques of bath products. In addition to ready-made curtains, hand-made materials are also sold there.
Sliding curtains
The sliding structure is installed on the edges of the bathtub. Its main advantage is that it takes up very little space. And the main disadvantage is the visual reduction of space. Sliding curtains are perfect for a spacious bathroom.
There are 2 most popular types of sliding curtains:
- glass;
- plastic.
In terms of functionality and aesthetics, the models do not have significant differences; the difference lies in the price and care features.
It is possible to assemble such a structure with your own hands, but it will take a lot of time and effort.
Folding curtains
Folding structures, also called accordions, are removed with one hand.
Folding curtains consist of fabric sheets of the same size, stretched over narrow frames
The movement of the structure occurs due to the hinge system, so when choosing, you need to pay attention to the strength and quality of the joints
Doing such a thing with your own hands is very troublesome and time-consuming, and you will also need the skill of sewing and constructing from metal or PVC profiles.
Hinged and corner curtains
Judging by the reviews, the swing design is the most inconvenient. To open such a curtain, you need to have a lot of free space. But for shower cabins without a tray, a swing curtain will be the best option.
Thanks to the waterproof fabric, you can better protect the room from moisture. To cover the corners that remain open, a convenient door is installed. With its help you can organize a completely enclosed space.
Acrylic sheets are usually used to make corner curtains. You can make such a thing with your own hands, but you will need engineering thinking and accurate calculations of materials and fasteners.
