Based on endurance, they are divided into: light and heavy.
The designs of the shelves may also be different. Large and unusual surfaces are in most cases difficult to install. It is also important to consider the material from which the walls are built.
We hang a shelf on the wall quickly and evenly with our own hands
Required Tools
Tools for attaching shelves to the wall
To securely hang a shelf on the wall, you should use the following tools:
- drill or hammer drill;
- screwdriver;
- level;
- dowels;
- self-tapping screws;
- pen or pencil.
drill of the required diameter;
Hidden bracket
Here the shelf is held on the wall by a long, metal lever that fits inside the material of the structure. This lever is attached to the wall using a plate that is screwed using self-tapping screws. The plate is completely hidden under the shelf.
The main advantage of this type of metal shelf brackets is their invisibility. The shelves seem weightless, as if floating in the air.
These brackets are suitable for minimalist modern interiors or for traditional Japanese style designs.
Installation of a light shelf
A shelf with hidden fasteners looks neater
If the shelf was purchased in a store, then the kit may come with fastenings. It is better to use them after reading the instructions before doing so. The need for preliminary study comes from the fact that some shelves are attached to the wall in a special way. Ignoring the necessary conditions may cause an undesirable result.
Depending on the shape, they can be very diverse: a straight shelf, a multi-tier shelf, a corner shelf, a closed and open shelf, a round and square shelf, and so on.
Various shapes of open shelves
Before you immediately nail the shelf to the wall, you should prepare. To do this, you need to decide on a place for it on the wall. First, the shelf is adjusted to the wall and marked in the center of the holes with a pencil.
Take a level and mark with a pencil the exact locations for the holes for the dowels
To ensure that the shelf is level, the distance between the fastenings is measured and compared with those marked on the wall. Then everything is checked by level, only after that the preparatory stage is completed.
Choosing a place to install the shelf
Then, using the tool, holes are made in the wall. It is important to use a drill bit that is the same size as the fastener. Once the mounting points are ready, you can hang the shelf.
We make 2 holes in the places of our marks
Progress
The design of the shelf consists of two parts: a frame - the shelf holder and a sleeve, which is put on the frame.
First, we make a holder from pine bars 1 by 2 cm thick (thicker is possible). You will need 2 bars 70 cm long (this is the length of the shelf), 2 bars 20 cm each and 5 bars 18 cm each. We connect them all as in the diagram with self-tapping screws.
The sleeve is made from two rectangles of plywood 72.5 by 21 cm, between which there is a “U”-shaped base of bars (see diagram).
When all parts of the shelves are ready, you need to sand them with sandpaper or a sander and paint the sleeves.
Now, using a level, screw the shelf holders to the wall.
Source
Attaching a Heavy Shelf
If you need to attach a shelf, you should think through some details in advance. You should decide on the choice of material from which it will be made, as well as its functional purpose. If the answers to these questions led to an understanding of the need for a reliable shelf, then it is worth knowing its features.
To attach a heavy shelf you should use: a drill or hammer drill, dowels and screws, drills of the required diameter.
So, we start by adjusting the shelf to the wall and marking the holes. In order to correct the evenness, we check with a level. After this, you can begin the drilling procedure. Using a drill, make holes in the marked places. Insert dowels into the resulting holes. Afterwards, the shelf is tried on the wall a second time and attached with self-tapping screws.
To determine the exact place where to screw a screw in a brick wall, you can use electrical tape
Correct execution of all steps guarantees safe operation of the suspended surface.
These spikes will serve as a mount for an invisible shelf.
Hanging a shelf on a tile
To attach the shelf to the tile, it is better to use a drill or hammer drill, dowels and self-tapping screws. The reason for choosing this type of tool is the fragility of the tiles.
A good guide to horizontality will be the seams between the tiles
The first stage - selecting a surface, marking holes and checking with a level - is the same for all types of surfaces. The second stage is the actual moment of drilling. But it is he who conceals his own nuances. For the effectiveness of this process, it is worth drilling the tile itself at low power, and then changing the drill to a smaller one and working fully.
You should not forget about the fastidiousness of tiles. Any wrong action can result in a crack in it. You should be very careful and follow the recommendations.
If you still need to drill the tile, mark the location of the hole on the masking tape
How to hang a shelf on drywall?
Builders often use drywall when working on walls. Its basis is specific and, at first glance, unreliable. Then the question arises about the technique of fastening shelves on this type of surface. But it is important to take into account that builders do not recommend installing heavy shelves on this type of wall.
To accomplish this task, such options are known.
Fastening with embedded beams. Fastened directly to the gypsum board when installing the wall. The bars are fixed in the place where the shelf is planned.
The embedded beam to which all the hanging elements will be attached
Scheme of fastening to the embedded beam
Using profiles. Using a strong magnet, the metal profile is determined. It is in it that a hole is made through. The length of the screw must be greater than the width of the plasterboard sheet. Afterwards the shelf is fixed to the wall.
Frame guide profile
Fastening to drywall. This is done using a butterfly dowel, an umbrella and fasteners. They pass easily through the plane and are screwed into the wall.
You can attach a shelf that is small in size and weight to drywall using special butterfly dowels
Operating principle of butterfly dowels
Anchor fittings. Used for shelves that can support large masses.
Using anchor bolts you can securely attach the shelf to the wall
Visual instructions for installing anchor bolts
Each of the options has its own mandatory conditions for the successful implementation of the plan. So, everyone can make their own choice that suits their realities.
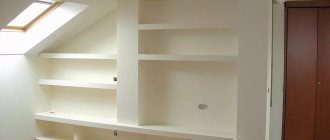
Shelves in a modern interior
In any house, if a person lives in it, there are always a lot of different jars, bottles, maybe books, souvenirs, photo frames and much more. And in order to keep order in the house, it is recommended to put each thing in its designated place. And often a wall shelf acts as such a place. It usually serves two functions - it is a convenient stand for something decorative or useful, and it can also be the highlight of a certain design.
Wall shelves in the interior
Depending on the room in which the shelf is installed, it can perform a very different role. So, in the kitchen there may be a set of spices on it or some elements of utensils. In the bathroom , a shelf is a must-have for arranging various bottles and bottles. A shelf is also needed in the bedroom , where you can place on it various things you need before going to bed. Of course, these interior elements are also in the living room - books, flowers, and souvenirs can be placed on them. Often they are able to significantly save space, as well as overcome clutter in the room, because from now on everything will be in its place. That is why this piece of furniture is absolutely irreplaceable, despite the fact that there may be many wardrobes or chests of drawers in the house.
Wall in the form of shelves
On a note! The shelf is appropriate and functional in absolutely any interior, regardless of its style. The main thing is to choose the right and suitable option and place it in a place where the shelf will look organic and as part of the interior.
Black and white shelf
Moreover, it is important to choose not only a shelf that suits the style, but also one that you will like and look aesthetically pleasing when hung. When creating certain styles, it is important that the fastenings on it are invisible. In general, there are several variations of fixing shelves on the wall.
Wood shelf
How to choose the right fastening method
Depending on the material from which the shelf is made, the method of fastening is chosen. In this case, not only the weight of the objects that are planned to be exhibited is taken into account, but also the weight of the canvas itself.
Wooden
To attach wooden shelves, a hidden installation method is often used. It is easier to make holes in wood or screw in self-tapping screws. The installation of such shelves on a wooden beam matched to the tone of the furniture will be invisible.
External fastenings include brackets made in a classic style, with ornamental elements, painted in copper or bronze color.
Glass
Glass shelves are installed on pelican brackets. The panel is clamped between two holder parts installed one above the other. It is possible to use metal slats in which the shelf is clamped in a similar way.
Corner
To install corner shelves, use any method. Only during the installation process is it worth considering that the fasteners under the canvas may intersect due to their length, so you need to select their size correctly.
Metal
To fix metal shelves, metal corners are used. However, they have a low load capacity, so for heavy structures frames made of metal slats are used.
Plastic
Plastic shelves are light enough, so they can be mounted on any holders. But if furniture is installed on a wall covered with tiles, it is better to avoid repeated drilling.
Accessories for rotating shelves
Rotating shelf accessories include:
- upper and lower fixation of the rotation axis;
- the axis of rotation, which is a telescopic metal tube, that is, the height of the pole can be changed according to the dimensions of the cabinet;
- flange mounting bracket.
Installation of a rotating shelf
To install the rotating shelf correctly, you must:
- choose a place to attach the rotation axis so that the installed shelf can move freely inside the cabinet;
- secure the upper and lower connecting structures (simply screwed to the lower and upper parts of the cabinet, respectively);
- install the pin by inserting the pipe into the fixed flanges;
- screw the shelf support to the board;
- install the shelf itself.
The rotating shelf is installed correctly
Therefore, when choosing accessories for shelves, you should proceed from the material from which they are made and the method of fastening the product. In stores you can find many different options for overhead, mortise supports, sliding and rotating mechanisms, the independent installation of which does not cause any difficulties.
How to attach correctly
The main condition for a durable installation of a shelf is the correct selection of fasteners depending on the load that they will have to withstand. The longer the shelf and the higher the mass of objects on it, the more support points there should be.
In addition, when fixing furniture, you should always take into account the quality of the wall.
In the usual way
The first thing they do when installing shelves is to calculate the places where the canvas is attached to the wall. The level checks for the absence of curvature. The brackets are screwed to the shelf. Screws are screwed in completely if there are no deviations. The shelf is applied to the wall and notches are made, holes are drilled, fastenings are installed and dowels are lightly screwed in. The shelf is installed on brackets. If the level does not show deviations, screw the screws into the dowels until the end.
Hidden method
The hidden method includes all the same calculation principles as the regular method, only it is more labor-intensive, as it requires great accuracy.
On the rods
One of the options for mounting a shelf without visible fastening is fixing it on rods. The fastening loops are screwed to the wall with self-tapping screws, and the furniture piece is “slipped” onto the free edge – the pin.
On plates
The plates are attached to the back of the shelf with self-tapping screws. The shelf is fixed on dowels screwed into the wall at a distance corresponding to the distance between the plates. In order for the hidden fastening to press the structure tightly, recesses for fastening are made on the back walls of the furniture.
On hidden hinges
To firmly install the shelf on hidden hinges, recesses are cut out from the back of the structure. The mount is screwed to the canvas with self-tapping screws and installed on dowels screwed into the wall.
Dependence of the mounting method on the wall material
The physical characteristics of building materials have a significant impact on the optimal technology for fastening shelves. Modern industry produces many options for fasteners for various types of partitions, the correct choice of which is an indispensable condition for ensuring stable fixation.
Table. Types of fasteners depending on the wall material.
| Wall material | Brief description of the features of shelf fixing technology |
| These are the most durable materials that can withstand maximum loads. The shelves are fixed to concrete and brick with plastic dowels or metal anchors. | |
| In terms of strength, it ranks right after brick and concrete; such walls are suitable for hanging heavily loaded shelves. For fastening, ordinary nails or wood screws are used. The amount of work is minimal, reliability is guaranteed for many years of operation. | |
| A modern building material with low thermal conductivity, used both for facade walls and internal partitions. Foam concrete has a porous structure and low mechanical strength. To hang shelves, you must use special plastic or chemical dowels. But even special fasteners cannot ensure reliable fixation; it is not recommended to heavily load the shelves. | |
| Interior partitions are made from it or interior walls are lined. This material is respected by designers, but civil engineers have an extremely negative attitude towards it. The first ones really like the opportunity to create unique elements, the ease of work and the versatility of using the material. Engineers do not respect them due to their extremely low physical strength. Only decorative shelves with minimal weight can be hung on such slabs. Special dowels are used to attach hanging shelves. |
Complex cases
There are a number of cases when attaching shelves to the wall requires care, some effort, or the use of more durable materials.
How to hang a glass shelf
Glass shelves are installed on brackets. The fastenings are fixed to the wall with ordinary self-tapping screws and covered with decorative overlays on top. The glass is clamped between two parts of the bracket using a compression mechanism.
On a plasterboard wall
To firmly install shelves on a gypsum plasterboard wall, it is necessary to make embedded parts from metal or wood at the installation stage. In this case, the fasteners will be screwed to a durable material and hold the structure tightly. If the wall is hollow, it is better to install the shelf using umbrella dowels.
Concrete wall
A special feature of a concrete wall is its strength, so installing a shelf will require drilling. To do this, use a hammer drill and a durable drill of a slightly smaller diameter than the dowel-nails that will be used.
Details and elements
How to make shelves in a closet or how to build a closet from scratch? Here are the answers to the questions:
Required tools:
- screwdriver;
- screwdriver;
- drill;
- hex wrench;
- roulette;
- pencil, square or ruler;
Parts for cabinet directly:
- laminated chipboard sheets with a width of 70 to 40 cm - for the frame and internal partitions (false sheets or panels 10 cm wide - for framing the contour along the top and side walls in the case of a built-in wardrobe when attaching elements to the wall);
- The same shelves for the wardrobe;
- doors with a sliding mechanism - usually 2 or 3 (you can order ready-made ones or assemble them yourself - all components are sold in stores);
To secure shelves in a finished closet or assemble a built-in closet, you will need the following parts:
- Pins. With their help, the frame elements are attached to each other;
- Furniture corners, eccentrics, shelf brackets or European screws. One of the options for attaching shelves to a frame or wall. With corners and Euroscrews - it doesn’t look very nice, it’s quirky - it’s more complicated, but the brackets for the shelves are practically invisible from both sides.
- Drawer guides;
- When choosing drawers, pay attention to the mechanism. The box should not completely unwind and fall.
- Drawer handles should not interfere with opening. To do this, handles are made in the wooden canvas or slots are left.
Non-standard methods
In addition to the standard, well-known methods for installing shelves, original options using various available materials are used. These details not only allow you to conveniently and easily fix the structure, but also act as decoration.
Rings with hooks
You can hang the shelf using rings with attached hooks. The rings are attached to the wall, and the hooks are attached to the loops that are screwed into the structure in advance.
Water pipes
The method is useful in any room. Holes are made in the furniture fabric slightly larger than the diameter of the water pipe. The shelf is “put on” and fixed with a flange in the desired position. The design may consist of a single panel, or it may be an open shelving unit.
Belts
Shelves suspended on belts look original. To do this, take two leather products of the same length, fold them in half and drill them towards the wall. A shelf is inserted into the resulting loops. To prevent the canvas from moving, the straps must be screwed to the shelf with small self-tapping screws.
Ropes
Shelves hung on ropes will look great. A thin rope is used for this. 4 holes are made in the tree through which the rope is threaded. Knots are tied on both sides, thus fixing the shelf. The ends of the ropes are tied together and attached to the wall.
Hidden fasteners in books
The shelf is an old book with a metal corner screwed into it. The second part of the fastening is fixed to the wall. This shelf will hold several more books.
Advice and recommendations from experts
Although attaching a shelf is not the most difficult task, there are some installation rules. Adviсe:
- Do not install the shelf too high or in a place where it may interfere with movement.
- To install the shelf level, a piece of electrical tape is glued to the level at the attachment point.
- Use stronger fasteners when installing the shelf on a gypsum fiber board wall.
- Correctly calculate the number of fasteners and the load on the structure.
- When drilling a hole for a dowel, use a drill with a diameter equal to the size of the sleeve.
When preparing holes in the wall and shelf sheet, it is important to keep the drill level, otherwise the screws will not hold tightly, which will cause the structure to fall.
Useful tips
Even if you think that you don’t know how to hang a shelf correctly, you shouldn’t immediately call a professional. All you need to do is show a little effort and diligence, and you can easily get the job done. If, for example, you also need a shelving unit hung in the closet, then you can first practice on it, and then move on to working in rooms where there is finishing.
In addition, the greater the planned load on the fixed rack, the stronger the fasteners should be used. After all, over time, they may weaken, and the shelf will fall with all its contents. And this is extremely undesirable. Therefore, it is not recommended to skimp on bolts, as this can have negative consequences.
DIY apartment renovation
or wall cabinet correctly How to hang a shelf in a bathroom where the walls are finished with ceramic tiles? How to hang a shelf on drywall, the main qualities of which are not strength? Similar questions arise quite often. Although there is no difficulty here. After reading this review, you will see for yourself and can easily hang any shelf on the wall with your own hands.
What types of fasteners are there according to method of use?
Among the diversity of the construction market, fittings are divided into categories depending on size, material, load capacity, and strength of the base. Craftsmen advise using wooden choppers instead of dowels; this measure will help the bookcase to fall soon. Over time, the tree dries out, in conditions of high humidity, and with temperature changes, it often and greatly changes in size.
Hidden fasteners for shelves to the wall
Often this method of fastening is chosen due to the design features of the room. Installation involves complexity and is rarely used. Hidden fittings are suitable for shelving made of wood, laminated chipboard, and plywood sheets.
These can be rods, bars, plates, hinged loops. The latter imply that first the hinges are attached, screws are screwed into the wall, and then the part is hung. The fixation is not visible, everything is securely hidden.
Rod products distribute the load perfectly. They are placed inside the shelf so that at least 2-5 cm remains to the edge. Often, sections of reinforcing rods, construction studs with threads, and drive-in anchors are used as rods. Depending on the expected weight of things, rods with a thickness of 1 to 1.8 cm are taken.
Concealed mensolo holders are rods that are attached to the back side of the shelf and a bracket for fastening to the wall. This way out of the situation is possible if there are holes inside the shelf without loss of functional qualities.
Multi-level products are successfully mounted on plates that are firmly fixed to the main surface.
When using wooden beams, a sheathing is assembled, on which a shelf is placed on top.
It creates the impression of a floating or floating shelf, weightlessness.
Open fittings, brackets
The easiest installation method is to use open fittings.
Corner brackets are suitable for inserts, withstanding loads of up to 20-40 kg, which depends on the type of fastener.
When an increased load is planned, reinforced parts are taken, with additional jumpers, capable of holding up to 100 kg.
Shelf bracket
If you don’t plan to put a lot on the shelf, decorative corners with a maximum load capacity of 10-30 kg, called mensolo holders, will suffice. This fastener has decorative qualities that complement the interior.
Wooden or metal slats are divided into single-level with a horizontal direction and two-level with a vertical direction.
Reinforced fittings are often used when decorating storage areas inside utility rooms, where increased load is expected. In other cases (in residential premises, offices), decorative holders are suitable.
Types of shelf brackets
There are many types of shelf brackets today. This diversity is due to the different types and designs of shelves for which the holders are intended. Also, the type of bracket depends on the interior of the room.
Most bracket designs use the lever principle, where a longer piece secures smaller screws in the wall. Thanks to this, the screws completely hold the entire shelf.
Important! Standard brackets for shelves made of wood or metal are designed for a weight of up to 30 kg, including the shelf itself. A standard wooden shelf can support exactly this weight.
How to choose a mount for different shelves
They are chosen based partly on the preferences of the owners and designers, the main criterion being the functionality of the product. When the choice of the main part is made, select the desired fastener.
Tree
It is convenient to hang wooden products on hidden elements, or put them in wide loops.
The installation of wood on forged mensolo holders looks good in the overall classic design style. They can be painted in black, copper or bronze tones for a nice look.
Glass
It is not recommended to drill or cut through glass shelves, so holders with clamps will be the solution. Glass is inserted inside them, pulled together tightly, and the shelf is securely fixed.
A good option with this operating principle is the “pelican”. These holders are represented by two large separate parts located at a distance from each other. A shelf is placed between both parts and tightened to fix it with a common screw.
Glass shelf
Sometimes aluminum horizontal profile slats are used. If the shelves are sandblasted, you can install additional lighting.
Corner products
The shelves located in the corner of the room are attached according to the general principle with the difference that the holders are placed at an angle relative to each other.
This is the main reason why long horizontal brackets are not used - they will intersect and overlap.
Corner model
It is necessary to choose aluminum slats, “pelicans”, or similar fastenings. It is worth remembering that corner parts assume a low load.
Metal
Metal ones are mounted on systems that are frames. They are formed from horizontal and vertical slats to which brackets are attached.
Metal model
A simple model involves lifting a load of up to 60 kg, the reinforcement from below holds up to 120 kg, and the placement of the amplifier at the bottom and top adds stability up to 180 kg.
Plastic
Light plastic products are often hung in the bathroom, less often in other rooms.
When tiling walls, you need to follow the rule - the fewer holes drilled, the better.
Plastic model
Plastic cannot support heavy weights, so any type of fastener can be used.
Bracket materials
The material of the shelf bracket depends primarily on its design. Hidden models are made only of metal, since appearance and design are not important here. For this design, it is important, first of all, to ensure high strength of the product with a small volume. Only metal can cope with this task.
Pelican-type brackets are most often made of chrome-plated steel alloys. This option looks very stylish. There are also wooden versions of “pelicans”.
Angle brackets are made from a variety of materials:
- Aluminum or steel. Such models can have an inconspicuous appearance and be almost invisible. Also, square-section profile pipes are often used for manufacturing.
- Cast iron. These brackets are designed for strong walls, as they themselves are quite heavy. However, they can easily withstand the heavy weight of the shelf - up to 50-60 kg. Cast iron products are often decorated with forged elements, which makes these massive parts quite elegant.
- Plaster stucco. Such models are made to order and often decorate rich classic interiors. They look massive, so they are only suitable for large rooms.
- Concrete. This material in the interior can act as a replacement for gypsum as it is stronger and more massive. You can also make brackets from it that will rest on metal reinforcement.
- Tree. They can have a simple design of two or three strips in the form of a corner, or they can have massive decorations in the form of carvings. This material will look organically in a Scandinavian or Japanese interior. Wooden shelf brackets are easy to make with your own hands. For beauty, they can be decorated with carvings, decoupage or varnished.
Advice. Wooden shelf brackets can be coated with bronze paint, this will give the structure an antique look, but at the same time the fasteners themselves will be very light. This option is perfect for the wooden walls of a country house, where it will go well with the fireplace grate.
Step-by-step guide for installing wall brackets
An empty shelf is placed against the wall, mounting points are marked below, and a level check is performed.
Depending on the type of base, holes are made or not made with a drill. The thickness of the drill must match the diameter of the dowels and anchors.
The horizontal elements are first fixed on the shelves: they are “baited”, then the screwing is checked for evenness, and then they are tightened until it stops.
Preparation for installation
A dowel is inserted inside the wall holes and a shelf is attached, checking that the holes are made correctly. If everything is correct, the shelf is screwed on. First they “bait”, check the even position, then pull it all the way.
Small products are not always screwed to the walls; most often it is enough to secure the holders firmly and simply place the stand on top.
An example of fixing a shelf with your own hands can be seen in the following video:
Installing a holder without visible fastening
Hidden fastening implies absolute marking accuracy.
Installation on the rods is carried out in stages. First, the mounting plate is fixed in a horizontal position to the wall using self-tapping screws and dowels with pre-drilled holes. Then the product is put on firmly fixed protruding parts of the fastening.
The plates are screwed to the reverse side with self-tapping screws. In this case, you need to use a router for the notches or place the back wall so that it is slightly recessed into the shelf. This is necessary so that after installation there is no gap between the two planes.
Recesses are cut out under the hidden hinges using a milling machine so that the hinge is flush with the edge. All fasteners are fixed with self-tapping screws, the finished elements are hung on pre-installed screws and dowels. All that remains is to hang the product by the loops.
Features of installing glass shelves
Glass cannot be drilled, so hinges or similar fittings cannot be used. You can't just lay glass on top of the fasteners because of the slippery surface.
The optimal solution is to install mensolo holders or “pelicans”. The advantage is that the fasteners are securely hidden behind decorative overlays, increasing the attractiveness of the shelves.
Example of installing a glass shelf
First, the parts are disassembled, holes are drilled, fastening parts are installed, and the installation is checked to see how smoothly the installation is done. The last step is to put on the decorative plugs, insert them, and fix the shelf.
How to do the job on plasterboard walls
GKL sheets do not differ in their ability to firmly fix shelf holders. In such a case, you need to take care of reinforcing the base.
At the assembly or cladding stage, additional profiles made of metal or wood are attached to the frame. Then, when installing the shelf, the fasteners are screwed not into plasterboard, but into a metal profile or wood, which strengthens the position of the product.
Metal dowel for drywall
When the workspace has already been covered with plasterboard and no additional reinforcements have been made, there is a way out in the form of special fittings. Umbrellas, butterflies, Knauf Hartmut, Moli Driva or Legs are suitable.
Non-standard solutions
It is not always possible to find the right mounting option for shelves, or the homeowner/designer has a special design idea. Then human imagination comes to the rescue, giving rise to unusual methods of solution.
Shelf with straps
Instead of loops, sometimes they use rings with hooks, water pipes, and fittings. Sometimes belts, chains, and rope are used.
Shelves on pipes with fittings
Unusual things with a different purpose create a unique style for the room and complement interesting design ideas.
Honeycomb shaped shelf
You can take non-standard fasteners and hang shelves in an unusual way. Not strictly horizontally, at an angle, forming corners, honeycombs, diamonds, making storage space of an unusual shape.
Non-standard arrangement of shelves at an angle
Shelves-tubes for toys
If you want to keep your playroom tidy, you can easily make round shelves from empty paint buckets.
And, voila, the furniture is ready! This DIY shelf is an economical idea for creating storage space for small items.
Sliding shelves - a solution to eternal problems
For wine connoisseurs: how to make the right shelves with your own hands
Source
General recommendations
When using visible and invisible fastenings, it is important to consider the thickness of the wall. Hidden fittings are used when the wall thickness is from 25 cm. If it is made of brick and at least 10.5 cm if it is made of concrete. When the wall is made of plasterboard or cinder blocks, with a total thickness of up to 10 cm, the use of hanging shelves is possible for decorative purposes.
The shelf itself needs to be chosen correctly. Do not take heavy, massive products; it is better to prefer thinner, lighter materials. The main requirements are cleanliness, dryness, high-quality coating. To store light items, shelves up to 3 cm thick; for books, heavy objects take a thickness of 4.5 to 6 cm.
Based on the factors described, fasteners are selected. Then there will be a clear idea of what load is imposed, what the main surface is made of, and what options are acceptable in a particular case.
Non-standard options include furniture fittings, an overview of which can be seen in the following video: