Kitchen decoration is important. After all, a person spends a lot of time here. Therefore, it is more pleasant to see an original design every day than just ordinary white walls. Thanks to a huge selection of finishing materials, it’s easy for us to find one that suits your design ideas and financial capabilities. In recent years, more and more builders are choosing MDF panels or sheets to decorate any part of the house, the kitchen is no exception. MDF, what kind of material is this? Due to their good resistance to temperature changes and humidity, MDF sheets will be an excellent solution for installing a kitchen apron.
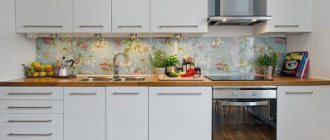
Kitchen apron
A decade ago, it was impossible to use MDF panels for kitchen splashbacks due to the large thickness of the sheets and their unesthetic appearance. But now, thanks to new technological processes in the production of moisture-resistant MDF, the opportunity to implement different design solutions has become real.
If previously the main material used for the apron was tile, now owners have the opportunity to purchase a cheaper and easier-to-install finishing building material, MDF panels.
The kitchen is very capricious in terms of materials used for finishing, especially the area where the apron is located. It is this part that is exposed to external stimuli every day:
- humidity;
- heat.
So you should pay more attention to the characteristics of the finishing material you choose.
Kitchen apron
Those who want to decorate their kitchen do not always have the opportunity, in addition to purchasing all the necessary building materials, to also pay for the services of builders. And let's face it, hired workers often suck. Therefore, more and more people decide to do their own repairs.
This also raises a number of questions:
- how to install a kitchen apron made of MDF sheets?
- what materials are needed for installing MDF?
- What is better and how to attach a kitchen apron made of MDF?
- Is it possible to install a kitchen apron from MDF with your own hands?
- How to install an MDF apron in a kitchen, step-by-step instructions.
You will find answers to each of these questions here.
Purpose
First of all, it is worth identifying the goal.
What is a kitchen apron? This is the space between the dining area and the hanging cabinets.
We can say that the apron is the face of the kitchen. Therefore, its color must be combined with the rest of the kitchen design.
It is also necessary to fulfill a number of conditions that the selected finishing material must meet:
- high practicality , especially with regard to the ability to clean the apron from dirt;
- resistance to high temperatures;
- moisture resistance;
- resistance to various chemicals such as detergents;
- long service life.
Since the apron is located in the kitchen work area, you need to provide as many items from the list as possible. By choosing MDF material as a kitchen apron, you will additionally protect the walls from: water, soot, grease and other external irritants. Panels for bathroom furniture also meet all these requirements.
Preparation of panels - layout, cutting
Circumstances do not always allow you to attach the entire apron to its rightful place - this may be due to insufficient space prepared for the height of the canvas. In other cases, in order to save money, potential consumers assemble a new coating from fragments of previous ones, or purchased on favorable terms.
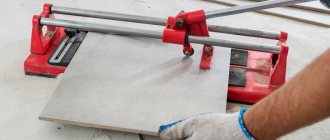
The bottom line is that you have to cut it. You can do it with one knife, but the smoothest result will be using an angle grinder, better known as an “grinder.” The most sophisticated option is to contact specialists who practice laser cutting.
Advantages and disadvantages
Whatever finishing material you choose, it will always have a number of advantages and disadvantages, so it is important to determine the characteristics before purchasing. Attaching an apron to a kitchen made of MDF will allow you to achieve the following possibilities:
- environmental friendliness in the production of the material. This point is especially important because food is prepared in the kitchen.
- the ability to easily remove dirt from the apron. Even the use of chemical detergents does not harm the color of the panel, and the apron can delight you with its gloss for many years.
- MDF has high resistance to temperature changes. Even the proximity of the gas stove to the apron does not deform the material.
- the material is resistant to sunlight.
- moisture-resistant laminated wall panels can withstand humidity up to 80%. And even exposure to hot steam.
- good impact protection.
- the low weight of the material makes it easy to install in the right place, even if it is large (solid). Uneven walls do not bother him.
- It’s easy to install an MDF apron in the kitchen with your own hands, even if the wall is not completely flat.
- When installing an apron in a kitchen from wall panels, improvised means are used for interior decoration, and there is no need to purchase additional tools.
- a rich color palette, and the ability to apply a variety of photographs on the film surface of MDF sheets, helps you choose the design you need to match the rest of your kitchen decor.
- the low cost of MDF panels makes it easy to change the interior to your taste. Attaching a kitchen apron made of MDF material will help significantly save your construction budget. In this case, there is no need to remove the furniture; the old apron is simply and easily dismantled and a new one is installed in its place.
- this often applies to photographs. The price of installing an apron in an MDF kitchen depends on the size and design of the room.
- long service life of the material. Manufacturers guarantee up to 5-7 years of service life.
All the advantages of MDF panels are achieved through unique production technology.
As for the disadvantages, this building material has few of them:
- MDF is highly flammable, so an open fire falling directly on the panel can even deform the apron for a short time. When an apron burns, toxic substances begin to enter the air, which have a detrimental effect on health.
- There are a number of restrictions on chemical compounds that cannot be used to process MDF aprons. This list includes all substances containing acetone and other solvent reagents. Only household detergents can be used for washing.
- Sometimes, if the slab is not fastened correctly, the apron may move away from the wall , but this defect can be easily corrected by installing it correctly again.
By comparing the positive and negative aspects, you will already decide whether to choose this material for repairs or not.
How to install correctly - installation options
How to install an apron in the kitchen from MDF sheets? And although the process of installing an MDF apron is quite simple, there are several issues that a novice installer may encounter. There are many videos on the Internet of installing an apron in a kitchen made from MDF material.
Basically, the nuances relate to the quality of work and if you follow the instructions, the result will leave you satisfied.
Below is a step-by-step installation of an apron in a kitchen made from MDF panels. Here is a list of preliminary work before installing the MDF apron. Take correct measurements of the work area. Thanks to the ease of processing MDF panels, you can give the desired shape to the apron. Much depends on how long you plan for the apron.
Some owners want the space from the bottom of the cabinets to the floor to be covered with an MDF sheet. In this case, you need to measure the space from the bottom of the wall cabinet to the floor.
And additionally add another 20 centimeters to the value so that the panel extends slightly under the hanging cabinets. This approach will provide additional aesthetics to the design.
This method is effective if the lower part of the kitchen unit is not solid. Otherwise, you will overpay for extra meters of material, which no one will see anyway, but the strength of the structure will be much higher.
Red single brick is the most commonly used among all types of bricks in construction. Here is its size.
It is almost impossible to carry out interior finishing work without putty. Here you will find out how long the putty takes to dry.
Today it is impossible to find a single building in the construction of which sand would not be used. By clicking on the link, you will become familiar with the heat capacity of sand.
Partial fastening method
Another option for attaching a kitchen apron made of MDF is partial. You do not overpay for extra meters and attach only the visible part of the apron between the tabletop and shelves. Fasten the MDF panel with a margin of about 25 cm, this will allow you to additionally fix the apron plate.
Horizontal measurements are also important, especially if there are sockets or switches in the kitchen splashback area. To do this, make a pattern with marked places where the sockets are located.
Take into account protrusions and other nuances that arise during installation. The template you have made will help you cut the MDF sheet exactly to your measurements.
How to install in the kitchen
How to hang an MDF apron in the kitchen? After the preliminary work necessary for correct fastening of the apron, you can install the MDF sheet itself.
Work carried out using a frame structure takes more time, but provides additional reinforcement and a longer service life without defects. How to fix an MDF apron in the kitchen using the frame method? The work area assembled from parts allows you to quickly assemble the apron.
How to install with self-tapping screws
How to attach a kitchen apron made of MDF with self-tapping screws? Here you will also need planks on which the entire structure will be supported. It also needs to be treated with special antiseptics. Then, in the marked places along the perimeter of the planks, MDF sheets are attached to dowels .
It is better to fasten an MDF apron for the kitchen with help to avoid defects. Below is a video on how to attach an MDF apron in the kitchen using self-tapping screws.
For more information about installing a kitchen apron made of MDF, watch the video:
Self-tapping screws
In this case, there is no need to ideally prepare the wall surface. For installation, you will need screws, dowels, bushings and decorative covers that match the design.
How is the apron attached?
Step 1. The panel is applied to the wall to transfer the mounting location to it (through the mounting holes).
The apron is carried using suction cups
Marking the places where the apron is attached
Step 2. Recesses are drilled in the wall into which dowels are inserted.
Drilling holes for fasteners
Dowels are inserted into the holes on the wall
Step 3. Bushings are inserted into the holes that were made in the apron.
A bushing is inserted into the apron hole
Step 4. The glass is again installed on the wall. Self-tapping screws are screwed into the holes.
Self-tapping screws are screwed into dowels
Step 5. Decorative caps are installed.
The fastening points are covered with decorative overlays
And they install sockets, switches, etc.
Installing a glass splashback can significantly decorate your kitchen space. The product itself will serve for many years without losing its external qualities.
Preparing the work area before hanging the kitchen apron - step by step
Once you have made all the measurements, you can purchase an MDF panel. Now it’s time to prepare the working area and all the materials you need for installation.
Although the panel is attached to an uneven wall surface, it is better to remove strongly protruding defects.
To protect yourself from the growth of various fungi on the wall after installing the apron, it is advisable to first clean the surface of the wall, removing all old materials, such as wallpaper.
Removing old wallpaper
Then treat with special means . But this is at the discretion of the owner.
Wall treatment with special means
To ensure uniform fastening of the apron, it is necessary to install a special strip. For these purposes, you can buy a special one or simply install a rail; it is removed after installing the panel.
What can you attach to?
How to attach an apron for the kitchen from MDF, or rather, what to hang it on? For these purposes you can use:
- adhesive composition ( liquid nails) ;
Liquid Nails
- aluminum frame;
- dowels
Depending on the method you choose, you will need to buy related materials.
How to install and secure MDF panels to the wall with your own hands
How to attach MDF to the wall? To attach the apron to liquid nails, you will need the following materials:
- The liquid glue itself.
- Decorative plinth, which is installed after attaching the apron between the table top and the wall.
This method helps to avoid additional costs for purchasing a frame, for example, and also to carry out all the work cleanly without waste, without even removing the furniture from the kitchen. How to glue MDF to the wall?
Liquid nails should be applied around the perimeter of the entire panel and in the middle at an equal distance of 20 cm.
Fastening with liquid nails
If you did not install the mounting rail, you will have to hold the panel with your hands until the glue is completely dry.
How to attach an MDF kitchen apron to an aluminum profile ? This method will require additional costs for the purchase of materials for installing the frame. The advantage of this method is the additional strength of the apron without the fear that the structure will deform.
Attaching an apron to an aluminum profile
The ability to install an apron even on a slightly defective wall without pre-treatment. Nowadays it’s not difficult to find a video of attaching an apron in an MDF kitchen using a frame structure. You just need a number of additional materials.
How to fix a kitchen apron made of MDF using self-tapping screws? This method is messier and will require purchasing dowels and placing them along the sheathing strips. When cutting MDF planks and sheets, it is better to use a fine-toothed hacksaw, which will ensure a more even cut.
Advantages
How to fix a countertop in the kitchen
Plastic has a number of advantages compared to other products:
- Easy panel mounting.
- When attaching products to a frame made from a guide profile, no preliminary preparation of the base is required.
- Absence of construction debris and dust during installation work.
- Low cost of lamellas and fasteners.
- Wide range of colors and shades of plastic. The selected products combine well with kitchen furniture and other finishing materials.
- Easy surface care. You can clean dirt using detergents and a regular kitchen sponge.
