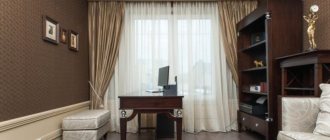
The final stage of any repair is the installation of skirting boards. They give the room a finished look, mask cracks at the junction of the floor and wall, and can also hide wiring. Properly selected skirting boards can become a real decoration of the interior, emphasizing the advantages of the room and hiding its shortcomings.
Installing skirting boards on the floor
Choosing a skirting board
When choosing a plinth, you need to pay attention to its color, texture and size. As a rule, the color of the baseboard is matched to the tone of the floor or the tone of the wall.
The most common option is to choose the color of the baseboard to match the color of the floor. Almost all major manufacturers of flooring have in their assortment a line of skirting boards that are best suited to a particular coating. If you don’t want to think long about choosing a skirting board, then just buy the one recommended by the manufacturer.
Skirting boards in the color of the floor
If the room has plain walls, then the best option would be to choose a baseboard that matches the tone of the walls; this will give the interior a holistic and complete look. However, if the walls in the room are covered with decorative plaster or wallpaper with a pattern, it is better to abandon this option.
White skirting boards are universal and suitable for almost any interior.
White skirting boards
Sometimes the color of the baseboard is matched to the color of the door, but this option is not suitable for every interior and it is better not to overuse it.
In rare cases, the color of the baseboard differs sharply from the color of the floor and walls and coincides with the main color accent of the room; as a rule, this is implemented in “designer” renovations, where a professional with extensive experience and well-developed taste is responsible for the choice of interior colors.
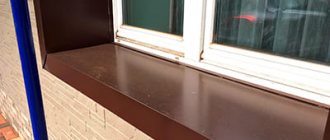
Stainless steel plinth
When choosing the size of the plinth, the rule is that the higher the ceilings of the room, the higher the profile of the plinth should be. With a ceiling height of about 3 m, it is advisable to use classic profile skirting boards with a height of 40 to 70 mm.
Skirting boards to match the color of furniture and door frames
If the room has high ceilings, then it is better to use a thin and high plinth in white or a contrasting color.
When choosing a plinth material, you need to proceed from your financial capabilities and type of flooring. Let's consider the possible material options in more detail.
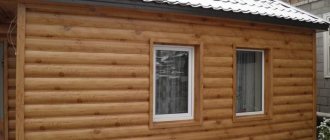
Wide plinth for an apartment with a high ceiling
Technical properties
Now you need to find out the dimensions of the plinth. The standard height of the product is 50-100 mm. The most common material is 60 mm high. This strip makes it possible to close a fairly wide gap between the floor and the covering.
The length of the plinth is usually 2.5 m, but there are options reaching 5.05 m.
It should be borne in mind that products can be sold in the form of elastic bands that are rolled into coils. Their sizes range from 25-50×48-50 mm. This elastic plinth is an excellent option for edging dense types of flooring, for example, tiles or linoleum.
The shape of the product may also be different. The easiest way is to attach straight plastic skirting boards with your own hands. As for the features of the choice of material, it depends on the height of the ceilings:
- Up to 2.6 m - plinth up to 7 cm wide.
- Up to 3 m - 90 mm.
- More than 3 m - 100 mm or more.
Solid wood skirting board
This is the most expensive version of the skirting board. It is usually used in combination with parquet and natural wood floors. Natural texture and pleasant color allow you to create a truly luxurious interior. Before installation, such skirting boards are impregnated with protective compounds and stain, and then varnished.
Solid wood skirting board
Traditionally, wooden baseboards were attached to the walls using screws, the heads of which were covered with special mastic. Today, a simpler and more aesthetic option for fastening with liquid nails is possible. Also on the market are wooden skirting boards with hidden fastening to brackets and even with channels for cable laying. However, the price of such skirting boards is quite high.
Wooden skirting boards must be purchased from the same batch, since the shade of wood in different batches may vary. To find out what color the baseboard will take after varnishing, wet it a little with a damp cloth.
Assortment of wooden skirting boards
Due to slight irregularities in the profile, trimming and adjusting the plinth can only be done at the installation site. When joining a wooden plinth in the middle of a wall, it is advisable to make it in a place that will be covered by furniture. The joints of the skirting boards at the corners are made by sawing off the edges at 45 degrees. There are no joining elements for wooden skirting boards, so sawing must be done as carefully as possible.
Floor and baseboard
Laying cables under the baseboard
The plinth with a channel for wires is laid on the floor according to the same principle as the rest. The only difference is the laying of the wires inside the strip. The wires can be laid in a channel located above the screws or after installing the structure. The wires are laid into the resulting channel, and the bar is installed in its original place. Additional holes for wires are made at the connection points.
Some types of skirting boards come with a convenient special channel for placing wires. It has a special cover according to the color and design of the floor plinth. Thanks to this cover, you can quickly and easily repair or replace wires with others.
The plastic plinth has a small channel for the cable, so wires that will serve for a long time should be attached under the plinth, and all the rest in the outer channel.
When deciding how to mount the baseboards, you should decide how the wires will be laid in the room, what method and what the floor cornice will be mounted to. By performing the installation carefully, taking into account all the tips, the floor covering will turn out beautiful and neat.
MDF plinth
This is a more budget-friendly version of the plinth; its main profile is made of MDF, and the front side is covered with natural veneer or plastic that imitates the texture of wood. In appearance, such a plinth is not inferior to a plinth made of solid wood, but at the same time it costs significantly less.
MDF plinth
Due to the great fragility of MDF, the plinth is not suitable for fastening with screws; it is usually fastened with liquid nails or hidden staples. The second option, as a rule, provides for the possibility of installing the cable inside the baseboard, which is very convenient.
Many manufacturers complete MDF skirting boards with plugs, joining and corner elements, which greatly simplifies the installation process.
MDF plinth with cable duct
Disadvantages of plastic products
- Use of auxiliary elements: plugs, corners, fasteners and connections. It is impossible to see all this in the finished design. In addition, after installation with your own hands, these parts often fall off during operation. The problem is small, but it makes its contribution.
- Imitation of natural materials. Appearing to be something you are not is always not very good, even if you are a baseboard. Not always worthy, not always high quality. Although this very drawback can serve as an advantage for someone: it’s like wood, but you pay less.
- Often cable channels do not contain all the wires that need to be hidden. But this is a drawback not only of plastic strips.
USEFUL INFORMATION: Features of the construction of a Russian bath
Plastic plinth (PVC)
This is the cheapest and most widely available skirting board option on the market. You can find plastic skirting boards of absolutely any color and profile. Plastic imitates wood, marble, ceramics and even plaster.
Plastic plinth (PVC)
Plastic skirting boards are easy to install, are not demanding on the base, are not afraid of water and are quite durable. Most models provide the possibility of hidden cable installation.
Elements and dimensions of plastic plinth
Typically, PVC skirting boards consist of two parts, one of which is attached to the wall with screws, and the other part is snapped into it, hiding traces of installation. Some plastic skirting boards can be attached with liquid nails, which is very convenient.
Main characteristics of a wide plinth
A wide plinth always attracts attention, because it creates a frame that becomes part of the overall composition. It must be taken into account that this category includes parts with a height of more than 50–65 mm. Although many craftsmen and designers include here only elements with a width of over 80–90 mm.
The products have a number of characteristics that make them stand out from the rest:
- Easy to install. Indeed, such parts are much easier to work with than narrow ones, which require more careful fitting and are susceptible to defects if handled carelessly.
- Decorative component. A plastic skirting board that is larger than average can give the room a more harmonious look. But it is necessary to take into account that only the right choice of product depending on the size of the room will create the desired effect.
High floor skirting boards look solid, but are not suitable for all rooms - Plastic elements perfectly imitate natural wood. This allows you to refuse to use more expensive material, but maintain all its visual qualities.
- Possibility of laying more communications. High fillets allow you to hide the location of electrical wires, twisted pair cables for the Internet, telephone lines, and television cables.
Large cable ducts easily accommodate most types of residential wiring
Of course, in addition to the listed properties, the material has all the advantages of plastic, which make it the optimal solution.
Skirting made of polyurethane foam (PPU)
These skirting boards are created specifically for decorating rooms; they can have a very complex shape that imitates gypsum stucco. PPU skirting boards go well with any type of flooring; they are especially suitable for tiled and marble floors.
Polyurethane plinth is an excellent alternative to a similar element made of plaster or wood
Such skirting boards are easily tinted and patinated; they can imitate almost any material. Thanks to their almost ideal geometry, they are easy to install, and the joints can be easily puttied and painted over.
Most manufacturers of PPU skirting boards offer flexible versions of their skirting boards; they can be fixed to a surface of almost any shape, including columns and niches.
PPU plinth in the interior
These skirting boards are mounted using liquid nails or special glue recommended by the manufacturer.
Ceramic baseboard
Ceramic baseboard
These skirting boards are intended for use in rooms lined with ceramic tiles, for example in bathrooms, swimming pools, saunas. They are absolutely waterproof and are mounted with tile adhesive. The joints with the walls and floor are additionally sealed with silicone sealant.
Large manufacturers of floor and wall tiles usually have in their assortment ceramic skirting boards that best suit their products, so choosing the right skirting board will not be difficult.
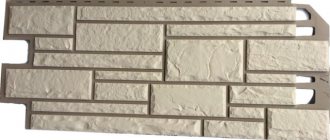
Ceramic plinth - shades
After choosing a suitable baseboard, you should think about how it can be fixed. There are three main options for attaching skirting boards; let’s look at them in more detail.
Tools
1a. Perforator (panel, monolithic, stone houses). 1b. Hammer or hammer drill (brick, block houses). 1s. Drill with drills of various diameters (adobe, wooden houses, any other houses with walls (partitions) covered with panels, plasterboard, chipboard, OSB, plywood, etc.) 2. Screwdriver (drill with attachment), screwdriver. 3. Hacksaw for metal. 4. Construction corner, tape measure. 5. Pencil, marker. 6. Knife. 7. Coarse sandpaper. 8. Vacuum cleaner (if the floor covering is carpet)
Note: A knife and sandpaper are not necessary, but are recommended for finishing baseboard cuts.
Fastening the baseboard with hidden brackets
Clipstar baseboard fastening system
As a rule, this fastening method is used for mounting baseboards made of solid wood or MDF. In this case, the plinth is snapped onto special brackets, which are pre-fixed to the wall using dowels.
PVC skirting board with hidden fastening system
The brackets are installed in the following order.
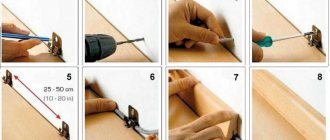
Step 1
A horizontal line is drawn on the wall, which corresponds to the height of the brackets. The exact height from the floor is taken from the technical data sheet of the baseboard.
Step 2
A series of holes for dowels are drilled along the line at intervals of 30-50 cm. The first and last holes should be located no more than 5 cm from the edge. If the wall structure allows you to fasten the brackets directly with self-tapping screws, then this step can be skipped.
Baseboard fasteners
Step 2
The brackets are attached to the wall at the same level with a given pitch using dowels or self-tapping screws.
Mounting procedure
When installing the baseboard, do not press it too hard to the floor.
Step 3
Once all the brackets are installed, the baseboard is simply pushed onto them and snaps into place with a little force.
Fastening the baseboard with hidden brackets
The advantage of this method is that there are no traces of installation on the front surface of the plinth, and if necessary, it can be easily removed and reused.
Methods of fastening the material and necessary elements
In order to connect the material, it is necessary to purchase the appropriate additional elements. For example, you will need:
- Corners. They can be internal and external. This makes it possible to design a surface of any complexity.
- Connectors. Thanks to them, you can fasten planks that have different sizes. They are designed for fastening straight elements
- Plugs. In order for the installation of the plinth to be complete, it must be equipped with special elements that cover the holes in the material. Plugs make the design more neat.
As for fastening methods, there are the following:
- Hidden fasteners. This method allows you to screw the product to the floor using self-tapping screws. However, their caps will not be visible. But this method is absolutely not suitable if the wall is uneven. In addition, the presented products, which have a cable duct inside, must be mounted only on dowels.
- Gluing. In this way, you can only attach the plinth to a perfectly flat base. Differences in the floor must be eliminated
- Through installation with dowels. This method differs in that the appearance of the finished product will not be very beautiful. The fastener caps can be seen. Special furniture plugs will help correct the situation. Despite all the external unattractiveness, this mount is considered very durable and reliable.
Fastening the baseboard with dowels
This fastening is most often used for mounting PVC skirting boards, but is suitable for any skirting boards consisting of two parts, one of which is used for fastening to the wall and mounting wires, and the other is a decorative trim. Fastening is carried out in the following sequence of actions.
Step 1
The main part of the plinth intended for fastening is applied to the wall, after which holes are made in it with a thin drill at intervals of 30-50 cm so that a mark from the drill remains on the wall. The first and last holes should be located at a distance of 5-7 cm from the edge of the wall.
Fastening the baseboard with dowels
Step 2
The plinth is moved away from the wall, after which holes for the dowels are drilled using a drill of a suitable diameter along the marks.
Fastening a plastic skirting board
Step 3
The baseboard is again leaned against the wall, dowels are inserted into the holes and screws are screwed in. It is better to screw in the screws without force, so as not to damage the PVC.
Methods for attaching floor plinths
Step 4
The sequence of actions is performed for the next plinth. When joining in a corner, the edges of the skirting boards are cut at an angle of 45 degrees.
Elements for fastening the plinth
Step 5
When the installation of the skirting boards is completed, a decorative front panel is installed on them, which hides traces of installation. The joints and edges are closed with plugs.
When the installation of the skirting boards is completed, a decorative front panel is installed on them
Self-installation
In interior decoration, PVC and MDF profiles occupy leading positions. Installing skirting boards with your own hands from these materials does not require careful adjustment of joints or skill in working with metal, unlike polyurethane or aluminum products. All operations are quite simple and easy to perform independently.
General operating principles
All types of skirting boards require fastening to the wall, and not to the floor covering, since the connection ensures the mobility of the material during temperature fluctuations. In any case, the connection should be tight enough, but not pinched, to prevent debris from getting under the bar, but allow the coating to move freely.
Installation of baseboards is carried out after completion of finishing work - painting or wallpapering walls, laying laminate, linoleum or parquet. Installation must be carried out carefully, without damaging or staining the finish.
Calculation of the length of the plinth for the room
Skirting boards are installed around the perimeter of the room. To find how many planks are needed, the length and width are measured in a room with standard geometry. By multiplying the sum of the sides by 2 we get the perimeter. A 10% reserve for cutting waste is added to the result.
The standard length of profiles is usually 2500-2700 mm. To determine the number of slats, you need to divide the perimeter by the length of one element and round up.
If the room has a complex shape, the length of each wall is measured, and the perimeter is found by adding all the values. Doorways, built-in wardrobes, protruding fireplaces and other interior elements where installation of baseboards is not needed are taken from the calculation.
It is better to lay a whole strip in visible places, and place joints at less noticeable points. Therefore, it doesn’t hurt to do the layout on a small drawing. It will also help you correctly calculate the required number of connecting parts.
Mounting accessories
Accessories for installing skirting boards will help hide the joints and neatly arrange the corners. For PVC moldings it is produced in the following types:
- plugs - cover the ends, can be right or left;
- connectors - mask the joint between the planks along the length;
- corners - depending on the configuration of the corner, there are external and internal.
To join wooden and MDF skirting boards, you can purchase columns of suitable thickness. They are installed in the corners, with plugs of the corresponding color glued on top.
If the necessary fittings are not available, the corner elements are cut at 45° using a miter box or a circular saw. Along the length of the planks, they are glued together with silicone glue with a pigment of a suitable color.
Workplace organization
Since installing skirting boards on the floor is the final stage of finishing, it is advisable to protect all surfaces that may be damaged or dirty with paper or film. The workplace should be clean and bright. If you are going to use glue, you need to ensure good ventilation.
To work with a miter box or circular saw, create a flat, open area on the floor or cutting table. All power sources for power tools should be located at a safe distance from people, and wires should be kept away from moving devices and mechanisms.
Moldings are stored in the room. Waste is removed in a timely manner. Work is carried out only at positive temperatures, since most materials do not tolerate a lack of heating.
Methods for attaching skirting boards to the wall
The fastening of skirting boards should ensure strength and be as inconspicuous as possible. The following are used as fasteners:
- Self-tapping screws for drywall. Designed for walls made of plywood or plasterboard, screwed with a regular screwdriver through the mounting holes.
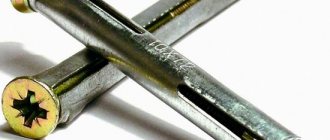
- Dowel-nails. A hole is drilled in concrete or brick walls, where a dowel is driven in, and a self-tapping screw is screwed into it;
- Plastic or metal clips. The fastener in the form of special brackets is screwed to the wall, and a profile made of MDF or wood is mounted on it.
- Guides. Using narrow slats, wide wooden or MDF baseboards are installed.
- "Liquid Nails". The glue does not contain toxic substances and forms an elastic, moisture-resistant compound. It retains a viscous consistency for a long time, which allows you to work with it for a long time.
According to the observations of many installers, the best results are obtained by the combined use of two options, for example, clips and glue. In the event of an impact, such a connection is more reliable than a one-component one.
Fastening skirting boards with liquid nails
This fastening option is suitable for all types of skirting boards, and for PPU skirting boards this is the only possible option. The surface must be sufficiently smooth, strong, clean and dry. Carefully remove dust and dirt from the wall. Immediately before installation, degrease the surface with a product recommended by the liquid nails manufacturer.
Installation is carried out in the following sequence.
Fastening the baseboard with liquid nails. Applying glue
Step 1
The first plinth is cut to the required length if necessary. If the joint with the next plinth falls on the corner of the room, then the edge is sawn off at an angle of 45 degrees.
Step 2
The adhesive composition is applied. The plinth is placed tightly against the wall and pressed with little force.
Fastening skirting boards with liquid nails
Step 3
The next plinth is joined to the previous one, measured and cut in place.
Gluing the baseboard
Step 4
If necessary, front panels, decorative caps and corner elements are installed.
How to properly screw a plinth with self-tapping screws
The method is reliable, but requires careful monitoring of the correspondence of the markings of holes on the walls and the profile itself.
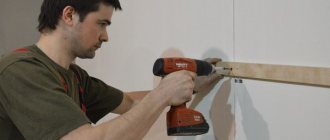
It is recommended to prepare the holes using the through method (the plank is pressed tightly against the wall and drilled together with it).
Drilling together with a strip
With clamps, the fastening step also increases on long straight sections up to 50 cm and is reduced on corners and complex sections to 10 cm.
Fastening pitch measurement
Then the dowel heads are hammered into the holes.
Dowel installation
The plastic panel is fixed with self-tapping screws.
Fixing the baseboard with self-tapping screws
The edges of the plank are also covered with connecting or corner elements before installing the next section.
Installation of corner joint
Measuring the length of the plinth
Installation of external corner
The main difficulty is correct fastening. When fixing plasterboard wall sheathing, concrete or similar stable bases to the floor profile, no problems arise; the profile is simply screwed on with self-tapping screws. When installing on regular plaster sheets, porous ceramics or similar walls with voids, it is worth using butterfly or “Molly” dowels.
The fineness is due to the drilling of the holes. It is not recommended to use large-diameter drills when preparing preliminary holes (the dowel head will not hold well).
After preparing all the holes, the walls are cleaned of dust (with a construction vacuum cleaner, or if one is not available, with a broom, brush or rag).
Cleaning the premises