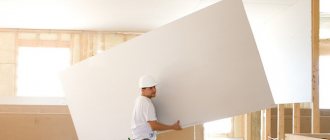
Often a great idea to cover the ceiling surface with gypsum board comes up against the problem of choice. It is clear that you can use the first ceiling plasterboard that comes to hand, but if you have the opportunity to choose, it may be right to choose a more suitable material, and not one that is cheaper or simply available.
The transverse size of the sheet should not exceed 100-120 cm
Types of drywall
Plasterboard ceiling cladding begins with the acquisition of good material that meets the requirements. There are many different types of gypsum boards, and they are all divided into two areas:
- Areas of use.
- Physical properties.
The first category includes:
- Wall - presented in a thickness of 12.5 mm. It is durable and quite heavy. Gravity plays an important role in the construction of ceilings using this type, when the question arises about a suitable profile for plasterboard, because the fastening elements and frame must withstand the declared loads.
- Ceiling, the average thickness of ceiling plasterboard varies from 8 to 9.5 mm. Less durable than the first option, but lighter.
- Arched has a minimum thickness (6 mm), as well as the least weight and strength. It is often used for finishing vertical structures on multi-level ceilings.
According to physical properties, all types of gypsum boards are divided into the following:
- Conventional drywall is a three-layer material made of gypsum and cardboard sheets. Color – grey. A distinctive feature is its lightness, which greatly facilitates the work of its installation. The lack of additional properties makes the material a cheaper alternative to other types. Such sheets can be installed in a standard living room, bedroom, hallway or other rooms where air humidity is low. Mounted sheets can be painted or decorated with wallpaper. The advantage is complete safety for health.
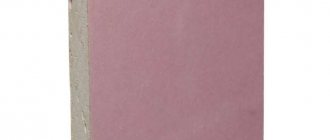
- Fire-resistant plasterboard for ceiling finishing (GKLO) is presented in red sheets that do not deform from high temperatures, which is why they can be used to decorate fireplace portals and be installed near other fire-hazardous systems. This is due to the addition of special reinforcing substances to the gypsum core. Very often gypsum plasterboard is used in wooden houses due to its ability to maintain the fire safety level of the premises.
- Moisture resistant (GKLV). The color of the sheets is green, marked with blue markings, and their base is impregnated cardboard.
- Fire and moisture resistant (GKLVO). This species is not afraid of moisture and high temperatures. The sheets are red and have special markings. It is considered the best option, so it costs more than others.
Important! When choosing drywall, you need to know the differences between individual types, the main parameters and characteristics, as well as the requirements that the room makes for finishing. Each specific case requires a certain type of gypsum board.
GCR and their properties
The simplest type is standard plasterboard sheets. They are a layer of gypsum, having the same thickness in any area, which is covered on both sides with special construction cardboard, which in this case acts as a reinforcing frame. In addition, it is also the basis on which the finishing material will be applied in the future.
GKL are produced with a width of 1.20–1.25 m. But the sheets can have different lengths - 2, 2.4, 2.6, 3 meters, etc., that is, you can purchase any suitable model.
Advantages of plasterboard in ceiling finishing
Drywall began to be used as a material for leveling ceilings more than 50 years ago. Initially, it was included in the decoration of industrial buildings only. Currently, it is unlikely that you will be able to find at least one room where there is no drywall. It became widely used in construction.
This is due to its undeniable advantages:
- Multi-layering consists of the presence of three layers, the middle of which is fragile gypsum, and the outer ones are cardboard. This technology results in a lightweight, environmentally friendly and smooth material, ideally suited for interior decoration.
- Using plasterboard, you can create original designs on the ceiling and install unusual lighting. Many designers prefer to combine drywall with suspended ceilings.
- GCR is easy to process and can be easily cut with a construction knife. The properties of the material make it possible to paint ceiling surfaces, the basis of which it forms.
Profile fastening
We proceed to the installation of suspensions, guide and supporting profiles.
- First, hangers are attached to the ceiling at the marked points. The dowels should go strictly vertically upward, not at an angle. Then the wings of the suspension are folded down. The standard length of the plates is 12 cm. If the distance from the drywall to the ceiling is shorter, then after installing the profile, the excess length is cut off with metal scissors or simply turned up.
- Then they move on to installing the guide profile around the perimeter of the room. It needs to be firmly secured to the wall. Install the profile on the dowels.
The step between fasteners is no more than 50 cm, but there cannot be less than 3 dowels per profile.
- Now you can install the supporting profile. It is inserted into the grooves of the guide and the level is checked for evenness of installation. Then, using metal screws (it is most convenient to use self-tapping screws with a drill end), the ceiling profile is attached to the hangers. Each plate will require 4 self-tapping screws with a press washer. You need to tighten it tightly so that the structure does not dangle.
Features of moisture-resistant plasterboards
The silicone granules and antifungal components included in this type, which reduce the threshold for water absorption, make the material resistant to high humidity. Therefore, moisture-resistant canvas is best suited for installation on ceilings in the bathroom or kitchen.
Can this material be used in rooms with normal humidity? Not only is it possible, but it is also necessary.
However, additional protection should be provided for it and the front side should be decorated with ceramic tiles, PVC panels or water-based paint.
If you need to protect the room not only from moisture, but also from fire, you can safely combine water- and fire-resistant plasterboards.
Installation of drywall panels on a wooden frame
The panels must be installed starting from the middle of the ceiling. The first of them should be mounted in the center, with minor deviations possible. Fix the remaining panels according to a pre-selected pattern. The panels can be mounted in two ways. The easiest way is to secure the panels to the supporting rails with mounting brackets, additionally fastening the joints with universal polymer glue. When performing seamless installation, tenons that are invisible from the outside should be inserted into the side grooves of the panels, which do not leave gaps between the plates. With this method, you can use decorative slats only to decorate the seams on a large area of the ceiling.
It is also possible to install panels by fitting their grooves onto slats, then the slats perform not only decorative, but also fastening functions. To fill the space between the outer rows of panels and the walls, pieces of slabs of the appropriate size or decorative slats should be laid. It is advisable to leave so-called “temperature joints” near the walls - these are empty strips 4–5 cm wide. They can be painted over with either dark paint or paint that matches the overall color of the room. Expansion joints simultaneously protect the ceiling elements from thermal expansion and serve to ventilate the space between the base and false ceiling. By the way, the same method is suitable for covering the ceiling with wooden boards or wooden or plastic slats - clapboard.
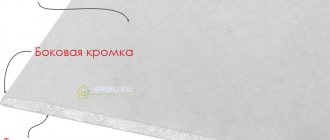
What are the types of edges on gypsum boards?
Each type of sheet has its own edge. It is very important to take this criterion into account when you need to decide what material to use in finishing the ceiling:
- Direct (PC), used with the “dry” installation method. Selected when the output layer is not the top layer. In this case, there is no need to putty the structure as the result is a perfectly flat and smooth surface. The straight edge is used when installing the first level of ceilings and decorative boxes.
- Refined semicircular edge (PLUC). Involves additional processing of the edges with reinforcing tape or serpyanka and a layer of putty. It is also used in the construction of a conventional single-level suspended ceiling.
- Rounded edge (CR). In appearance it resembles a thinned edge. It is distinguished by the absence of the need to use reinforcing tape at the final stage of work.
- Thinned edge (UK). Ceiling plasterboard sheets with this type of edge at the joints will need to be finished with reinforcing tape and putty.
- Semicircular edge on the front side (PLC). It has a beveled semicircular edge only on the front part of the sheet. Therefore, you can use one putty to seal the joints.
Main advantages
Drywall is a sheet material. It can be used for various construction and finishing works, but most often it is used to make structures such as suspended ceilings. This is due to the advantages of the material itself.
The best plasterboard ceilings are systems that allow you to completely transform a room. This is an environmentally friendly material with which you can get a neat ceiling at minimal cost. It also has good soundproofing properties.
Moreover, if the area of the room and the height of the ceilings allow, you can create structures of different shapes. This way you can mask the design flaws and make the design more interesting. And, of course, such designs are a practical solution for any room.
All that remains is to decide which drywall is best to use for the ceiling. After all, manufacturers produce both fire-resistant and moisture-resistant sheets. The latter are especially relevant for the kitchen, since it is characterized by high humidity.
The choice of material is of fundamental importance. Cracks may form on it if its thickness and other parameters do not meet the requirements of the ceiling finishing.
GKL or GVL
There is another way to finish the ceilings. It involves the use of gypsum fiber sheets, which are also ideal if you urgently need to level the ceiling surface.
Gypsum fiber sheets are made from gypsum and a special filler, which includes cellulose fibers. The material is protected on both sides with fiberglass. This method makes the sheets durable and strong.
When you first decide to carry out independent repair work, you may have a question about which material to choose. You can answer this by comparing the characteristics of both types.
The differences between conventional gypsum plasterboard and gypsum plasterboard are presented in the table
| Criterion | Plasterboard sheets | Gypsum fiber sheets |
| Price | From 70 rub. per sq. m | From 180 to 300 rub. per sq. m |
| Strength | Low, cracks appear from impacts | High, sheets are not afraid of mechanical stress |
| Installation | Simple, and you can easily cut any type | Complex, sheets are difficult to cut due to the large weight and hardness of the material |
| Insulating properties | Medium, decreases with increasing humidity | High, retain heat well and reduce sound vibrations |
Installation of a plasterboard ceiling made of gypsum plasterboard or gypsum plasterboard begins with the installation of the frame. Depending on your wishes and the dimensions of the structure, you can choose a base - metal profiles or wooden slats.
Important! If you prefer GVL, purchase a profile whose thickness is at least 0.5 mm due to the heavy weight of the material.
General scheme of work
You can use a plasterboard ceiling both for the living room and for the hall, bedroom or corridor. It all depends on your preferences. Below we will describe step by step how to install the frame correctly, what needs to be taken into account and how to mount the profile.
Important! If, in addition to ceiling reconstruction, any work on the walls is planned, they should be completed before installation begins. This way you can avoid many inconveniences later.
Installation of the structure relieves the residents of the house from painstaking leveling of the surface using putty and further painting. At the same time, if there are deep cracks, they should be repaired. This is important for the strength and reliability of the installation of the structure.
It’s worth saying right away that the profile can be made of aluminum, or it can be wooden. It is important to take all the necessary measurements in advance, sketch out a work plan on a piece of paper, and only then proceed.
The step-by-step installation of the profile is described in detail in this video:
If the frame is wooden, it must be secured with self-tapping screws, just like metal ones. To do this, markings are first made so that the ceiling is at the same level. Then the profile is assembled. Hangers, screws, dowels, brackets and polyethylene foam tape are used. Using this tape, you should isolate the metal parts of the frame from the walls.
Important! Each hole and each self-tapping screw should be screwed in conscientiously. Unscrupulous attitude towards small details can lead to rapid damage and destruction of the entire ceiling.
When distributing the frame, it is important to consider that each sheet of cardboard must be attached in at least three places. After the frame is completely installed, if desired, you can insulate the ceiling. There should always be a gap between the sheets of drywall. Although this adds work to the finishing stage, it can prevent the material from swelling due to temperature changes.
At this stage, it is worth thinking about what kind of lighting will be used. After covering with plasterboard, it will be impossible to connect the electrics and install lamps. It is quite possible to furnish a private house without the help of craftsmen. After installing the drywall sheets, the seams need to be puttied, primed and painted.
Without the help of specialists, you can also perform a good ceiling repair
How to choose a quality gypsum board
Calculating drywall for the ceiling
To determine the amount of plasterboard for the ceiling depending on the area of the room, you will need to perform the following procedure for calculating the material:
- Divide the calculated area of the room by this parameter for the gypsum board sheet.
- Multiply the resulting figure by the “reserve” factor. It differs depending on the size of the room:
– area less than 10 sq. m – 1.3;
– 10-20 sq. m – 1.2;
– from 20 sq. m – 1.1.
- Round the calculated value up to the nearest whole number.
If you decide to install a multi-level ceiling, then the material is calculated separately for each level, and then summed up and rounded to the whole value.
Criteria for choosing drywall
Despite the variety, you cannot find gypsum boards in production, which can only be used for ceiling decoration. The average thickness of sheets of material ranges from 6 to 16 mm; the sizes are:
- 2.5 by 1.2 m;
- 3 by 1.2 m;
- 2 by 1.2 m.
In order to choose the correct thickness of the ceiling plasterboard and its length, take into account the following point: the sheet will have to be fastened at arm's length, so pay attention to the fact that the length and thickness of the material do not allow the sheets to sag. As for ceilings, it is worth using 9 mm thick plasterboard for them. Choosing a thinner option involves increasing the number of cells in the overall design.
In rooms with normal humidity, ordinary drywall is often used. Moisture-resistant panels can also be used to construct ceiling structures in living rooms. They will help out if the neighbors on the top floor were careless in allowing water to leak. But moisture-resistant plasterboard cannot completely protect against water; it is simply not so susceptible to deformation.
Thus, to summarize the above, it can be noted that any sheets that have the following characteristics are suitable for the ceiling:
- Thinned edge.
- Thickness – from 9 to 11 cm.
- The thickness and length of the sheets can be 9-11 mm and 2.5-3 m.
- The width of the sheets is always 1.2 m.
These are the characteristics that correspond to the required type of plasterboard for the ceiling.
On a note! A material with the specified properties is usually used for a single-level simple ceiling, the design of which does not involve the inclusion of decorative overlays or additional tiers. If you want to add originality to the surface using non-standard elements or simply add nuances in the form of baguettes, lamps, etc., it is better to purchase sheets with a thickness of 12.5 mm.
Choosing a manufacturer
The modern building materials market offers a wide range of types and names of plasterboard, produced by large and little-known companies. They all try to make their product as perfect as possible, despite the fact that most types of gypsum plasterboard have the same standard parameters.
Which manufacturer is better? There is no clear answer to this question. Sometimes the quality of material from little-known companies is not inferior to advertised organizations. The main condition when choosing is the absence of cracks and other visible damage on the sheets.
We will focus on the most famous drywall manufacturers:
- Knauf. The most popular company present on the modern market produces ceiling (9.5 mm thick), wall (12.5 mm), arched (6.5 mm) gypsum boards.
The manufacturer also offers all types of material - standard, moisture-resistant, fire-resistant and plasterboard, combining the last two options.
The quality of the material is at a high level. GCRs do not emit odor, are easy to process and have increased flexibility.
- Volma also occupies a leading position. The main advantages of the material include ease of installation, strength and reliability, increased wear resistance, and environmental safety.
The company produces products in several variations. The main types of gypsum boards include: heat-resistant, reinforced, standard and water-resistant.
- LaFarge has been operating on the market for a very long time, exceeding the Knauf company in terms of the number of points. Thanks to its production capacity, its products are cheaper, but at the same time remain competitive.
It was LaFarge that was the first to release gypsum boards with edges trimmed with cardboard, which became a distinctive feature of its material.
The downside is the small overall dimensions of the sheet. Typically 1.2 by 2.5 m or 1.2 by 3 m, the weight of which reaches a maximum of 9 kg.
Calculation
How to calculate the amount of plasterboard required for finishing a flow?
Very simple:
- For a single-level ceiling, it is equal to the result of dividing its area by the area of one sheet of drywall (with a size of 2500x1200 - 3 square meters) with a 15 percent margin for trimming. When calculating the stock, please note that the division result (the number of gypsum boards) is rounded to the whole value;
Arrangement of plasterboard sheets on the frame of a single-level ceiling
- For a multi-level ceiling, you have to additionally calculate the area of the vertical sections. It is equal to the product of the length of the transition between levels measured with a tape measure and its height;
- If the frames of the lower levels are installed after the first level of the ceiling has been completely covered, the total number of gypsum plasterboards for them is summed up.
Rules for installing gypsum boards
Before giving the ceiling a flat surface using plasterboard sheets, their edges must be processed with a special plane and the edge chamfer cut at an angle of 40-50 degrees. This will make it easier for you to putty the joints.
If a sheet needs to be cut, it is done like this: first, cut along the line marked on the surface of the material, then break the sheet on a hard surface, and then make a cut on the reverse side.
When you install suspended ceilings using a screwdriver and self-tapping screws, pay attention to the correct location of the gypsum boards. Their edges should lie on the guide profile, and the screws should be at a distance of no more than 20 cm from each other.
Preparing the base surface for installing a suspended ceiling
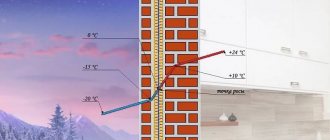
Before installing the frame for fastening plasterboard panels, you need to prepare the load-bearing surface. Usually this work does not require much time and effort. Before installation, the load-bearing surface of the base ceiling must be prepared so that it can firmly hold the mounting strips, since they must fit tightly and evenly to the ceiling. First, level the ceiling, knocking off large protrusions and thick, durable layers with a hammer and chisel. Wash off the chalk whitewash with a rag soaked in water, and at the same time remove thick, weakly adherent layers. After this, clean the ceiling from dust, remove loose or loose elements. Then, using putty based on PVA glue, use a spatula to repair all deep cracks and dents. Next, strengthen the weak areas of the surface, for which a strengthening primer with high penetrating ability or an aqueous solution of PVA glue is suitable. Surface areas with small cracks and stubborn dirt can be painted with nitro paint or wiped with a 5% solution of PVA glue. On a previously painted ceiling, clean all flaking areas and then prime with a quick-drying nitro primer or a primer based on PVA glue. There is no need to sand the load-bearing surface of the ceiling, since the panels successfully hide all irregularities.
Drywall storage rules
If the material was purchased for various needs, or it is not intended to be installed immediately, the sheets of drywall need to be provided with optimal storage conditions.
First of all, for 2-3 days before installation, it is kept in a dry room in a horizontal position so that excess moisture is removed.
Long-term storage should be carried out indoors. In this case, the material must be placed on a flat surface and away from heating sources.
Required materials and tools
You need to prepare for work. To make a gypsum board ceiling, you will need the following tools:
- metal scissors;
- drill;
- level;
- putty knife;
- drywall knife;
- screwdriver;
- sandpaper;
- hammer;
- roulette;
- pencil.
What brand of drywall do you use?
USEFUL INFORMATION: How to remove old wallpaper from drywall without extra effort
Ceiling materials:
- guide profiles (UD);
- load-bearing profiles (CD);
- plasterboard sheets;
- crab connectors;
- suspensions (for a large distance to the ceiling - spring suspensions with a clamp);
- self-tapping screws;
- screws;
- dowels
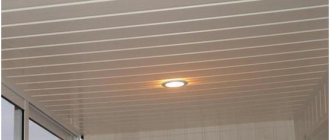
Plasterboard ceilings in the interior
Drywall is one of the most popular materials for finishing ceiling surfaces. A simple option is to install a single-level ceiling. If the height of the room is small, it is better to prefer this design. It is very easy to install such a ceiling with your own hands, and the built-in lighting will make it no less original than a multi-level suspension system.
You can find design variations in which plasterboard on the ceiling is organically combined with tension fabrics. Then the main structure is mounted from gypsum plasterboard (most often along the perimeter), and the center of the ceiling space is decorated with PVC film or fabric.
Knowing all the features and properties of gypsum plasterboard, you will be able to choose the material with which your plasterboard ceilings will become perfectly smooth.
Installation of a frame for a plasterboard ceiling
In relatively small rooms, it is possible to install plasterboard on a wooden sheathing, although this significantly reduces the strength of the entire structure. Mounting strips must be secured to the ceiling and, if necessary, to the walls, using nails or hardened steel self-tapping screws. Then level the slats by inserting wooden wedges.
The slats should be directed parallel to the longitudinal wall. Then, when laying the panels using the “end-to-end” method, the ceiling surface looks like a solid one, since the tightly fitting joints with the help of inserted tenons are almost invisible. A ceiling laid out in this way looks good in a small room; it visually expands its space and creates visual unity of the ceiling surface. In larger rooms, it is best to use decorative slats. Lay out the fastening strips in two directions - longitudinal and transverse. The resulting seams between the panels, decorated with slats, form a pattern in the form of canvases or rectangles. This emphasizes the longitudinal or transverse orientation of the ceiling. To obtain a complex pattern, you can insert one or two slats between the panels, or lay them through two panels.
What is fire resistant drywall sheet and when is it appropriate?
Flame-resistant sheets can be considered as a finishing material option for the ceiling. Its main feature is its increased resistance to fire, so it makes sense to choose this material when decorating the ceiling in specialized rooms:
Fire-resistant plasterboard is ideal as a means to improve fire safety. For residential premises, this option is not the most convenient. The sheets have a characteristic gray surface and red or pink markings. But the thickness of plasterboard for a fire-resistant ceiling can be different, but you should choose the least heavy (thin) sheets to reduce the total weight of the finished structure.
Leveling ceilings
The ceiling can be leveled using plaster. But this method is quite labor-intensive and time-consuming. In addition, it will not be suitable if the differences in unevenness are significant.
Therefore, the ideal material for this type of work is ceiling plasterboard. The work will be done much faster, because you won’t have to wait for the material to harden and dry, as when working with plaster, and the very next day after installation you can finish the ceiling.
However, it is worth remembering that when leveling with plasterboard, the ceiling drops lower. This fact must be taken into account when renovating rooms with low ceilings.
You can do this work yourself, without resorting to the help of craftsmen, since the process does not require highly specialized knowledge and skills.
To do this, you will need tools for precise marking, iron profiles and special screws for drywall.
Marking - the initial stage of work
The design will be neat and reliable only if you prepare markings at the preparation stage. In a bathroom that is usually of a standard rectangular shape, it will not be difficult to do. To do this, initially plan the volume of the niche, taking into account soundproofing materials and insulation. As a rule, the distance from the rough base to the plasterboard finish is about 20 cm. Having measured the required distance, leave a mark in the corner of the room, continuing to mark for convenience using a level.
When all the marks have been made, using a dye thread, beat off the lines of the future plasterboard structure along and across the ceiling. The base frame will be mounted on them.