How to cut a plinth for a ceiling
To quickly cut a ceiling plinth without a miter box, you need to take into account what material it is made of. This will also allow you to select the tool needed for the job.
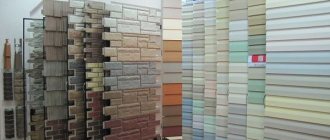
On the construction market, skirting boards are most often made from the following materials:
- wood;
- PVC;
- polystyrene foam;
- polyurethane.
Polyvinyl chloride has a small price category. But any break or dent will not pass without a trace for him. Also, skirting boards made from this material quickly become dirty. You can cut it with a hacksaw or a construction knife.
The foam version is cheap, but is fragile. To cut such a ceiling plinth in the corners, you should take a sharp knife or a hacksaw. And it is advisable not to put pressure on the material.
The extruded version is much denser than the foam baseboard, but it is more difficult to cut, especially without a miter box. You will need similar tools for the job.
Polyurethane baseboards are considered the most expensive. It is durable, moisture resistant and has excellent flexibility. You can use a construction knife for cutting.
To figure out how to cut the ceiling plinth in the corners without a miter box, you first need to clarify how exactly this is done with it.
Color Mixing Chart
| Red Burgundy | Red add brown, black and yellow |
| Red | Red White for brightening, yellow for orange-red |
| Royal red | Red add blue |
| Crimson | Blue add white, red and brown |
| Tomato red | Red add yellow and brown |
| Reddish chestnut | Red add brown and black |
| Chestnut | Red add black or brown |
| Pink | White add a little red |
| Grass green | Yellow add blue and green |
| Coniferous | Green add yellow and black |
| Bottle green | Yellow add blue |
| Fern green color | White add green, black and white |
| Forest green color | Green add black |
| Emerald green | Yellow add green and white |
| Light green | Yellow add white and green |
| Pale green | Yellow add blue/black for depth |
| Light green | Green add white/yellow |
| Turquoise green | Green add blue |
| Green-gray | White Add light gray plus a drop of green |
| Avocado | Yellow add brown and black |
| Olive | Green add yellow |
| Khaki | Brown Green |
| Pistachio | Pistachio paint is made by mixing yellow paint with a small amount of blue. |
| Yellow | Yellow white to lighten, red or brown to darken |
| Lemon yellow | Yellow add white, a little green |
| Mustard | Yellow Add red, black and a little green |
| Mandarin, orange | Yellow add red and brown |
| Gold | Yellow drop of red or brown |
| Orange | White add orange and brown |
| Orange | Yellow add red |
| Dark brown | Yellow red, black and white |
| Red-brown | Red yellow Add blue and white to brighten |
| Medium brown | Yellow Add red and blue, white for lightening, black for dark. |
| Golden brown | Yellow Add red, blue, white. More yellow for contrast |
| Copper gray | Black add white and red |
| Light brown | Yellow add white, black, brown |
| Royal blue | Blue add black and a drop of green |
| Dark blue | Blue add black and a drop of green |
| Gray-blue | White Add light gray plus a drop of blue |
| Aquamarine | White add green and black |
| Turquoise blue | Blue add a little green |
| White-blue | White add blue |
| Wedgwood blue | White add blue and a drop of black |
| Plum/Purple | Red add white, blue and black |
| Dark purple | Red add blue and black |
| Royal purple | Red add blue and yellow |
| Grey | White Add a little black |
| Pink gray | White A drop of red or black |
| Gray coal | White add black |
| Pearl gray | White Add black, a little blue |
| Almost white | White Add brown or black |
| Beige | Take brown and gradually add white until you get a beige color. Add yellow for brightness. |
| Honey color | White, yellow and dark brown |
| Eggshell color | White yellow, a little brown |
| Black | red blue green |
How to get the desired color when mixing colors to get the desired color or shade is shown in the color mixing table. You can select a color to mix in the color palette on the online color selection page.
Useful tips
Some useful recommendations from experienced craftsmen who will quickly help you cut the baseboard in the corners without a miter box:
- ceiling strips are installed after preparing all the parts;
- If there is an error on the foam baseboard, it can be corrected with a regular knife. If it is made of another material, it is better to use a file;
- you need to cut the skirting boards from the side, and then try them on at the desired angle in order to immediately detect errors;
- Before finishing cuts, it is advisable to perform several tests on fillet scraps to avoid mistakes;
- It is advisable to treat the joints at the corners of already glued skirting boards with silicone sealant or finishing putty;
- to cut the fillet on a straight and solid plane with the markings facing up;
- to mark the outer corner, the plinth must extend its entire width beyond the corner;
- to mark the internal corner, the length of the plinth is measured from the corner;
- The template for a home miter box may well be a table pressed against the wall. It forms a perfectly right angle.
How to attach a plinth to a wall: what methods are there, their advantages and disadvantages
Before installing skirting boards, it is advisable to take care of improving heat and sound insulation. There is sound insulation on a self-adhesive basis, it is sold glued to sheets. You can find it at a hardware or auto store. Before attaching the baseboard, glue strips of sound insulation to its lower part. The strips must be glued with some gap so that air can circulate. With sound insulation it will become much quieter, the effect will be especially noticeable with laminate.
Fastening with clips. It's not noticeable, but you have to look at how well the clip holds
There are three ways to attach skirting boards:
- On screws or nails, on dowels.
- Gluing.
- On clips or mounting plates.
All three methods are not ideal. Everyone has pros and cons. Two methods - fastening and gluing - can be used both for fastening to the wall and to the floor. The clips are only used to attach to walls. Let's look objectively at all the methods of attaching skirting boards. This way you can choose the best one for each specific case.
How to trim baseboards in corners without a miter box
It seems easy to handle a miter box, but the angles are not always 90 degrees. This method will help solve the problem of properly cutting the plinth in the corners quickly and without unnecessary hassle.
The procedure for correctly cutting the baseboard in the corners without a miter box:
- Place the baseboard close to the corner.
- Run the line with a pencil along the top of the baseboard.
- Do the same on the other side of the corner - attach the plinth and draw a line. These stripes will intersect in the corner.
- Reattach the plinth and draw the fishing line down from the intersection point. We do the same with the second part.
- Cut the baseboard along the marked strips. The result will be an even and beautiful angle.
On glue
Gluing skirting boards to the wall works well, but only if the walls are level. Smooth - this is with a maximum deviation of no more than 1-2 mm. Otherwise, you will need to fix the “problem” areas at least until the glue sets. This is at least several hours. Holding with your hands is too problematic. You can try to prop it up with something heavy, but it doesn’t always work. Another drawback is that if you need to remove the baseboard, it will be very difficult to do. Either with a piece of trim, or plinth in pieces.
Glue and all necessary components for installing plastic skirting boards
Glue for gluing floor skirting boards - “liquid nails”. When choosing, consider the material of the baseboard and wall/floor. The instructions must indicate both materials to be glued. Also look at the setting time. It is critical for walls that are not too smooth, otherwise you will be stuck in problem areas for a long time.
You can use silicone or acrylic sealant instead of glue. It is better if it is not rigid after polymerization - it remains elastic. For example, Silicone-Acrylic Sealant 420. Also make sure that it is compatible with both surfaces. Why is elastic sealant better? Because when it is necessary to remove the baseboard, the semi-rigid mass can be cut with a knife. And this despite the fact that it holds well even on curved surfaces.
How to cut ceiling plinths in corners with and without a miter box?
The procedure for installing fillets on ceilings seems quite easy, but requires specific techniques to successfully complete the repair. Often we cut the corners of the ceiling plinth completely incorrectly, which leads to a reduction in its service life and poor quality of repair work. Correct joining, evenly fixed edges are quite achievable results if you use the recommendations of experienced specialists.
Cut off the outer corners using a miter box
- Place the baseboard against the corner and mark with a pencil the place on the baseboard where the outer corner begins.
- Then the plinth is placed in the miter box. The side that will be attached to the ceiling is placed on the bottom of the miter box , and press the other side against the wall. The mark on the plinth should be located near the left slot. Trim one edge.
- Then we cut the other half of the corner in a similar way. Only the mark on the baseboard should be located near the right slot.
Place both halves against the corner and check if there is a gap. If everything is in order, then you can glue the baseboard in place.
How to cut a corner of a plinth - video
Trim internal corners using a miter box
To do this you will need the following tools:
- The fillet is placed on the bottom of the miter box with the side that will be glued to the ceiling, and the lower side is pressed against the wall of the miter box, to its right slot.
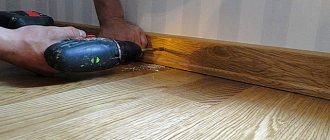
- Trimming the fillet is done with a hacksaw or a sharp knife. trimmed carefully, without excessive force, so as not to deform the ceiling cornice and cause chips to appear.
- In this way, we also cut the adjacent corner of the plinth, but using the left slot on the miter box.
- Then these parts are applied to the corner to check, if there is a gap, you can cut it with a knife.
READ How to Cut a Skirting Board at a 45 Degree Angle
Advice: In order not to waste material and gain skills, practice on small pieces first.
How to properly lay a fillet in a miter box
Method two - without additional tools
For the inner corner, you can use the simplest method for perfect joining - by marking it on the ceiling. Another example of how to cut a corner nice and even.
- Apply the fillet to the ceiling, pressing its smooth edge tightly into the corner.
- Draw a line along the long side of the baseboard on the ceiling.
The same action is performed with the adjacent part on the other side.
Mark the point of intersection of the lines.
The result is an even angle of 45° if you draw the line from the intersection point to the edge of the part. Note that the above marking method only works with perfectly even angles.
Cutting a corner using a miter box
We take a polyurethane ceiling plinth. designed for the left or right side of a corner. We lean it against the future installation location so that the end of the segment opposite from the corner is against the edge of the already glued molding. In the place where the bottom edge of the ceiling plinth touches the top of the wall corner, make a dot with a pencil or stick a piece of insulating tape. We repeat these steps with the second segment.
How to cut an external corner of a ceiling plinth:
- We place the left blank in the miter box from left to right, pressing it to the edge closest to us. The corner vertex mark should coincide with the leftmost slot in the same edge
- We place the right blank from right to left, pressing it to the near edge. The mark for the top of the corner is to the far right slot.
How to saw down a ceiling plinth at an internal corner? Everything is very simple, the actions will be exactly the same, only the location of the corner vertex mark changes. Here it’s the other way around: for the left segment – the far right slot, and for the right – the far left. The finished ceiling fillets must be aligned, and then the joints should be held up to the light - there should be no gaps. If they are very small, then editing is not necessary; you can get by with sealing with putty material after installation.
How to make a corner of a ceiling plinth: positioning the workpiece in a miter box
How to correctly cut a wooden plinth
Important: sometimes the angles deviate too much from the standard 45 degrees, and a simple miter box for the ceiling plinth becomes useless - you can cut off the excess. The solution would be to purchase a rotary tool, but it is not cheap and this “one-time” purchase will be irrational. In this case, you can use the intersecting point method.
Miter box cutting method
The most popular fastening option is using household tools. The miter box is a well-known carpenter's assistant, helping to make cuts at the desired angle. This is usually a tray, wooden or plastic, with vertical slots for the blade at 45 and 90 degree angles. How to cut the corners of a ceiling plinth with a miter box?
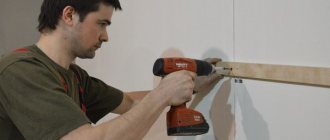
First, you should attach the material to the ceiling and install its strip in the miter box. In this case, the tool must coincide with the position of the product. Holding the plinth with your left hand, select the position for the cutting tool (hacksaw) at an angle of 45 degrees. They cut the material without unnecessary pressure. After this, cut the counter strip and install it to the far wall of the wort.
Holding the working material with your right hand, select the position of the hacksaw at 45 degrees and cut.
Do-it-yourself ceiling plinth cutting
Let's look step by step at how to properly cut the corners of a plinth (also called a fillet). In the vast majority of modern apartments, the angles of rooms and other rooms are 90°. The ceiling plinth must be cut at an angle of 45° or 90°. How to cut ceiling plinth? To do this, use a special tool called a miter box. This tool already has slots made at an angle of 45° and 90°. At first glance, the task of cutting the baseboard is simple. But the fact is that it is glued to the ceiling at an angle of 38° to 45°, which means that the cut corners will not meet, leaving gaps. To prevent this from happening, a miter box is used.
Types of angles
Corner joining and trimming of the plinth differs depending on the type of corner; they are distinguished: internal, external and non-standard.
An internal angle, in other words, an angle of a room less than 180°, is usually 90°. When trimming an internal corner, the lower part of the ceiling plinth always protrudes above the upper. The first step is to measure the angle between the walls; if it is standard and equal to 90°, then the planks are cut at an angle of 45°. The baguette that is glued on the right side should be cut on the left, and the left strip on the right.
The external or external angle is less common, it is more than 180°, usually around 270°. When working with such angles, everything is exactly the opposite. The edge of the plinth that will press against the ceiling should be larger than the bottom.
Non-standard angles. These most often mean angles with a degree greater or less than the standard of 90° and 270°, as well as various types of rounding. In this case, pruning is carried out “by eye” or with markings in place. Areas with curves are assembled from several small elements, each of which is adjusted in turn.
Joining ceiling fillets without an industrial miter box
Factory miter box. This is an aluminum, plastic or wooden tray with recesses 45 0 or 90 0. This device is rarely used at home, so it is not found by everyone. But few people also know how to cut a ceiling plinth without a miter box, so let’s look at a few simple solutions that will allow you to join the ceiling plinths in the corners of the room with great precision.
When renovating an apartment, installing a new ceiling is often necessary to create a complete design idea. The completed ceiling is decorated with beautiful fillet skirting boards. Baguettes are glued, nailed or screwed around the perimeter of the room; their position is first marked in the corners at the junctions of the walls and ceiling. Cornices for the ceiling are often rigid and solid strips (although there are elastic silicone ones), so they need to be beautifully joined together in the corners of the room, and without a miter box this is difficult, but possible.
The fillets for framing the corners of the ceiling are made of polyvinyl chloride (PVC), expanded polystyrene (PPU), polyurethane (PU), polystyrene (PS), polystyrene foam (PP), wood or metal:
- The foam decorative cornice is fragile, but for unloaded ceiling structures this does not matter. PP skirting boards can have different widths, the standard length is 1 meter, the surface is bas-relief with various patterns;
- Expanded polystyrene is a dense material, easy to install, the edges of the cornice do not crumble when cutting;
- Aluminum or wood are the most difficult to join - you will need great precision, which is difficult to achieve without using a miter box. It is recommended to cut the corners of such cornices with a metal blade; to calculate the correct cutting angle, use the methods below.
Polyvinyl chloride is easily crushed, after which it is not restored. Requires care and minimal pressure when machining
Cuts with a carpenter's cutter or hacksaw
The foam strip is fragile and crumbles easily. It is recommended to cut PP skirting boards with a very sharp cutter or a special tool - an electric nichrome cutter
Cuts with a carpenter's cutter or a hacksaw for metal, hot wire clamped in clamps
Cuts with ordinary hand or special tools (power miter saw, fine-toothed wood saw, metal blade), the cost of the products is higher than PU, PP OR PVC curtain rods
The Ballad of Wooden Skirting Boards
Today on the market of facing materials you can find two types of wooden skirting boards: solid and veneered. A profiled shaped solid wood strip is made from solid timber of hardwood: oak, ash, beech, walnut, polysantrum, zebrawood, teak, maple, etc.; skirting boards are also produced from rare and exotic wood species for exclusive interiors, the price of such products is quite high.
The veneered plinth is based on laminated veneer lumber of coniferous species, usually pine or spruce. The stability of the slats is ensured by the needle-shaped connection of the base parts. After formatting the front part of the plank, a veneer made of valuable wood is applied to it.
Let us separately mention the MDF profile covered with veneer; this category of floor skirting boards, indirectly, but can be classified as wooden, they look gorgeous with laminate floors.
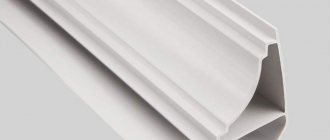
Solid oak plinth with a decorative strip that hides the heads of the fasteners
Form
The woodworking industry, in order to keep up with the times and remain competitive, is constantly updating its equipment and developing new wood processing technologies. Unlike previous years, when a nondescript fillet, at best with a chamfer, was offered to cover the joint between the wall and the ceiling, modern machines and various cutting tools make it possible to produce wooden plinths with a figured front part and a beautiful three-dimensional ornament, reminiscent of hand-carved wood. Expensive models represent serious competition to polyurethane skirting boards in creating classic interiors. Wooden plinth has become more “elegant”; now it is rightfully not only a functional, practical touch to the renovation, but also a real decoration of the interior, and in some cases, its highlight.
As for the sizes, each manufacturer has their own, but you can make to order the size and shape of a wooden plinth that the most intricate room design will require. But still, for typical repairs, manufacturers adhere to average dimensions that fit into the dimensions of ordinary apartments: the lower leg-sole adjacent to the floor is 1.5-2.5 mm, height is from 2.5 to 15 cm and above. In shape, a typical plinth is a “boot”, or a straight profile with a rounded chamfer at the top. Wide wooden plinth is not produced by all companies; the maximum height is 30 cm; as a rule, it is a plinth made of oak or beech.
Floor profile with a recess for a cable duct and a removable decorative insert, which hides the fasteners
Design features
Now on the construction market there are several models of wooden shaped planks, differing in the method of fastening. The simplest and most common option is ordinary wooden fillets, which are fastened with nails or screws through the entire body of the profile, breaking the front decorative layer. As a rule, this is a massive plinth made of oak, ash or beech in an inexpensive price segment. This fastening option subsequently requires sealing the fastener heads with a wax pencil, putty or plugs.
For any covering, you can choose wooden skirting boards to match; if you have a beech laminate, choose a beech skirting board; the matching texture largely smooths out the difference in materials
Natural veneered and veneered MDF plinths are manufactured in such a way that there are special grooves in the back with which the profile is fixed with clips. Of course, such fastening allows you to maintain the integrity of the front part of the whip, but if errors are made during installation, then secondary fixation is not always successful, the grooves become loose, and the plinth cannot be pulled tightly to the wall.
Wooden plinths with cable ducts are in great demand; they are somewhat more expensive in price, but you can hide all technical communications and fasteners in the groove, which is very important in modern renovations. Also popular is a wooden floor plinth, which has a groove on the front side for fastening with screws; after installation, it is closed with a decorative insert made of the same material as the profile.
Characteristics
No artificial material, despite its excellent physical and chemical properties, can compare with the beauty and warmth of wood. A wooden floor plinth looks much more impressive than any imitation; its exquisite texture harmonizes perfectly with an aristocratic floor covering: parquet or expensive laminated boards.
The quality of wooden plinths mainly depends on compliance with wood preparation technology. First of all, these must be planks with the correct geometry, not bent, without cracks; the permissible number of knots per linear meter depends on the type of plinth; for the manufacture of high-grade plinths, the presence of knots is unacceptable.
Modern devices allow you to install the profile without damaging the front side
Carefully dried and properly processed wood is very strong and durable. Before installing the baseboard, it is necessary to impregnate it with fire-resistant, moisture-resistant and antiseptic solutions, then it will not be damaged by high humidity and sun, as well as by temperature changes.
Wooden floor plinths are quite rigid; they do not have a soft edge, which allows the profile to fit tightly to the walls with slight curvatures, for example, like plastic counterparts. Therefore, before installing the profile, it is necessary to level the surfaces. You can “plant” the plinth with special glue or liquid nails, but then you will have to modify the surfaces, and such strips cannot be used again.
Color
The process of making the plinth ends with finishing work. The profile can be simply sanded, or with a finishing finish: tinted, brushed, aged, bleached, coated with various enamels and oils, glossy, special painting to match the texture of stone, exotic animal skin, etc. On top, such painting is additionally protected with a varnish that is resistant to mechanical stress. Such a huge selection of colors and textures allows you to use wooden plinths not only for parquet, but even for porcelain stoneware, marble and self-leveling floors. “Bare” skirting boards are matched to an identical floor covering based on the wood texture, and are painted after installation, at the same time as the floor.
Methods for cutting and joining baguettes
In the picture above you see the process of cutting the cornice along the miter box slot , but how to trim the ceiling plinth without a miter box ? We offer you several options with descriptions, as well as making your own template for a simple miter box. Let's consider all the methods in order:
- Try the cornice on the ceiling surface, draw a marker line along the ceiling surface;
- To the right of the selected corner, press the product to the ceiling, draw another straight line;
- At the intersection of straight lines, mark the plinth itself with a dot, then draw a line from the markings on the baguette to its lower corner. Using it you will cut the required angle on the fillet;
- The left corner is marked in the same way;
- After cutting both skirting boards, press them into the corner and check for accuracy of the cut. If there are gaps, trim the corners again. Remember - to prevent the strip from becoming shorter than the required length, do not shorten the unmarked part until you achieve an exact connection;
- After adjustment, the fillet is glued or screwed. The ceiling plinth for suspended ceilings cannot be attached to the surface of the ceiling material - it is glued only to the plane of the wall.
How to cut a corner of a plinth or baguette without a miter box. how to cut baseboard without a miter box
Attention: Do not press too hard on the foam or polystyrene foam when cutting it - it may lose its shape, and after gluing, dents and other irregularities will be visible.
The method is as follows: how to cut a ceiling plinth without a miter box along the outer corner of the ceiling:
- Press the plinth to the right of the corner and draw a line 200-300 mm long along the ceiling with a pencil or marker;
- Press the cornice into the left corner, make a mark to the first mowing line so that the markers intersect;
- On the plank, mark points at the intersection of markers and in the corner of the room;
- Connect the marked points on the cornice, cut the plinth according to the markings with the angle of inclination of the plank inward;
- Check the accuracy of the joint in place and trim again if necessary.
Classic baguettes are wooden, but they are difficult to join accurately without the use of a factory miter box and appropriate cutting tools. Wooden baguettes are formed with a miter saw, and if it is not available, with a carpenter's hacksaw with a fine tooth, an electric jigsaw or a hacksaw for cutting metal.
Important: A cornice made of polyurethane or aluminum is considered reliable in terms of moisture resistance. But polyurethane cornices cannot be exposed to temperature changes, so it is not recommended to install them in the kitchen or bathroom.
Whatever the baseboard, if the angle in the room is not 90 0. then it will be difficult to make an accurate cut for joining the planks. In old buildings (Stalinka, Khrushchev, and even Brezhnevka), the corner in the room can be formed as 88 0 or 93 0 (for a piermer), and cutting off such an end according to a template is problematic. Then how to properly cut the corner of a plinth without a miter box , without allowing large discrepancies and without using a complex and expensive tool? Use the presented method.
The picture shows cornices made from materials such as:
- Polyurethane (PPU);
- Foam plastic (PP);
- Polyvinyl chloride (PVC);
- Wood.
READ How to cut film onto a round table
To form an accurate internal corner from planks, perform the following operations sequentially:
- Try the baguette to the corner of the room, for example, on the right;
- Draw a line along the baseboard with a pencil;
- On the left side, do the same operations with the cornice;
- The point where the marker lines intersect will be the top mark, and the cut must be made from it;
- Place the cornice in the corner and transfer the crossing point to the bar;
- Use a pencil to connect the top and bottom marks on the cornice;
- Cut the ends according to the markings;
- For the second bar, the points are repeated in the same sequence.
Important: Before gluing the planks, check the accuracy of the cut: place the cornices in the corner, and if there are no gaps between the fillets, fasten them. If there are unevenness at the ends of the joining surfaces, trim the baseboards more precisely.
The following solution is how to accurately cut and how to glue the ceiling plinth without a miter box to the inner corner of the ceiling:
- Find out the width of the fillet;
- At the bottom, mark a point at a distance of the width of the plank;
- Connect the point of the upper corner with the point of the lower mowing line with a diagonal line, cut the product along this mowing line;
- For the second cornice, all points are repeated in the same sequence.
Working solutions for preparing baguettes without miter box
Another option for cutting the plank is to create some kind of structure from thick cardboard and a wooden block. The first step: you need to bend the cardboard at the angle that you measured in the corner of the room. Then press the cardboard onto the wooden block intended for cutting the corner and draw a line along which you need to cut the block - this will be your template. To cut the fillet, place a wooden template on top of the plank, and cut the required angle along the block.
Current offer on the construction market. Kindekor plinth made of foamed polystyrene, made using extrusion technology. Therefore, Russian ceiling strips do not have the disadvantages of polyurethane foam cornices. The cost of curtain rods is much lower than foam or other analogues.
But in old houses with “floating” corners, such sets are unlikely to be useful - in the kit you will only find angles at 45 0. 60 0 and 90 0. How to correct the situation? You need to approximately trim the end of the baguette. an angle of approximately 45 0. and then, over the course of several fittings, cut the angle locally to the required value.
When cutting the baguette and forming the outer corner, use this method:
- Press the baseboard to the right side of the corner so that the strip extends beyond the corner by at least its width;
- Use a pencil to mark the fishing line on the ceiling;
- Press the baseboard to the left side of the corner so that the strip extends beyond the corner by at least its width;
- Use a pencil to mark the line on the ceiling, mark the point where these two lines intersect;
- Copy the markings onto the plank, connect the dots with a line, cut the baguette along this mowing line;
- Check the evenness of the cuts by applying the prepared baguettes to the outer corner;
- Before gluing the ceiling plinth without a miter box, eliminate any errors (irregularities, chips, gaps, inconsistencies) on the surfaces of the fillets.
How to calculate the line connecting parts on their sides
On the back upper side of the plinth, a distance equal to its width is set aside. It is measured from the edge and a line is drawn parallel to the end. On the top face it forms a square with it, on the side, if its dimensions are different, an elongated figure.
When finishing a column or free opening, markings are applied as follows: from the corner of the plank facing the room, a hypotenuse is drawn from above, dividing the square in half. Its projection is transferred to the edge facing the wall. To do this, the space measured on the edge is also divided in half diagonally, drawing a line from the hypotenuse. The excess piece is cut along the two resulting diagonals.
If the joint is facing inward, the diagonals are drawn in the opposite direction.
Polyurethane
Polyurethane skirting boards are the most expensive products. The high cost is due to a large number of advantages, including excellent resistance to moisture, high mechanical strength, reliability and elasticity. For most situations, this option will be optimal.
However, there are exceptions - polyurethane does not withstand temperature changes well. If you place such skirting boards in the kitchen near the stove, then over time the polyurethane will deform and crack. The cutting of such fillets is carried out with a special knife, and no complications arise during the work.
The need to trim skirting boards
The installation of ceiling skirting boards (another name is fillets) must be carried out using the correct technology. However, there are no difficulties in it - the vast majority of fillets are mounted using glue. It is enough just to coat the product correctly and hold it in the right place for a while.
But questions arise regarding how to properly cut the ceiling plinth in the corners. When arranging a ceiling, there is always a need to process corners - but their value can have either a standard value (for example, a right angle) or a certain deviation. The latter case is possible if the room has a complex shape, or if it was not possible to level it during the renovation.
The fillets must fit perfectly evenly, regardless of the corners of the room. In addition, it is often necessary to cut skirting boards at the outer corners. To carry out such work correctly, you need to stock up on suitable tools and figure out how to cut the corners of ceiling plinths at home.
Duropolymer plinth
One of the latest developments from companies producing stucco and decor is duropolymer plinth. The new product is a product made of high-density polystyrene foam.
Duropolymer strips have increased wear resistance, strength, safety and biological passivity. Installed in rooms with high shock loads.
The properties of duropolymer are similar to polyurethane. Installation is carried out using glue or self-tapping screws. The service life is at least 10 years.
Cutting skirting boards for the ceiling without a miter box
You also need to figure out how to glue the ceiling plinth without a miter box - this tool is not always available. One of these methods involves marking skirting boards on the ceiling. Perhaps the only drawback of this method is the fact that holding the bar motionless while simultaneously applying markings is not very convenient. Otherwise, the method is quite reliable - the measurement accuracy is higher, since when applying the plinth to the place, all errors become noticeable.
Another method involves cutting the baseboard at an angle. The edges of the two joined pieces are cut at right angles. One of the planks is applied directly to the corner, after which a fishing line is applied to the ceiling along the contour of the plinth. The same operation is repeated with the opposite plinth.
The point where two separate mowing lines intersect is the mark according to which the baseboard will need to be cut. The workpieces are placed back in their places one by one, and the cutting line is marked on them. A straight line is drawn from the mark to the opposite edge of the part. The skirting boards are cut in accordance with the markings applied to them and joined in place. This method is an excellent answer to the question of how to connect the corners of a ceiling plinth without a miter box, especially when it comes to internal corners.
Styrofoam
Foam fillets are one of the cheapest options. However, the advantage in the form of low cost is compensated by a large number of disadvantages. In particular, foam itself is a fairly fragile and soft material that is very easy to break. Even if you simply squeeze such a product in your hand, it can become deformed.
Due to their low strength, it is very difficult to process foam skirting boards. If you have little experience in cutting such parts, then most of them will become unusable during the process, so all the benefits from the cheapness of the skirting boards will be neutralized. To cut foam fillets, a hacksaw or a well-sharpened knife is usually used.
Types of floor skirting boards
We are not talking about shape and assortment, but about materials. The installation of skirting boards often depends on the material. Some installation methods are not compatible with all. So, floor skirting boards are made from four types of materials:
- wood;
- MDF;
- plastic;
- metal
There are different floor skirting boards, as well as methods for installing them.
Metal skirting boards are often installed in offices, although in ultra-modern high-tech, loft, and minimalist styles they may also be appropriate in an apartment. But, most often, wooden products are used in an apartment or house. In recent years, MFDs and plastic have also become popular. They are easier to match to the color of the flooring or door, because they are often made using the same technology.
Tree
Ceiling plinths made of wood differ from their analogues. Wood is quite heavy, which affects the weight of products made from it. As a result, the skirting boards are quite dense, very resistant to mechanical damage and hard, which allows you not to be afraid of accidental deformation during installation or cutting.
READ How to cut a floor plinth correctly
To trim a wood fillet, it is best to take a fine-toothed hacksaw designed specifically for fine work with this material. However, a good option would be a high-quality metal sheet.
Determination of quantity
First you need to determine the required amount of plinth boards and fasteners. The total length of the room should be divided by the length of one segment of the baseboard. But it is almost impossible to determine the exact amount. Sometimes the amount of waste can reach two hundred percent.
In order to calculate the required amount of plinth boards as accurately as possible, it is necessary to determine the texture and shape of the source material. Planks made from different types of wood will vary in length. Then you need to calculate the required number of whole planks and the number of smaller segments, then add up the indicators and calculate their total number. At the end you need to add five to ten percent for the margin.
Ceiling plinth - fillet
To do this correctly, it is important to strictly follow existing recommendations and rules for finishing work. And then the result will please you.
Even inexperienced repairmen have no difficulty hanging the ceiling plinth. They are worried about something completely different: how to properly cut the ceiling plinth? In fact, almost every room, no matter how intricate its shape, is equipped with corners.
And in these inner corners, the individual elements of the plinth should be nicely and evenly joined. And in rooms with a particularly complex configuration, you will have to be smart about the external corners. Let's try to figure out what to do in each of these situations, and how to cut out the required part using the available tools.
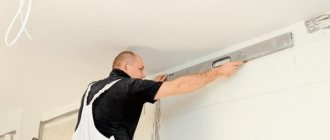
Aligning walls and measuring corners
It is necessary to level the walls, otherwise it will be impossible to fix the new skirting boards as needed. This is especially important to do during renovations in block and brick multi-storey buildings.
Before installing the plinth, it is important to level the walls
Measure the angles using a tape measure and a building square.
We cut the ceiling plinth in the corners at home without a miter box correctly: Review Video
Ceiling plinth is a narrow decorative demarcation between the ceiling and adjacent walls.
They are very convenient for masking joints on walls and ceilings, especially if they have a different structure and are not made very carefully.
Its presence makes the room design clearer and more complete.
People often wonder: how to properly and accurately decorate a room with ceiling plinths?
DIY miter box. How to join the plinth???
This is especially true for those cases when the home owner prefers repairs done with his own hands.
Sources:
https://macter-potolok.ru/kak-otrezat-potolochnyj-plintus-bez-stusla.html https://td-neko.ru/info/articles/otdelochnye-materialy/kak-otrezat-potolochnyy-plintus-bez -stusla/ https://pod-potol.com/prinadlezhnosti/plintusa-i-bagety/kak-pravilno-obrezat-potolochnyy-plintus-v-uglakh-varianty-i-sposoby-dlya-plintusov-iz-raznykh-mater .html https://domsdelat.ru/potolok_svoimi_rukami/kak-pravilno-obrezat-potolochnyj-plintus-sovety-i-instrukciya.html