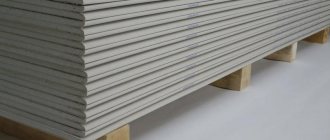
01/18/2017 Drywall is the most popular material for renovation of premises, used for covering walls, ceilings, and creating partitions. GVL 10, 12 mm (or drywall) can be mounted in different ways. Therefore, it is better to consider all the options in order to choose the most suitable one for each specific case. Plasterboard sheets are attached mainly using a frame profile structure. Sometimes special glue is used to fasten sheets, but fastening to a profile is more reliable.
This method also allows you to implement design ideas: arches, niches, figured elements. The type of frame will depend on the purpose of the entire structure and the materials that will be used for it. Fastening elements for them are selected taking into account the future load on the structure and the strength expected from it.
The metal frame for fastening GVL consists of guides, or starting, and load-bearing, or rack-mount elements. To choose the right materials for making a frame, you need to consider all their types.
Tips for installing a profile for plasterboard yourself
Not so long ago, drywall installation was done using a wooden frame.
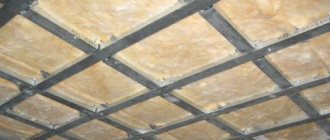
But it was not reliable and quite difficult to install the frame structure, so it became obsolete. It was replaced by a metal profile, durable and reliable. Installing drywall will allow you to level out unevenness on the wall surface, lay communications without problems, soundproof and insulate the walls by filling the gaps with mineral wool slabs.
Nowadays, almost all types of metal profiles used in the installation of plasterboard frames, wall cladding and ceiling installations are manufactured at domestic enterprises.
They are made by cold rolling from steel strip, which is coated with zinc. The thickness varies from 0.56 to 0.6 mm. The main products are:
- ceiling profile (PP);
- ceiling guide (PNP);
- rack-mount (PS);
- guide (PN.);
- corner (PU).
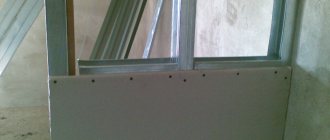
By installing a galvanized profile, the frame is assembled. The frame consists of guides, as well as racks, which are attached to the wall with brackets. Vertical racks are a ceiling profile that is mounted together with a guide ceiling profile. The brackets are attached to the surface of the rack with self-tapping screws. Using a cutter, the rack and guide profiles are joined to each other.
The rack profile has grooves that run along the entire length. Two side grooves center the screws that are screwed into the profile, and the central one is where the plasterboard panels join. For the installation of communication systems that are carried out inside, there are special holes with which the profile backs are equipped. They are located at the end and their diameter is 33 mm.
Installation technology
And now more about the technology of installing drywall. The ceiling and floor, the place where the structure will be mounted, guides, racks and points at which anchors for rack profiles will be fixed are marked. The distance between the wall and the structure should be minimal; for this, a ceiling profile for plasterboard is used, the width of which should be minimal. In order to prepare it for installation, a sealing tape is glued to it; it increases the sound absorption property of the structure.
The profile is attached with dowels to the ceiling and floor, the distance should be 0.6 m. The ceiling guide profile has holes with a diameter of 8 mm, the distance between them is 250 mm. If you plan to lay tiles on top of the drywall, then the distance must be reduced to 0.4 m, but in other cases the distance will remain the same.
The seal is used for sound insulation; small pieces of it are placed between the wall and the bracket or other supporting structures. The next step is to insert the ceiling profile into the guides and fix it in the hangers.
All protruding parts must be cut off. It is best to cut it with metal scissors. Using a level, the accuracy of the installation is checked. The racks should be 3-5 mm shorter than the distance between the guides. When the frame is ready, it's time to fasten the drywall with self-tapping piercing screws, their length will be from 25 mm and beyond.
Installation algorithm
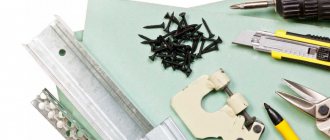
The tools have been prepared, the profiles and fasteners have been purchased - it’s time to start installing the frame. For clarity, we first present a list of all actions for installing the frame in order of priority.
- Dismantling the old coating
- Markings for hangers
- Marking for guide profiles
- Installation of hangers
- Installation of guide profiles
- Installation of ceiling profiles
- Aligning the frame plane
- Installation of jumpers
Now we perform each stage sequentially.
Sheathing process
Drywall sheets are attached in a vertical direction. If the sheet is not enough for the entire length of the room, then small sections of the guide profile are made at the horizontal joints. Be sure to use a planer to rough up the ends of the drywall sheets. When doing DIY repairs, try to avoid joints in the area of windows and doors. If this does happen, cracks may occur. But this can be avoided if you install an intermediate profile at the joints.
During installation, a mandatory gap of approximately 10-15 mm must be left between the floor and the sheet of drywall. It is also necessary to stick a separating tape and create a gap, it should be at least 5 mm between the overlap and the edge of the drywall sheet. The gap is covered with a putty solution, and the edges of the tape are cut off during final finishing.
To protect the outer corners of plasterboard sheets, they are covered with protective corners, which are completely puttied during final finishing. In places where plasterboard sheets meet door frames, the distance between the profile for plasterboard should be minimal, and it should also be decorated during final finishing.
Additional and useful information during installation
There is also a frameless method of installing drywall, in which you can easily mask the seams at the joints and seal the surface. When using this method, reinforcing tape is not needed for horizontal end seams, because A very strong putty is used to seal them.
Do not forget that when doing DIY repairs, the edges of the plasterboard sheets must be cleaned with a roughing plane, and chamfering must be done using an edge plane. Also, in addition, all the edges of the drywall are processed with sandpaper. The screw heads must be at least 1 mm deep into the surface of the drywall. All seams at the joints must be primed and then puttied.
Which is better: heated floors or radiators?
Warm floorBatteries
Often when installing it yourself, it is used for insulation and soundproofing of walls. To do this, any insulating material you choose is placed in the space between the frame and the wall, after which the frame is sheathed with sheets of plasterboard. Slopes are also installed, filling the space between drywall panels and window or door openings with insulation materials.
Plasterboard sheets with moisture-resistant properties are mounted using special screws that are intended specifically for this job. They have a sharp cone head and countersink stripes. The distance between the screws must be maintained no more than 300 mm.
If there are a lot of utilities running along the wall, then during installation you need to use a slightly different set of guide profiles (50(65; 75; 100)X40 mm) as well as rack profiles (PS 50(65; 75; 100)X50 mm). This cladding is more like a huge false panel, but the technology for installing drywall remains unchanged. The only difference is that you do not need to attach the rack profiles to the wall, only if the height of the surface you are covering is no more than 4.2 m, and if more, then the racks are attached to the wall at a distance of no more than 1.5 m.
Requirements for lumber for sheathing
Wooden sheathing made from plasterboard may have high humidity during the purchase process, which can subsequently cause warping of the material. The shrinkage percentage will be less if the moisture content of the material is below 22%. It is this value that indicates that the material in front of the consumer is dry. When purchasing bars with natural moisture, you may face the risk of their geometric parameters changing over time. This will certainly affect the evenness of the drywall installation.
As for the wooden sheathing for drywall, the lumber may belong to the first or second grade. The material in this case should not have increased strength. An important factor when choosing is the deviation from the curvature and cross-sectional dimensions
It is important to exclude material that has wane. But if it is still found after purchase, you should additionally use an antiseptic
It is applied in several layers, sparing no composition.
Recommendations for choosing the size of bars
The timbers for the frame can be selected with different sections to save on lumber. Thus, support posts must be made of products with a minimum cross-section of 75 x 25 mm. Guides and horizontal struts can be installed using 50 x 25 mm minimum lumber. Values greater than those specified are permitted, but less values are not.
The material must be selected taking into account the equivalent thickness. When cutting the bars to length, you should be guided by the fact that they should be 4 cm less than the height of the walls. This will provide a compensation gap between the sheathing and the ceiling. After completion of the installation work, these gaps will be covered with skirting boards or shaped slats.
Expert advice
- The moisture content of the lumber used in the work should vary from 12 to 18%.
- If you plan to install a partition with a height of up to 4.2 m, you should use a beam with a section of 60 x 50 mm. The thickness of the sheet will vary depending on the height of the wall. If this value is 2.8 m, the sheet thickness should be 12.5 m. As the wall height increases to 4.2 m, an 18 mm sheet should be used. And as an intermediate value there is a 14 mm sheet, which is suitable for a wall 3.6 m high.
- When carrying out fire retardant treatment, it is necessary to achieve the indicator of the first group regarding fire safety.
- The step between the rack bars should not be more than 60 cm.
- If the master cannot choose between self-tapping screws, tenons and nails, the second option should be preferred - with its help you can achieve a rigid connection.
- The minimum thickness of the wall on the frame can be 85 mm.
Suspended elements on the surface of drywall
Plasterboard is laid so that some interior elements or equipment can be attached to their surface. You must first take into account the weight of the object being attached, and install special jumpers from the rack profile, which will serve as reinforcement for the frame. All objects will be attached to them subsequently.
If the weight of the object that you will fasten is no more than 30 kg per 1 m / p., then it can be fixed with dowels anywhere on a sheet of drywall. If the weight of the object is even less, then it can be hung using hooks or dowels made of plastic or metal with a diameter of 6-8 mm, this can be a shelf or cornice.
Now you know how to make a drywall profile with your own hands, so you can safely get to work.
Installation of profiles for drywall - simple assembly of complex structures
Nowadays, it is impossible to imagine interior decoration during the renovation of residential premises without the use of plasterboard - rigid panels that allow you to quickly create structures of various geometric shapes. In most situations, before installing the gypsum board sheathing, a frame is created, which determines the rigidity and shape of the interior elements being created. To assemble the lathing, you need to know what to make it from and how, so that the structure meets the strength requirements and ultimately acquires the desired configuration.
To assemble battens with rectilinear geometry for subsequent sheathing with sheets of plasterboard, you can use lumber - wooden beams or slats. However, wood products used for these purposes are gradually becoming a thing of the past. There are several reasons:
- fragility of wood materials;
- difficulties in selecting products of the correct geometric shape;
- deformation of the elements of the supporting structure made of wood under the influence of changes in humidity and temperature;
- difficulties when trying to create a structure of irregular geometric shapes (arches, elements of a multi-level ceiling and designer zoning partitions).
To create a frame for drywall, metal profiles are most often used.
Nowadays, to create load-bearing structures sheathed with gypsum boards, they prefer to use profiles - galvanized metal products, which are produced specifically for these purposes. The profiles at the end are U-shaped, and the top of the letter is called the back, and its “legs” are called shelves. The dimensions of the shelves and backrest vary depending on the purpose of the galvanized products. There are four main types of profiles:
- ceiling guide (UD), having end dimensions of 28x27 mm;
- load-bearing ceiling (CD), end dimensions – back 60 mm, shelves 27 mm;
- partition guide (UW), shelves 40 mm, back 50-100 mm;
- load-bearing partition - the back varies within the same limits as the previous product (the thickness of the partition depends on this size), shelves are 50 mm each.
The assembly of most types of frames is based on the use of the listed products. Auxiliary devices are adjustable and straight hangers that attach load-bearing profiles to capital structures, and single-level connectors (crabs). Fixing metal products to each other when installing a profile for plasterboard is carried out with small size (9 mm) metal screws, which can be galvanized (white) or phosphated (black). The hangers that hold the supporting profile are attached to permanent structures with dowels or self-tapping screws (depending on the structure of the material).
Recently they began to produce arched (flexible) profiles, although such a product can be made from UD without much hassle by cutting the shelves.
Whatever type of suspended ceiling structure made of plasterboard is intended - single or multi-level, first we install the basic sheathing. At the beginning of the work, we mark the horizontal plane, for which we use a water level or a laser level and painting thread. As a result of the procedure, horizontal stripes remain on the walls, which serve as a guide for installing the guide profile. The latter is fixed completely around the perimeter with self-tapping screws or dowels with a fastening step of about half a meter.
Now it’s the turn of the supporting profiles. Before installing them, you need to decide on the lathing scheme. There are two options. The first provides for the installation of longitudinal strips at a distance of 60 cm from each other with the installation of additional transverse partitions in increments of 50 cm. The second version of the frame provides for a distance of 40 cm between the main profiles with the installation of cross members only at the places of longitudinal joining of plasterboard sheets. Both schemes are worthy of attention and meet the strength requirements, but the first option is more convenient if you plan to install a second level of the ceiling structure.
First, we insert longitudinal strips into the grooves of the guide profiles, cut to the required length with metal scissors, and distribute them in increments corresponding to the chosen version of the sheathing scheme. The next step is to attach the hangers to the ceiling. We fix the products with two dowels opposite each load-bearing element of the frame at a distance of 50-60 cm from each other. Having secured the hangers, we raise the supporting profiles above the normal level of the mounted frame and temporarily fix them with the side plates of the hangers in this position.
2-3 threads or fishing lines are stretched across the longitudinal strips at the level of the lower flanges of the guide profiles. Each longitudinal structural element is installed and fixed to the hangers so that the back does not reach the approximate threads by 1-2 mm. Having fixed all the main load-bearing planks, we install the crossbars using crabs, and additionally fix each partition to the ceiling using a suspension. At this point, the installation of ceiling profiles under plasterboard is completed - you can sheathe the assembled frame or begin installing the second level.
To assemble the frame for plasterboard on the wall, the same products are used as on the ceiling. The difference in the process itself is that a vertical plane is formed and there are obstacles in the form of door and window openings that need to be additionally “bypassed.” The principle of assembling the sheathing is also not much different. First, the guide strips are fixed to the ceiling or ceilings. Using a plumb line, vertical landmarks are marked on adjacent walls, according to which guides are also installed. A line is drawn between their lower edges, which will help complete the formation of the vertical perimeter. Along the floor, the guide profile is not fixed completely - gaps are made in the doorways.
First, the guide strips are mounted on the ceiling
Vertical racks (CD profile) are installed in increments of 60 cm (standard) or 40 cm (reinforced version), starting from one of the walls. Regardless of the location of the main posts, additional load-bearing elements are mounted along the side edges of the openings. When installing profiles under drywall, the wall hangers are attached in a different order. The first suspension from below is fixed at a distance of 50-60 cm from the floor surface, the second - at the same distance from the first. The third fastener is fixed approximately in the middle of the distance from the ceiling (floor) to the installation site of the second suspension. Additional fasteners are installed only in the event of an expected increased load on the structure (installation of a kitchen unit, boiler, gas wall-mounted boiler or water heater).
Racks are also positioned along threads stretched horizontally or diagonally. In places where mechanical damage to the plasterboard sheathing is most likely (about a meter from the floor level), the structure can be strengthened by installing transverse partitions. The same sheathing elements are additionally mounted in the places where wall items are supposed to be installed. The crossbars are also reinforced with hangers that rigidly fix them to the main wall.
The principle of installing a profile under drywall when assembling a partition frame is somewhat reminiscent of installing a wall structure. The work process begins with beating the perimeter of the vertical plane and fixing the guide partition profile. The guide strip is not installed only on the section of the floor corresponding to the opening for the door or arch that is supposed to be in the partition. The frame posts (CW profile) are also installed in two distances between them (40 and 60 cm). The pitch is selected depending on the expected load on the structure.
Regardless of the distance between the load-bearing elements of the sheathing, to form the opening, additional racks are installed so that the profiles are turned back to each other (the door frame will be attached to them). To give the partition structure additional rigidity, wooden blocks of the appropriate cross-section are placed inside the rack profile. This is done if heavy wall objects will be hung on the partition.
You should also remember to make an indent of 1 - 1.5 centimeters from the edge of the sheet to the place where the screws are screwed in. There should be no chips on the edges of the slabs. When this happens, the self-tapping screw must be removed and a new fastener must be installed 3-4 centimeters from the chip site.
Ceiling structures constructed using plasterboard slabs are one of the popular floor finishing options. They allow you to give the surface to be designed any shape.
Briefly about the main thing
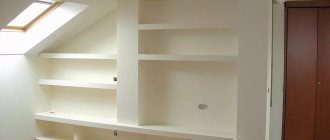
If you use a profile frame for drywall, the structure will be reliable and will last for many years. The cladding will perfectly hide all defects on the walls and allow you to arrange the interior to your liking. You can add shelves, niches, make partitions in rooms and build arches.
But in the process of work, one should not forget that the cladding takes away a small area from the room. This is especially important for those rooms that are already small in size.
Despite the fact that wooden frames do not harm the environment, they are used less frequently in the construction of frames due to the fact that the material does not have a long service life. They are used only in rooms with low air humidity, where the elements will not become covered with fungus and rot.
Ratings 0
Drywall mounting options
Let's talk about the main thing about cutting the profile correctly; it is better not to perform this process using a grinder, since it leaves unevenness along the edges of the profile, after which the galvanization begins to peel off from it - it becomes susceptible to corrosion. It is better to use scissors, which can be used to make neat, even cuts. If you have to cut a lot of profile, that is, your hands will get tired, then use electric scissors, which are much easier to use.
Self-tapping screws must be inserted every 10–15 centimeters. Their cap should not stick out from the sheets of drywall. It should be at the same height as the surface of the drywall sheet. But here you need to be careful that you shouldn’t push the hat in too deep.
The head of the self-tapping screw should go a maximum of 2 mm deep into the sheet. In no case should you install drywall sheets close to the floor or ceiling, since moisture accumulates there, you need to make a distance of 1 centimeter between the ceiling or floor and the drywall; later these holes can be filled with putty or cover it with decorative elements. If you decide to take a thorough approach to studying the subject of drywall, before you start working with it, we recommend reading about tools for drywall. Also, depending on the shape, purpose and features of the plasterboard structure that you will build, it is necessary to vary the fastening parameters, installation distance, maximum weight of profiles, screws, plasterboard sheets and all other materials. According to materials, the profile differs only in two types.
The profile can be made of wood and metal. A wooden profile is highly susceptible to the temperature and climate in the room, that is, it will change its size and properties, but only as the temperature and humidity of the room where the wooden frame is installed. For these reasons, we recommend using a metal frame that will not be subject to changes from temperature and other factors.
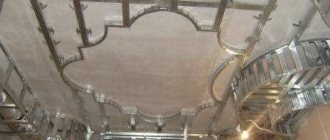
Construction of a semicircular frame
Semicircular plasterboard structures are used for the following design solutions:
- creating an arch;
- establishing rounded corners of the room;
- construction of multi-level ceilings;
- creating armholes and wall edges.
To build such frames, you can buy ready-made elements. But it will be cheaper and more practical to create them yourself. If you buy a ready-made structure, you will need to look for elements of the required length and then fold them into the required circular shape.
In order to make a semicircular frame yourself, you need to cut several wedges in the profile along the edges. This will allow you to bend it into the desired shape. Further work is no different from the above processes.
Required distance between profiles under drywall
Partition profiles for suspended ceilings. They act as a rigid structure or a decorative element. Rigidly fixed to the surface of the floor and ceiling; The strength of the frame for plasterboard walls is determined by many factors: the quality of the racks, fastening material, as well as the number of attachment points and the distance between the profiles. The number of racks in the frame will ensure the reliable fit of the sheathing sheets, as well as the number of drywall screws with which they will be attached. Separately, the racks are fixed with suspensions to the load-bearing surfaces, which strengthens the rigidity of the entire structure. However, the types of frames for ceilings and walls are different. However, you should not skimp on material; if you need to install the required number of racks, then they must be present.
Such savings will simply be dangerous in the further operation of the structures. One sheet of drywall requires 3 rack profiles: 2 at the edges and one in the middle of the sheet. Stretching the distances between the rack profiles leads to a significant weakening of the entire structure, which can lead to its destruction.
Metal frame for plasterboard on the ceiling wall. They are assembled to create suspended ceilings, connected by suspensions to load-bearing floors;
Cost of gypsum plasterboard partitions
If you are going to install the partition yourself, then the costs of its construction will consist only of the prices of materials.
Let's calculate the cost of a plasterboard partition per m2 from our example. Let's count several options: from a thin profile, from a thick profile and from a thick profile with sound insulation. GCR is applicable, not moisture resistant. Prices for materials are taken from the Leroy Merlin online store.
| Partition option/material | Quantity of material | Price | Cost of thin profile | Price | Cost of thick profile | Price | Cost of thick profile with sound insulation |
| GKL 12.5 mm | 10 pieces. | 267 | 2670 | 267 | 2670 | 267 | 2670 |
| Guide profile | 4 things. | 85 | 340 | 228 | 912 | 228 | 912 |
| Rack profile | 11 pcs. | 105 | 1155 | 231 | 2541 | 231 | 2541 |
| Noise insulation | 3 packs = 17.3 m2 | — | — | — | — | 734 | 2202 |
| Sealing tape | 1 roll 30 m | 174 | 174 | 174 | 174 | 174 | 174 |
| Self-tapping screws for metal | 1 pack 22 pcs. | 27 | 27 | 27 | 27 | 27 | 27 |
| Self-tapping screws for gypsum boards | 1 kg | 284 | 284 | 284 | 284 | 284 | 284 |
| Driven anchors | 1 pack | 350 | 350 | 350 | 350 | 350 | 350 |
| Dowel-nails | 2 packs = 20 pcs. | 18 | 36 | 18 | 36 | 18 | 36 |
| Total, incl. per m2 | — | — | 5034 rub. 395 RUR/m2 | — | RUB 6,994,549/m2 | — | 9196 rub. 722 RUR/m2 |
If you want to entrust the construction of the partition to a construction team, then you need to add the cost of the workers’ services to the above figures.
Here are approximate prices for the cost of installation of plasterboard partitions, price per m2:
- single-layer - from 400 rubles;
- two-layer - from 570 rubles;
- sound insulation - from 80 rubles.
Please note that the cost of installing (constructing) a plasterboard partition depends on the region, the complexity of the design and the remoteness of the facility. Therefore, when calculating, always check prices with construction companies.
In order to roughly estimate the cost, we can assume that the cost of installing a square meter of a plasterboard partition is equal to the cost of materials for its construction.
How to correctly calculate a profile for drywall
- “UD” guides. They are usually installed around the entire perimeter. Such profiles are responsible for the strength of the assembled frame. Rack profiles are attached to them;
When working with drywall, you will still have to create a diagram of the upcoming structure, as well as calculate the required amount of materials, including profiles.
- multiply the resulting number (75) by the number of jumpers for the entire frame;
- divide the result of multiplication by 300 cm (the length of one guide rail);
- As a result, we get a figure that needs to be rounded up and we get the desired number!
Note! All vertical slats must be oriented in the same direction, i.e. they must all be attached to one side (it is better to orient along the “empty side”).
- rack “CD”. Their installation is carried out between guiding profiles. They are usually attached every 60 cm. They are used to screw drywall sheets to the created frame.