- Reasons for demand
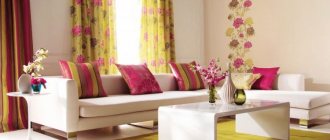
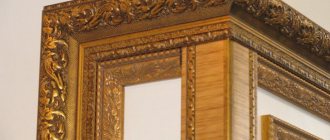
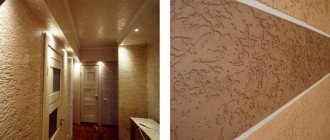
- Decorations for walls and ceilings
- Arches
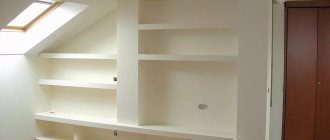
- Unusual racks and shelves
- Niches
- Decorative partitions
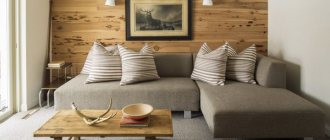
- Headboard
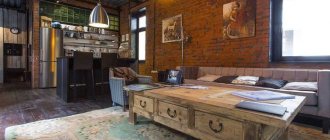
- Coffee table
- Fireplace
- Column
- Bar counter
- Interesting examples
Drywall is a building material that can be called one of the most versatile. It is successfully used not only for the manufacture of ceilings and partitions, but also for creating exclusive designs. Let's look at the most interesting options for decorating a room using plasterboard decor.
Features of the material
Drywall is widely used in construction and finishing work all over the world. This is a type of building material consisting of sheets of cardboard, between which there is hard gypsum dough, supplemented with various fillers.
Depending on the additional properties, ordinary (GKL), moisture-resistant (GKLV) and fire-resistant (GKLO) plasterboard are distinguished.
Drywall figures, depending on their complexity and functional load, are mounted directly on the wall, ceiling or on a special profile frame. Thanks to the pliability of the material, you can create all kinds of three-dimensional patterns, waves and other decorative elements. Having made the necessary calculations, it is possible to install a simple rectangular structure with your own hands.
The undoubted advantage of this building material is its environmental friendliness , which makes it possible to use it in a children's room. Due to the presence of moisture-resistant types, plasterboard is suitable for creating decor in the bathroom and kitchen. By covering the wall in the bedroom, you can achieve additional soundproofing of the room.
Types of decor
When developing the design of a room using decorative elements made of plasterboard, it is necessary to clearly understand what function they will perform. Depending on this, the installation method, type of material and additional fastening devices will differ. We can conditionally distinguish between functional and purely decorative elements.
Functional decors, in addition to decorating the interior, can also serve as storage space; they can also be a demarcation structure or a way to hide communications.
Since the material can be given almost any curved shape, the design of the arch is limited only by the customer’s imagination. This element is used to decorate both doorways and individual sections of the wall, using part of the ceiling. Arches can be blind or with through openings for arranging vases, figurines and other decorative items.
Often, additional lighting is installed in a plasterboard structure, which is used as a separate light source or backlight for decorative elements.
It is not always possible or necessary to install separate cabinets or shelving in rooms. In this case, a technique such as installing a niche made of plasterboard will be useful. This design has a number of advantages over a traditional storage system.
- The niche is built as an inseparable part of the wall, which allows it to be integrated into the interior as organically as possible.
- The parameters are set by the customer; there are no restrictions on sizes and shapes.
- During the final finishing, you can decorate it in the same way as the walls of the room, then the structure will not stand out. This is true for small spaces. Thanks to this technique, the space will not be visually cluttered, but there will be room to place the necessary things.
- Another option is to make the niche a separate bright element of decor. To do this, you can paint it in a contrasting color, install mirror panels on the back walls, install lighting or lay out a mosaic pattern.
Shelving or false walls
Often, for zoning space, this type of plasterboard decor is used, such as small wall structures. With their help, you can highlight functional areas without burdening the interior.
In order not to deprive part of the room of a light source, false walls are often made through. In this case, you get a kind of rack that is suitable for arranging all kinds of objects: books, vases, figurines, photographs.
Which is better: heated floors or radiators?
Warm floorBatteries
Designers also use drywall as a material to create various volumetric decorative wall or ceiling figures. Natural motifs are very popular. Using a rigid frame, drywall bends smoothly and takes on the shape of, for example, a flower, a butterfly or a cloud.
On the wall, such a figure is usually highlighted in a contrasting color, and on the ceiling, in order to avoid visual pressure, it is painted in a neutral tone, but backlighting is installed.
Reasons for demand
Drywall is in great demand in the modern market, because it has many positive qualities. We can highlight the following most significant features of this material for consumers:
- safety (the material consists of sheets of cardboard and gypsum);
- ease of use (with the help of plasterboard sheets you can create niches, arches and much more);
- light weight. (the drywall is held on by self-tapping screws, it is attached to the frame precisely on them, after which you can immediately begin finishing work; in some cases, the frame is made of slats and bars, but it is still better to use a galvanized profile, as it is more reliable and convenient in application).
However, drywall also has a drawback: it is not resistant to high humidity. It is also worth noting that plasterboard sheets are more fragile than other materials. However, this does not make drywall less popular.
Dry processing method
This is a simple option for creating figures from gypsum board, for which arched material is used. The thickness of the sheets is only 6 mm, thanks to which the plasterboard easily bends and takes the desired shape. When dry, the sheet can be bent 10 cm.
Dry method of bending drywall Before making a bend, construct the desired frame from a metal profile, on the sides of which cuts are made. The plasterboard element is placed against the profile and begins to be screwed with self-tapping screws for gypsum boards, carefully bending it along the structure. The screw pitch is 25 cm.
Important! Do not bend drywall using too much force, as it may break. The work must be carried out as carefully as possible. If the curvature is more than 10 cm, then small V-shaped slits can be made on the opposite side of the bend. The slots are made parallel, on the opposite side of the bend.
Example of arched drywall This method is simple, but the cost of arched drywall is slightly higher than regular drywall.
Which drywall to choose for curved walls and ceilings
Flat and three-dimensional figures are best made from arched or flexible plasterboard, the thickness of which is 6.5 cm. Its main distinguishing property is its high flexibility, which makes it possible to easily create convex and concave surfaces.
When working with arched drywall, there is no need to wet and treat the surface with a needle roller to increase elasticity. The cost of flexible gypsum plasterboard is higher than that of conventional material, but it pays off due to the strength and long service life of the created structures.
It is possible to use ordinary ceiling or wall plasterboard with a thickness of 8 to 12.5 mm, but in this case you need to be prepared for the fact that it is much more difficult to give it the desired shape.
Why gypsum board?
Everything is simple here - this material has several advantages:
- Extremely high prevalence. You can buy plasterboard sheets almost everywhere. As well as various components for working with it (profiles, screws);
- Drywall is plastic. Below we will describe in detail how to bend this material correctly. This will help you create literally anything, not limited to right angles and smooth surfaces;
- Easy to use. The skills of installing a frame and attaching drywall to it come quickly.
Important! In the complete absence of any knowledge in this area, it is not recommended to create complex figures, especially in order to obtain a 3D effect. The best choice will be simple designs that will help make your home original, and which we will talk about later.
Preparation for work
Example of a frame for a wave pattern
If you decide to change the design of the room and create plasterboard patterns on the wall yourself, then you need to know what tools and materials will be needed to install gypsum boards. Tools and materials for installation
In order to line a room with gypsum board sheets yourself, you will need the following tools:
- Screwdriver and drill;
- Metal scissors;
- Water level and plumb line;
- Compasses and patterns;
- Knife for cutting plaster.
The main frame for mounting gypsum board sheets
Regardless of what patterns or design you plan to make, the following materials will be required:
- Metal profiles (guides and load-bearing), as well as a flexible profile if you decide to build an arched structure.
Advice. The sheathing can also be made from wooden beams. But wood is a rather capricious material that requires additional antiseptic treatment and moisture-repellent impregnation. It is also worth considering that wooden sheathing is heavier than metal, this puts additional load on the walls of the building and significantly makes the entire finish heavier.
Installing figured shelves on a gypsum board wall
- Self-tapping screws for metal;
- Suspensions and crabs for attaching the material to the frame;
- Plasterboard wall or ceiling.
Important. When choosing gypsum boards for cladding a room, pay attention to the complexity of the finishing planned. If the patterns on the plasterboard wall are not complex, then it is better to opt for a thickness of 12.5 millimeters. But if you decide to make a complex design with arched elements, then it is better to buy a ceiling gypsum board, 9 millimeters thick.
Preparing the walls
The main frame for installing gypsum board sheets
Before installing the metal frame, the gypsum board installation instructions recommend preparing the walls of the room. They must be cleaned of old finishes, dirt, dust and fungus. After cleaning, the area to be coated should be treated with a deep-penetrating antiseptic primer. This is necessary to prevent mold and mildew from appearing under the finishing.
Large potholes and cracks must be plastered with cement mortar. In some cases, craftsmen advise additional insulation of the front wall of the room facing the street. The insulation can be mineral wool or expanded polystyrene.
Tools for creating figures from drywall
To work you will need the following set of materials and tools:
- construction knife;
- metal scissors;
- drywall cutter with replaceable blades;
- level;
- roulette;
- perforator;
- drill;
- screwdriver;
- self-tapping screws;
- dowels;
- nails and screws;
- Bulgarian;
- circular saw;
- metal profiles;
- pendants;
- roller;
- rule;
- chockline;
- awl;
- cutter;
- construction markers;
- squares;
- stencils of different shapes.
Preparatory stage
Before you begin to implement your plan, you need to prepare the room:
- Remove furniture and all functional and decorative furnishings.
- Remove plaster and wallpaper.
- Prime the cracks.
- Thoroughly clean the surfaces of walls and ceilings from dust.
Sheets of drywall should be kept in a horizontal position for several days to acclimatize to the temperature and humidity in the apartment.
How to choose the right material
The choice is based on the level of complexity of the figure that is planned for production:
- 6mm sheet is used for bends, radii, circumferences of the part, and its end sides;
- 9 mm sheet is used to “sew” all planes of the structure;
- The 12.5 mm sheet serves as the basis for the entire structure and its supporting elements.
If necessary, you can easily hide communications and electrical wiring in drywall so that the required pattern is located exactly in the place where it was intended for the project. This contains another element of the uniqueness of drywall as a finishing material - its versatility.
Glue mount
This is the easiest way to make a beautiful figure on the wall; just cut out the desired structure from drywall and glue it to the wall using silicate glue or tile mortar.
Attaching drywall with glue If desired, you can glue the drywall in several layers to make the figure on the wall more voluminous.
No. 1. Plasterboard figures for decorating ceilings and walls
Drywall is often used to create a perfectly flat surface of walls and ceilings; this is one of its main purposes. The distinctive properties of this material and imagination will allow you to create a unique interior in the room, forming figures from plasterboard on the ceiling or walls. It is necessary to think through such decisions in advance, since the profile frame will be constructed taking into account the shape and size of the protruding decorative figures.
Using a similar solution, you can create voluminous clouds, flowers or stars on the ceiling in a children's room, a ship, a butterfly, etc. on the walls. In the living room and bedroom, plasterboard can be used to form any, even the most bizarre, shapes, creating interesting design solutions. There can be a lot of options and they are limited only by your imagination and the style of decoration of the room.
The created multi-level solutions can be additionally decorated with spotlights, focusing attention on them
Interesting examples
Original niches look much better than ordinary wall cabinets.
A rounded plasterboard arch is an ideal option for a room decorated in an oriental style.
A partition made in the form of a lattice will look very interesting.
Smooth lines are good for the bedroom. Such design elements look very elegant.
Such an original plasterboard structure with lighting can be called a real work of art.
Headboard
You can also create a beautiful headboard from plasterboard material. First you will need to make a frame, and then cover it with plasterboard sheets. The resulting design is sometimes decorated with textile wallpaper with patterns or fabric. This headboard can even reach the ceiling.
If you don't want to create a frame, simply finish the drywall using leather or fabric. The product can be filled with foam rubber or padding polyester. Some decorate such designs with decorative buttons.
Coffee table
Plasterboard coffee tables are distinguished by their mobility; when decorating them, you can turn a variety of design ideas into reality. Build a frame of suitable size and cover it with plasterboard material. After preparing the base, you can stick textured paper or paint on it.
You can make such a table indistinguishable in appearance from a wooden product. There is an option to make a niche to store the necessary little things in the table (however, in this case you will also have to spend time covering it with plasterboard material from the inside).
Frame installation
At this stage you need:
- Mark the floor using a chockline or construction markers.
- Install a frame made of UD and CD profiles, hangers and firmly secure the first level of ceiling plasterboard.
- Using a stencil, draw the outlines of the figures on the first level of drywall and attach guide profiles to them.
For curved structures, it is necessary to make cuts on the profile: straight if it needs to be bent outward, triangular if it needs to be bent inward. You can use a special arched profile with holes.
- Attach the ceiling profile (CD) to the guide profile (UD). The CD profile, the length of which exceeds 0.5 m, must be fixed on hangers so that the drywall does not deform under the weight of the shaped elements.
Finishing an arched doorway
The most common decoration options:
Stucco molding. With the help of such a sophisticated design, you can create interesting patterned designs, bas-reliefs and other figured elements that visually exalt the vaulted structure.
Decorative rock. An impressive and solid stone finish, due to its natural texture and color, looks harmonious in any interior design.
Wallpaper. Pasting an arch with wallpaper is the most accessible and inexpensive option, with a huge number of shades, textures and textures.
Tree. This beautiful type of decoration has a very solid appearance; quite often wooden passages are decorated with openwork carvings or various patterns.
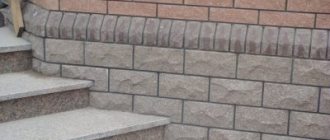
Tile. Cladding with tiles imitating granite, marble or other stones allows you to place the necessary accents in the room and create a complete and harmonious interior composition.
Plaster. Looks especially impressive and unusual
The photo shows the interior of the hall with a round arch lined with decorative stone.
The decorative design should not only correspond to taste preferences, but also, first of all, harmoniously combine with the main design of the room.
Column
With the help of plasterboard columns you can hide various communications and divide the space. Such decorative elements are suitable for rooms of various sizes. Column frames are attached to the ceiling and floor. Columns are usually installed in corners or next to walls. First you will need to process the plasterboard material using a needle roller.
Wet the drywall and give it the required shape, using a pre-prepared template for this. Installation work can only begin after the product is completely dry.
When you have installed all the plasterboard material, you can apply decorative plaster, paint, putty, and sand the surface. It is possible to use Venetian marble (such a coating will look simply fascinating on the surface), polyurethane, and gypsum stucco.
Decorative partitions
Plasterboard partitions can be openwork. Such elements can be given various unusual shapes. A decorative plasterboard partition will not only divide the space, but also serve as an unusual accent in the room.
Bar counter
Using drywall, you can create a bar counter and decorate it in some original way. Such decorative elements look good in a variety of places.
First you need to make a frame. To make the structure as rigid as possible, it is better to use a solid profile for the corners. Using crabs, secure the guides and cross profiles. The frame should be stable. Make sure it is strong and install drywall. Racks can be made with niches or completely smooth. It will be necessary to putty the places where there are fasteners and joints.
Then sand the product and apply a coloring compound to it. After this, you can begin installing the lighting (if you want to decorate the resulting bar counter in this way).
For more information on how to make a drywall bar counter, see below.
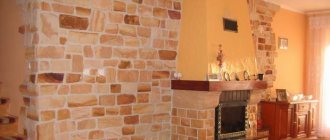
Fireplace
You can make a fake fireplace out of plasterboard. You cannot light a fire in such products, but they look very interesting and can become wonderful decorative elements. They are well suited for libraries, offices, halls.
First, create a drawing of the future structure. Then mark the wall and make a fireplace frame from the profile. Cover it with plasterboard. Such fake fireplaces can be decorated in different ways: with brickwork, ceramic surfaces, artificial stone. You can simply paint the design using brushes and paints. To simulate a flame, you can take logs and wrap them in flickering garlands. Some people do without wood and simply use flashing lamps with foil to reflect the light.
Lighting and backlighting
Any lamps can be built into a plasterboard box: from classic chandeliers to the latest LEDs. There are three classic lighting planning schemes - along the perimeter, by zones or by design accents.
Chandelier
When installing pendant chandeliers, remember that drywall is a fragile material, so the fasteners must go into the concrete base. Use special extension pins or attach the lamps directly to the frame elements. Lightweight shades can be fixed to the sheet using butterfly dowels, which redistribute the load.
Spotlights
Spotlights can be of different shapes, configurations and brightness, open and closed, rotating and fixed. Even rows visually enlarge the room, light around the perimeter provides uniform diffused lighting, and a curvilinear arrangement emphasizes the design concept. For installation, it is enough to cut holes in the drywall with a special nozzle and secure the cartridge.
Drawing lessons
Before you start assembling the structure, you need to draw the pattern that you want to see in your room on a piece of paper. For a high-quality drawing, you need to carry out the following calculations:
- Measure the length and height of the wall on which the structure is supposed to be created.
- Next, it’s worth deciding on the parameters of the pattern; it should fit harmoniously into the interior without taking up too much space.
- All calculations should be transferred to paper.
A pattern drawn on a sheet of paper.
If everything is done correctly, it will be easy to calculate the amount of material and not make mistakes during installation.