Michel
21107 0 11
Michel October 22, 2016Specialization: plumber with 10 years of experience, computer repair specialist, powerlifting coach. I have extensive experience in construction, interior decoration, and making homemade furniture. Hobbies: sports
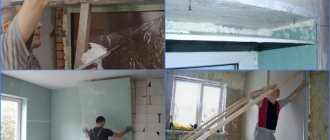
Drywall is probably the most popular sheet material for residential use. Traditionally, it is mounted on a lathing or frame made of timber or galvanized profiles. In this article I'm going to talk about what it looks like to attach drywall to a wall without a profile.
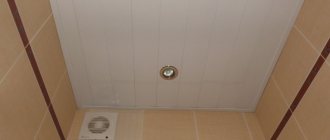
Installation of moisture-resistant plasterboard on a wall without sheathing.
Cladding with plasterboard sheets: advantages
Facing with HA sheets is carried out in the following cases:
- surface leveling;
- improved heat and sound insulation;
- hide wires and pipes;
- surface decoration - creating niches, shelves, design with figured elements.
The plasterboard sheet has a flat surface; when mounted on a wall, it does not deform, but remains flat. This is convenient for subsequent painting, laying tiles, and wallpapering.
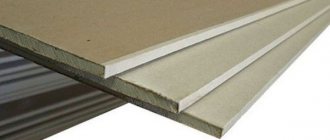
In various rooms with high humidity and high temperatures, the following types of gypsum boards are used:
- An ordinary room with moderate temperature changes is a gray gypsum board sheet.
- Wet room: bathroom, corridor in a private house, balcony, attic, kitchen - green sheet of plasterboard.
- A room with a working fireplace, a Russian stove, with a rough stove - pink gypsum board.
On the construction market there are types of floor plasterboard and facade plasterboard for outdoor work.
There are methods for attaching sheets to the surface - frame and without frame. In the first case, profiles are applicable. For the second method, you need to choose the right adhesive composition.
Advantages of gluing gypsum board to the surface:
- installation is easy and quick;
- less expensive method compared to frame;
- this method does not take away extra centimeters.
The negative side is the inability to hide wires and communications behind the casing.
Drywall as an option for interior decoration of a house made of foam blocks
Drywall is a very popular material for finishing the walls of a foam block house. With its help, work is carried out without much labor. Drywall has a flat surface, which is a favorable condition for applying the finishing coat. It is attached to foam blocks in two ways. If the surface is flat, then this is a frameless method. If there are significant irregularities, a frame is used.
Frameless fastening
This option is easy to implement, it does not take much time and effort. To complete it, you only need to make the desired adhesive composition.
Independent finishing of the walls of a house made of foam blocks is carried out in stages:
- The base is cleaned, all contaminants (dust, grease, etc.) are removed. If they are present, reliable adhesion of the plasterboard sheet to the surface will be impossible.
- Cutting plasterboard sheets.
- Coating the surface with an adhesive composition. The solution must be applied carefully and evenly.
- After the above steps, the sheet must be glued. Remember, the glue hardens for at least 30 minutes.
- The final stage of surface finishing is puttying. It is performed to align the seams at the junctions of the sheathing parts.
- Once the putty has dried, you can begin finishing.
Attaching drywall to the frame
This method is the most common and popular when working with drywall. Its advantage is that, in addition to rough finishing, it makes it possible to provide for the placement of a layer of thermal insulation. The insulation also partially performs soundproofing functions.
When using the method of attaching drywall to a frame, the work is also performed in several steps:
- As in the previous situation, the surface is first cleaned, then the sheets are laid out and cut.
- The frame racks are being secured. First of all, they are attached to the ceiling and floor, then to the walls. The pitch of the vertical profile is determined by the dimensions of the selected thermal insulation material. It is important that it can be laid without additional cutting.
- The length of the plasterboard sheet often cannot cover the entire height of the wall. To connect the sheets horizontally, transverse frame jumpers are installed.
- It is also recommended to frame the upper and lower parts of window openings with a profile/timber belt. In this case, attaching the finishing elements will not cause any difficulties.
- The frame is secured with dowels. After its installation, you can begin installing the sheets.
- Before attaching the sheets, you should lay the thermal insulation material and the necessary communications in the empty space between the supports. This method is very convenient because wires or small pipes are completely hidden. Next, the drywall is secured with self-tapping screws to the finished frame. Before doing this, do not forget to mark the areas where communications and sockets will be located.
- The stage of finishing the walls is completely the same as when fastening without a frame.
Thus, drywall is a very convenient material for simple finishing of a house made of foam blocks.
Other news and articles
What you need to know about a balcony in your own frame house
A balcony in a frame house is a way to make the facade of an ordinary house more aesthetic and functional. During frame construction, the installation of a balcony differs from the installation of this architectural element in a house made of bricks or blocks.
A few words about the pile foundation
Various foundations are used to construct buildings. The pile option is becoming increasingly popular nowadays. This is an economical, simple and quick option. We will tell you a little about the design features.
What kind of staircase should there be in frame houses?
It is best to build a staircase in a frame house during the construction stage of the house itself, so as not to subsequently destroy the floor covering and walls. When designing a staircase in a private house, you must take...
Advantages of installing drywall without a profile
The frameless method of attaching gypsum boards to walls is justified under certain circumstances. The most compelling and mandatory use of a frameless fastening method is the curvature of the walls. The maximum permissible value of curvature is 5 cm over the entire plane of the wall, otherwise it is unlikely that you can level it using adhesives and save money.
When choosing a frameless fastening method, you can save a lot, but remember, the more irregularities, the more adhesive you will need
So, three reasons why installing drywall without profiles is beneficial:
- This method will allow you to save significantly. Thus, by purchasing all the necessary elements for a metal frame, you can spend five times more than on purchasing adhesive compositions. However, it is worth remembering that the greater the unevenness, the more glue will be required to level the walls.
- Gluing drywall will not reduce the total area of the room as much as installing gypsum board on the frame. For comparison: when installing lathing (depending on the unevenness), the length of each wall will take about 5 - 10 cm, while with the adhesive installation method - 2 - 3 times less, often no more than 1 cm.
- You can attach drywall directly to the wall in different ways and on different bases. It doesn’t matter whether they are permanent or partitions, brick, shell rock, foam concrete or aerated concrete, concrete panels or clay blocks. It also does not matter whether it is a wooden base made of boards, timber or shingles, covered with plaster or not.
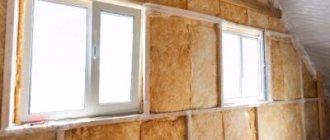
Leveling walls with plasterboard without a profile is possible regardless of the technical condition of the base. This could be old brick or clay walls, old plaster, wallpaper or paint, partially crumbling plaster, etc. Naturally, there are certain restrictions:
- large rubble of walls;
- high room humidity or direct contact of plasterboard with water (even moisture-resistant drywall will collapse under constant exposure to moisture).
Features of fastening gypsum boards without a profile to different bases
Carrying out repairs on their own, many home craftsmen wonder whether it is possible to attach drywall directly to the wall and how exactly to do this.
There are several ways in which you can attach sheets of drywall directly to the base and still correct the plane. The main parameter when choosing methods is the material of the base wall.
Wooden base
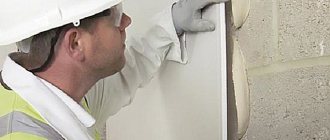
Whether it is a wooden partition in an old “Stalin” building or a wall made of timber in a new house, plasterboard is attached to the wall without a profile using wood screws. It is better to use self-tapping screws of at least 35 mm, but you should pay attention to the curvature of the walls. Perhaps in some places the fastenings will need longer ones, for example in old houses on wooden walls, where a thick layer of plaster is applied, which should not be removed. In this case, you need to choose a self-tapping screw of such a length that it reaches the tree.
Self-tapping screws can only be screwed in with a screwdriver; doing this with a screwdriver is extremely inconvenient. In this case, you need to ensure that the fastener fits strictly perpendicular to the gypsum board sheet.
After installing drywall on a wooden structure, the seams must be reinforced, because fluctuations in humidity and temperature may change the geometry of the sheets. For reinforcement, a narrow sickle mesh is used, which is applied to the seam and puttied.
Capital base (brick, foam concrete, etc.)
To attach drywall without profiles to a solid brick base or to a foam block wall, it is optimal to use the following methods:
- fastening with gypsum glue;
- fixing gypsum board sheets with mounting foam;
- with a perfectly flat surface with differences across the entire plane of no more than 5 millimeters, gluing gypsum boards to assembly adhesive (for example, liquid nails) is allowed.
Gluing a sheet of drywall using any of the above methods is not enough to securely fix it. How to properly attach drywall to a wall without a profile using each of the above methods, we will consider in more detail.
Technology of frameless installation of gypsum boards
Before you begin installing drywall without using a frame, you need to carefully check the surface of the walls for unevenness and level differences. Using a building level, rules, plumb lines or a professional laser level, the necessary parameters are determined. If for the adhesive method of installing gypsum boards the curvature is not critical (differences are no more than 5 cm), you can proceed to the next stages of work.
For any of the frameless methods of leveling walls with plasterboard, you must follow the same preparatory procedures:
- cleaning the surface from loose parts, old coatings, stains;
- eliminating protrusions larger than 5 mm using a hammer or hammer;
- plastering recesses more than 10 cm wide with cement or gypsum mortar;
- surface primer for better adhesion with adhesives (can be applied with a roller, brush or spray).
Is it possible to glue on uneven walls?
One simple way to level a “falling” wall is to cover it with plasterboard on a pre-made frame.
If the difference in wall unevenness is small, the method of gluing sheets is used. To use this technology, you need to familiarize yourself with the nuances and rules.
- The type of plaster and adhesive composition must be selected in accordance with the humidity and temperature conditions in the room.
- The frameless method is applicable if the wall has an unevenness of maximum 5 cm.
- When carrying out installation, you must follow the step-by-step instructions in compliance with all the rules.
- To select glue, you need to pay attention to the material of the rough wall.
If you follow all the rules, installing gypsum boards with glue will be easy and will last a long time.
How to choose fasteners for foam blocks
When using any building material, it is necessary to use consumables that will correspond to its physical properties and qualities. This is determined by a simple definition: The consumable matches the material and enhances the fastening capabilities.
In accordance with this definition, a similar consumable element and fastening is available for the foam block. Taking into account the low density of the block, the fastening will not only easily fit into it, but will also create additional support, and this, in turn, makes it possible to count on increased loads.
How to glue drywall to a foam block wall - Construction and repair
When making repairs, it is important to know how to attach drywall to a wall without profiles so that the surface becomes perfectly flat. This is necessary to save money and space.
Any, even the most sophisticated finishing options will look poor against the background of uneven walls, bumps and depressions. In small rooms, where every centimeter of space is important, it is very important to choose the most effective finishing method. You can straighten curved walls so that they become perfectly smooth, and at the same time save on materials, by choosing the method of installing drywall without a frame.
Choosing a profile for drywall
Before attaching the drywall profile to the wall, you need to make markings and determine their number in the frame. Profiles are supplied in standard lengths of 3 or 4 meters. For their manufacture, metal with a thickness of 0.4-0.8 mm is used. Profiles with a thickness of 0.55 mm are optimal for ease of installation on the wall and strength characteristics.
Depending on the purpose, profiles are:
- PN guides (UD). They have a U-shape with a base of 50, 75 or 100 mm, while the width of the sidewalls is 40 mm. The main purpose of the products is to assemble a wall frame in order to obtain a durable frame.
- Rack-mounted PNP (CD) – can be used for wall mounting as vertical and horizontal elements.
- Corner (PU) are designed to strengthen and level the corners of the room and come in widths of 25 or 31 mm.
How to choose the right gypsum board adhesive for gluing plaster
Wall covering with plasterboard is carried out by choosing the right adhesive composition. The mixture is selected according to environmental factors. Stroy market offers mixtures:
- Gypsum glue "Perlfix".
- Plaster based on gypsum: “Start”, “Finish”.
- Gypsum-based putty “Knauf-fugen”.
- Tile adhesive "Ceresit -SM 11". This is a cement composition with fillers.
- Silicone sealant made of acrylic and polyurethane, “liquid nails”, assembly adhesive mixture. These mixtures are used for smooth surfaces or for gluing sheet to sheet.
- Polyurethane foam. Select a composition with a “min” coefficient.
Sealants are mainly used on brick, concrete walls, and foam blocks.
Is it possible to glue it to polyurethane foam?
There are 2 ways to glue a sheet of material to the wall on foam:
- First, the gypsum board is attached to the wall with dowel nails, then holes are made and the void under the plaster is filled through them.
- Apply foam to the sheet and stick it to the wall.
First method
The material is placed on a flat horizontal surface. 9-12 holes are drilled in it. After the gypsum board with holes is applied to the wall, all drilled holes are marked with a pencil. The holes for the dowels are brightened on the rough coating.
The GC sheet is secured with dowel nails. There is no need to screw in the screw all the way. It is necessary to achieve evenness of the vertically placed material, so when screwing in, use a level. When the sheet is exposed, foam is injected into the holes.
Second method
If the wall is flat, then the foam is applied to a horizontally lying plasterboard. After this, the sheet is applied to the wall, leveled and pressed to force the foam to adhere to the surface.
Polyurethane foam increases 2-3 times. Therefore, the product with the lowest expansion coefficient is selected, and during drying, the condition of the plasterboard on the wall is constantly checked.
Is it possible to glue gypsum boards to tile adhesive?
GKL is glued with tile adhesive, but if the wall has unevenness up to 1 cm. If the unevenness is more than 1 cm, the adhesive will eventually fall off along with the sheet of drywall.
For greater strength, plasterboard sheets are additionally fixed with self-tapping screws or dowel nails.
If you need to make a double covering of gypsum plasterboard, then when gluing the first layer, apply glue with a thickness of 0.3-0.5 mm, after complete drying, the same amount of glue is applied for the second gypsum board. A prerequisite is additional fixation with self-tapping screws.
Adhesive for foam block walls
The best option for choosing adhesive for a foam block wall is Perlfix. Holes are made in the HA sheet at a distance of 40 cm with a diameter of 2-2.5 cm. The glue is applied to the wall. After which, the gypsum board is immediately glued. Excess glue will come out through the holes made. It is removed with a spatula. In this way, additional reinforcement is achieved.
Made from polystyrene concrete
Polystyrene concrete - made from cement, foam balls, quartz sand and additives. On a wall made of this composition, it is necessary to use cement-based adhesive mixtures with fillers. There is a negative point at the base - it freezes. Therefore, to ensure that the wall finish is held firmly in place, it must be additionally secured with dowel nails.
For wooden walls
The cladding of wooden walls is done in this way:
- Treating wood with an antiseptic agent.
- Setting beacons for the evenness of the applied sheet.
- Holes are made 30 cm from the beacons and a plastic sleeve from the dowel-nail is inserted.
- GK sheets are glued to the adhesive mixture. Additionally fixed with dowel nails.
Attention. Before using glue, you need to coat the rough surface with a primer.
For walls made of brick, concrete
GCRs are attached to brick and concrete walls in 4 ways:
- Fixation with glue.
- Cladding with polyurethane foam.
- Using self-tapping screws.
- Fixing the dowel-nails.
The choice of method depends on the curvature of the wall and humidity.
Concrete wall. It is mostly smooth; cement-based glue is used. For better adhesion, notches are made on the wall, covered with a primer, and then the gypsum board is fixed.
Brick wall. The facing material is fixed using polyurethane foam. Applying foam to the sheet with a snake allows you to control the amount of product applied. After applying the foam to the sheet, wait 2-3 minutes. When the foam begins to expand, the sheet is applied to the wall and leveled.
For mounting on a brick wall, polystyrene foam is used for mounting. It doesn't expand as much as other similar products.
Features of frame assembly
Due to their simplicity, installation of profiles for plasterboard on walls can be done with your own hands. Vertical lines are corrected with a plumb line, and horizontal lines are corrected using a rule.
At the first stage, a guide profile is installed around the perimeter of the wall, which is attached to the surface using dowels and screws. Vertical and horizontal guide elements are installed overlapping, for which the sides at both ends are cut and bent outward. The structure is fixed around the entire perimeter, the distance between the screws is selected in the range of 20 – 40 cm.
When installing a drywall profile to a wall in an attic or other room, some features should be taken into account. When performing insulation, vertical elements are mounted at a distance of 50 mm from the window slopes. Horizontal crossbars are fixed with “crabs”. It is recommended that after fixing the wall frame in the room, draw up a drawing with the exact dimensions of the frame and the location of the guides, so that paintings and shelves can be placed on the wall after finishing.
Before attaching a plasterboard profile to a wall made of foam blocks, you need to understand the need to strengthen the structure. To obtain a reinforced structure, special metal profiles of increased thickness, having a width of 100 mm, are used. To strengthen the frame, you can use vertical racks of two products stacked together. The elements are connected using self-tapping screws in increments of 15-20 cm. The profile can be strengthened by inserting a wooden beam into it, connected to the metal with self-tapping screws.
Compliance with all the features and nuances will allow you to mount a strong and even frame for covering the walls with plasterboard. The evenness of the gypsum board sheathing depends on the accuracy and quality of fixation of the profile elements.
Profile mounting
Covering walls with plasterboard over sheathing, in addition to leveling the surface, solves different problems in each room:
- in living rooms, acoustic mineral wool mats are used to improve sound insulation;
- in the kitchen, bathroom - used for hidden pipe installation;
- in the bathroom behind it, an installation is installed for a wall-hung or attached toilet.
The frame for covering can be provided with niches and shelves. For example, for TV and decorative accessories.
The easiest way is to lay electrical power and low-current cables in a foam concrete wall. But even in this case, you can not groove the channel, but lay the wiring behind the drywall - a corrugated pipe with a diameter of 25 mm is placed in the gap, which provides the height of the side of the standard profile.
Materials
To arrange the lathing for attaching plasterboard to the wall, use ceiling profiles CD (according to the Knauf standard) or PP (according to the Gyproc standard). They are absolutely identical in size - 60 mm shelf width, 27 mm wall height. They are supplied with UD or PPN guide profiles, which are attached to the floor and ceiling. They are the same in shelf width 28 mm, but differ in wall height. If the CD profile has both walls of the same height of 27 mm, then the PPN side for fastening drywall is slightly higher than the inner one - 33 mm versus 27 mm.
The profile thickness may vary. For branded products it is 0.6 mm. There are domestic analogues made of thinner sheet steel - 0.4-0.55 mm. These profiles are not as durable as branded ones. But for lathing fixed to the wall, the strength of such a profile is sufficient provided that the spacing of the attachment points is reduced by 20%.
To fix the profiles to the wall and level the plane of the sheathing, direct hangers are used. And the most difficult thing when interior finishing walls made of foam blocks with plasterboard is to attach the hangers to the wall.
The usual plastic dowel-nail, which is available from the Knauf company, is not suitable for cellular concrete. You need special plastic dowels with enlarged external ribs. There are also screw and drive-in anchors, but they are more expensive and are used if you need to secure a heavy object to the wall.
To attach the suspension you need a 6x52 dowel for a screw with a diameter of 3.5-5.0 mm. Its wholesale price starts from 1.15, retail - about 1.5 rubles. For one suspension you need 3 dowels: one in . For a branded profile, the height of the mounting points is 80-100 cm (plus fixation in the guide profiles on the floor and ceiling). For a room with a standard ceiling height, 3 hangers are needed. For a profile made of “thin” metal - 4 hangers.
The type of drywall depends on the humidity conditions of the premises:
- in living rooms they use ordinary gypsum board with a light gray or gray-blue tint of cardboard;
- in the bathroom, toilet, hallway - moisture-resistant green plasterboard.
The standard sheet has a size of 250x120 cm, a thickness of 12.5 mm and a thin semicircular edge (PLUC).
The final list of materials for attaching drywall to a foam block looks like this:
- ceiling profiles CD and UD;
- straight hangers;
- single-level connectors;
- plasterboard 12.5 mm thick;
- dowels for foam concrete;
- dowels for floor slabs and floors;
- fasteners for profiles, hangers, drywall.
Tools
In total you need three sets of tools.
For marking you need: tape measure, laser level (or plumb line and bubble level), construction angle, ruler, pencil, marking cord.
To install the frame, work with the profile and fasten the gypsum boards, use:
- drill for foam block;
- perforator for ceilings and floor screeds;
- rubber mallet;
- hammer;
- metal scissors;
- screwdriver (screwdrivers).
To work with drywall you need:
- hacksaw;
- knife;
- edge plane.
Execution of work
For installation, you need a drawing (sketch) of the frame with dimensions and details for each node.
Drawing and detailing are also necessary to calculate the amount of materials
Drywall for interior decoration of aerated concrete houses
Among the many varieties of popular methods for leveling and finishing walls made of aerated concrete blocks, covering with plasterboard sheets is the simplest solution. The main disadvantage of aerated concrete is its fragility.
If part of the building material was damaged during transportation and you did not check it in time, then everything can be corrected with plasterboard.
Most often, the interior decoration of a house built from aerated concrete involves eliminating defects and uneven surfaces of the walls.
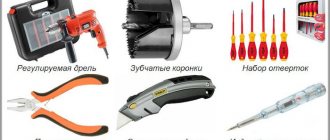
Tools and materials for fixing drywall
- electric drill;
- metal scissors;
- stationery knife;
- self-tapping screws for drywall and aerated concrete;
- special metal profile;
- building level, ruler and simple pencil;
- screwdriver;
- self-adhesive tape or sickle tape;
- putty or plaster;
- glue.
Aerated concrete is a fairly soft material that is easy to process. To ensure a strong fixation, it is important to take into account the load that will appear on the surface of the blocks. It is enough to secure lightweight finishing materials using small nails or self-tapping screws, as they cope well with the load. It is recommended to use wedge-shaped nails, they guarantee resistance to tearing out. When attaching various objects to an aerated concrete surface, only special fasteners should be used; they will ensure strong and long-term fixation. It is important to remember that metal parts interacting with concrete are prone to destruction.
The screws must have threads along their entire length. All fasteners must have anti-corrosion properties and must be made of stainless steel or treated with hot zinc. The ideal option is nylon dowels; they are characterized by significant durability. It would be ideal to use special fasteners for aerated concrete.
Fastening plasterboard to a metal profile
In most cases, walls made of aerated concrete are very smooth, but if suddenly they have large differences and unevenness, then plasterboard should only be attached to a metal profile. In such cases, it is used specifically for leveling and preparing for the interior decoration of the walls of the house.
- At the initial stage, it is necessary to thoroughly clean all surfaces from dirt, debris and residues of previous processing.
- Correct marking of the walls is the most important stage. The distance between the profiles should be 60 cm along the axes from each other if you have a standard sheet of plasterboard with a width of 120 cm. If you have it of a different width, then take the distance along the axes of the guides equal to half the width of the plasterboard sheet.
- A hammer drill creates holes in the floor and ceiling to secure the upper and lower guide profiles. Vertical profile guides are attached to them, the length of which is equal to the height of the ceiling.
- Then hangers are installed, which are attached to the wall at a distance of 50-60 cm from each other using special fasteners, since ordinary self-tapping screws are not suitable for aerated concrete.
- To install the profile correctly, we level it and fasten it using ordinary self-tapping screws to the hangers, as well as to the upper and lower guides.
- Let's start attaching the drywall sheets. This is done with self-tapping screws on the drywall to the guide posts. The distance between the screws should not exceed 25 cm.
- The final stage is to strengthen the joints with self-adhesive tape or sickle tape and fill them with putty solution. After hardening, the putty is sanded and, if necessary, the seams are treated with a special grout.
If the height of the ceiling is greater than the height of the drywall, which is 2.5 m, then the sheets must be installed staggered. The joints are reinforced with jumpers from the same profile.
Before finishing, non-factory seam joints between sheets are embroidered at an angle of 45 degrees and plastered together with the factory ones.
Fixing drywall with an adhesive base
Installing plasterboard sheets with glue is considered a more accessible and economical way to interior decorate the walls of a house made of aerated concrete. This technique will allow you to do without expensive guides and save as much space as possible in small rooms. This is a great way to hide chips, dents and electrical wiring in your home.
- Preliminary work consists of cleaning the walls. For high-quality adhesion to the glue, the surface must be completely dry and clean.
- Using a pencil, you need to make horizontal markings (two lines at a distance of 10 cm from the floor and ceiling, and two in the middle, dividing the distance from top to bottom into three equal parts). Vertical markings are made at a distance of 60 cm.
- Using marks (dowels and screws), a grid is built, which helps to fix the plasterboard sheets as evenly as possible. Using a plumb line will help you set the extreme markings and find the vertical in the corners by screwing in or out the screws. A fishing line stretched between them secures additional vertical stripes.
- On each vertical marking line, you need to find a plane and place beacons in the form of screws along a plumb line at a distance of 50 cm. You should check the aligned plane using a level; if there are deviations, adjust the screws with a screwdriver.
- The glue is applied to the drywall in small strokes at the approximate locations of the marks and applied to the wall. Long-hardening gypsum mixtures, such as starting putty or building gypsum, can be used as glue. The thickness of the adhesive layer depends on the curvature of the surface. If the aerated concrete wall is perfectly flat, then the thickness of the adhesive seam is minimal.
- It is important to check the common plane of two or more sheets of drywall using a building rule-level.
The resulting completely flat and strictly vertical wall greatly facilitates further final finishing. In the planes, it is possible to carry out electrical wiring unnoticed, and the proximity to the wall greatly facilitates repair work, should such a need arise. Unlike the frame method, there are no problems with fixing heavy objects, since they are attached directly to the load-bearing wall.
The entire process of finishing the walls of a house with plasterboard is quite simple to perform and does not cause difficulties; it can be successfully carried out without special skills. Considering the low moisture resistance of aerated concrete surfaces, it is preferable to carry out work in the warm season under dry weather conditions, with good ventilation of the room. Of all the variety of options for interior wall decoration, plasterboard material is the most versatile and can perfectly suit the interior and match the functional design of a house built from aerated concrete blocks.
Preparing a plasterboard wall: what is needed?
To fix the gypsum board to the wall, you need materials and tools:
- The selected type of drywall is moisture-resistant, ordinary.
- Dowel-nails, self-tapping screws.
- Selected adhesive for fixing sheets.
- Hammer, construction mixer.
- A plumb line, usually a sharp knife, a level.
- Container for preparing glue, spatula.
- Primer, roller, brush.
After collecting the necessary tools, as well as purchasing all the materials, you need to prepare the rough surface.
- Clean the wall of old cladding, wallpaper, paint.
- Existing cracks must be reinforced and puttied. Seal all holes with cement or gypsum based mortar.
- The surface is coated with a primer.
When the primer dries, gypsum boards are prepared. Holes for switch sockets are cut out in them.
For high-quality wall finishing, you need to properly prepare the adhesive mixture:
- The specified amount of water is poured into a clean container.
- Add a little dry mixture to the water and mix.
- After this, add the specified amount of dry mixture and slowly mix with a mixer.
To obtain a homogeneous mass, you do not need to set the mixer at high speed. This will cause a lot of air bubbles in the solution.
- After obtaining a homogeneous mass, pour a small amount of PVA into the glue and mix again.
After kneading, the solution must stand for at least 5 minutes to completely dissolve the additives and obtain elasticity.
DIY gluing plaster to the wall: step-by-step guide
Having prepared the rough walls and mortar for fixing the gypsum boards, you can begin installation. There are 3 methods for gluing sheets:
- Apply a continuous layer of glue using a notched trowel. Used for concrete walls.
- Applying glue in small piles.
- Using beacons and lining foam (gypsum pieces). For very uneven walls.
Each method is applicable according to the evenness of the rough wall.
Sticking the first sheets
A sheet of drywall is placed on long wooden slats opposite the place where it will be fixed. An adhesive composition is applied to the sheet in a continuous layer or in piles.
After this, the gypsum board with glue is carefully lifted to the wall. Wires are threaded through the holes. The sheet is raised above the floor by 10mm - for this you can put a piece of drywall. Place it close to the wall and level it. Evenness is measured by level, diagonally, vertically and horizontally. After installation, the plasterboard is pressed against the wall and checked again for evenness. The glued drywall must be secured with supports.
The second sheet is glued only after the glue under the first sheet has set. Equalization follows it.
Plasterboarding corners
Pasting the wall with finishing material begins from the inner corner. Drywall is glued onto the adjacent wall with an overlap.
To paste the outer corner, you need to measure the distance from the corner to the glued sheet and carefully cut off the measured distance from the whole gypsum board. This cut out part with glue is applied to the corner and aligned with a level and plumb line.
The next cut piece is placed on the corner so that it covers the end of the drywall glued to the 900 corner.
Grouting joints
After covering the wall and the glue has completely dried, it is necessary to carry out a series of work to reinforce the joints. For this:
- Cover the entire surface with primer. All joints are primed with a brush.
- After the primer mixture has dried, joint putty is applied to the joints. Reinforcing tape is glued onto it and covered with the same putty on top. If self-tapping screws or dowel-nails were used, then all fasteners are covered with the same solution.
- When the putty has dried, grout with sandpaper to remove all small excess putty particles and smooth out the seams.
The last stage is filling the entire surface and priming before finishing.
Verdict
Various types of fasteners allow you to carry out all the finishing work on the facade of the house, as well as safely install various equipment - air conditioners, heating devices, shelves, etc.
But for each type of mounted equipment, it is necessary to select its own mount, designed for its load. This will be the main feature of working with foam block walls.
Foam block and gas block are not very expensive materials. Mounts for it are also not expensive. And if you also choose plastic fasteners, you will get serious savings and the cost will be generally minimal.
Scope of application
Surfaces intended for gluing gypsum boards are conventionally divided into three groups according to the material from which the wall is made.
- Aerated concrete slabs. They have a relatively smooth surface. The irregularities are small, no more than half a centimeter. Drywall can be glued to aerated concrete using any glue. The most common is polyurethane foam.
- Wall made of foam blocks. The surface of the foam block must first be well treated with deep penetration soil. Allow the foam block to dry well for 12 hours. Make holes with a diameter of 2-2.5 cm in the drywall every 40 cm, apply PerlFlix glue to the wall, then glue the drywall, and remove the excess glue that comes out through the holes with a spatula. This will ensure good reinforcement, which is important when using foam blocks.
- Brickwork. When gluing brick walls, apply depending on the appearance of the surface. For even laying, any glue can be used. For uneven brick surfaces, PerlFlix is ideal. Glue is applied to the sheets pointwise around the perimeter. The thickness of the glue layer varies from 5 to 30 mm, the distance between the “dots” should be approximately 30-50 centimeters.
For the kitchen and bathroom, special moisture-resistant plasterboard is used.
If necessary, drywall can be glued to a layer of insulation, for example, penoplex. In this case, the insulation is glued directly to the wall using any tile adhesive, and after drying, drywall is glued onto it.
Fasteners
Before attaching a plasterboard profile to a wall made of aerated concrete, brick or other building material, you must purchase special additional and fastening elements:
- Special couplings for connecting individual parts to increase the length of the profile when installing in the attic and other rooms.
- Crabs, which, thanks to their cross-shaped shape, are used for fixing at the intersection of profiles in order to increase the strength of the frame.
- A straight element that has the ability to bend at a certain level, forming a U-shaped opening for installation and reliable fastening of profile products.
- Anchor suspensions ensuring reliable placement of structural elements.
Fastening elements (hardware), which are intended for fixing profiled products, are selected depending on the type of surface used:
- To attach the profile to a concrete or brick wall, it is advisable to purchase dowels of the required sizes, depending on the quality of the surface.
- When installing the profile on a wooden wall, self-tapping screws are used.
- To connect drywall profiles to each other or to additional parts, screws with a pointed end are required.
- The plasterboard sheet is attached to the profile using galvanized steel self-tapping screws with fine threads.
How to properly attach drywall to foam block
Leveling the walls with plasterboard greatly facilitates interior finishing. Simple technology, a minimum of “wet” work, a perfectly flat surface - these advantages alone are enough to abandon classic plaster. But not all materials from which walls are made are the same. Even within the same room, they can differ in strength and ability to hold fasteners. If everything is relatively simple with brick or wood, then walls made of cellular concrete have their own characteristics. And in order to know how to attach drywall to a foam block, you need to take them into account.
Correct use of fasteners
To begin with, it is worth considering the above-mentioned disadvantages of the foam block:
- Hygroscopicity . This interesting property of the foam block can be considered both an advantage and a disadvantage when the material becomes saturated with moisture;
- Low density . There are also two opinions here: the advantage is that the weight on the foundation is reduced, and the disadvantage is that choosing a fastening for foam concrete becomes an exciting task.
Now let’s talk in more detail about the last point.
Profile mounting
Covering walls with plasterboard over sheathing, in addition to leveling the surface, solves different problems in each room:
- in living rooms, acoustic mineral wool mats are used to improve sound insulation;
- in the kitchen, bathroom - used for hidden pipe installation;
- in the bathroom behind it, an installation is installed for a wall-hung or attached toilet.
The frame for covering can be provided with niches and shelves. For example, for TV and decorative accessories.
The easiest way is to lay electrical power and low-current cables in a foam concrete wall. But even in this case, you can not groove the channel, but lay the wiring behind the drywall - a corrugated pipe with a diameter of 25 mm is placed in the gap, which provides the height of the side of the standard profile.
Materials
To arrange the lathing for attaching plasterboard to the wall, use ceiling profiles CD (according to the Knauf standard) or PP (according to the Gyproc standard). They are absolutely identical in size - 60 mm shelf width, 27 mm wall height. They are supplied with UD or PPN guide profiles, which are attached to the floor and ceiling. They are the same in shelf width 28 mm, but differ in wall height. If the CD profile has both walls of the same height of 27 mm, then the PPN side for fastening drywall is slightly higher than the inner one - 33 mm versus 27 mm.
The profile thickness may vary. For branded products it is 0.6 mm. There are domestic analogues made of thinner sheet steel - 0.4-0.55 mm. These profiles are not as durable as branded ones. But for lathing fixed to the wall, the strength of such a profile is sufficient provided that the spacing of the attachment points is reduced by 20%.
To fix the profiles to the wall and level the plane of the sheathing, direct hangers are used. And the most difficult thing when interior finishing walls made of foam blocks with plasterboard is to attach the hangers to the wall.
?
The usual plastic dowel-nail, which is available from the Knauf company, is not suitable for cellular concrete. You need special plastic dowels with enlarged external ribs. There are also screw and drive-in anchors, but they are more expensive and are used if you need to secure a heavy object to the wall.
To attach the suspension you need a 6x52 dowel for a screw with a diameter of 3.5-5.0 mm. Its wholesale price starts from 1.15, retail - about 1.5 rubles. For one suspension you need 3 dowels: one in . For a branded profile, the height of the mounting points is 80-100 cm (plus fixation in the guide profiles on the floor and ceiling). For a room with a standard ceiling height, 3 hangers are needed. For a profile made of “thin” metal - 4 hangers.
The type of drywall depends on the humidity conditions of the premises:
- in living rooms they use ordinary gypsum board with a light gray or gray-blue tint of cardboard;
- in the bathroom, toilet, hallway - moisture-resistant green plasterboard.
The standard sheet has a size of 250x120 cm, a thickness of 12.5 mm and a thin semicircular edge (PLUC).
The final list of materials for attaching drywall to a foam block looks like this:
- ceiling profiles CD and UD;
- straight hangers;
- single-level connectors;
- plasterboard 12.5 mm thick;
- dowels for foam concrete;
- dowels for floor slabs and floors;
- fasteners for profiles, hangers, drywall.
Tools
In total you need three sets of tools.
For marking you need: tape measure, laser level (or plumb line and bubble level), construction angle, ruler, pencil, marking cord.
To install the frame, work with the profile and fasten the gypsum boards, use:
- drill for foam block;
- perforator for ceilings and floor screeds;
- rubber mallet;
- hammer;
- metal scissors;
- screwdriver (screwdrivers).
?
To work with drywall you need:
- hacksaw;
- knife;
- edge plane.
Execution of work
For installation, you need a drawing (sketch) of the frame with dimensions and details for each node.
Drawing and detailing are also necessary to calculate the amount of materials
Can drywall be attached to boards?
If you have a thin wall, then you can
insert the bars through it, align them on the same plane, securing them to the boards.
And then he will attach the sheets to them. Directly onto drywall boards
, they are not stable, they can play, and as a result, cracks in the places where the sheets join are possible.
Interesting materials:
What is CASCO, types of CASCO? What are castes and podcasts? What is an ignition coil? What is KBM when calculating compulsory motor liability insurance? What is KBM in insurance? What is kdss on prado 150? What is KDSS on Prado? What is ceramic car coating? What is ceramic coating? What is a chassis?
Preparation and marking
First, the surface is prepared for work. For new construction, you just need to clean the wall from any remaining mortar and dust. During repairs, the list of activities is wider:
- clean the old finish;
- having de-energized the network, remove wall lamps, sockets and switches;
- insulate exposed wires (when replacing wiring, it is dismantled to the junction box);
- perform markings.
Although the markings for the frame are done individually in each case, the algorithm for carrying out the work is general:
- Using a level, find the most protruding point on the surface. It is “projected” onto the floor using a plumb line or laser level, and then transferred to the ceiling. This will be the “zero” level.
- From this point, two lines are drawn on the floor and ceiling parallel to the plane of the wall. Check with a level (plumb line) in the corners to ensure that the edges of these lines lie in the same plane. With conventional cladding (without installing installations and laying large-diameter pipes), UD guide profiles are subsequently attached along these lines.
- The same markings are made for adjacent walls. Determine the points of angular intersections. Departing from these points a little more than 30 mm, beat off a vertical on the wall for the central fastening of the suspensions of the corner posts from the CD profile.
- Having chosen one of the corners as the “start”, marking the lines for attaching the suspensions of the remaining CD profile racks on the wall with a step of 600 mm.
Installation
Installation of the frame and fastening of drywall is carried out in the following sequence:
- UD and CD profiles are cut to size in the drawing.
- UD guide profiles are attached to the floor and ceiling. The fastening step is 40-60 cm. To reduce the level of structural noise, an elastic tape is laid between the profile and the surface of the floor/ceiling.
- Direct hangers are attached to the walls.
- Insert the CD profile into the guides, check the position in the plane of the skin, and attach it to direct hangers. Check the vertical level and finally fix it to the walls of the guide profiles.
- To cover the height of the wall, a standard sheet may not be enough. In this case, additional jumpers are installed between the racks. They are secured using a single-level connector. In adjacent areas, the jumpers should be located alternately at the top and bottom, and the joints of the sheets should lie in the middle of the profile.
- A chamfer is made at the ends of the additional pieces along the joint line.
- The frame is sheathed with plasterboard - the fastening step is no more than 20 cm, the head of the screw is slightly “recessed” into the sheet.
To hang something heavy on the sheathing, the frame in this place must be reinforced with an embedded element that is attached to the frame. It redistributes the load onto the supporting structure.
M4 screw
Along with other fasteners, screws combined with metal expansion elements can be used for fastening into a gas block. They are also suitable for dense gas and foam concrete. The installation process is simple. A hole is drilled. The fastener is inserted and tightened. At the moment of tightening, the metal part expands the material. This allows the hardware to be securely fixed in the wall.
Installation without frame
If the walls do not have large irregularities, and the thickness is sufficient to lay wiring in the grooves and install mounting boxes, then you can fix the drywall to the foam block without a profile. For this purpose, adhesive solutions with mineral fillers are used.
There is even a technology for fixing drywall to mounting foam. But any of them (even with a small expansion coefficient) requires additional tightening of the sheet to the wall with self-tapping screws at several points. The method is labor-intensive, it is difficult to level several sheets, so it is used in small areas - for example, when arranging window slopes from plasterboard. It is not suitable for walls.
Materials
In addition to drywall, installation requires a mineral-based adhesive mixture and a Betonkontakt type primer.
The advantage of mixtures over ready-made contact adhesive is that, due to the increased layer thickness, they can compensate for minor surface unevenness (up to 20 mm).
There are two large classes of adhesive mortars: cement and gypsum.
Cement compositions are universal - for external and internal work. They can also be used for fastening sheets of drywall, but their main purpose is tiling the surface.
For interior work with drywall, dry adhesive mixtures based on gypsum are produced. The most famous is KNAUF-Perlfix. To improve adhesion, it contains polymer additives. And the manufacturer indicates concrete surfaces as one of the base materials.
Why come up with some ways to glue drywall to a foam block? For example, use putty or finishing gypsum plaster as glue. There is a proven technology for this, which is recommended by the Knauf company, a manufacturer of drywall and dry mixes.
Tools
To work with drywall, you need a standard set of tools: a hacksaw, a knife, and an edge plane.
To prepare the glue you need:
- capacity of at least 50 liters (for 1 bag of dry mixture weighing 30 kg you need 15-16 liters of water);
- mixer;
- trowel.
To prepare the surface you need a vacuum cleaner (preferably a construction one) and a primer brush.
Self-tapping screws
You may be surprised, but you can use a regular wood screw in a porous gas block. However, it is advisable to use them in denser versions. So, they will not stay in a porous foam block. But for fastening elements that will not create significant loads on the fasteners, they are quite suitable.
For example, if you need to hang a picture, frame or something similar, then such fasteners are quite suitable. For example, you can take a self-tapping screw measuring 3.5x55. However, it is worth estimating the load that will be placed on it. If in doubt, it is better to use a plastic dowel.