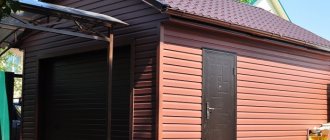
When building a house without the involvement of professional workers, you must independently study all the intricacies of the process. To do this, you need to know how to pour a solid foundation and build walls, know how to attach the Mauerlat to a brick wall and how to create a strong support for the roof so that the entire roof structure is held securely and does not deform.
Attaching the Mauerlat is a very important stage in the construction of a house that should not be skipped. It determines how all the elements of the roof will hold up, so any mistake can lead to serious problems and even the need to completely rebuild the upper part of the house and install everything again.
What it is
You can explain what it is in the construction of a Mauerlat as follows. This structure serves as a connecting element between the roof of buildings and the walls, and therefore specialists take its arrangement very seriously. Another task of the Mauerlat can be called reducing the windage of the roof to a minimum - this means that it can be torn off by strong winds.
There is a practice of building houses without a Mauerlat, when the rafters are attached directly to the floor beams. In this situation, all loads from the roof structure are directed to the supports of the rafter system, and if there was a Mauerlat, they would be evenly distributed on the walls.
What is a Mauerlat and its functions
The roof structure includes many functional elements, as it provides protection for the load-bearing walls of the building. One of these components of the rafter system is the mauerlat, which is a row or crown of timber laid on the top of the walls. The Mauerlat is in contact with the upper area of the walls along the entire perimeter of the building, which ensures the performance of the functions assigned to this row of timber.
The Mauerlat has a simple design
The simple design of the Mauerlat ensures its functionality and maximum efficiency. The beam system serves to evenly distribute the weight of the roof over all walls of the building, which is necessary to prevent skewing and deformation of the roof. This is the first function of the Mauerlat, and the second is to hold and fix the roof on the walls.
The roof truss system is attached to the Mauerlat
Materials for making a Mauerlat
This roofing element is made from:
- wooden beam;
- I-beam;
- metal products or channels.
The choice of material depends on the weight of the roof being erected:
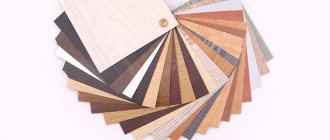
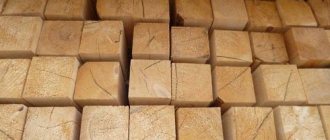
- The beam can have a section measuring 10x10, 10x15, 15x15, 8x18 or 20x20 centimeters. It is placed under the rafters along the perimeter of the roof and thus evenly distributes the load on each point of the walls of the house. When choosing a wood material for a mauerlat, pay attention to ensure that the length of the knots on it does not exceed 2/3 of the thickness of the timber. These places on the wood will not respond well to tension and cracks will appear as a result.
- Bonded boards, from which murlats are made - roof fastenings, are used in the construction of light frame houses, when heavy loads will not be placed on their roof. To save money, experts recommend using boards connected to each other instead of solid timber, which is heavy.
- Sometimes, instead of timber, beams made from steel pipe products are used to make a mauerlat for a gable roof. In this case, the wooden part of the Mauerlat does not extend beyond the perimeter of the building. Tubes are attached to its ends, which become the main support of the roof structure. Pipes must meet certain requirements: small cross-section; high strength and high quality steel alloy.
In the latter case, holes in the rafters are created strictly along the axis; their diameter should be 10 centimeters less than the height of the rafter leg. If this does not work, then steel elements should be additionally attached. The main advantage of this design is that the wooden part of the Mauerlat is protected by the roof.
Installation of roof slat
Installation of the Mauerlat can be carried out with or without a reinforcing belt. The first option is optimal for walls that are not strong enough, which rarely happens. Therefore, installation without a reinforcing belt is most common.
The Mauerlat is attached to the walls with anchors, but other fastenings are also possible
Fixation to a brick wall
Before attaching the Mauerlat, waterproofing material is laid on the brick wall, the edges of which, after installation, are fixed with staples on the beams. And you can also treat the edges of the walls with bitumen, and then lay the boards. This allows you to protect the base from rotting and deformation. Next steps are as follows:
- The beams are connected into a single rigid frame by splicing, which is carried out with an oblique cut and fixation with nails or bolts.
Mauerlat bars are spliced along the walls and fastened at the corners - As they are joined, the boards are secured to pre-installed anchor bolts. Additional fixation is possible using a strong metal wire embedded in the brickwork.
The ends of the bolts must be long enough to screw on the nuts - After laying and fastening the Mauerlat around the entire perimeter, you need to bend the edges of the waterproofing material, tighten them and secure them with staples.
Mauerlat can also be treated with a protective stain to prevent corrosion
Fastening the base for the roof can be done with an armored belt. To do this, along the edge of the walls, concrete is poured into a reinforcing structure made of rods laid along the length of the walls and fastened into rectangular structures. The formwork for pouring consists of boards screwed on the outside and inside of the walls. Concrete is poured inside onto the reinforcement and a fixation time of 5 days is waited.
The width of the armored belt should not exceed the thickness of the wall
Video: attaching the Mauerlat to the armored belt
Connecting beams to each other
The mauerlat can consist of thick beams, fastened together by cutting or sawing to half the thickness of the elements. If boards measuring 150x50 mm are used for the base, then they are laid three in a row. The elements are carefully fixed to each other with strong self-tapping screws, additionally installing them on anchors.
Video: splicing beams
Internal thermal insulation of the Mauerlat
As a result of the construction of the base for the roof, small cold bridges are formed, which significantly affect the atmosphere inside the room. For example, the area of contact between the attic floor and the mauerlat is often such an area. In such situations, careful insulation is necessary.
For insulation, it is important to identify the zones through which the cold enters
Before laying the insulation, all wooden elements must be treated with an antiseptic composition to prevent the development of fungus. Mineral wool is most often used as an insulating component, and polystyrene foam boards, fiberglass materials, and polyurethane foam are also popular. Plates of material are simply laid and glued to the surface of the required areas. An effective solution is sprayed insulation, namely polyurethane foam.
Features of waterproofing
Preventing moisture from entering the roof base structure is an important aspect of construction. Waterproofing protects the timber from rotting and preserves the integrity of the rafter system. For this purpose, the Mauerlat timber is wrapped in several layers of roofing material or one layer of waterproofing. Additional protection will be provided by pre-treatment of the boards with stain or other antiseptic and fire-fighting agents intended for wood.
Ruberoid and bitumen are popular waterproofing options
A minimum number of joints, high quality wood, and the absence of cracks are important conditions for the long service life of the Mauerlat. In this case, waterproofing will protect the material well and make the structure durable.
Methods for laying Mauerlat on walls
After the decision has been made on what the Mauerlat should be, its production begins. You also need to decide on the need for a reinforced belt. They do it on walls whose strength is in doubt, so that the future roof has reliable support.
There are 2 options for laying the Mauerlat:
- without armored belt;
- installation on a reinforced belt.
If the work is planned to be carried out on aerated concrete, which is considered a fragile material for walls, this is not easy to do. Experts advise constructing a structure for the Mauerlat using concrete or durable brick to provide a solid base for the connecting element.
Installation methods
The construction of the Mauerlat involves fastening the beams to the walls in the places where the rafters are supposed to be. In this case, you should give preference to solid wood. If the length of the walls is greater than the length of the beams, they are fastened together with an oblique cut using bolts, nails, and self-tapping screws. The corners are fastened with brackets and plates. An important point when installing the Mauerlat is the location of the beams. If you are not sure about this issue, it is better to get advice on construction from specialists.
There are several ways to install the Mauerlat on the walls:
- For the entire thickness of the wall (if the masonry is one brick).
- At the level of the inner surface of the wall, when wooden plugs are installed in the masonry.
- At the level of the inner wall, when small-section wooden plugs are embedded into the wall from the outer edge.
- At the level of the internal wall, on top of built-in wooden plugs, the dimensions of which correspond to the dimensions of the wall brick.
When installing the mauerlat on the inside of the walls, the masonry continues above the floor beams for another four rows. Then a wooden plug is built in on one side, and several more rows are laid out on the outside. Next, a double row of brick is made to cover the plug. Waterproofing is laid on top along the inner edge, and mauerlat bars are installed. Along the outer row, two more rows of masonry are made. Thus, from the outer edge the base is protected from moisture.
If the plugs are installed on the outside, the masonry is made to the required level. After this, wooden plugs are installed on the outside; Bricks are placed near them on the outer side. Waterproofing is laid on the top. The Mauerlat bars are installed on the inside, where there is a gap. In the case where the plug is installed under the Mauerlat, the masonry is not completed. Wooden plugs are installed two rows before the end; Laying continues on top. A mauerlat is installed on the inside, and masonry is continued along the outer edge to the desired height.
In all cases, 4-5 rows before the end, the bricks are laid with some offset. This creates a small niche for the mauerlat logs. The result is a rigid structure that works in tension and bending. It can withstand the entire thrust load.
Installation of the Mauerlat on the wall of the house is carried out using:
- wires;
- hairpins;
- staples;
- anchors
Such a Mauerlat (photo below) is installed for most house structures. These include houses made of brick, logs, or timber. But in some cases, when the walls of the house are built from aerated concrete, expanded clay, the mauerlat is installed on a reinforced belt. The reinforcement method is also used in cases where a house is built in an area where there is often bad weather and strong gusty winds blow.
Preparing to create a reinforced belt
Its thickness is calculated taking into account the projected loads acting on the roof of the building. They can be permanent (the weight of the rafter structure and roofing pie) and temporary (wind and snow). In any case, the width of the reinforced belt cannot be less than this parameter near the walls.
To get a strong belt, you need to use cement grade M400 and higher. It should be filled in one go. To prepare the mixture, take cement, pre-washed sand and crushed stone in a ratio of 1:3:3. Plasticizers are used as additives to reduce the water content in the solution and, as a result, increase the strength of the armored belt.
It is important that this element is laid continuously on both sides of the external walls of the building. The formwork for it can be building blocks that have a U-shape. Also, to complete the outer row, sawn blocks with a width of up to 10 centimeters are used. You can build formwork from OSB boards and even use standard wooden boards.
Required materials and tools
To install a horizontal supporting structure, you will need the following tool:
- hammer drill (impact drill) with a set of drills and wood drills;
- a hammer, preferably two, one weighing 1...1.5 kg and the second 0.6 kg;
- a hacksaw for wood with a blade length of at least 500 mm, large teeth and a wide pitch;
- chisel or chisel with a wide blade;
- a set of mechanical locksmith wrenches or an adjustable wrench;
- a sharp knife with a durable blade;
- pliers (pliers);
- measuring instrument: level, tape measure, plumb line, carpenter's square;
- marker or paint pencil.
The procedure for attaching the Mauerlat for a gable roof
To install the Mauerlat on frame or timber walls, screws, self-tapping screws or nails are used. To provide additional strength, perforated connecting parts are used.
If the house has a large area, and the roof will have a size of about 250 “squares”, then to attach the Mauerlat they use studs - threaded metal pins. They are installed every 2 meters and along the edges of the element.
First of all, for the armored belt, a concrete screed is poured around the perimeter of the walls, and then the pins are sequentially embedded so that the height of each of them is at least 3 centimeters greater than the thickness of the Mauerlat. Only after this can the Mauerlat be firmly fixed using nuts and washers.
In addition to them, metal staples are easy to use and are durable. We should not forget about the possibility of using anchors and twisted wire, which have excellent tensile properties.
Builders consider the simplest method of fastening to be using wire rod:
- Several rows before the very top of the masonry, pieces of wire are laid out between the brick rows so that their length is sufficient to tie the mauerlat after the walls are finished erecting.
- After completing the installation of the connecting element, the remaining ends are hidden between bricks in the thickness of the wall.
Mounting can be done differently:
- Reinforcement pins are embedded in the armored belt - they should be located below the height of the Mauerlat.
- 4-5 centimeter studs or long bolts with cut off heads are welded to them.
There is another method, which involves embedding studs or pins into them while laying the walls. But this option is only suitable for small roofs.
What is the Mauerlat made of?
The roof truss system is most often made of wood. The Mauerlat is also made from the same material. In wooden houses, the role of the Mauerlat can be played by the last crown of the walls, which is securely fastened. In buildings made of aerated concrete, brick and other similar materials, the mauerlat is constructed using wooden beams with certain parameters depending on the dimensions of the walls.
High quality wood is optimal for constructing a mauerlat
The Mauerlat is attached to the walls using metal anchors. To do this, bolts are fixed in the brickwork, the length of which is greater than the thickness of the beams. Then the places for the holes are marked on the boards, the beams are laid, inserting the ends of the bolts into the holes. Special nuts are screwed on top, securely fixing the Mauerlat. Thus, to create the basis for the rafter system, wooden beams with a cross-section of 150 or 200 mm and anchor bolts longer than the thickness of the beam are required.
Arrangement of a reinforced belt
After the concrete has hardened, a beam is placed over the rods protruding from the reinforcement. Even on the shortest wall, there must be at least four 12 mm rods in the armored belt for attaching the Mauerlat. When choosing pins or wire, the belt must also be made with reinforcement.
The thickness of concrete when constructing an armored belt cannot be less than 5 centimeters. As soon as the mixture is poured, it is necessary to ensure that air cavities do not form in it, which can be seen by the bubbles that appear.
This process violates the homogeneity and strength characteristics of the armored belt, but it is necessary to lay the mauerlat on it, which in fact is the foundation of the roof. Air bubbles will disappear if you pierce the not yet hardened concrete with a reinforcing bar. After 10 - 12 days, the formwork is removed after the mixture has hardened and become strong.
Next you need to do waterproofing. As an insulating material, roofing felt is laid on the finished armored belt.
Basic installation details
The Mauerlat beam should be laid no further than 50 millimeters from the outer edge of the wall. In the case of a gable roof, the timber must be laid parallel to the ridge of the roof, along the entire axis of the wall on the load-bearing walls of the house.
But also when installing it, it is important to ensure that the timber is laid horizontally, using a building level. If a deviation occurs, measures must be immediately taken to eliminate this deficiency.
The timber under the Mauerlat needs to be prepared, treated with an antiseptic and a fire retardant. Before fastening, lay the beam in its place and mark where the holes will be located. Individual sections of timber must be connected with a straight lock, additionally secured with nails. And also additionally securing it at the corners with a straight lock or an oblique cut. The Mauerlat can be attached to the boards using corners or metal brackets. Tighten all threaded connections using locknuts or with a groover backing and washer, and trim the excess length of the stud with a grinder.
How to properly lay murlat on walls
There is a certain order in how to correctly place the Mauerlat. When constructing a gable roof, it is mounted on the finished building frame parallel to the ridge along the entire perimeter of the walls. During installation, the main task for the home craftsman is to check the levelness using a level.
When even the slightest unevenness is detected, it must be eliminated: protruding areas are cut off, and those below the required level should be raised using linings.
Then they begin to prepare the timber, which will become the Mauerlat. The wood is treated with a disinfectant and fire retardant and dried well. The timber is applied to the place of fixation and marks are made where the holes will be drilled. Individual sections of the Mauerlat are connected into a common structure with a direct lock and additionally fastened with nails. At the corners, the timber is fastened with an oblique cut or using a straight lock.
After laying the Mauerlat, they begin to build a “bench”, for this:
- Measure the distance between the opposing parts of the Mauerlat.
- The resulting value is divided in half and the middle of the span is marked.
- The marks are connected so that the axis of the “bench” is formed.
Focusing on it, they begin to build the lower run. It would be more convenient to completely make a “bench” with the bottom girder in a horizontal position, and then lift it and secure it vertically according to the axis of the floor.
How to correctly calculate the parameters of the support beam
The Mauerlat is one of the strength elements of the rafter system, so it must be made from a powerful wooden beam or thick board. When determining the size of the mother beams, experienced builders are guided by the dimensions of the external walls - the transverse dimensions of the elements of the rafter belt should not be less than a third of their thickness . In most cases, these conditions are met by wooden beams with dimensions from 80x150 mm to 200x200 mm. The principle “the thicker the better” does not apply here, because excessively thick beams place an increased load on the walls and require additional effort during lifting and installation.
For the sake of economy, as well as for light loads, for the construction of the Mauerlat, you can use not a solid wooden beam, but fastened boards.
The length of the beam must correspond to the wall of the building. If the wooden frame cannot be made from solid beams, then they are joined. It is important that the individual parts of the straight sections are as long as possible. So, when using lumber of a standard length of 6 m on an 8-meter wall, you should take two beams 4 m long.
The dimensions of the Mauerlat belt are determined based on the length of the walls and their thickness
The connection is made with an oblique cut or the “half-tree” method with a straight or beveled lock. The first method is preferable because it provides higher rigidity under vertical loads. To fasten two parts of a beam, a bolted connection is most often used, less often - nails or powerful self-tapping screws.
In order to calculate the load that the Mauerlat will exert on the walls, use the simplest formulas to determine the weight and volume m=ρ×V and V=S×L, where m and V are the mass and volume of the Mauerlat, ρ is the density of wood, and S and L are the cross-sectional area of the beam and its length. When making calculations, all dimensions should be reduced to one system of units.
Popular methods of fastening rafters
Earlier in the article it was already explained what a roof plate is and why it is needed. Since it distributes the load on the roof, attention must be paid to the process of attaching the rafters to it. The integrity of the roof depends on it, which, if installed poorly, can deteriorate over time; it will begin to sag or put an increased load on one of the walls.
Two technologies for laying rafters are used:
- Tough . This option does not allow the rafter legs to move. To ensure stability, a hemming block is used to prevent shear. Thanks to the use of metal corners, elements of the rafter structure cannot move to the sides.
- Sliding . This method of installing rafters is necessary when the house was built from logs or timber, which begin to settle over time. In this case, the Mauerlat is not used, but only the upper crown of the wooden frame. If you apply hard technology, within a year the roof will lose about half of its strength because it will begin to leak.
Mauerlat for different types of roofs
The design of the roof base does not imply significant differences in the construction of different types of roofs. For simple gable roofs, the Mauerlat is always placed on the walls, as it serves as a support and connection layer for the rafter system and load-bearing elements.
Depending on the type of roof connection, the type of Mauerlat fastening is determined
If it is planned to equip a residential attic in a house under construction, then the construction of the Mauerlat is carried out using conventional technology. In this case, complex methods are not used, and the timber is attached to the walls with anchors. A special point is careful insulation, as well as waterproofing, since the attic should be comfortable.
The Mauerlat for the attic roof has a standard design
Hip roofs have a rather complex structure and therefore the Mauerlat system must be as strong as possible. The basis for a hip roof is created according to general principles, but the load on it is slightly greater than with a simple gable roof. To do this, it is best to attach the base to an armored belt.
The hip roof has four slopes
To build a roof with two slopes, you need a Mauerlat securely attached to the walls. The main load is carried out on two walls on which the roof slopes rest. In this case, fastening with or without an armored belt is suitable.
For a gable roof, the Mauerlat can be fastened using any method
Rigid option for fixing rafters to the Mauerlat
Usually, when arranging roofs, wooden rafters are installed, since they are the most affordable and easy to process. But wood has a significant drawback - it absorbs moisture and swells. True, after drying it returns to its original size.
It is important to correctly install the rafters on the Mauerlat of a gable roof and secure them so that, with increased humidity, the so-called expansion force does not form, which will lead to a significant reduction in the durability of the structure.
The goal of this technology is to eliminate the slightest possibility of the rafters moving. Therefore, the saddle of the cutout is firmly pressed against the Mauerlat and secured with nails, driving them in at an angle. It is important that these cutouts have the same shape and do not exceed a third of the width of the rafters.
Sometimes a meter-long beam is hemmed under the rafters, which also serves as a stop, and a metal corner is used for fixation.
Product requirements
- Wooden products must be thoroughly dried, preferably in a drying chamber. This is done so that during operation, under the influence of changes in temperature and humidity, warping of the base does not occur - this will affect the entire roofing structure.
- It is mandatory to treat the wood with antiseptic compounds that will prevent damage by insects, mold and mildew, otherwise, over time, the Mauerlat will weaken and collapse.
- The wood must be a dense, integral product that does not contain cracks, dead (black) knots, or areas affected by biological diseases and rot.
- Metal products must be smooth , without rust cavities, and covered with several layers of anti-corrosion paint.
Sliding (hinge) mount
Each wooden house shrinks in its own way. Over time, a structure made of laminated timber will sag the least, and a fresh log house will sag the most. In this case, shrinkage occurs unevenly and this negatively affects the condition of the rafter system. Installing a sliding mount helps to avoid distortion.
In a residential wooden house, after prolonged rains, the wood begins to swell, and in winter, as a result of loss of moisture, it dries out. This means that roof misalignment often occurs during the operation of the house.
At the same time, the following settle to varying degrees:
- south and north sides of the house;
- parts of the building that are constantly in the shade and in the sun;
- the side exposed to moist air from a nearby body of water, and the drier side;
- a wall blown by the wind and one in front of which there is another building.
Throughout its entire service life, the geometric parameters of a wooden frame are constantly changing. This happens especially strongly in winter. Thus, if the rafters on the upper crown are rigidly fixed, then the snow load will greatly bend the roof structure.
To avoid this, they use a special metal part that looks like a loop, called a “sled.” When the geometry of the log house changes, this fastening element moves relative to the guide, and the rafters settle without causing damage to the entire structure.
Sometimes roofers create a sliding angle using other time-tested methods. A gash is made in the rafter leg.
The beam is installed with a cut on the upper crown and fixed using:
- staples;
- crossing nails in the mauerlat;
- fixing steel plates;
- vertically driven nail.
A good alternative to sliding supports is forged wire twisted twice. It behaves well in tension and gives the elements of the rafter structure a certain degree of freedom.
Step-by-step installation guide
Before installing the beam, a number of preparatory works must be completed:
- a screed or armored belt is made;
- wire, threaded rods or a wooden block are installed to fix the Mauerlat (operations are determined by the selected type of beam fastening);
- the necessary tools and material have been prepared.
Stages of installation work:
- On the ground, all the necessary cuts are made in the block at the joints with other structural elements. Newly opened areas (by sections) are treated with an antiseptic.
- A control assembly is also carried out there , and if miscalculations and execution errors are identified, they are corrected.
- In parallel (if possible) or alternately with other work, waterproofing operations are carried out on the upper section of the wall - roofing felt is laid, coated with mastic, and other similar work.
- The elements of the Mauerlat rise to the top
- Installation using anchors. Installation of a wooden product is carried out on frame anchors or bolts - for this purpose the holes are made at the same time, through the beam and the wall at the same time.
- Fixation with staples. The frame is fastened with metal brackets, made in the form of a capital letter “P” stretched across the width. One sharp part is driven into a wooden block that was previously walled up when laying the wall, the other into the mauerlat.
- Fastening with wire. The beam is fixed to the wall with wire, previously mounted in an armored belt or wall masonry.
- Wedging method. One of the simplest inexpensive methods. Reinforcement of the same diameter is driven through the holes made in the load-bearing structure and the wall. Next, a metal wedge is driven between the reinforcement and the wooden beam, or, for example, you can screw in two self-tapping screws with a diameter of 4...6 mm from opposite sides. The depth of the hole in the wall should be equal to or greater than 25...50% of the thickness of the beam. The method is suitable for small houses with cross-sectional dimensions of no more than 10 x 10 meters.
The need for underlay and waterproofing
With direct contact between the wall and the Mauerlat, condensation forms due to the different thermal conductivities of the materials, so cut-off waterproofing must be installed (otherwise the wood will begin to rot).
In practice, waterproofing of Mauerlat is most often made from roofing felt or any other rolled bitumen-guided material in two layers. Ruberoid can be rolled out on the surface of the wall or attached to the Mauerlat using staples and a stapler; a strip of the required width is marked and sawed off from the roll with an ordinary hacksaw.
It is recommended to lay a linen or jute inter-crown sealant on top of the waterproofing for a tight fit and additional thermal insulation.
Another possible option is to install the Mauerlat on a substrate made of foamed polyethylene, which has both insulating and waterproofing properties.
That seems to be all I wanted to talk about in this article. As always, I invite readers to discuss nuances in the comments.
Adviсe
- Tip 1 . It is more convenient to install the Mauerlat with two people, due to the weight of the product and its dimensions, as well as the fact that when taking measurements, you will have to move a lot from one edge of the structure to the other.
- Tip 2 . If you have never done such work, then it is better to invite a specialist at least for consultation.
- Tip 3 . When exposing a beam along the horizon, you can first draw a horizontal line on the wall - this will facilitate visual control.
- Tip 4 . When choosing a material and having it delivered by third parties, be careful when accepting it - for reasons beyond your control, the material you have chosen may be changed to another. Hence the recommendation - if possible, it is better to accompany him yourself.
- Tip 5 . As an antiseptic, it is advisable to use a combined agent - bioprotection coupled with fire-prevention impregnation.