When finishing the ceiling, we want to receive not only aesthetic pleasure from the result of our work - the quality of the work performed and its durability are no less important.
For everything to work out as it should, knowledge alone of how to paint a ceiling without streaks: drips and unevenness is not enough. No less important components of the painting process are the correctly selected materials, dye and available tools. And, of course, strict adherence to all technological stages.
Preparatory activities: purchasing materials and necessary tools
When deciding whether to paint or whitewash the surface, you should take into account the specifics of the room in which the renovation is planned. From an economic point of view, whitewashing the ceilings is the cheapest and most accessible way to refresh a room.
However, this option is absolutely unacceptable in the kitchen and bathroom due to high humidity. For such rooms it is better to use water-based paint. The ceiling painted with it can be washed.
The only tools you will have to use during the work process are a brush (for small, hard-to-reach areas) and a roller.
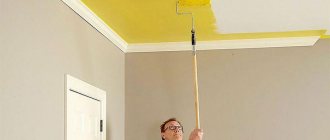
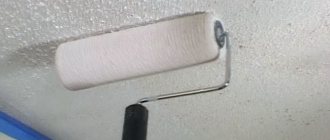
To ensure that the final result of painting pleases you and that the dye applies correctly and evenly, avoid using a foam-based tool - when working with such a roller, you will get defects in the form of drips formed from excess water-based paint. But whitewashing a room with such a roller is very convenient. For painting, it is better to take a fluffy seamless roller - it will not leave seam marks on the surface of the ceiling.
And one last thing.
Professionals recommend buying dye “with a reserve”, that is, a little more than you plan to use - subsequently choosing the required shade will be very problematic. When all materials and tools have been purchased, you can begin to work.
Spray painting
An alternative to a roller is to use a spray bottle. In Soviet times, a method was used such as painting the ceiling with a vacuum cleaner, but it is still more effective to use a spray gun specially created for this purpose.
The advantage of a spray gun is that it allows you to apply a thin layer of paint. And this, in addition to aesthetic beauty, also saves material. This method is also suitable for finishing embossed surfaces. Thus, painting a lining ceiling is most effective using a sprayer.
Painting the ceiling with a spray gun requires the mandatory use of a gauze respirator and safety glasses. Although modern water-based paints do not contain toxic substances, getting their microscopic droplets on mucous membranes is highly undesirable.
Before use, the paint must be strained through a thin cloth to filter out any clots. To do this, as a rule, it has to be diluted more than the instructions prescribe. But for spray painting it is quite acceptable.
The gun for painting the ceiling must be kept no further than 50 cm from the surface to be treated. Paint is applied in a circular motion. It is recommended to move the sprayer evenly without stopping in one place.
Painting technology, expert recommendations
How to paint the ceiling with your own hands so that it turns out smooth and neat? Experienced professionals recommend adhering to the following tips; their strict adherence is the key to a successful result.
Before you start painting the ceiling, you need to treat its outer surface layer.
If you plan to renovate the kitchen, it is better to first (before working with water-based paint) apply a layer of starting putty, sanding cracks, irregularities and protruding areas. A day after the screed has dried, it is advisable to remove dust. This is done for a more even and durable setting of the coloring composition.
When working with water-based paint, it is better to first paint the ceiling with some kind of primer. This way the dye will not begin to crumble and crumble over time. Compliance with this rule is especially important when finishing the ceiling in the kitchen - under the influence of external factors (soot, moisture, elevated temperatures coming from heating devices), the surface layer is destroyed, and the appearance of the ceiling will lose its attractiveness, no matter what paint you use.
When trying to paint the ceiling yourself, allow time for the primer to harden. If this is not done, then when you try to paint the surface with water-based paint, small grains of sand from the primer will mix with the coloring agent and the surface will lack shine and smoothness.
How to paint the surface correctly, from what angle to start, how to work with a roller: along or across the ceiling? These, at first glance, seeming little things, are not. When applying water-based paint with a roller, it is correct to start from the area located above the door of the room, applying stripes across the primer stripes.
The technology and principle of treating the ceiling with a paint layer is similar to the technique of applying primer: first, use a small brush to paint the corners and places where it is inconvenient to work with a roller, then apply the dye over the entire surface.
Roller painting
Like priming, painting starts at the corners. At this stage, a thin brush is used. It needs to be dipped in paint and pressed firmly to the very recess of the corner. Then the joints of the ceiling and walls are processed with broad strokes. It should be remembered that the correct pressure of the tool ensures uniform application of paint in a thin layer.
Then the strips along the edges of the ceiling are processed. To do this, use a wide flat brush. Immediately after completing this stage, you should begin to paint the ceiling with a roller, while the edges have not yet dried.
First, the roller must be immersed in the paint several times and squeezed out using a special clamp in the ditch. This is necessary to ensure that the tool is evenly saturated with paint, as well as to get rid of possible clots. If your tray does not have a spin system, you can use something with a flat surface, such as a piece of plywood.
Painting is done in stripes, starting from one of the walls. The edge of each subsequent strip should slightly overlap the edge of the previous one. The resulting layering should be rolled out with perpendicular movements of the roller. The pressure of the tool should be gradually increased as the paint on the surface of the roller decreases. Do not forget to squeeze the roller, otherwise the paint will drip and splatter. About
How to use a roller professionally
When making repairs, both in the kitchen and in living rooms, during the painting process you should not use the roller that was used for preliminary priming. It's better to buy a new one.
To paint the surface evenly, you can dip it well with paint and let it soak.
This should be done regularly, before applying the next stroke with a roller to the surface of the ceiling. This way the layer of water-based paint will not be too thin, the coating will become smooth and shiny. You can use a container with a special mesh for squeezing out excess paint.
Do not make the stripes too wide, since it should not begin to dry out before the next one is applied. The marks formed along the edge of the roller movement can be rolled out perpendicular to the direction of painting. And in order to immediately see minor defects and unevenly painted areas, you can ask someone close to you to monitor the process from time to time.
Try to avoid drafts and excess sun - you can ventilate the room no earlier than after 24 hours. This is how long it will take for the ceiling to dry completely.
Ceiling paint
Currently, materials for treating the ceiling surface such as lime, whitewash or chalk are used less and less (read: “White the ceiling with your own hands: easy and economical”). Their places have been taken by more effective water-based paints, which are offered by manufacturers in a wide range. They differ both in their purpose and quality characteristics. The main advantages of modern paints are environmental friendliness, safety for consumers, lack of unpleasant odor, and vapor permeability. Any paint contamination that occurs during operation can be easily removed without any consequences for the coating.
Finishing suspended ceilings
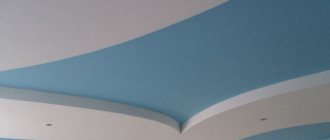
If you decide to update stretch ceilings or improve their appearance by painting, you should know that only stretch ceilings that do not have connecting seams are treated in this way. Otherwise, the result is unlikely to please you.
For painting, it is preferable to use acrylic-based compositions, and use a spray bottle. Professionals recommend not to carry out this procedure too often, since stretch ceilings increase in weight with each subsequent layer and will sag over time. Therefore, suspended ceiling structures can be painted no more than 4–5 times.
Experienced craftsmen consider it inappropriate to try to paint suspended ceilings on their own, since even a good professional cannot maintain the gloss and luster that they had before being treated with dye. After all, it is this fact that makes them original and stylish. Having lost their former luster and gloss, tension surfaces attract dust and dirt more strongly, in addition, it becomes more noticeable.
And finally, when exposed to temperature changes and the use of electric heating devices, suspended ceiling structures “updated” by self-painting will inevitably begin to crack after some time - such a ceiling will no longer look perfectly even and smooth. You can, of course, update it again, but the effect will be short-lived.
If, for some reason, the tension coverings have lost their presentability and need urgent restoration, an excellent alternative to painting would be to partially decorate it using airbrushing (applying ornaments, drawings, etc.). An artificially created, for example, imitation of the sky and clouds looks very stylish and creates a feeling of peace and comfort. Such suspended ceilings will not leave either children or adults indifferent.
Now, knowing in general terms how to paint the ceiling correctly, what materials to prefer, what they “like” and what they don’t, stretch ceiling structures, you can safely begin to embody your wildest ideas and design solutions. Remember, only a combination of knowledge of painting technology, the ability to choose the right paint, primer compositions and working tools will create a beautiful, high-quality and reliable finish for your ceilings.
The first (preparatory) stage of the process
Having decided to repair the ceiling, it is necessary to create convenient conditions for its implementation:
- Clear the room of all objects and furniture. For ease of finishing, it is necessary to organize access to the entire ceiling area. It is advisable to remove everything that is possible from the room - ideally, the room should be left with bare walls and floor. Those objects that, due to their dimensions, do not fit through the door, are placed in such a position that they do not interfere with the movement of scaffolding. For example, it is recommended to pull out a cabinet under the wall and place it in the center of the room.
- Protect all remaining items from dirt. Such repairs are accompanied by a large amount of debris and dust, so furniture and other items remaining in the room are carefully wrapped in film or old fabric. It is recommended to protect the floor with paper or thick film;
- Remove the chandelier and wall lights. It’s better to spend time on this than to clean them of dirt and paint later. Instead of a chandelier, one incandescent light bulb with a power of 150 W or more is hung.
Preliminary diagnostics of the ceiling
Carefully examine the external condition of the ceiling covering before painting the ceiling in the room. Painting will make ceiling defects, unevenness, cracks, chips of old paint or chalk more noticeable. Even the slightest peeling of plaster and swelling threaten to fall to the floor after applying a heavy layer of fresh paint on top, and this will significantly complicate and prolong repair work.
Experienced craftsmen use the light method to preliminary diagnose the condition of ceiling plaster.
To do this, direct the light beam of an ordinary table lamp or spotlight along the ceiling and notice all the resulting shadows in order to then eliminate them. You can thoroughly level the ceiling using a wide spatula or a hard grater. This is a really important point in the process of construction and repair work, and especially in the task of properly painting the ceiling with your own hands in order to maintain its impeccable appearance for a long time.
Preparing the premises
Painting the ceiling is a rather “dirty” type of renovation. But this, of course, is not a reason to abandon the idea of painting the ceiling. It’s just that all interior items that cannot be removed from the room need to be reliably protected. Furniture must be wrapped in plastic wrap or unnecessary sheets that you don’t mind throwing away. Window sills and radiators can be covered with newspapers. The floor can also be covered with newspapers or film.
It is better to remove the chandeliers, as they will interfere with work and may become stained with paint. For lighting, it is recommended to use a bright portable lamp. It can be hung from a pole or mounted on a tripod, like those used for professional photography, and moved during renovations so that it shines on the area of the stream you are painting.
Ceiling painting technology
Do-it-yourself whitewashing of the ceiling and baseboards
The next question concerns the ceiling painting technology itself. You should seriously think about which construction tool to choose for painting and what paint to paint the ceiling with.
As a construction tool that is best used to paint the ceiling, you need to use a rectangular brush and a seamless polyacrylic roller with a pile thickness of 11 mm.
Using a brush, carefully trace the perimeter of the ceiling to a line width of at least 5 cm and paint the corners. To paint the ceiling without streaks, you should apply at least two layers of paint. The first layer is applied very carefully with a roller over the entire area of the ceiling, drawing continuous stripes from wall to wall in one direction.
Each subsequent strip begins from the middle of the previous one, but does not allow excessive paint to flow. In this case, the formed sagging should be rubbed with a roller extremely carefully, because...
plaster saturated with paint becomes loose and may even fall away from the ceiling. Secrets of the craft and a description of the work process on how to paint a ceiling with a roller are offered on our website. For a better understanding, there are also photos of ceiling painting that will help you cope with this task perfectly.
After treating the entire ceiling, you should take a break of at least 4 hours to allow the paint to dry completely. And only after that, proceed to applying a second layer. This is an excellent way to achieve a glossy finish when painting the ceiling with water-based paint or any other type of paint.
The process of painting a ceiling with your own hands involves a lot of different questions. It is for non-professional repairmen that our website has prepared a special video on how to paint a ceiling, which will help cope with such a difficult task.
In addition to technological aspects, special attention is paid here to design solutions. For example, what color to paint the ceiling in order to advantageously present your own style and achieve perfect harmony in the room. These are exactly the moments that will allow you to live brightly and comfortably!
Stage No. 2 Selecting paint
A number of factors will help you decide what paint to paint the ceiling: the purpose and volume of the room, the ability to care for the surface.
Criterias of choice
- If the paint is intended for a kitchen ceiling that requires wet cleaning, it is worth choosing abrasion-resistant and washable types of paint.
- The required volume of dye is determined based on the calculation of consumption per square meter and the degree of coverage, meaning how much paint is needed to paint over a dark surface without showing through. A good opacity indicator is from 20 to 60 grams per square meter.
- It is necessary to purchase the material taking into account the fact that the coating is made in at least two layers.
- There are matte and glossy varieties of dyes. If you are not sure of the evenness of the ceiling, a matte one will be acceptable.
- However, it is worth remembering that it is difficult to care for a matte ceiling. There is also a compromise version - semi-glossy paint.
Types of dyes
Today the market is rich in a variety of products. The most suitable for covering the ceiling is water-based paint. It has an affordable price, dries quickly, and does not have a strong odor.
In addition, it is safe as it is water-based.
There are several types of water-based dyes:
- Polyvinyl acetate - not suitable for rooms with high humidity, since the resulting condensation can leave marks on them.
- Mineral - made on the basis of cement or lime; such dyes are practically not used in painting ceilings.
- Silicate – paints that contain silicate glue. The advantages of dyes include low price and good performance. The disadvantage is that it is unstable; when washing the surface, the paint wears off.
- Acrylic – dyes based on acrylic resins. They are one of the most commonly used for painting wet rooms due to their low cost, resistance to moisture and temperature changes.
- Silicone – paints based on silicone resins that mask cracks well. They have the advantages of acrylic paints, but have a high price.
DIY ceiling painting video
How to paint a ceiling
Video diagram of leveling and painting the ceiling:
How to level and paint a ceiling with your own hands.
It would seem a simple matter to paint the ceiling
I've been renovating for several months now.
Alone without any help, and without any special training. Before that, I did a little renovation, not professionally, mostly finishing work. Before I started painting the ceiling, I didn’t read a single line on this topic on the Internet.
Apparently in vain. There are some things I could have done better. It would seem such a simple matter to paint the ceiling.
To tell the truth, I was hoping to finish this process in a few hours. In the end, it took several days to do everything about everything (about 24 hours in total), because I didn’t know the most basic things and figured everything out on my own. Knowing the simple points, I could have done it much faster.
Because My ceiling required quite serious repair work, so I didn’t start right away with painting. In fact, the painting process itself is the simplest thing about painting a ceiling :).
In my case, the scope of work, from start to finish, was: cutting the groove (for wiring), laying and fixing the cable, sealing the groove, leveling the ceiling, priming, painting and touch-up. Each of these types of work brought me many “pleasant” surprises. In our case, we will assume that you have hidden wiring and you do not need to cut the grooves and lay the cable; this is a separate topic for “conversation”.
Primer
When deciding how to paint the ceiling yourself correctly, you need to remember such an important event as priming the ceiling. Without its application, the paint will not adhere well to the surface, since moisture from the paint will be absorbed and dry quickly, depriving the material of all adhesive properties, and the paint itself may soon begin to crumble. After applying the primer, you need to wait for it to dry completely and then paint the darkest areas. You can achieve a perfectly flat surface by applying a second coat to the dried primer. However, it is important that an excessively large amount of primer is not applied to the ceiling (more details: “Do-it-yourself ceiling primer”).
Tools you'll need
Let's start with the tools.
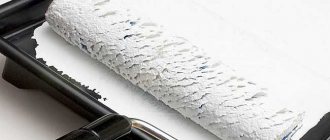
So, we need a roller. I painted with a long nap roller. The seller recommended it to me (I think for good reason), and later I found confirmation of this.
Foam and velor rollers are not suitable. We will also need a paint tray and a brush. It doesn’t matter what kind of brush, the main thing is a bigger one :).
I’ll go into a little more detail about paint.
I used water-based paint, of course you can use oil paint, but then it will be difficult to peel it off the ceiling in the future. I would also NOT recommend using glossy paint; it perfectly conveys any unevenness in the ceiling and looks somehow too glamorous. You will also need a rag and, oddly enough, construction glasses :).
Can you guess why? That's all. Let's move on to the actual painting process, or rather preparation for painting.
Painting tools
Once you have decided on the choice of paint, it is time to check the availability of the tools that will be used and, if necessary, purchase the missing ones.
The list of necessary equipment is quite simple:
- Stepladder. Even if you use a ceiling paint roller with a long handle, you will need it to paint the corners.
- Spatula for preparatory work.
- Sandpaper.
- Construction tape.
- Drawer for paint. It is recommended to use modern models with a special device for squeezing paint from a roller.
- A set of thin brushes for finishing corners.
- Wide brush for applying paint at the joints with walls.
- Roller. This is the most important tool for painting, so we will talk about it in more detail.
There is also a finishing method such as spray painting the ceiling. It will require the same list of tools, with the exception of a roller, instead of which an electric spray gun will be used.
Ceiling leveling
Nowadays, even a small child knows that in order to paint the ceiling, it must first be leveled.
Most often, the problem of uneven ceilings occurs at the joints of ceilings. They either stick out or, on the contrary, have gaps. For example, my ceiling joints were sticking out.
I solved this by using a sander. I walked along the joints, removed a layer of paint, concrete and old putty, the sander removes all this perfectly. When processing joints, the main thing is not to get carried away and not to remove too much.
If gaps appear in the slabs, they can be eliminated using putty.
The difference in height in the slabs can also be leveled with putty. It allows for leveling in layers up to 1 cm, which is quite enough for a ceiling. Important point! When leveling the ceiling, do not use oil-based putty; it is expensive and will crack on large surfaces; this has been proven through bitter experience.
It’s a good idea to use oil putty to eliminate small gaps and depressions, no more than 1 cm wide. For example, I putty the grooves quite well with it. If desired, you can putty the same joints in the slabs.
Pre-treatment of the base ceiling
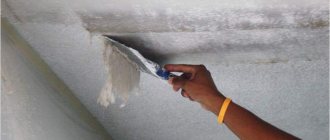
The ceiling painting technology requires thorough cleaning of the concrete surface before performing all subsequent work. The whitewash is washed off with a damp cloth, the paint is cleaned with a spatula and sandpaper. All old finishing materials must be completely removed.
After the ceiling is cleaned, cracks and potholes are repaired. Large surface defects are filled with fiberglass. Then small cracks are sealed with putty and the ceiling is leveled. The dried layer of putty is sanded with sandpaper. The result should be a flat surface. The final result will largely depend on the quality of this stage of repair. After all, the ceiling painting design is determined by the condition of the surface on which the material is applied. Unlike other types of finishing, painting does not hide unevenness.
The final stage of preparation is cleaning the ceiling from dust. The procedure is carried out using a vacuum cleaner. A surface cleared of putty microparticles will require less primer, and the paint on such a ceiling will adhere better.
Prime the ceiling, this is important!
Before leveling the ceiling, prime it and remove the top layer of paint.
I screwed up on this. In places where leveling was not needed, the old paint peeled off and appeared in clumps mixed with the new one, I had to literally pick out the old layers of paint with my fingers. The solution in this case may be this.
Take a spatula or sandpaper and scrape off the old layer of paint, quickly and efficiently. As a last resort, when painting, just take more paint so that the roller does not stick to the surface. If your ceiling is painted with oil paint, I would recommend going over the surface with sandpaper, IMHO this is more effective and the paint will adhere better.
We smoothly move on to the painting process itself.
When the surface is leveled and primed, you can begin painting. There is no wisdom here. The main thing is to make sure that the primer and putty are completely dry.
According to the instructions, the primer should dry for 1 hour, and the putty for 12 hours (time varies depending on the manufacturer). I waited a day in both cases, which is a lot. In your case, everything depends on your patience.
One more thing. There is no need to apply a primer over the putty; the paint will adhere perfectly. Especially if it is white paint, it will match the putty.
Ceiling priming - everything you need to know
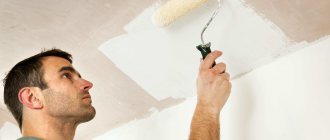
Before you start painting, don't forget about the primer. It will provide better adhesion of paint to the surface, extend the life of the coating and reduce material consumption. The recommended type of primer is usually specified by the manufacturer. In some cases, the ceiling is primed with the same paint diluted with water. When preparing the mixture, strictly follow the manufacturer's recommendations. We start priming the ceiling from hard-to-reach places with a brush, and then move on to the main surface.
A primer is needed for better adhesion of paint to the surface.
A roller will help you quickly prime the ceiling. We advise you not to use the same painting equipment as for painting, but to purchase an additional set. We start priming from the corner from the window, moving towards the opposite wall. We carry out the process continuously. Apply a layer of primer in overlapping strips about 1 m wide. After drying, treat dark areas with gaps or apply a second layer of primer to the entire surface. Let the primed surface dry in accordance with the manufacturer's instructions.
Preparing the ceiling for painting
- Dismantling. At the beginning, when the entire room is cleared of furniture or it is securely covered and does not interfere, the old finish is cleaned off. The whitewash is washed off, the old paint is scraped off with a spatula. It is advisable not to leave streaks or uncleaned areas, otherwise there will be uneven areas and they will stand out.
- Sealing cracks. There may not be any defects, but if they are found, you will have to putty or plaster. Select a building mixture for the type of paint, mix and start processing. When the layer is dry, sand it thoroughly.
- Padding. The prepared surface is coated with a deep penetration primer. If necessary, anti-mold or mildew compounds are additionally applied to it. But now there are combined liquids, which greatly simplifies and speeds up the process.
Ceilings
0 votes
+
Vote for!
—
Vote against!
Today, painting the ceiling is still popular. This is a simple and fairly cheap option for finishing the ceiling, which can be completed in a short time and without special construction skills. The only thing that can spoil the impression of a freshly painted ceiling is its uneven surface. Therefore, preliminary preparation of the ceiling for painting is necessary. The work itself takes up the lion's share of the entire ceiling finishing. But if the preparation of the ceiling for painting is poorly done, then the final result may be disappointing. To prevent this from happening, you need to be patient and carefully complete all the work to prepare the ceiling for painting.
- Ceiling cleaning
- Ceiling repair
- Ceiling primer
- Surface reinforcement
- Ceiling putty
- Ceiling sanding
- Preparing the ceiling for painting: video
Preparing the ceiling before painting takes place in several stages. Each of them is necessary to create a smooth and reliable surface for further paint application. To carry out surface preparation work, you will need a certain tool :
- wide and narrow spatulas;
- roller and brush;
- paint trough;
- container for mixing putty;
- drill and special mixer attachment;
- stationery knife;
- a grater with a sanding mesh or a special sanding machine with zero sandpaper;
- safety glasses and respirator.
Materials you will need :
- deep penetration primer, for example, Ceresit ST 17;
- Knauf multi-finish gypsum putty or other;
- painting fiberglass “gossamer”;
- glue for glass wallpaper;
- a stepladder, or better yet a table or trestle.
Having acquired everything you need, you can begin the actual work of preparing the ceiling for painting.
Ceiling cleaning
When finishing from scratch in a newly built house, you can immediately proceed to the second stage of work. But if a major renovation is being carried out, then you will first have to clean the ceiling of the old finish. There are several options for what you have to do.
- If the ceiling was covered with wallpaper , then using a regular spray bottle or roller we wet the surface with warm water and let it absorb. After some time, the glue will get wet, and the wallpaper can be carefully removed using a regular spatula. It is enough to pick them up, they will easily come off. As a result, not a single piece of paper should remain on the ceiling. Finally, wash off any remaining glue. This can be done with a regular sponge dipped in warm water. You may need to change the water several times. The main thing is that the ceiling surface is clean as a result.
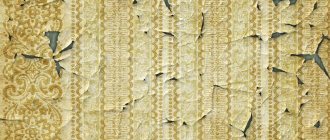
- If the ceiling was previously painted with water-based paint or whitewashed , you will have to do the same as with wallpaper. First, lightly wet it and then use a spatula to scrape off the old finish. But unlike wallpaper, which can be removed almost as a whole canvas, paint or whitewash is not so easy to scrape off. Ideally, the old coating will be removed in small flakes. Otherwise, you will need to work hard. To facilitate the process, the surface will have to be slightly moistened from time to time. Some craftsmen remove the whitewash dry. This approach has its place, but it has one significant drawback - too much dust. Upon completion of work on removing whitewash or water-based emulsion, the ceiling must be thoroughly washed. You will have to change the water several times.
- In the case where the ceiling was painted with acrylic paint , you can go in two ways. The first is to moisten the surface with a special remover, and then carefully remove the paint using a spatula. This method is the easiest, but also the most harmful to health. The second option is to use a hammer to knock off the old paint. Which method to choose is up to the masters to decide. After cleaning the ceiling from acrylic paints, it is enough to scrape it with a metal brush.
- If the ceiling was covered with plastic or ceramic tiles, you will have to be patient, since the removal job will not be easy. And if with plastic panels everything is relatively simple - tear off all the panels and then remove the remaining glue. In the case of ceramic tiles, you will have to tinker, beating the mortar with a hammer.
- For suspended plasterboard ceilings, things are somewhat different. The thing is that it is quite difficult to remove the old coating without damaging the sheet of drywall. Therefore, the option of complete or partial replacement of sheets is possible. And these are additional costs. But in contrast to this, less effort will be spent preparing the surface of a plasterboard suspended ceiling for painting.
Ceiling repair
After cleaning the ceiling from the old coating, you should carefully inspect its surface for cracks, potholes or other damage. If there are any, you will have to do a little repair and seal them. To do this, we impregnate the damaged areas with a deep penetration primer. The most convenient way to do this is with a brush. Let the primer dry completely and then, using a narrow putty knife, seal it with multi-finish putty. A special feature of multi-finish putty is the ability to perform both finishing and rough finishing, applying a layer of putty up to 10 mm. If the depth of damage is more than 10 mm, then cement-based putties should be used. After complete drying, some unevenness of the putty area may occur due to shrinkage of the putty. This is quite natural and will be eliminated with further leveling of the surface.
Important! The putty dries quickly enough, so to carry out rough repairs to the ceiling you should do a small batch. After completing the work, you can safely throw away the remains and rinse the container thoroughly.
Ceiling primer
After the repaired areas have completely dried, you can begin priming the ceiling surface. Applying a layer of primer will ensure better adhesion of the putty to the ceiling surface. To do this, use a roller to evenly roll out the primer over the entire surface. You can apply the primer in two layers, which will only increase adhesion. The work itself should be carried out wearing safety glasses.
For convenience, the roller can be attached to a telescopic handle. This will allow you to saturate the entire ceiling quickly and without much difficulty. Coat corners and hard-to-reach places with a brush. Here you will have to work hard, getting to difficult places with the help of a stepladder. If you plan to putty the walls in the future, then immediately prime 15–20 cm of the wall from the ceiling. Upon completion of work, leave the primer to dry. The drying time is indicated on the packaging and should be adhered to.
Surface reinforcement
To give the ceiling additional strength, seal cracks and partially level the surface, the surface is glued with fiberglass “gossamer”. The first thing to do is to coat an area equal to the size of the canvas with special glue for glass wallpaper. Apply the glue with a roller, then apply the canvas and press it so that it sticks to the ceiling. Complete leveling is carried out using a wide spatula, holding it at a slight angle, first along and then across the canvas. Having smeared another area, glue the next canvas. At the same time, we make a small overlap of 2–3 cm over the previous one. Now we take a utility knife and, using a metal ruler or a wide spatula, cut both canvases along the entire length of the overlap. The result will be slices on both canvases that fit perfectly together. Having removed the cut pieces, we bring together and glue the edges. This method of bringing the edges together is necessary so that the surface of the ceiling after gluing the fiberglass is smooth, without protrusions or cracks. Having pasted the entire surface in this way, we apply another layer of glue, which will strengthen the already glued canvases. After letting the glue dry completely, you can proceed to puttying the ceiling.
Ceiling putty
Plastering the ceiling is quite a labor-intensive process. The reason is the inconvenience of applying materials. Of course, after some time the skill is perfected, and the work goes quite quickly. But for a beginner, preparing a plasterboard ceiling for painting, or even preparing a regular concrete ceiling, can seem like quite a daunting task.
To make puttying the ceiling relatively easy, you should ensure ease of movement. And a goat is perfect for this. If this is not the case, you can put a couple of tables nearby. The main thing is that when performing work you can move freely 1.5 - 2 m forward and backward. Also, for convenience, it is necessary to ensure that there is a height reserve of 10 - 15 cm above your head. This will allow you to see all the flaws without straining your neck too much.
Having arranged the workplace, we perform putty. Everything is simple here. According to the instructions on the package, add the dry mixture and water in the required proportion to a large container. First, after mixing a little by hand, connect a drill with a mixer attachment and knead until it becomes thick sour cream. If the resulting consistency is too runny, you can add a little mixture and mix thoroughly again. If it’s thick, use water. We make the batch at the rate of production in 40 – 50 minutes. Beginners are advised to make small batches and see how long it takes to produce it. And only then make a full batch.
Important! It is highly not recommended to add mixture and water to an old batch. Such a batch will not have the necessary strength characteristics.
Now we take an ordinary wide or notched spatula and apply the finished putty on it. This is done using a narrow spatula. Next, placing the spatula at an angle to the ceiling, pull it towards you. We repeat such movements over the entire surface of the ceiling until we have worked out all the putty from the spatula. At the same time, we make sure that no large clumps of putty remain on the surface of the ceiling. And the surface itself was smooth and without drops. If necessary, use a spatula and level it. After puttying the entire surface of the ceiling, leave it until completely dry, after which we proceed to sanding.
Ceiling sanding
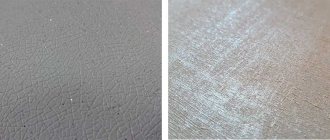
Preparing the ceiling for painting with Snezhka, Auro, Tikkuril or any other paint requires a perfectly flat surface. Otherwise, in a certain light, all the imperfections will be visible. Therefore, at the last stage of preparation, the ceiling is sanded. It can be done manually or using special grinding machines.
Sanding the ceiling manually is done “under a light bulb”. To do this, take a regular incandescent lamp attached to the end of the holder. By holding it close to the ceiling and highlighting it, you can see all the imperfections after puttying. You can level them using a grater with a mesh. To do this, performing circular movements with a grater, we move in a straight line from wall to wall. From time to time we go some distance away and check the work. The mechanical grinding method is much simpler, requires less effort and time, and there is almost no dust. But the principle of doing the work is the same - circular rubbing while moving in a straight line.
Important! When sanding by hand, you must protect your eyes and respiratory system from gypsum dust.
After sanding the ceiling, all that remains is to go through the primer again, let it dry and the surface is ready for painting. All work on preparing the ceiling can be safely done alone, since there are no particular difficulties in this. When working, the main thing is to carefully ensure that the surface is smooth during puttying and sanding. As a last resort, you can go through the putty again and sand it again.
Preparing the ceiling for painting: video
Advantages and disadvantages of painted ceilings
Advantages of a painted ceiling
- Environmentally friendly and harmless to people.
- Large selection of colors and the ability to create unusual combinations.
- Suitable for arranging original interiors.
- Easy to clean from dirt and dust.
- Quickly repaired, especially if the shade is white.
- Ceilings in cold and heated rooms can be painted. Coatings with the correct composition will not crack.
- The presence of impregnations will prevent the appearance and spread of mold and mildew.
- No special equipment or special skills are required for application.
- Paint is a great option for those who often change their decor and love variety.
Disadvantages of this finish
- A painted ceiling can easily be scratched if touched with any sharp object.
- Over time, the decoration may begin to crack.
- Not suitable for uneven interfloor floors, since other materials will have to be used for leveling, and this will entail new expenses.
- Requires fairly frequent updates. Usually once every 3-5 years, but maybe more often if the room is too hot or damp.
- It is difficult to restore a rare or mixed shade. The whole room will have to be repainted.