assets/from_origin/upload/resize_cache/iblock/c56/600_450_2/c5644f0fe522cb0e71ba0ce37570cb5e.jpg From this article you will learn:
- What types of wallpaper can be painted?
- How to properly glue and paint wallpaper on the ceiling
- What paint to choose for wallpaper
- What paint to paint non-woven wallpaper on the ceiling
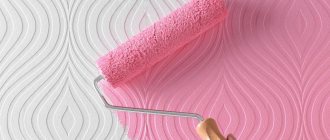
Textured ceilings are found in many interior styles. You can create various three-dimensional images on the ceiling surface using ordinary putty material. But this will require spending a lot of time and money. Using fiberglass or non-woven wallpaper will help solve the problem. Later the surface is painted in the desired color. In this article we will tell you what paint to use to paint wallpaper on the ceiling.
Selection of coloring composition
Before painting wallpaper on the ceiling, you need to choose the right paint. Its selection depends on the type of finishing material that is glued to the ceiling. If glass wallpaper is used, then you can give preference to any coloring composition. For vinyl wallpaper, it is recommended to use acrylic paint. For non-woven fabrics, only water-based ones are suitable. However, even for fiberglass, materials must be selected carefully, because this will determine the characteristics of the finished surface.
Often painting wallpaper on the ceiling is done using alkyd enamels. They create a hard, wear-resistant and moisture-resistant film on the ceiling. Thanks to these properties, the surface painted with this type of paint can be constantly washed using detergents. However, this enamel also has disadvantages:
- due to air tightness, the microclimate in the room is disrupted;
- completely dried enamel releases toxic substances;
- the paint does not emphasize, but smoothes out the texture of the ceiling wallpaper.
Thus, for painting the ceiling indoors, it is not recommended to give preference to alkyd enamels. Water-based paint is durable and harmless. But ceilings painted with it should not be subjected to frequent wet cleaning to avoid washing off the coating. This type of paint needs to be applied in 2-3 layers to obtain a rich color. In this case, the work must be done very quickly, otherwise the junction of the fresh and already dried paint composition will be too noticeable.
The best option would be to use water-based paints. They contain polymer additives and acrylic, thanks to which the painted surface becomes wear-resistant and can also be subjected to wet and dry cleaning. Currently, painting the ceiling in various colors is very popular. To give the paint a certain tone, it is recommended to use machine tinting, which can repeat the shade. If there is a shortage of tinting composition, it is very difficult to manually calculate the required amount of coloring pigment.
Also, when choosing a material, it is worth considering that coloring compositions come in matte and glossy. The choice of the required type depends on the quality of the ceiling surface. If it has unevenness, then it is worth buying matte paint, since glossy paint will only highlight the defects.
Which ones are better to choose?
The best option is non-woven and vinyl wallpaper. This type of finishing is intended specifically for painting. Let's look at their differences, advantages and disadvantages.
Vinyl
This type of wallpaper consists of two layers. The first is paper, the second is PVC. Due to this, they have high strength and elasticity. Their main advantage is fire resistance and water resistance.
They can be washed with water and cleaning agents.
After cleaning, the top layer will remain in its original form. Such wallpapers are not afraid of direct sunlight, which means their color will not fade and will retain its original brightness for a long time. Vinyl wallpaper is not afraid of mechanical damage either.
The layers of wallpaper are impregnated with a special antifungal composition, which prevents mold from forming at high humidity. Therefore, they are often glued in the kitchen and bathroom.
They come in a wide variety of shades and textures. Manufacturers produce coatings that imitate tiles, wood, fabric and even leather.
Vinyl wallpaper comes in three types:
- Foamed.
They have a textured surface, making them ideal for finishing uneven walls. The only negative is that they are less moisture resistant.
Silkscreen printing.
They differ in the content of silk threads in the layer. They retain their color and structure for a long time, but are more expensive than their analogues.
Washable.
Washable vinyl wallpaper is most often used to decorate bathrooms and kitchens. Their waterproof surface protects walls from moisture and fungus. They are easy to clean, withstand constant humidity, and do not fade.
The disadvantages include the presence of a synthetic layer that does not allow air to pass through and releases formaldehyde.
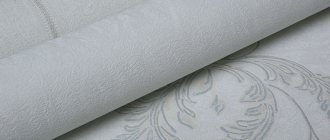
Non-woven
Non-woven fabric is made of cellulose bonded with polymer fibers.
In its composition, it is close to ordinary paper wallpaper, but unlike them, it has increased strength and fire resistance. This type of finish allows air to pass through well, allowing the walls to “breathe.” Another advantage is that dust does not settle on the surface. Non-woven wallpaper does not require special care. To remove dirt, use a damp cloth or sponge. They are not afraid of water, are not subject to fire and fading.
Their undoubted advantage is that during repeated repairs they do not need to be torn off from the walls - new wallpaper can be glued directly to their surface.
The only downside is the susceptibility to mechanical stress. Scratches and cracks can easily form on the top layer if you protect the walls from the influence of external factors.
Unlike vinyl wallpapers, non-woven wallpapers are much more expensive, and the design solutions are not particularly diverse.
Painting wallpaper is a very responsible process. After all, in order to get the desired shade, you will need to master tinting - mixing several colors. For painting, as a rule, choose white wallpaper.
If the shade is not particularly important to you, and you do not want to spend more money and time on repairs, then you can opt for colored wallpaper.
Preparatory work
Before you paint the wallpaper on the ceiling with water-based paint, you need to do some preparatory work. These include the following:
- De-energizing the electrical wiring in the room where painting will be done. This will prevent electric shock or short circuit.
- Bringing the room temperature to the values recommended by the paint manufacturer.
- Preventing drafts, since it does not allow the paint composition to dry evenly, and there is also a risk of dust settling on the undried surface.
- Covering floors, doors, windows, lamps with polyethylene, as well as removing furniture from the premises.
- Prepare gloves, safety glasses, headgear and tools required for the job.
When performing complex repairs, the ceiling is painted before the walls are finished, so it is not necessary to protect them. When repainting only the ceiling, the walls must be covered with plastic film, secured with double-sided tape.
Painting options
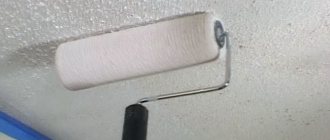
There are several options for painting the ceiling surface. To color paper and glass wallpaper, you can use the traditional method. First of all, use a brush to paint the corners and perimeter of the ceiling, and then paint the rest of the area with a roller. Painting is carried out in 2-3 stages. The first layer is applied across the beam of light, that is, along the wall with the window. After the first has dried, a second layer is applied parallel to it.
Painting non-woven wallpaper on the ceiling can be done in several ways. To create an unusual color effect, you can paint the wallpaper before gluing it to the ceiling. Painting is done from the reverse side. In this case, the outer part, that is, the interlining, will be painted, but the base itself will remain white. Pasting the ceiling is done after the paint has dried.
An unusual option for painting non-woven-based finishing material is to use two shades of paint. To do this, add a smaller amount of water to the dispersion paint than indicated in the instructions. The ceiling is first painted and then covered with wallpaper. After complete drying, take a foam sponge, previously soaked in paint, and then wipe the wallpaper with it only along the relief. As a result, the base of the finishing material turns out to be dark, rich, and the protruding pattern is delicate. If desired, the pattern itself can be painted with contrasting paint.
Tips from the professionals
Ceiling wallpaper painting should be done professionally. Many professionals advise:
- Be sure to soak the roller coat before painting. This will prevent the lint from falling out. After drying the instrument, you need to rub it with your hand to remove all excess fluff.
- Do not immerse the roller completely in the bath. First one side gets into the solution, and then the other. This will allow the paint to be evenly distributed over the surface of the wallpaper.
- The paint is applied in two or more layers. If the first layer was applied horizontally, then it is better to apply the second one vertically. This way the surface will be painted more evenly.
- If the wallpaper dries too quickly, increase the humidity in the room.
- To highlight the pattern, you need to apply a third layer. This work is done with light and smooth movements. You can use a rubber or velor roller.
Painting non-woven wallpaper
Before you start painting non-woven wallpaper, you need to prepare in advance the materials and equipment necessary for the work:
- coloring composition;
- paint tray;
- roller with a pile length of 12 mm;
- telescopic handle;
- brush width from 50 to 80 mm;
- polyethylene to protect the room;
- work clothes.
The roller must be selected according to the type of finishing material. For embossed wallpaper, a tool with a long pile is suitable, and for smooth wallpaper, a tool with a short one.
After preparing everything you need, you can start painting. Process sequence:
- Initially, you need to pour the paint into a special tray, dilute it 1/3 with water, and then put the paint on a roller and roll it out on the grooved surface of the tray provided for this purpose. This is necessary to remove excess paint and distribute it evenly over the roller.
- After applying the base layer, you need to use a brush to paint the surface in hard-to-reach places and around the entire perimeter of the room.
- You should wait until the base layer has completely dried, and then apply the final adjustment layer parallel to the window. It is necessary to even out the base tone and mask painting errors when applying the base layer.
Water-based compositions begin to dry 5 minutes after they are applied to the surface. If poorly painted areas are found, they are covered with a correction layer, but this is done only on a dry basis. When gluing new wallpaper to the floor, you need to wait until it is completely dry and only then start painting.
Preparing the concrete surface
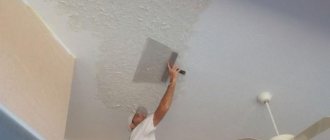
The scope of work depends on the material of the walls, for example, concrete surfaces most often only need puttying. And plastering work is carried out in several stages: applying a spray, followed by a cape of the main layer, no more than 6 mm thick. At the finish they make a covering. So:
- After the plaster has dried, the surface is leveled using putty. It is applied in two layers, before each the surface is treated with a primer (see Primer for the ceiling - a useful necessity), which significantly improves the quality of finishing work. At the final stage, the walls and ceilings are leveled using sandpaper.
Preparing the ceiling surface
Useful tips
When painting wallpaper on the ceiling, you must adhere to some rules:
- It is advisable to choose plain wallpaper so that when you subsequently repaint from one tone to another, color distortion does not occur.
- To paint non-woven finishing material, it is prohibited to use oil-based compounds or solvent-based dyes, because they can damage the structure of the wallpaper.
- If the surface of the wallpaper is embossed, you should apply the paint with a large brush with stiff bristles, since this way the paint will lie more evenly.
- When applying water-based emulsion to ceiling wallpaper, you need to roll it out in a strip the width of the roller from wall to wall, and then roll out the next strip of paint next to it, trying not to overlap too much with the previous strip. You can conditionally divide the ceiling into equal small sections and paint them one at a time.
- For textured wallpaper, it is recommended to use a roller with a pile length greater than the thickness of the embossing. For textured matting or non-woven wallpaper with an embossed pattern, you must use a fur coat with medium-length pile. For wallpaper with a fine texture, a fine-pile tool is suitable.
- It is recommended to work with a roller while standing on the floor, using a telescopic handle. In this position it is better to control the uniformity of paint application. When painting with a brush, it is better to use a stepladder.
- After painting 2-3 layers, you need to wait for the wallpaper to dry completely. This may take from 1 to 3 days.
- Do not turn on the air conditioner or fan to speed up the drying of paint.
If you want to remove wallpaper from the ceiling and paint it, after removing the finishing material, you must prime the surface, putty with a thin layer, and then grout the ceiling to eliminate unevenness.
Thus, you can cope with painting a ceiling covered with wallpaper yourself. But to obtain a high-quality result, you must follow the rules and sequence of painting work.