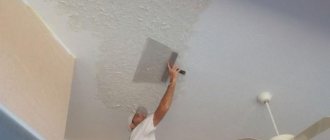
Drying oil for painting has long been considered a protective agent used to process wooden products. So a person can paint the lining, having previously opened it with drying oil to consolidate the result. In addition, this product is involved in the creation of putties and oil-based paints. There are several types of this remedy:
- Natural.
- Semi-natural.
- Combined.
- Synthetic.
Each of these qualifications has its own characteristics and in order to choose the best one, it is worth conducting a comparative analysis.
Is it possible to paint over drying oil and what paint is best to do this?
Any person sooner or later faces the need for repairs.
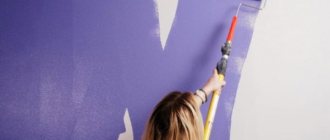
Today on the construction market there are many tools and materials that will help you update your interior or exterior on your own. One way is to paint interior wooden surfaces - window frames, doors, floors or even walls. Many people do not approach this issue seriously, so they buy the first available (that is, cheap) paint and start working without first preparing the surface, which becomes the main mistake.
If we are talking about a clumsy process with a roller, the result of which is visible on every fence, then the direction has been chosen correctly. But at the heart of any well-done finishing operation is attention to detail, which should be taken care of in advance. Otherwise, you can not only waste time, effort and money, but also completely ruin the consumables and the wooden object itself.
Therefore, it is important to take into account the nuances. For example, what to do if the wooden surface was previously covered with a coloring or strengthening solution: varnish, paint, impregnation or drying oil? The last composition is more problematic than the others, so, first of all, you need to figure out: with what and how to paint the drying oil previously applied to the surface of the wooden material?
To answer this question, you should get a little closer to such a construction archaism as drying oil, and understand why its use nowadays causes such heated debate, both in the professional community and in amateur circles?
Features and disadvantages of drying oil
Drying oil is a film-forming liquid consisting of sediments of vegetable oil (linseed, hemp, sunflower, mulberry, etc.), which is processed in a special way (overheating or oxidation). And the solvents and driers in its composition are similar to oil paints, varnishes, primers and putties. In other words, drying oil as a finishing mixture can be used as any lubricating or coloring raw material.
Drying oil is both a coloring agent and an impregnating agent.
In the Soviet years, oil paint based on drying oil was almost the only available means of painting surfaces. It was applied to literally everything: floors, walls, ceilings, doors, windows and even furniture. When removing worn-out wallpaper layer by layer, old tiles in the bathroom or worn-out linoleum, there is a high probability that you will come across an oiled surface. Previously, not a single repair could be done without it.
With the appearance of new paint and varnish mixtures on the shelves of construction stores, drying oil began to be used only for putty purposes in order to give integrity to the porous structure of the material and protect it from moisture. Due to its viscous composition, drying oil has good filling properties, which significantly reduces its consumption. Another area of its application is painting metal surfaces and walls and ceilings in service areas (toilet, locker room, industrial kitchen) where there are hoods. In addition, it is used to prime concrete surfaces and renew wood in exterior work.
With all its advantages, drying oil has a number of significant disadvantages, of which those who have at least once tried to apply another paint and varnish substance to it without pre-treatment are well aware. Among the obvious disadvantages it should be noted:
It must be said that all of the above negative aspects are for the most part characteristic of low-quality, cheap drying oil. A good coating only partially has them.
It would seem that it is simply impossible to re-paint a surface impregnated with drying oil. But the situation is not as dire as it seems at first glance. The main thing is to choose the right tools and paint.
Purpose
By application:
- Protection from rodents. The death of trees and shrubs is often caused by small rodents, such as voles or water rats, and hares. By eating the bark, they injure the tree, leaving it without protection. The special components included in the paint repel pests and prevent them from damaging the trunks;
- Reflection of ultraviolet rays. When exposed to the sun, trunks that are not covered with protective paint receive burns and cracks, which serve as an entry point for insects. The white color reflects the rays, so the barrel is reliably protected from overheating and cracking;
- Protection from temperature changes. Winter time is dangerous because there is strong heating during the day and sharp cooling at night. Such temperature fluctuations destroy the unprotected surface, opening access to pathogenic microbes. It prevents the destruction of the trunk, protecting it from frost;
- Destruction of harmful insects and bacteria. Trees often become a refuge for insects in the winter, so the paint includes an antiseptic that can destroy colonies of fungi, microorganisms and pests and preserve the health and beauty of the trunks;
Pests
- Protection from moisture and rot. If, due to an oversight, cracking of the bark does occur, then the paint layer will protect the trunk from excess water and prevent rotting of the surface;
- Healing. When pruning branches or cutting trunks, it is permissible to use paint instead of garden varnish, treating the unprotected surface. This will prevent rotting or fungal infection;
- Disinfection of all parts of the tree. Diluting the paint with water and spraying the crown and skeletal branches with a spray bottle will protect against the development of scab and rot diseases and neutralize the effects of acid precipitation.
Timely treatment of trunks twice a year will preserve the health and beauty of the garden, preventing the development of diseases and harmful parasites.
Choosing paint and tools
When working with oiled material, choosing the right paint is of paramount importance. Anyone who tried to put paint on drying oil invariably noticed: the freshly applied coating “bubbles” as it dries, and the opened bubbles have a yellow, resinous content and a characteristic smell of drying oil.
Still, there are several types of dyes and finishing materials that I can cope with the difficult drying oil. These include:
Any of these options is perfect for painting not only wood, but also concrete and metal surfaces. You should not try to paint drying oil with quick-drying nitro enamel or water-based paint: our cunning oil-based impregnation will simply “repel” the layer of paint. To use water-dispersion and water-based paint, the surface must be thoroughly washed and cleaned, removing the film from the drying oil. In this case, 2-3 layers of water-based paint will cover the surface, but, unlike other compositions, will not saturate it.
Several new devices are purchased for the standard set of tools:
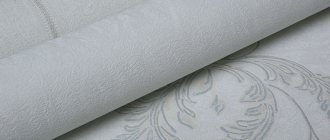
To apply self-adhesive film you need:
Everything you need is at hand. Nothing prevents you from getting to work.
The bark of an apple tree is damaged - what to do?
The bark of the apple tree is damaged due to sunburn, temperature changes in winter, due to rodents or other mechanical damage . Also, the bark may peel off from an old, unkempt tree.
The bark on the apple tree is restored, but only if the damage is minor. If the bark is damaged along the entire circumference, the tree will dry out.
The burrs of the bark are cut off with a garden knife, and the exfoliated pieces are cleaned off with a hard brush. When working, you must try not to damage the wood. Be sure to treat with Bordeaux mixture , because there may be pest larvae under the bark.
Cover the area with a mixture of clay, mullein and ash diluted with water . For reliability, the damaged area is bandaged with natural fabric.
Surface preparation
The importance of pre-treatment of the oiled surface has been discussed more than once. Only a short-sighted amateur who does not feel sorry for his wasted efforts and money on materials can omit the preparatory stages. A thrifty owner would prefer to do everything once, but thoroughly and well.
So, here is the sequence in which the processing work needs to be carried out:
These carefully completed stages will greatly facilitate the application of paint and prevent their deformation throughout their entire service life.
What to do if juice flows from the cut?
If sap flowed only from small cuts that were not covered, this indicates that the pruning was done very late and the wounds did not have time to heal before the sap began to flow.
This will not harm the tree itself, but some small branches and fruit buds may dry out. You can partially protect them by making a liquid clay paste and applying it to all wounds , even small ones.
If juice flows from one or several large cuts, this means that the damage is not sealed properly. It must be cleaned again and coated with thick clay mash . To better secure it to the branch, you can bandage this place on top with a strip of cotton fabric.
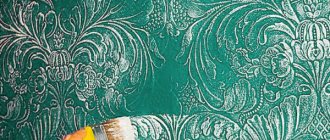
Recommendations for coloring
Now that the negative properties of drying oil have been minimized as much as possible, it’s time to begin the procedure of painting or gluing the surface.
Painting work is carried out in several stages at temperatures from –30 to +40 degrees and relative air humidity not higher than 80%:
It is very important to wait until each previous coat of paint is completely dry before applying the next one. The final drying time of the finished coating at a temperature of +20 degrees is at least 24 hours.
You can check whether the surface has dried or not, perhaps using the traditional method - by placing your finger on the area of painting. If necessary, you should wait a longer period.
Transforming an oiled surface is not the easiest task. But with a skillful approach and competent selection of the necessary tools and finishing materials, in just a few days you can revive the interior and give it a new, more attractive look that will delight its diligent owner for a long time.
Source
Is it possible to mix drying oil with paint or varnish? How to mix, what proportions?
Is it possible to mix drying oil with paint, or with varnish, if so, how is this done and how to mix correctly.
Drying oil can be natural, synthetic, semi-natural (composite), etc.
Paints and varnishes are made on different bases.
That is, you cannot mix any drying oil with any varnishes or paints.
Basically, drying oil is used before applying varnish or paint in the form of a primer, that is, it is a protective and independent layer.
Drying oil is applied to the surface in a heated state.
And then either painting the surface or opening the surface with varnish.
Drying oil interacts with oil paints (many of them are made on its basis) or with oil varnishes (oil-based).
Drying oil acts as a thinner, for example, for thickened oil paint, and not as a necessary additive that improves certain characteristics of both paint and varnish.
That is, there are no certain proportions, there is only one guideline, this is the desired consistency of paint or varnish.
Open a jar of varnish or paint, prepare a tool for mixing paint (varnish) with drying oil.
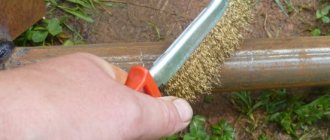
You can use this glazing bead:
Pour drying oil into the paint (varnish) and mix thoroughly until a homogeneous mass is obtained.
If the paint (varnish) is still of a thick consistency, add another portion of drying oil and repeat the kneading.
But I do not recommend using drying oil more than 8-10% of the total mass of paint (varnish) as this will negatively affect their performance characteristics.
And be sure to read the information on the can of paint or varnish; they are made on the basis of different drying oils and not all drying oils are mixed with each other.
Source
Basic rules for painting
When preparing to whitewash a garden, it is important to properly prepare the tree. The trunk of the plant must first be removed from the peeling parts of the bark, and the cracked areas must be carefully cleaned. The removed bark must be removed away from the garden and burned. It contains parasite larvae, which, after the winter awakening, can continue to destroy the plant.
Damaged areas on the trunks should be carefully treated several times. First apply the first coat of paint, then, after drying, re-treat the area. One layer of the substance is applied to regularly treated surfaces.
Autumn painting is best done after the end of the heavy rainy season. Spring manipulation - before the onset of stable warm temperatures. When the soil warms up, insect larvae become active in the plant bark, which worsens the result of its treatment.
Paint for garden trees adheres more firmly to the bark than a well-known solution; painted areas of wood will be protected all season.
Garden tree protective paint can also be used to disinfect wood cuts when pruning shoots in spring. Its antibacterial properties prevent plant infection and promote rapid healing of shoots. Some formulations in diluted form are used for spraying trees and shrubs. They help eliminate harmful parasites and pathogenic bacteria.
Paint for garden trees is applied using a brush, roller, or special sprayer. When choosing the best painting option for yourself, you should also take care of protecting your own skin. It is better to carry out manipulations with gloves and safety glasses. This minimizes the possibility of injury and damage to the skin.
Dilution features
The basis of oil paint is pigment mixed with drying oil until smooth. While the mixture is not being used, the heavy powder pigment can settle, the middle hardens, and oil accumulates on top, so you need to thoroughly stir or shake the jar before working. If you need to bring the coloring substance to a more liquid state, first answer two questions:
It is important for us to decide on these points, since oil paint should be diluted with a substance similar to what is in the composition.
If a can of paint and varnish material has been standing for a short time after opening, then the thickening is eliminated by adding drying oil. However, this substance differs in the manufacturing method, so if you choose the wrong one, you risk ruining the entire coloring material. When it is necessary to revive heavily compacted paint, you cannot do without a solvent. We also add it if we are preparing a primer.
What to do if the cut rots?
If a cut on an apple tree begins to rot, this may indicate that the tree is infected with spores of a tinder fungus. The spores are carried by the wind, and an uncovered cut is an excellent place for infection. No means have yet been invented to combat this scourge.
The branch is cut off completely and the place of the cut is checked. Healthy wood is an indicator that the disease has not yet penetrated deep into the apple tree. The diseased branch is burned, and the cut is disinfected and covered with garden varnish.
If soft dark wood , it means that the tinder fungus has taken over the entire tree, and after a while the apple tree will die. It is cut down completely and burned. If you leave it, the whole garden can become infected.
Selection and use of solvents
Before choosing a solvent, keep in mind that some substances can change the properties of paint. Basically, they use either multi-component ready-made mixtures under numbers (for example, “Solvent 647”), which contain alcohols, ketones, ethers, or organic substances with a high degree of volatility (white spirit, turpentine, kerosene, gasoline, etc.) in various proportions. d.).
Add solvent carefully and little by little so as not to spoil the composition, since excess can cause the destruction of the bonds between the pigment and drying oil.
Types of organic solvents:
Purified white spirit has a better liquefaction ability than regular one.
Before choosing a method for rehabilitating oil paint, you need to decide what exactly to buy – solvent or thinner? You will need a solvent for long-standing and hardened paints. When adding it, you need to wait a few minutes or hours until the consistency becomes suitable for work. If the mass has become thick, then a ready-made thinner or drying oil will help you. It reduces the viscosity of the composition.
Source
Water-dispersed
The composition of the liquid mixture is unique. Here are present:
- antiseptics (protect tree trunks from pests);
- white pigment (prevents destructive processes occurring as a result of ultraviolet irradiation);
- latex (provides durability and long-lasting coverage).
An important component of the product must be acrylic, which will prevent the paint from being washed off under the influence of precipitation.
This type of product repels rodents and insects, so no additional components should be added to it.
There are several common varieties of this garden paint for trees. “Luck” is one of them. It is easy to use and safe for any type of plant, even the youngest.
The next type of acrylic water-dispersed garden paint for trees is “Ecosil”. Garden emulsion improves the frost resistance of plants. In some cases, it can serve as a growth stimulator for garden trees and shrubs.
Is it possible to paint over drying oil and what paint is best to do this?
Any person sooner or later faces the need for repairs. Today on the construction market there are many tools and materials that will help you update your interior or exterior on your own. One way is to paint interior wooden surfaces - window frames, doors, floors or even walls.
A wooden surface painted with drying oil does not always look attractive
Many people do not approach this issue seriously, so they buy the first available (that is, cheap) paint and start working without first preparing the surface, which becomes the main mistake.
If we are talking about a clumsy process with a roller, the result of which is visible on every fence, then the direction has been chosen correctly. But at the heart of any well-done finishing operation is attention to detail, which should be taken care of in advance. Otherwise, you can not only waste time, effort and money, but also completely ruin the consumables and the wooden object itself.
Therefore, it is important to take into account the nuances. For example, what to do if the wooden surface was previously covered with a coloring or strengthening solution: varnish, paint, impregnation or drying oil? The last composition is more problematic than the others, so, first of all, you need to figure out: with what and how to paint the drying oil previously applied to the surface of the wooden material?
To answer this question, you should get a little closer to such a construction archaism as drying oil, and understand why its use nowadays causes such heated debate, both in the professional community and in amateur circles?
Features and disadvantages of drying oil
Drying oil is a film-forming liquid consisting of sediments of vegetable oil (linseed, hemp, sunflower, mulberry, etc.), which is processed in a special way (overheating or oxidation). And the solvents and driers in its composition are similar to oil paints, varnishes, primers and putties. In other words, drying oil as a finishing mixture can be used as any lubricating or coloring raw material.
Drying oil is both a coloring agent and an impregnating agent.
In the Soviet years, oil paint based on drying oil was almost the only available means of painting surfaces. It was applied to literally everything: floors, walls, ceilings, doors, windows and even furniture. When removing worn-out wallpaper layer by layer, old tiles in the bathroom or worn-out linoleum, there is a high probability that you will come across an oiled surface. Previously, not a single repair could be done without it.
With the appearance of new paint and varnish mixtures on the shelves of construction stores, drying oil began to be used only for putty purposes in order to give integrity to the porous structure of the material and protect it from moisture. Due to its viscous composition, drying oil has good filling properties, which significantly reduces its consumption. Another area of its application is painting metal surfaces and walls and ceilings in service areas (toilet, locker room, industrial kitchen) where there are hoods. In addition, it is used to prime concrete surfaces and renew wood in exterior work.
With all its advantages, drying oil has a number of significant disadvantages, of which those who have at least once tried to apply another paint and varnish substance to it without pre-treatment are well aware. Among the obvious disadvantages it should be noted:
Painting with cheap drying oil is not recommended; it has a number of negative qualities
It must be said that all of the above negative aspects are for the most part characteristic of low-quality, cheap drying oil. A good coating only partially has them.
It would seem that it is simply impossible to re-paint a surface impregnated with drying oil. But the situation is not as dire as it seems at first glance. The main thing is to choose the right tools and paint.
Breeding mistakes
It is not recommended to use gasoline, kerosene or diesel fuel as a solvent. Drying oil can be diluted, but the fire hazard increases sharply. In addition, the application of such a composition in residential premises is prohibited.
Immediately after finishing work, you must wash all tools with soap or other detergent. Otherwise, it will end with polymerization (hardening) of the material and damage to the instrument.
To properly dilute drying oil, you only need to know its types and properties. Knowing all this, you can easily select one of the existing thinners. You will learn more about it and its dilution from the written article.
Today, as a rule, you can see a huge amount of building materials that are usually used in any construction of various premises, as well as in finishing work in them.
In addition, there are also many different mixtures that people simply cannot do without, usually during renovation or construction of a room. This necessary mixture also includes drying oil, which is now used in construction for a wide variety of purposes.
Thus, its most popular use, which has been known since ancient times, is the coating of wooden products for their high-quality impregnation. By impregnating wooden products with drying oil, people protected them from rotting and the negative effects of wood parasites. Previously, people could make this mixture themselves. However, now preparing it yourself is also not a problem.
The most important thing you need to know in preparing this mixture is how to properly dilute the drying oil, and what ingredients are needed for this.
Nowadays, drying oil is used not only for impregnating wooden products, but also in enterprises that work with a variety of paints and varnishes. Thus, using this mixture you can dilute the paint, thereby giving the paint the property of quick drying. Thanks to the mixture, the paint adheres better to the surfaces that are painted with it.
So, when diluting paint with it, the paint changes its consistency, making it easier to apply. Moreover, the consistency of the paint becomes such that painting any surface requires less paint than when using it without drying oil. In addition, paint containing drying oil dries quite quickly. It is also used as a separate mixture, which is used to paint wooden products, giving them an aesthetic appearance. For example, the linen type of the mixture paints wooden products in beautiful light colors.
Choosing paint and tools
When working with oiled material, choosing the right paint is of paramount importance. Anyone who tried to put paint on drying oil invariably noticed: the freshly applied coating “bubbles” as it dries, and the opened bubbles have a yellow, resinous content and a characteristic smell of drying oil.
Still, there are several types of dyes and finishing materials that I can cope with the difficult drying oil. These include:
Pentaphthalic enamel easily copes with drying oil and lays perfectly on top of it
Any of these options is perfect for painting not only wood, but also concrete and metal surfaces. You should not try to paint drying oil with quick-drying nitro enamel or water-based paint: our cunning oil-based impregnation will simply “repel” the layer of paint. To use water-dispersion and water-based paint, the surface must be thoroughly washed and cleaned, removing the film from the drying oil. In this case, 2-3 layers of water-based paint will cover the surface, but, unlike other compositions, will not saturate it.
Several new devices are purchased for the standard set of tools:
To apply self-adhesive film you need:
Self-adhesive film looks good and can be easily glued onto surfaces previously treated with drying oil.
Everything you need is at hand. Nothing prevents you from getting to work.
Water-based
Very effective protection against sudden changes in air temperature and in too bright sunlight. Most water-based paints are based on acrylic resins, which protect trees from rotting and the spread of various types of bacteria. However, acrylic paints do not protect against pests, so it is recommended to add special substances containing copper to ready-made solutions. You should only choose acrylic paint marked “for garden trees.” Must be applied in warm, windless weather.
Surface preparation
The importance of pre-treatment of the oiled surface has been discussed more than once. Only a short-sighted amateur who does not feel sorry for his wasted efforts and money on materials can omit the preparatory stages. A thrifty owner would prefer to do everything once, but thoroughly and well.
So, here is the sequence in which the processing work needs to be carried out:
These carefully completed stages will greatly facilitate the application of paint and prevent their deformation throughout their entire service life.
Optimal time of year
Where to start preparatory work for painting or whitewashing trees? First of all, you need to decide when to carry out the manipulations. The most important thing is to carry out painting on a dry and windless day. If you want to start coloring in the fall, you should wait until the end of the rainy season. If it is more convenient for you to whitewash trees in the spring, then you should carry out the procedure after warm weather sets in, when the thermometer rises above seven degrees with a plus mark.
There are a number of detailed recommendations for spring painting:
- Don't wait for the earth to warm up. This can lead to insects waking up, and then whitewashing the trees will become practically ineffective.
- If the autumn painting of tree trunks was not carried out for some reason, then spring manipulations are recommended to be carried out in two stages: in the last days of February and in mid-April.
Recommendations for coloring
After treating the surface, the painting process can only bring a good mood.
Now that the negative properties of drying oil have been minimized as much as possible, it’s time to begin the procedure of painting or pasting the surface.
Painting work is carried out in several stages at temperatures from –30 to +40 degrees and relative air humidity not higher than 80%:
It is very important to wait until each previous coat of paint is completely dry before applying the next one. The final drying time of the finished coating at a temperature of +20 degrees is at least 24 hours.
You can check whether the surface has dried or not, perhaps using the traditional method - by placing your finger on the area of painting. If necessary, you should wait a longer period.
Transforming an oiled surface is not the easiest task. But with a skillful approach and competent selection of the necessary tools and finishing materials, in just a few days you can revive the interior and give it a new, more attractive look that will delight its diligent owner for a long time.
Source
Why is it necessary to dry the saw cuts?
Experienced gardeners know that the procedures of cutting branches and covering inflicted wounds with special mixtures are never carried out on the same day: it is necessary to wait some time for the cuts to dry.
The duration of this period depends not only on the time of year, but also on the vagaries of the weather:
- In the midst of prolonged autumn rains, wounds on trees take a very long time to heal, so from the moment of pruning to processing the cuts it can take from 7 to 10 days.
- In the spring, subject to the establishment of sunny, warm days, the drying process of saw cuts can be reduced to 48 hours.
In the summer, only young shoots that have not yet become woody must be removed. After such pruning, small, quickly healing wounds remain that do not require special treatment.
Wounds received in winter, at very low ambient temperatures, do not heal on fruit trees. If the integrity of the bark is damaged, there is a very high risk of damage to healthy branches by frost. It is for this reason that trees are never pruned in winter.
Drying oil paint
Drying oil for painting has long been considered a protective agent used to process wooden products. So a person can paint the lining, having previously opened it with drying oil to consolidate the result. In addition, this product is involved in the creation of putties and oil-based paints. There are several types of this remedy:
Each of these qualifications has its own characteristics and in order to choose the best one, it is worth conducting a comparative analysis.
How to treat a cut apple tree? Disinfection methods
Damage to an apple tree of any size must be treated with a disinfectant so that pathogens do not enter the wound.
So, what to cover a pruned apple tree with? Potassium permanganate and preparations containing copper or iron sulfate are suitable for these purposes. All solutions are prepared immediately before processing apple trees:
- 50 grams of copper sulfate are diluted in 1 liter of very warm water;
- Several grains of potassium permanganate are diluted in warm water. The color should be bright pink;
- 30 grams of iron sulfate are diluted in 1 liter of water;
- Prepare a 3% Bordeaux mixture . To do this, 30 grams of copper sulfate are dissolved in 0.5 liters of warm water. Separately, dilute 30 grams of lime in 0.5 liters of water. The vitriol solution is slowly poured into the milk of lime in a very thin stream, stirring constantly. The finished Bordeaux mixture has a beautiful blue color.
To apply the solution, use any brush. The weather at the time of processing should be dry and windless. Be sure to use rubber gloves.
To disinfect damaged wood, you can use balms with fungicides, which are sold in gardening stores.
Advantages and disadvantages of drying oil for painting
It is better to use oil-based paint based on drying oil. It acts as both a coloring and impregnating agent. This product appeared in Soviet times. It covered literally every surface in the room. Nowadays, a hardware store can offer a large number of variations of paint and varnish mixtures. Let's consider the advantages of drying oil for paint:
Despite the fact that it is possible to apply another paint coating to it, there are also disadvantages in this product:
Despite the presence of positive and negative sides of the product, most builders use drying oil as an initial coating, and then apply a coloring agent. To choose the right paint for this process, let’s analyze the features of this process.
What to do if the cut turns black (darkened) or a stain appears?
If the cut on the apple tree is not processed in time, then pathogens could settle on it. With such symptoms, apple canker and cytosporosis . If these diseases are not treated, the disease spreads to the rest of the branch, occupying increasingly larger areas. First, individual branches will dry out, and then the entire tree.
Neighboring trees may also suffer from this disease.
During treatment, all damaged parts are cut off, going onto healthy bark and wood. Treat this area with a 3% Bordeaux mixture if the leaves have not yet blossomed, or with a 1% solution if the growing season has already begun.
Let it dry a little, and then cover it with garden varnish or diluted clay. If the disease spreads further, the treatment should be repeated. It is necessary to spray not only the cut site, but the entire apple tree.
Watch the video report on apple tree cancer: