When performing renovation and finishing work in an apartment with your own hands, you often have to think about whether it is possible to paint with water-based paint over oil-based paint. In fact, everything here is quite simple. It all depends on what you want to achieve in the end. The best option is achieved with complete cleansing of previous finishing materials. But dealing with this on your own is quite difficult.
To obtain a flawless coating, it is better to completely remove old coatings and other contaminants. But in practice, this is quite difficult to implement, and when turning to finishers, it is economically unprofitable.
How to paint with water-based paint over oil-based paint and is it possible?
Every second family in our country is constantly renovating their home. The renovation goes from the bathroom to the kitchen, from the kitchen to the balcony, then through all the rooms and again in a circle. The renovation is being delayed due to a lack of funds for materials for the entire apartment/house at once and for hiring a professional repair team. Therefore, finishing work is often done with one’s own hands, and the question of whether it is possible to paint with water-based paint over oil-based paint is asked by almost every family leading a “repair” lifestyle.
For specialists this is not a question. A professional finisher will clearly answer that all the old oil coating needs to be completely removed, will do this, re-prepare the surface for painting and ideally apply a new paint composition. But... he will ask for a tidy sum for the work. Homeowners in search of more economically accessible and less labor-intensive options are perplexing themselves and perplexing manufacturers of paint and varnish products.
Rating of water emulsion brands
| Brand | Place of production | Positive sides | Negative sides | Price |
| Tikkurila | Finland | The composition combines high quality and affordable price. |
The production process is set up in a modern way.
New products are constantly being released for different bases.
A vapor-permeable coating with dirt-repellent properties is formed and does not cause allergies.
The materials of the same brand are used in the work.
For 3360.00 rubles
Is it possible or not?
So is it possible to apply a water emulsion to oil paint, and which one is better? And yet, the answer is: you can use water-based emulsion, but under certain conditions. First of all, it is worth considering the question of the intensity of use of the place that is to be painted with water-based oil paint, and then answer the question - can it be painted or not. If this is the ceiling or the upper part of the wall in the living room, then you can, without hesitation, choose the desired color and, after a little preliminary preparation, paint it with enamel.
If you are planning to paint a cramped hallway with protruding corners with water-based paint over an oil-based coating, then this idea will seem promising at first, but after a couple of weeks of use it will become clear that this was a bad idea. Even with very high-quality preparation and compliance with all application rules, with frequent intense friction, water-based paint will quickly rub off from a smooth oil coating.
Condition 1. Painting with water-based paint over previously applied oil paint is allowed if the area to be painted will not be subject to intensive use.
Advantages of using water emulsion
Emulsion paint composition, like other facing materials, has its advantages. Worthy qualities include the following features:
- no chemical solvents are required for dilution;
- long service life of the coloring composition under conditions of light use;
- After painting, pores form on the coating; they allow the base to breathe, preventing the appearance of mold.
- has an unstable odor, so it disappears within a few hours after painting;
- it is consumed slowly but rationally, and this saves financial investments in repairs.
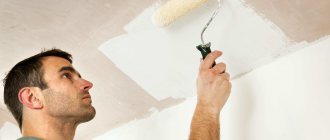
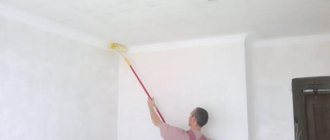
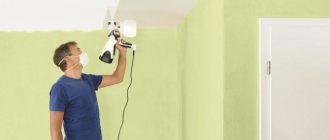
Painting the ceiling with a gray water emulsion using a wide brush Source sdelai-lestnicu.ru
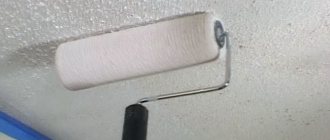
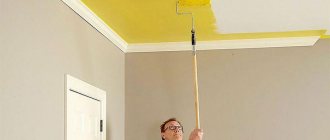
Applying water-based paint to the ceiling using a spray gun Source gidpokraske.ru
Is there an easier way?
Yes, this principle of homeopathy applies to the preparation of colored oil base. Its essence is to cover the old oil layer with a fresh layer of drying oil. For good adhesion of drying oil to paint, the old coating is thoroughly washed and degreased with any suitable composition, the simplest is warm water and soap. Drying oil is applied in a thin layer to the old cleaned coating, forming a rough, slightly sticky surface that “accepts” any subsequent staining well. It doesn’t matter what kind of paint the surface will be painted with.
Treatment with drying oil is more economically expensive than simple priming, and is less comfortable due to the persistent strong odor and drying time, but in the end it gives a high-quality result.
To summarize, there are three ways to prepare a base painted with oil paint for subsequent coating with water-based paint:
- priming (with an ordinary construction acrylic primer or a special one for old paint);
- grinding/sanding followed by thorough cleaning of dust and priming;
- applying a layer of drying oil to a previously cleaned surface.
Condition 2. Painting with water-based paint over oil-based paint is possible if the substrate is properly prepared.
Can primer be mixed with paint?
There are different opinions on this matter:
- Using a regular primer helps achieve a glossy surface. Before processing, mix paint, water, and primer in appropriate proportions;
- Other masters do not recommend mixing formulations. Test the quality of the finish on a small area of the wall structure. It determines how well the product will be finished.
In rooms characterized by a high degree of humidity, the use of a red-brown primer is recommended. It is suitable for processing wood, metal and other materials.
In rooms characterized by a high degree of humidity, the use of a red-brown primer is recommended.
Surface preparation
Carefully inspect the oil finish that is to be repainted. Typically the coloring is from the late 80's or much earlier. In the 90s, water-based painting was already widely used. Almost all surfaces were painted using water emulsion.
Oil-painted surfaces from those early years are distinguished by enviable durability; it is not so easy to “tear off” such a coating from a wall or other surface, unless together with plaster. Even “killer” chemical solvents are sometimes powerless in the fight. With water emulsion everything is much simpler. Here primer manufacturers came to the rescue of home-grown finishers.
Coating oil paint with the simplest acrylic primer will create a slight roughness on a smooth surface, allowing the water-soluble coloring composition to “catch” on the slippery surface.
Manufacturers went even further by releasing a special primer composition for old paint. It is designed for preliminary preparation of smooth oily surfaces and is sold in any large construction supermarket.
Better surface preparation can be achieved by pre-grinding with fine emery cloth. For this “procedure” it is better to use a grinder with a grinding disc or a drill with a special attachment.
It is unlikely that it will be possible to sand a large area by hand. The big advantage of this method is that unevenness, roughness and smudges of the old oil coating are simultaneously removed. The downside is that it's long and dusty. Sanding will not eliminate the additional work of thorough cleaning and priming, but will significantly improve the adhesion of primers and water-based paints to old oil paint.
On video: preparing walls for painting.
What you need to know before starting work
Often problems arise with smooth coatings that cannot be removed mechanically. There is no need to apply new paint over it. To improve adhesion, a primer for oil-based paint is suitable. There are different compositions on the market from domestic (VD-AK-0301) and foreign manufacturers (Neomid). Which one is better to choose?
The domestic primer VD-AK-0301 can only be used for application to water-based paint. The store may also offer other domestic brands, so it is important to clarify whether a specific composition can be used for the oil base. Imported products can be used on any surface, be it plaster, putty or oil paint.
Why apply primer? This is needed for:
- improving adhesion between paint and surface;
- accelerating the drying process;
- creating a layer that prevents the appearance of fungus;
- improving the result.
You should be careful when choosing a primer, as there are different solutions:
- for use on concrete, metal;
- for protection against destruction;
- with antiseptic properties, if the wall periodically “blooms”, that is, becomes covered with mold.
How to paint correctly
Painting a well-prepared surface will not be difficult. It is carried out with brushes or a roller in two layers. It is important to observe the direction of movement of the brush relative to the incident light so as not to leave streaks of paint and the paint lays down evenly. The paint should be a little thicker, especially if no sanding was done, because the absorbency of the surface is still low. With liquid paint, three layers are applied.
Also, three layers cannot be avoided if the surface was previously painted in a dark color, but it needs to be made light. It is better to choose a high-quality composition with good covering properties.
Condition 3. Using a good water-based paint with a slightly thicker consistency in several layers will help hide the old layer of oil paint.
To cover an old oil finish with acrylic paint or enamel, the same conditions will need to be met, but fewer final coats will be required. Is it even possible to paint with acrylic paint over oil paint and will it adhere to the previously painted composition? This should not be done, since good adhesion of the materials cannot be expected.
And, finally, a little secret: lightly sand the dried surface painted with water-based paint with fine sandpaper, you will get a perfectly smooth, flawless matte finish. And no one, not even the most “cunning” master builder and finisher, will guess that underneath there was a thick layer of shriveled gray-brown “Sovdepov” paint.
How to prepare walls for painting (1 video)
Useful tips
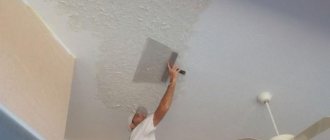
The main stage, which should be given special attention, is surface puttying. If the ceiling is well puttied, then applying the paint yourself will not be difficult. But this process has its own tricks:
- the coloring composition must be applied quickly;
- Separate tools must be used for each layer;
- structural paint will help hide some minor flaws;
- for kitchens and bathrooms it is better to use waterproof washable paint;
- be sure to use plastic barriers that can protect walls from paint splashes;
- when painting surface joints, use adhesive tape and masking tape;
- drying should take place in a dark room in the absence of drafts, otherwise the paint may peel off;
- It is not recommended to carry out work in a cold room with high humidity; you should also not paint in the heat, the coating will dry out too quickly;
- Painting should start from the window.
If you follow all the stages of painting and follow the basic rules for applying the paint composition, then the process of updating the ceiling coating will not take much time, money and will not be difficult, and the result will pleasantly surprise you.
See below for more details.
What to do with the previous coating?
In most cases, the previous coating is various versions of oil paints. In this regard, the question arises: is it possible to paint with water-based paint over oil-based paint or does the latter need to be removed?
The best option, of course, is to remove the old coating. This will allow for preparatory work to level the surface, and also ensure the best quality of painting.
However, difficulties may arise here:
- It is quite difficult to completely remove old oil paint, despite the fact that in some places it may fall off on its own;
- Perhaps you don’t need leveling the surface, and removing the old coating will be a waste of time;
- Actually, the old coating may be completely fine - you just decided that it’s time to change the color.
Primer drying time
Oil paint primer usually dries within 24 hours. Masters say that the morning is suitable for applying the special substance. During the day, the composition will be absorbed into the material, having a beneficial effect on it.
In hot conditions, the primer mass can dry out in a few hours.
Oil paint primer usually dries within 24 hours.
Primed surfaces are excellent for applying paint, extending its service life and improving the adhesion of materials.
Suppose I don't remove the old paint
Let's look at how to paint with water-based paint over oil paint. Note that the quality of the final coating will depend on the quality of the old one. If the oil paint still begins to peel off the surface, it is better to remove it completely.
Before work, the surface must be completely cleaned of dirt and degreased. A primer is not necessary when working on oil-based paint, but it won’t do any harm.
Oil paint has water-repellent properties. Since water is the main binding component of water-based paint, it will not adhere well to the surface, especially if you forgot to degrease it.
You can improve the adhesion of water-based paint to a surface painted with oil-based compounds in the following ways:
- Matting. The new paint will adhere perfectly to a matte (finely porous) surface. Matting can be done by covering the surface with drying oil or mechanically. On the one hand, the first one is simpler, but drying oil has a pungent odor and not everyone wants to work with it. The mechanical method involves treating the surface with fine sandpaper (zero sandpaper).
- Using a primer. There are special primers that work well on glossy surfaces. They should be used. In addition to the fact that the primer will ensure good adhesion of the water-based paint to the surface, it will also eliminate minor surface defects (for example, pinpoint bald spots in an old coating).
- Finally, the last option is to remove the old coating. Please note that immediately after removing the old coating, you cannot apply a new one. The wall must be cleaned of dust, washed and degreased.
Possible options
So, the same emulsion paint that was used during the previous painting was chosen as the finishing composition. This is a very important point. Talking about using water-based solutions with different bases for work is a waste of time. The answer will be clear: no, you cannot combine such materials.
Preparatory stage
It all starts with a correct assessment of subsequent actions; in such a situation, you should avoid haste and rash actions. If it turns out that the decision was made incorrectly, the result will be disastrous: there will be a need to completely redo all the work, spending additional time and money.
You need to follow this scheme:
- The similarity of the compositions is determined: previously applied and applied. It happens that this can be very difficult to do, but there must be complete confidence in the identity of the materials.
To quickly determine the identity of the compositions, it is necessary to apply a small fragment of paint to the surface; if after a couple of days there is no rejection, then you can paint
- A thorough assessment of the surface is carried out, the condition of the coating and base is determined. It is necessary to thoroughly examine all defects. It would be a good idea to tap the surface a little to determine the presence of hidden delaminations.
- Based on the data obtained, an informed decision is made.
- The old layer has no swelling or cracks, the coating is completely smooth.
- There are no noticeable changes in planes, differences in height and width. This is checked using a level. It happens that the previous application took place immediately after the construction of the house. Over time, shrinkage occurred and distortions occurred, but without damage to the decorative layer.
- The areas and corners adjacent to the wall and ceiling show no signs of mold or mildew. This is an important aspect, because if even small formations of microorganisms are missed, their growth will occur on the newly treated surface.
- There are no voids, the paint does not peel off when tapped.
On a note! It must be taken into account that a high-quality result while preserving the old decorative layer is a lottery; it is impossible to give a 100% guarantee.
Ideal surface
It happens that a painted wall or ceiling is almost perfect. That is, the surface meets the following requirements:
The level rarely shows paint defects, so special attention should be paid to visual inspection and tapping
If all these factors are present, we can assume that finishing will not require dismantling the old layer of water-based composition. This situation is quite rare. This often happens when only cosmetic repairs are required: the previous surface has faded or the shade does not match the interior design plans.
Applying a new coat of paint over the old one
- The surface is well washed to remove dust and dirt. The first time the process is performed using a detergent, which should not contain aggressive chemical elements and abrasive inclusions. The second time is a simple wipe with a damp sponge to remove traces of detergent.
Grease stains on a water-based coating can be removed with any alcohol-containing composition.
On a note! Any oily areas that occur are removed with medical alcohol, after which treatment with water must be carried out.
It seems that a solution to the possibility of applying similar water-based solutions has been found. But there is one important limitation: the new layer must be darker than the previous one. Failure to comply with this condition is the key to a negative result.
If light paint is applied to a dark base, fragmentary translucency is possible
Is the presence of defects a path to dismantling?
It happens that defects have a local location, without greatly affecting the overall condition of the surface:
- peelings or bubbles do not occupy more than ten percent of the total area;
- cracks no more than 0.5 mm wide;
- slight abrasion of the decorative layer is noticeable.
In this situation, it is advisable to make a particularly balanced decision. If the previous option provided a guarantee of a high-quality result, then this case involves risk.
Apply new water-based paint according to a specific scheme:
- All damaged areas are cleaned. Using a spatula, remove flaking and bubbling parts. It is necessary to carry out the preparation very carefully, so defects are removed until the paint stops peeling off the surface.
- The treated areas are cleaned of dust and dirt particles. To do this, it is better to use a rag.
- Next, the entire coating is washed in two steps: with a soap solution and water.
- You need to wait a certain amount of time for the walls to dry completely.
- Areas that have been previously cleaned are primed and covered with a layer of putty. It is important to consider that the layer must be very thin, not exceeding the thickness of the existing paint layer.
When repainting, primer must be used, but it must be the same type as the paint.
Thus, even surfaces with minor defects can be painted. Of course, you will first have to perform a number of preparatory procedures.
When deciding whether it is possible to paint with water-based paint over paint with a similar composition, you need to take into account certain features. Coloring will be justified only if there are no serious flaws.
Is it possible to apply water-based paint over oil-based paint? Review of the issue from all sides
When carrying out repairs, many inexperienced repair enthusiasts think about whether it is possible to apply water-based paint to oil-based paint.
Logically speaking, it is better to take the same coating that was used before - the new and old layers will definitely not conflict. However, many are stopped by the pungent and difficult-to-dissipate smell of oil paints. And visually, walls covered with oil paint are not very pleasing: the color palette is not very diverse, the tones are rather rough, and it will not be possible to achieve relief with it.
Water emulsion is much more attractive from all points of view:
- non-toxic because it is diluted with water and not with chemicals;
- the walls - floor - ceiling breathe under it;
- stays on walls for up to 12 years without losing its qualities;
- practically no smell;
- dries quickly;
- Easy to apply and economical.
Is it possible to apply water-based paint to oil paint?
– the question is controversial. Different masters give completely contradictory advice on this topic. And they all seem quite logical.
Let's look at the problem from different angles, taking into account different opinions and arguments.
Water-based paint directly indicates by its name that water acts as a solvent for it. In order for it to adhere to the surface to be painted, it must be soaked with paint. However, the oil coating is practically waterproof: a kind of film forms on its surface, repelling liquids and a new applied layer, for example, an emulsion containing water.
When dry
The water-based emulsion, of course, partially loses moisture, but on oil-based paint this happens unevenly - where it has been rubbed or scratched, absorption occurs to a greater extent. Where the previous layer is better preserved, the new one can completely drain without getting caught at all. So, without prior preparation, applying water-based paint means playing a kind of roulette: whether you will be lucky or not.
It is also worth remembering that the evenness of the oil coating greatly depends on the time it lasted on the wall or other surface, and on the quality of the paint used. It is not uncommon for the old layer to resemble a washboard with bubbles and dips right down to the base. If you paint directly like this, the end result will be terrible.
Professional masters get out of the situation in different ways. Their experience can also be applied to painting yourself. Here are a few methods you can use with confidence for small home renovations.
It gives good results if the oil paint is in good condition: it has not formed streaks or peeled off. It is necessary to remove from it the very film (or, as it is called, gloss) that prevents the water-based emulsion from penetrating deep into the surface.
Result:
The new paint acquires the ability to adhere to the surface, and at the same time holds well for a long time.
This is done in a fairly primitive way: the wall is thoroughly washed with any detergent, then with clean water and dried (either naturally or with a hair dryer). The entire surface is coated with drying oil, on top of which a layer of water-based paint is already applied.
An alternative option could be mechanical matting: take sandpaper - zero or one - and sand the wall that needs to be painted. Securing reliability is guaranteed, although quite a lot of effort will be required.
Method No. 2: priming:
In addition to ensuring the adhesion of the water-based emulsion to the oil, it also provides partial leveling of the wall if the old paint has fallen off or sagged somewhere. Although in such cases it is better not to neglect putty - it is unrealistic to smooth the holes clean with soil.
Modern primers like PARADE Reanimator, Bindo Base or GLYCOPRIM are very easy to use, do not require preliminary preparation and dry quickly: you can start painting within an hour after treatment.
Method #3: removal:
However, the best results are still achieved by completely removing the oil layer down to the concrete (brick) base. This result is achieved in two ways:
- purely mechanical: the oil is manually knocked off the wall using drills, a hammer drill or a grinder. If you don't have them, a chisel and hammer will do. It’s long, dusty and labor-intensive, but the end result is a clean wall;
- so-called removers, that is, scientifically, destroyers of paint and varnish coatings, for example, B-52. Apply to the area to be cleaned, wait the time specified in the instructions, after which the softened layer is scraped off with a spatula.
Among the positive aspects of this method: the absence of dust, which is harmful to health to breathe, and the integrity of the base wall, which is deeply scratched during mechanical cleaning. On the downside, you can point out that it is not possible to achieve the result with every paint: some stubbornly resist washing, even if applied repeatedly. In this case, you will have to look for a hammer drill from friends and fight stubborn oil with its help.
Note that removing the old layer does not mean immediately applying a new one (in our case, water-based). The wall will require additional preparation: sanding the entire surface, puttying in places of noticeable flaws, plastering. If your apartment is damp, treating it with anti-fungus and mold impregnation will not hurt.
Result:
Most experienced renovators believe that doubts about whether it is possible to apply water-based paint to oil-based paint should be cast aside if you are making repairs at home and are not going to paint the walls in the entrance. And the most recommended method is to remove the old coating. Yes, you will have to suffer - but only once. Once the oil is removed, you will no longer have to deal with it in the future, and during subsequent repairs you will be able to choose any coating that can last a long time.
Features of priming a painted wall
The main task of the soil solution is degreasing. Therefore, it is perfect as a base before painting the surface with enamel, solvent-soluble or water-dispersion paint, even over oil paint. Priming the prepared surface has its own characteristics that need to be remembered during work:
- The mixture must be homogeneous before application. This can be achieved by constantly stirring the mixture with a wooden stick.
- If the consistency is too thick and it is not possible to apply it in a thin layer, the primer should be diluted with water, but the water content should not exceed 10%.
- To make it easier to distribute the solution, you can use a paint roller and a tray as a tool. This will create the thinnest and most uniform layer possible.
- You need to start from the bottom, moving gradually upward, avoiding the appearance of drips. If during the process excessive accumulations of primer material are formed in one place, they should be smeared with a roller immediately, since after drying such a defect can spoil the final result.
- In places where the painting tool does not allow you to apply the solution evenly, you can use a brush of the required size - it will also do the job perfectly.
If the oil paint has an almost glossy surface, then after applying a thin layer and completely drying it, the primer solution is applied again. Usually it takes an hour, but provided that the temperature in the room does not exceed 20 degrees and the humidity is about 80%. This period is approximate, but it is necessary to observe it so that the composition provides excellent adhesion to the surface.
Is it possible to apply enamel to water-based paint?
Prolonged repairs are a problem for many Russian families. A difficult financial situation often prevents finishing the decoration; work has to be postponed indefinitely. With the accumulation of money, the process moves from one room to another.
Unfortunately, not every one of us can afford to hire a repair team, and therefore we have to improve our homes on our own. Repairs are progressing slowly and raising many questions. Lack of experience and theoretical knowledge turns finishing work into an endless lottery. The owner of the house is forced to consult with friends, visit Internet resources, and look for information from sellers of construction and finishing stores.
People often ask experts whether it is possible to paint with enamel over an old water-based paint coating. The professional’s answer in this case is obvious: “first you need to remove the existing coating, then prepare the surface for further painting, and only after that, apply the paint and varnish composition.” The work of a specialist promises to significantly deplete the family budget, which forces homeowners to look for alternative options.
When thinking about whether it is worth applying enamel to a water-based emulsion, you need to think about the intensity of use of this place. If finishing work is planned to be carried out on the ceiling, then painting is quite possible. However, some surface preparation will still be required.
Attention! When it is intended to carry out repairs in a narrow hallway, it is most likely that the water-based paint will soon peel off due to frequent friction.
Composition and technical characteristics of enamel and water-based paint
The consumer can find out about the composition of the enamel by following the symbols that the manufacturer places on the label of the paintwork:
- GF - means that the main component of such a mixture is glypthal varnish;
- PF - informs that the main component of the material is pentaphthalic varnish;
- ML - this marking is placed on melamine alkyd compounds;
- MS – represents alkyd-styrene mixtures.
In addition, on the label you can read information about the properties of the enamel; the number following the letters reads as follows:
- 1 – the material is excellent for outdoor work, since the composition tolerates temperatures well;
- 2 – enamel is recommended to be used for work carried out inside the building. It is allowed to paint cold, unheated rooms;
- 3 – the mixture can be used for temporary protection, that is, to preserve the surface;
- 4 – the designation indicates that it belongs to the category of alkyd paints and varnishes that are resistant to moisture;
- 5 – the indicator informs that the components of the enamel include special substances that give it specific properties (for example, producing a luminescent effect);
- 6 – this composition exhibits high resistance to various petroleum products;
- 7 – this material is resistant to aggressive chemicals;
- 8 – heat-resistant enamel, perfectly withstands high temperatures;
- 9 – the product has electrical insulating properties and tolerates the effects of electric current well;
- 0 – this mixture is recommended for priming a variety of surfaces.
When carrying out work, enamel requires careful handling. First of all, this concerns the use of the composition in an unventilated area; you will also have to beware of open flame sources. Due to its thickness and good adhesion, enamel can be used for work on:
Important! The coating is not suitable for roof renovation. High heating of slate or tin can cause discoloration and cracking.
The enamel is recommended for use outdoors; it is used both as a monolayer and multilayer coating, in combination with anti-corrosion, insulating and antiseptic compounds. It can be used in various climatic conditions, at temperatures from –50 to +60 degrees.
Water-based paints include the following components:
- Thickener;
- Antifreeze;
- Defoamers;
- Plasticizers;
- Antiseptics.
Depending on the purpose of the coating, certain substances are added, thanks to which the mixture acquires the necessary qualities.
There are different types of water-based paints:
- Acrylic. Made on the basis of acrylic resins;
- Silicone. They contain a lot of silicone;
- Silicate. They are made using liquid glass;
- Mineral. Created using lime or cement.
Water-based compositions have a number of advantages:
- Do not have an unpleasant odor;
- Dries quickly;
- Easy to lay down;
- During work, it is possible to add pigment to the paint to create the optimal shade.
Paint selection
Currently, for painting ceilings, compositions are used that are presented in a huge range by manufacturers of paints and varnishes. Each type has its own characteristics and has a number of advantages and disadvantages.
To paint the ceiling surface, do not use oil paint. The best option is water-based, water-emulsion, or, as they are also called, water-dispersion paints.
Experts recommend using this type of paint to decorate ceilings in residential premises, because its main characteristics include:
- no pungent odor;
- absolute non-toxicity;
- good adhesion with most building materials;
- Possibility of application on old paint;
- practicality in use.
The most popular types of water-dispersion paints are:
- Latex - has a good level of coverage and density, does not wash off after drying, the surface can be wet cleaned. In most cases, one coat is sufficient.
- Silicate is a good option for exterior finishing of buildings. This type of paint is more expensive than its analogues, since it is based on liquid glass. As a rule, this coating is used for profile finishing of various surfaces in warehouses and production facilities. Perfectly covers concrete or stone surfaces.
- Acrylic is the most versatile paint, adapted to various surfaces. This substance can hide minor surface imperfections, and textured paint can remove minor cracks or potholes. The acrylic coating dries quickly enough and does not change color during use. Has a certain level of resistance to direct sunlight. The disadvantage is sensitivity to moisture. The color palette of acrylic paints is huge. All shades can have a glossy or matte effect. A matte surface can visually increase the height of the ceiling and help hide some defects. Gloss is convenient for use when painting large areas; it requires a perfectly flat surface.
- Silicone paint creates a beautiful finish that is washable. This type of paint is suitable for covering surfaces in rooms with high humidity and sudden temperature changes.
Each type of paint can be diluted with water if necessary to give the required consistency. With the help of tinting pigments, you can get any desired shade; to do this, just add the desired amount of dye to the white composition.
Ways to solve the problem and additional tips
Carrying out repair work requires significant material investments, and therefore the desire to save is completely justified. Below we will tell you how to refuse to remove the old coating and finish the room yourself.
The composition of the water-based emulsion is similar to wood putty. Based on this fact, the old coating must be cleaned using sandpaper before applying enamel. After carefully removing the top layer, the surface must be treated with a deep penetration primer, which will significantly improve adhesion. At the final stage, the enamel should be applied to the old water-based paint.
The theory about the correct choice of dye
The painting will be of high quality and the paint layer will adhere firmly to the surface with the old CM layer if there is good adhesion between the compounds. To achieve the goal, the following actions are taken:
- Before applying a new dye, the old coating is completely removed, and the surface is treated with special materials.
- The adhesion will be good if a composition similar to what was used before is chosen for applying the new coating. Their identical structure allows, to some extent, to simplify the work, which will save time. This is felt when painting a large surface area.