The unquestioned authority of ceramic tiles as a floor covering is quite understandable. However, tile is not always durable and comfortable. Let's remember how many times we and our loved ones risked slipping on a wet tiled floor at the entrance to a store or in the bathroom at home. Today, in the era of development of innovations in construction production, an alternative to ceramic tiles has appeared - a wide range of materials that perfectly take on the role of floor coverings.
When choosing flooring for rooms, you must:
- calculate the budget;
- assess the compliance of the coating with the style of the existing or future interior;
- resolve the issue of using one material or a combination of several types of floor coverings;
- determine the need to visually increase the space so as not to make a mistake in choosing the color of the flooring.
An improved version of ceramic bonded tiles is porcelain stoneware. Harder and more expensive
Wallpaper
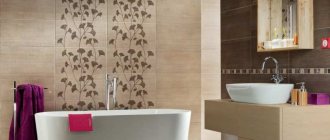
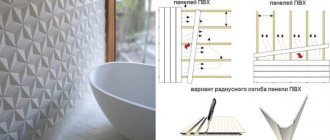
What else can you replace tiles in the bathroom with? And here you can offer wallpaper, oddly enough, but such material can also be called a good alternative to expensive tiles.
Of course, we are not talking about paper wallpaper. Only moisture-resistant and washable types are suitable for such rooms, which can be identified by the brush icon and three waves on the packaging.
For the bathroom, you can choose vinyl wallpaper; compared to other types, they are more expensive. But vinyl is durable, easy to care for, and won’t fade, plus wallpaper comes in a variety of colors, textures, and patterns. You can even choose a material that imitates wood or stone. But such wallpaper is toxic if ignited, so you should take a bath with candles carefully.
Another good alternative to tiles in the bathroom is fiberglass wallpaper, which is made using special glass threads. Such wallpapers can be painted in different colors, they have a pronounced texture and are supplied in rolls up to 1.5 m wide.
This material has many advantages, but there is one significant drawback - cleaning them is quite problematic, so it is better not to use them for finishing areas around the sink or bathtub.
Self-leveling floor instead of tiles and other coatings: weighing the pros and cons
Self-leveling flooring in the interior of premises causes a lot of discussion among designers. Some actively use them when creating their projects. Others try not to use such a coating at all, considering it a bad decision. In order to accurately determine whether it is worth using a self-leveling floor in an apartment, you should find out all its advantages and disadvantages, as well as get acquainted with the opinions of experts.
Laminate is a favorite in Russian kitchens
No less common than tiles is a kitchen flooring option and a worthy replacement for parquet boards. Most often, it is placed in the kitchen in an attempt to maintain a uniform design for the entire apartment for reasons of economy, or simply because it is pleasant to look at and familiar. But is laminate flooring suitable for the kitchen? Yes, it does, but only the moisture-resistant type with increased water-repellency!
- PROS: This is the most affordable flooring option, so if you often change your interior, then laminate is your choice. It is not very susceptible to mechanical damage. Traditionally, the surface of the laminate imitates wood, and does it very well;
- CONS: It only withstands short periods of exposure to steam, water, grease, and spilling beet juice will stain most laminate floors. This is a synthetic material, which may not be suitable for fans of naturalness and environmental friendliness.
Helpful Tips:
- Laminate flooring in the kitchen needs increased attention - make sure that the pipes do not leak, that your neighbors do not flood you, and that spilled liquids are quickly wiped up;
- Be careful with beets - laminate floors can easily be painted and then cannot be washed off!
Photos of kitchen interiors without ceramic tiles
In the apron area and on the floor, not only tiles are used, but also other finishing options. You can choose the material to suit almost any tastes and capabilities. The main thing is to imagine the desired result.
How to make: stages of work on making a concrete bath
The strength of a concrete bath is comparable to that of a cast iron one. Maximum damage can be exclusively external. It is recommended to start making a concrete bath with the following steps:
The marking of the structure must be carried out according to the developed diagram.
- Determine the type and size. It is taken into account that the specific gravity of concrete is 1 cubic meter more than a ton. It is advisable to check the strength of the ceilings.
- Replace old pipes and water supply, as access will be blocked after installing the concrete structure.
- The future bathroom is marked on a concrete slab.
- Holes are drilled for the reinforcement and secured with wire, thereby creating a reinforcing belt.
- Install a pipe for draining water.
- The corners of the structure are connected with reinforcement.
- Formwork with a curved profile is made.
- Install inclined supports for installation of formwork. It is necessary to completely remove unstable places in the structure.
- Fill with concrete mortar after complete fixation of the external panels.
Tools and necessary materials
The solution is prepared from sand and durable cement, diluted with water in a ratio of 3 to 1. Basic tools that will be needed when making a bath:
To carry out the work, it is necessary to prepare wooden panels in advance.
- boards for formwork;
- staples or nails;
- trowel;
- knitting wire from reinforcement;
- putty knife;
- drill;
- insulation (when making a bath in a private house on the street);
- wooden shields.
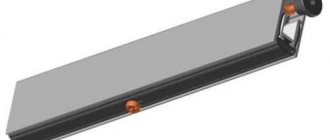
Installation of formwork
For the installation site, the surface is cleared to bare concrete and covered with a primer to adhere the bottom to the future structure. The reinforcement frame is fixed to the load-bearing wall. The boards are used to create formwork for the side walls. Wooden slabs are tightened as tightly as possible with wire to eliminate cracks. To avoid adhesion to the wood flooring, use polyethylene film.
Before pouring the solution, you need to properly assemble the formwork.
Pouring concrete
Concreting begins from the bottom of the structure. The solution should completely cover the reinforcement frame. Voids are removed by tapping the formwork with a hammer in different parts. Using manual vibration, the solution is evenly distributed over the entire surface. When the first layer is laid, a second reinforcing layer is installed for the vertical parts and poured with concrete again. After complete drying, the formwork is removed. Install a drain to connect to the drainage system.
Finishing and final work
Tiles are an excellent option for cladding this structure.
The final stage of work begins no earlier than 10 days after the concrete has dried. To obtain a smooth surface and rounded parts, use a trowel. The cladding is done with tiles or stones. The materials are secured with water-repellent glue. After finishing, cover the seams with a composition with antiseptic properties using a comb spatula.
The glue should be applied in 2 layers perpendicular to one another. This method of application allows you to achieve saturation of the entire surface.
To make a concrete bath comfortable to use, tiles for it are chosen with a non-slip surface. Before installing mosaic tiles, markings should be made with a pencil in areas where entire plates are located. It is better to start the process from the side walls, ending with laying out the bottom.
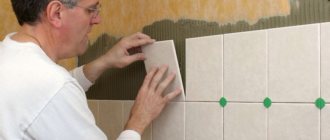
Floors made of artificial or natural stone slabs
Recommended for large bathrooms. The installation technology is almost no different from working with ceramic tiles. The only peculiarity is that the slabs are large in size and weight, and are much more difficult to align horizontally. Heavy weight requires thick glue, but it is very important to choose the right proportion of water. Otherwise, the adhesion coefficient of thick glue is significantly reduced, and with liquid glue, the slabs “float” under their own weight. It is very difficult to level the surface of the coating. Conclusion - finishing the floor with stone slabs can only be done by professional tilers who have practical experience working with such materials.
Natural stone floor