08/11/2019 Laminate is a finishing coating that is easy to install and provides an ideal appearance for floors. Like other types of decking, the sub-base must be carefully prepared before installation. This stage directly determines how high quality and how long the coating will serve.
There are several technologies that are used by modern builders to make subfloors. Many of them, for example semi-dry screed, simply cannot be made with your own hands. We suggest that you familiarize yourself with the types and technologies for installing a subfloor under a laminate, which can be used without the involvement of specialists:
- Rough concrete screed for floor coverings;
- Preparation of floors with self-leveling mixtures;
- Dry prefabricated floor screed;
- Installation of wooden slabs on joists;
- Installing laminate flooring on a subfloor.
Rough concrete screed for floor coverings
The technology for preparing a rough surface using cement screed has been used in construction and renovation for decades. Although technology has stepped forward, and the market has been filled with more efficient materials and technologies, this type of rough foundation does not lose its relevance to this day. The reason lies in the significant advantages of such coatings, namely:
- high strength;
- wear resistance;
- durability.
Selection of materials for screed under laminate
Previously, to prepare a concrete solution, it was necessary to purchase and deliver sand and cement, use a concrete mixer and mix the components in the correct proportions. Now manufacturers offer ready-made dry mixtures for rough screed, which greatly simplifies the installation process. Many such compositions contain special fillers that improve the properties of the material: they increase the hardening rate, provide additional strength, resistance to moisture and chemically aggressive environments. Such mixtures include:
- Reinforced floor screed Eunice Horizon. This composition contains reinforcing fibers. They significantly increase the resistance of the screed to “pulling out” loads that can occur due to the expansion of concrete and heaving of the soil (for private houses). This property allows the coating to be installed on “warm floor” systems, as well as in freezing unheated rooms.
- Floor screed Eunice Horizon HYDRO. It is a composition, one of the components of which is a water repellent. Its presence allows you to install floors in kitchens and bathrooms, without fear of losing their properties during use. This screed is suitable not only for laminate, but also for any other floor coverings, including ceramic tiles and porcelain stoneware.
- Floor screed EK LEVEL 1.1. with a self-leveling effect. This is a mixture that has increased fluidity when mixing. Due to this, the effect of spreading on the surface is achieved with the formation of a high-quality horizontal floor. This material allows you to level floors with large differences in height. The self-leveling effect is achieved even when applying a solution up to 8 cm thick. If the installation technology is followed, this mixture allows you to lay the laminate immediately after the screed has completely hardened.
How to install a rough screed: technology
The technology for arranging a rough screed includes basic stages, at each of which a number of works are performed:
- surface preparation;
- laying insulating materials;
- placement of beacons;
- preparing the solution;
- filling.
At the preparation stage, the existing base must be completely cleared of debris and dust free. All defects that could subsequently lead to destruction of the layer must be eliminated. Weak and loose areas are strengthened, and potholes with cracks are filled with putty.
Next, using a laser level, the layer thickness is marked on the walls. For these purposes, you can also use the STAYER construction painting cord. It is also called beating thread or marking line. The cost is cheaper than a laser level, and it allows you to apply markings in just one movement.
The base must be primed to improve adhesion and equalize moisture absorption. On concrete floor slabs, you can use the Knauf Betonkontakt primer, which is intended specifically for pouring screeds. It is better to apply in two or three layers, waiting for the previous one to dry completely.
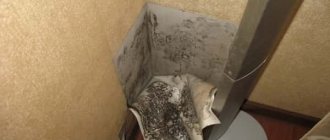
To prevent the formation of condensation and the negative effects of moisture between the base and the screed, it is necessary to install insulation. This is especially important to do in private homes, where there is a high probability of exposure to dampness from the ground. Coating or roll materials can be used as waterproofing:
- Coating waterproofing Eunice Hydroplast. It is a cement-based dry mixture that mixes quickly and is easy to apply. Its main feature is counteraction. Moisture flows in both forward and reverse directions. Due to this, it reliably isolates the screed from the base.
- Mastic without bitumen Knauf Flechendicht. Ready-to-apply latex-based water-dispersed composition. It is characterized by high adhesion to mineral substrates and provides high insulating ability (class W7). Easy to apply using hand tools (brush, roller). Dries quickly (3 hours one coat).
- Ruberoid RPP-300 without topping. Attached to floors using bitumen mastic. Provides absolute moisture resistance.
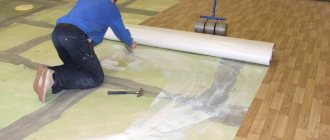
- Polyethylene film BPS technical. An inexpensive option for arranging insulation in an apartment.
When using rolled waterproofing materials, their installation is carried out with a mandatory overlap of 20-30 mm. The joints are sealed by heat welding (polymer films) or using adhesive mastic (bitumen waterproofing). A damper tape must be installed along the perimeter of the walls. It will compensate for the thermal expansion of concrete and prevent the formation of cracks in it.
At the next stage, beacons are laid out on the floor. They are cards made of metal mesh with a large cell pitch. In addition to the fact that such meshes act as a level, they additionally reinforce the screed and increase its resistance to cracking.
At the last stage, the solution is prepared. Be sure to follow the instructions on the proportions of dry mixture and water. This will help avoid problems with subsequent pouring and loss of screed strength. The prepared solution is poured portionwise onto the floor and leveled according to the beacon rule.
The cement screed must undergo a full hardening period for subsequent use. According to the standards, it is 28 days.
How to prime correctly
How to make a heated floor under tiles with your own handsHeated floor under tiles with your own handsVideo on laying DEVI heated floors under tilesVideo on laying heated floors Teplolux under tilesUseful articles It is
important not only to choose the right solution, you also need to apply it well. How to do it? Here are some tips
- Be sure to properly prepare the surface. Remove old paint from concrete or wood, remove varnish or oil stains, and remove bubbles or peeling.
- Vacuum the surface. It is advisable to use industrial vacuum cleaners as they provide better results, but if you do not have one, then a regular one will do. It is almost impossible to properly sweep away the dust with a broom.
- Strictly follow the manufacturer's recommendations. If the instructions say that the soil needs to be diluted with water in a ratio of 1 to 3, then dilute it exactly that way, no more and no less.
- Buy a special flat container for primer and paint at a hardware store. It's inexpensive, but it makes the process a lot easier.
- To apply the primer, you can use a roller and a regular brush.
- Be sure to wear protection for your hands, body and eyes. The primer is very sticky, it quickly eats into the skin and practically cannot be washed off.
- Apply the primer evenly, without skipping any parts of the surface. You shouldn’t leave puddles behind - study the approximate consumption rates and follow them.
- Don't skimp on the solution. Apply the first layer, wait until completely dry (4 to 12 hours). Then apply a second coat.
- It is recommended to fill the screed after the surface has completely dried. Take your time - let the soil soak in and cover the floor with film.
When applying the primer, make sure there are no gaps.
These are the basic recommendations for application - as you can see, there is nothing complicated. Do not spill the soil over the surface and then rub it with a roller - this will lead to uneven impregnation of the base. Let us note once again that the primer for the floor under the screed is selected based on the base material, and not on the future filling. This is a mandatory procedure and should not be skipped under any circumstances.
Self-leveling floors: preparing floors with self-leveling mixtures
In multi-storey apartments, where flat slabs are used as flooring, it may be irrational to install a full-fledged screed under the laminate. Indeed, in this case it is enough to simply achieve ideal flatness and horizontality. An acceptable option is to use a self-leveling floor.
Self-leveling floors are dry mixtures based on cement or gypsum. Due to modifying additives, the solution acquires increased fluidity and spreads evenly on the surface. This creates a perfectly even layer both horizontally and flatly.
Selection of self-leveling floor materials for laminate
As mentioned, self-leveling floors come in gypsum and cement. Many may have doubts about the effectiveness of using gypsum mixture as a floor. However, in practice, this type of rough coating behaves in operation no worse than cement. And this result is achieved due to the presence of polymer additives in the composition. They increase strength, resistance to moisture, cracks and other influences.
For the rough base under the laminate, you can use self-leveling gypsum-based floors of the following type:
- Self-leveling floor OSNOVIT SKORLINE FK 48 R. Quick-hardening gypsum-based composition. It is applied with a thickness of 3 mm and provides a fast rate of strength gain. Ideal for prefabricated floors, including laminate and parquet.
- Self-leveling floor Dauer ECOLINE. Spreads well over the surface. Has a longer solution life (90 min). Characterized by increased resistance to expansion, cracking and moisture. It can be applied in a layer of 5 to 100 mm.
For a rough base under the laminate, you can use cement-based self-leveling floors of the following type:
- Self-leveling floor EK LEVEL 3.0. finishing. Suitable for smooth surfaces without defects. It will also be an excellent choice for perfectly leveling the surface of a rough screed. Apply in an ultra-thin layer from 1 to 10 mm. Hardens quickly and provides high strength even at this thickness.
- Self-leveling floor EK LEVEL 2.0. quick-hardening, moisture-resistant – designed specifically for rooms with high levels of humidity. The composition includes water repellents and plasticizers. It can be used for flooring in kitchens, hallways, and bathrooms. Thickness of the applied layer: 2-100 mm.
- Self-leveling floor Eunice Horizon universal quick-hardening Monolith. Can be applied from 2 to 100 mm. Additionally, it is reinforced with fibers, due to which it is able to withstand increased loads.
- Self-leveling floor Yunis Horizon is a universal, quick-hardening composition for obtaining a high-strength floor covering. It is characterized by the presence of plasticizers, due to which it has increased resistance to cracking and loads. Can be used on underfloor heating systems. Can be applied in layers from 2 to 100 mm.
How to install a self-leveling floor: technology
The technology for installing a self-leveling floor is somewhat simpler than that of a conventional screed. It includes the stages of preparation, preparation of the mixture, and application of the solution.
At the preparatory stage, the surface of the rough screed or monolithic slab is dust-free, and defects are eliminated. Next you need to prime the surface. You can use the above-described compositions or a deep-penetrating acrylic primer, for example, Ceresit CT 17 deep-penetrating primer.
After the primer has dried, a solution is prepared. To do this, the dry powder is poured into a container with water in the required proportion. To increase the vitality and reduce the preparation time of the solution, it is recommended to mix the components with a construction mixer. Moreover, a mandatory condition: the preparation of the self-leveling floor must be carried out exclusively at low mixer speeds . Otherwise, numerous bubbles form in the solution structure. They can create many problems during the further use of the floor.
The finished solution can be poured onto the prepared base. To level it on the surface, it is extremely important to use a needle roller for self-leveling floors!!! The reason is still the same - removal of air bubbles from the structure of the self-leveling floor.
When pouring a self-leveling floor, you cannot stop and postpone the process “for later” . One room should be completely filled with the mixture to ensure the integrity of the entire coating. Otherwise, you will be in for an unpleasant surprise in the form of destruction of the floor at the junction of the layers.
Once fully cured, proceed with the installation of precast flooring, laminate, parquet or other finished flooring.
Checking the flatness of the floor under the laminate
This is the first and probably the most important stage. For interlocking flooring, the base must be level. According to most experts, bumps and depressions should not be more than 2-3 mm per 1 m².
! In order to check the indicators, you can use a meter ruler and apply it to the surface so that it lies between the light source and you, on the edge. Below the ruler you will see a strip of light. If in some places it is more than 3 mm, proceed with leveling work.
We strongly recommend that you check several places at once, including the area under the radiators and the middle of the room. Small unevenness can be compensated using a special substrate. The higher the differences, the higher the quality of such an intermediate layer should be.
Are the irregularities local? Then removing them will not be difficult. We offer you several basic options for preparing the floor for laying laminate flooring. Consider each alternative solution and choose the one that suits your case.
Dry prefabricated floor screed
Dry prefabricated screed is a multi-layer system, where bulk materials are used as the base layer, and durable sheets are used as the top layer. This type of rough coating is characterized by quick installation, does not include “wet” and “dirty” work, and if the installation technology is followed, it guarantees a good final result.
Selection of materials for the manufacture of dry screed
When installing a dry screed, the main choice of materials comes down to determining the best filler and top floor sheets. Therefore, we will consider the material on this division.
It is customary to use bulk dry materials as filler. The most commonly used are expanded clay or expanded clay sand. When choosing, the fractional nature of the backfill deserves special attention. The presence of large fractions in the composition of particles is undesirable. Under load, fragments can break, which will lead to compaction of the filler and shrinkage of the floor.
The best option for installing dry screed is considered to be specialized ready-made backfill. They are supplied in 50 liter bags. It contains expanded clay filler with a homogeneous fraction from 1 to 5 mm. A cheaper material that is in no way inferior in quality is expanded clay in bags. The product is porous and absorbs moisture well, but it can only be used in dry, heated rooms.
A special slab material is laid on top of the filling. Its variety includes the Knauf-Superfloor moisture-resistant floor element 1200x600x20 mm. This sheet is made on the basis of gypsum fiber. It has sufficient thickness and strength to withstand increased loads. Features of the material also include the presence of a tongue-and-groove lock and ideal geometry. Thanks to the lock, simple joining of sheets is achieved without the formation of gaps. And thanks to the precision of the shapes, the floors guarantee excellent horizontalness after installation.
How to install a dry screed: technology
Installation of dry screed is less demanding in terms of preparatory work. This is explained by the fact that unevenness and other defects will be hidden behind the backfill layer. However, it is recommended to eliminate gross defects on the base. The fact is that to isolate the filler from the rough surface, a plastic film is placed between them. If there are chips and sharp protrusions, there is a possibility of damage to this barrier. This will lead to loss of insulation quality.
After removing defective areas, the base is cleared of debris. Markings are applied along the perimeter of the walls using a level or a tapping cord. Next, it is necessary to install the edge strip to a height equal to the thickness of the backfill and the thickness of the slabs. The tape compensates for linear elongations, which will make the floor operate flawlessly.
It is recommended to fill a layer of expanded clay sand with a thickness of at least 40 mm. If the layer is thinner, it will not be able to efficiently distribute the load. If it is planned to install communications in expanded clay, then the layer in this place can be from 20 mm. All communications must be laid in a durable pipe. It is advisable to use a metal corrugation of the required diameter. The maximum limit for filler thickness is 100-120 mm.
Next, the expanded clay is slightly compacted and leveled. Leveling the expanded clay surface is easy using a long rule. If its length is not enough, then before backfilling it is recommended to install beacons, along which the surface can subsequently be leveled.
When the installation of the filler is completed, you can begin laying the sheets. They are fastened to each other using suitable self-tapping screws. After installing the last fragment, you can immediately lay the laminate or other finishing coating.
Ready base for laying laminated flooring
Here we are standing in a room in which, according to the plan, you will have a laminated floor covering. And now you are worried about only one question: - how to prepare the floor for laminate?
So, after installation, such floors become a single whole, and the slightest irregularities will immediately be visible on the floor. Therefore, before laying such a floor covering, it is necessary to make a screed. It will serve as a rough subfloor.
If, when installing the screed, you carefully monitored its quality, and the finished surface turned out to be ideal, in your opinion, then you can begin laying it directly on the screed. But we strongly recommend that you carry out additional processing.
Additional surface leveling with self-leveling floors
Before you begin installing laminate flooring, spray the base with a self-leveling mixture. With an even screed, the mixture consumption will be minimal, but the additional benefits will be maximized. First of all, it is a mirror-smooth surface. Another plus is that you completely remove dust from the surface and there will never be any dust under the coating. Well, it’s not worth talking about protecting the screed as a rough coating.
Installation of slabs on joists
One of the most common ways to quickly install a subfloor under a laminate is to install the slabs along the joists. This method allows you to raise the floor to any desired level. It provides good geometry, strength and durability. Such floors can be installed relatively quickly due to the dimensions of the sheets. There is no “dirty” or “wet” work during the arrangement.
Selection of flooring materials by joists
Both wood sheets and cement-based sheets (CSB) can be used as materials for installing floors on joists. The most common materials for making floors on joists are as follows:
- OSB board. Made from compressed and glued wood chips. Characterized by high strength and resistance to breakage. Due to the moisture-repellent resins in the composition, it provides excellent performance. Can be used for corridors and kitchens. For floor installation, it is recommended to use OSB-3 boards with a thickness of 15 to 22 mm, depending on operating conditions.
- Chipboard - chipboard. The chips are moistened with resins and pressed. Due to the resins in the composition, this material provides good performance properties when used in rooms with normal humidity. In terms of strength and resistance to breaks, it is slightly inferior to OSB boards. However, it can be used for installing floors on joists. The recommended thickness of chipboard boards is 16 mm or more.
- DSP plate. It is a material based on pressed cement and shavings. It has excellent geometry, high strength and load-bearing capacity. For floors on joists, it is recommended to use sheets with a thickness of at least 12 mm.
Timber is most often used as lag. This can be a beam with either a square or rectangular cross-section. The second option reduces the cost of the floor without compromising its technical characteristics. The most popular log sizes are 50x50, 50x100, 100x100. When using a beam with a rectangular cross-section, it must be placed with the narrow side on the base.
To ensure that the logs serve for a long time, do not change shape, and the floors do not begin to creak after a year of operation, we recommend paying attention to the following features:
- you need to choose quality timber, preferably grade 1, without large knots or other defects;
- the beam must have good geometry, large deflections are not allowed;
- check the degree of drying: humidity should not exceed 18-20%, otherwise, when drying out, the timber may bend, and the floors will become deformed and begin to creak;
- after delivering the material to the site, allow it to acclimatize for 1 day or more;
- Be sure to treat the timber with a protective compound, for example Senezh Bio or Senezh Ultra.
It is recommended to use a special type of self-tapping screws as fasteners - self-tapping screws. After screwing in, they lock into the material and prevent unscrewing from the wood on their own.
How to install a floor on joists: technology
Like other methods of arranging a subfloor, installation of slabs on joists begins with preparation. The surface of the base is cleared of debris and dusted. To strengthen the surface layer, it can be re-primed 1-2 times. This will subsequently prevent dust from getting through the gaps.
The level is struck on the walls with a construction cord or using a laser tool. A layer of waterproofing is laid on the rough base. It can be glassine or thin roofing felt. Further along the level, logs are set.
To improve the performance properties and level the lags, a backing made of unedged boards is mounted on the surface. If it is not possible to get it, then you can use a sheet of fiberboard. It is cut into small fragments and the level of the logs is raised, leveling horizontally.
The logs are placed at a distance of 40 to 60 cm, depending on the thickness of the slabs. The thicker the slab, the higher the permissible distance between the lags. There is always a gap of 3 to 5 mm between the timber and the wall. It is needed to compensate for the elongation of wood due to thermal expansion.
The cut sheets are laid on the joists and fixed to them with self-tapping screws. If this is the installation of chipboard or OSB, then a compensation gap of 2-3 mm must be left between the sheets. The same gap is left between the slab and the walls. After laying the last element, you can begin the finishing coating.
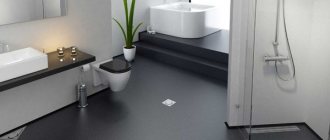
Laminate flooring in your home
Correctly laid laminate looks beautiful and lasts a long time
To understand how important a flat base is for laminate flooring, let's take a closer look at this material. What is he?
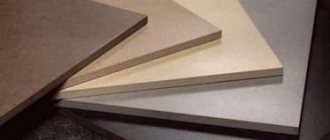
Laminate imitating natural wood
- So, the laminate surface is assembled from individual boards, panels, which are more correctly called lamellas.
- On average, the thickness of such a panel is 1.2 centimeters, while the width and length are 20 and 120 centimeters, respectively.
Interesting to know! Naturally, the most common standard sizes are named. You can also find models with other parameters, but this changes little in essence.
- If you have already purchased laminate (you can do this in the store), take it in your hands and try to bend it slightly. You will see that the body of the lamella gives in perfectly and bends quite strongly, which indicates that it cannot withstand strong deflection loads. Imagine that such a board lies loosely on the floor with a depression in the middle and a person steps on it. What will happen? That's right, deflection.
Installing laminate flooring on a concrete floor: interlocking system
- Now inspect the panel from the sides. There you will see, depending on the side, different types of locks. It is due to them that the canvas is held together. Laminate locks are very fragile, as they are made of glued and compressed wood fibers, like the main body of the board. They do not have a protective face covering.
- Now imagine what will happen to a plane assembled from laminate lying on an uneven base. The deflection, when compared with a separate lamella, will become much smaller, due to the fact that everything is connected by locks, that is, they take on most of the mechanical load.
- If you begin to intensively use such a coating, the locking connections will begin to weaken. If the unevenness of the floor is large, then with a high degree of probability the locks may break, visible seams will appear on the coating, which will increase the thermal expansion of the material and moisture, which will inevitably get inside when washing the floors.
In general, such a coating will have very little service, and will not save the high class of coating, since it is only available on the front surface of the lamellas. Therefore, there can be only one conclusion - alignment is necessary, and you should not think that it will take a lot of money. Believe me, the price of damaged laminate and your nerves is much higher.
Summary: installation of prefabricated flooring (laminate and parquet boards)
Installation of laminate parquet boards or other flooring is the final stage of arranging the floor in the house. The technology for carrying it out is the same for each of the described rough foundations. The bottom line is that a polyethylene backing is placed on the surface. There is a damper tape around the perimeter of the walls. Next, the fragments are assembled together.
If the technology was followed exactly during the installation of rough coatings, then in the end you will get an ideal surface. It will allow you to simply and quickly lay the laminate and ensure its high quality of operation: without deformations, squeaks and other defects.
Wooden floor
The preparation of a concrete floor for laminate was discussed above, but in old houses wooden floors are mainly used, which also have to be prepared before this material can be laid on them (for more details: “How to level a wooden floor for laminate - methods from the practice of craftsmen”).
The preparation of the wooden base is also carried out by leveling. But, in this case, the method is selected based on the characteristics of the existing wooden base (read: “Is it possible to pour a floor on a wooden floor and how to do it correctly”).
First you need to assess the quality of the existing foundation. If necessary, it is partially repaired: any defective boards are replaced, protruding nails are driven in, screws are screwed in. In the end, it all comes down to working with a rule by which the various irregularities of such a foundation are determined. There are several basic ways to prepare a wooden floor for laminate flooring by leveling the surface. Let's take a closer look at them.
Selection by production method
Depending on which production method was used, laminate can be classified according to the intensity of pressure. It can be direct or high pressure material. The first coating can be used for a period of time, which will be influenced by the quality and durability of the upper protective film.
If we are talking about high pressure laminate, then the top layer will be multi-component. In addition to expensive melamine or acrylic resins, this material uses aluminum oxide or corundum, which increases strength.
The film is used to protect the material from exposure to ultraviolet radiation, chemicals and abrasion. Underneath it there is a decorative layer, which in some types of material is made of special foil, and in others - from paper. It depends on how attractive the coating will be. Most often, a pattern imitating wood is applied to the surface.
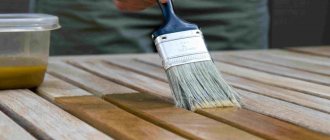
Do-it-yourself floor surface priming
In order for the concrete floor primer you have chosen to fully fulfill its function, you need to carry out the work of applying it in strict accordance with the technology. Following step-by-step instructions, you will perform high-quality surface treatment extremely quickly and simply.
Tool preparation
In order for the process of applying primer to go quickly, you need to prepare in advance a set of certain tools that can be purchased at any specialized store. To properly apply primer to a concrete floor you will need:
- a set of brushes of different widths and shapes for treating the most inaccessible places on the floor surface;
- for high-quality processing of the screed, it is better to use a roller with long or short pile (depending on the type of primer solution);
Rollers with long and short pile - for greater convenience, you also need to purchase a special container in advance in which you will apply the solution to the surface of the roller and brushes.
Cleaning the premises
In order to get a high-quality result from a single application of primer, it is necessary to thoroughly clean the floor surface from the smallest dirt and construction dust. In this case, it is best to use a construction vacuum cleaner, which will completely collect dust from the entire surface area in just a few minutes.
Applying the mixture
This stage is not very labor-intensive, but very important, since the result of its implementation directly determines how soon you can begin finishing the surface.
- If you bought the mixture in dry form, then dilute it with water at room temperature in accordance with the manufacturer's instructions. If you prefer a ready-made solution, then simply open the bottle and pour some of the liquid into the prepared container.
- Next, you need to carefully brush all the corners of the room and hard-to-reach areas of the floor with brushes.
- The last step in applying the primer is to cover the main area of the floor surface with a roller. Start applying primer from the corner farthest from the door and gradually move towards the exit, carefully painting every square centimeter.
- On average, it takes from three to ten hours for the primer to dry completely, depending on its composition. Does the floor need to be re-primed? Of course you need it! After the applied primer has completely dried, it is necessary to apply a second layer of solution of the same brand to create the required level of waterproofing and adhesion.
Conclusions: Priming a concrete floor is a mandatory step that should be carried out correctly before applying the finishing coating. This is the only way to ensure high-quality adhesion of any finishing materials and significantly extend the service life of the concrete floor covering.
Floor design in the apartment
The floor in the apartment is mounted on the upper surface of the interfloor ceiling and consists of two main layers:
- intermediate;
- flooring.
In the simplest cases, for example, in a Khrushchev apartment, intermediate layer . The flooring in it, most often PVC tiles, linoleum, or thin pinless parquet strips, is glued directly to the upper surface of the concrete floor slab with bitumen mastic, latex or PVA glue.
smoothed with a thin layer before gluing . It’s no wonder that in such apartments the audibility and thermal qualities leave much to be desired. The horizontality of the floor plane in such apartments is also far from ideal.
In modern houses, inter-apartment floors are complex reinforced concrete or metal structures , equipped with layers of heat, moisture, and sound insulation. In frame-monolithic structures, floors are most often cast from expanded clay concrete - an excellent insulating material. In these cases, insulating layers should be installed in the intermediate layer if the insulating properties of the ceiling are insufficient.
The wooden beam floor may also contain heat, moisture and sound insulation. Most often this is mineral wool laid between the beams. A layer of waterproofing may also be provided there. An intermediate layer is already installed on the beams, which can consist of joists, a subfloor, insulating layers of insulation and waterproofing, screed, and a floor covering is placed on top. The wooden floor, which, thanks to the cottered boards, forms a single sheet, can be laid directly on the beams. If the beams are located far apart, use joists attached to the beams.
There may be no overlap, for example, in basements or basements. In this case, the floor is mounted on a screed, which covers a specially prepared cushion consisting of compacted layers of sand and crushed stone lying on the ground.
Filling the screed
Filling the floor should begin from any corner of the room that is as far away from the entrance as possible.
Having poured the prepared mixture onto the floor, we carefully fill all the depressions and cracks with the solution to prevent the appearance of unevenness and voids.
Next, take a rule or half-rule and smooth the surface of the screed at the level of the guide strips.
The plane of the half-ter or rule should move along the guide profile as if on rails, while the leveling tool should be moved with uniform movement in three directions.
The movement of the rule should be carried out across the slats, according to the back and forth principle, i.e. to the right/left by 10-15 mm and pull towards yourself also carefully and smoothly by 5-7 mm.
Those. We carefully move the rule to the right/left, now in one direction, then in the other, at the same time shifting towards ourselves so that the excess solution moves from above to the space of the floor that is not yet filled with it, to our feet.
NOTE
Different batches of the solution may differ in consistency, which is why a wavy, convex joint sometimes forms at the places where they are connected.
To prevent this from happening, the places where different batches of the mixture come together should be smoothed out more thoroughly.
To make the floor surface as smooth as possible, we stretch the rule over one place several times to smooth out all the smallest irregularities.
If necessary, add solution to the resulting voids, and once again level everything with the rule.
When the concrete has set and you can already walk on the floor, but the screed is still somewhat damp, using a wide spatula you can easily cut off and clean up the lumps, pebbles, etc. that have formed on the surface of the floor, if you wait until the concrete has completely dried, then do this it will be very difficult.
Content
- Floor design in the apartment
- Types of flooring bases Cement screed
- Semi-dry cement screed
- Dry screed
- Self-leveling floors
- Wooden floor
- Board
That is, in addition to strength, it must protect the apartment from extraneous sounds and foreign climates. It is the finished, well-executed floor that gives the apartment ensemble completeness.
Installing a floor is not a cheap undertaking. However, the variety of materials and methods of its construction allows you to build a fairly comfortable and aesthetic floor based on the most modest budget.
Thus, the floor in the apartment bears the following functional loads, which must be taken into account when installing it:
- Carrier.
- Warming.
- Soundproofing.
- Moisture-proof.
- Aesthetic.
Preparing the base
For a high-quality screed, you need to thoroughly prepare the base on which it will lie. When repairing the floor, it is better to remove the old screed. Over time and use, cracks, chips, and potholes appear on it. The process of destruction is accelerated by expanded clay, which in Soviet-built houses was poured under it - the backfill becomes compacted over time, forming voids under the cement screed, which is almost impossible to repair.
The increase in cost of work when replacing the floor will result in savings later, when during the service life of the new floor covering you will not have to disassemble everything again due to deformation of the screed.
The old subfloor is removed using a hammer drill. The concrete floor is cleared of debris and dust. After this, it is advisable to vacuum it and do a wet wipe. All damage to the ceiling, chips and peeling are removed. Cracks, seams and surface damage are sealed with thick cement mortar.
It should be remembered that cement mortar will not lie on concrete without preliminary preparation of the base. He'll just fall behind after a while.
Therefore, places where concrete is damaged and seams are primed. Small cracks are opened using a scalpel or a puncher, otherwise the solution cannot be rubbed into them.
Large seams are reinforced.
Concrete primer
Repairing damage to the ceiling and seams, and then priming the entire surface is carried out using:
- cement laitance;
- water;
- special primer (Ceresit ST 17).
For reference: other types of factory primer are either more expensive, or their quality is lower, or, like Vetonit, they have a short shelf life.
The purpose of the primer is to saturate the pores of the concrete with moisture in the sealing areas. If this is not done, the solution will not connect to the concrete base.
The technology for laying screed on expanded clay is discussed in detail in the materials: “How to make a floor screed with expanded clay?” and “Dry floor screed with expanded clay.”
Dry concrete will draw water out of the cement-sand mixture and disrupt the chemical hardening process of the cement. In addition, the primer binds dust particles and creates a film that improves the mutual adhesion of concrete and cement mortar.
Laitance of cement is obtained by mixing cement with water in a ratio of 1:2. The areas to be restored are wetted 2-3 times with both cement laitance and water, but without the formation of puddles. It is advisable to speed up the saturation of the pores with moisture using a paint brush. To do this, the primer is actively rubbed into the concrete with a brush. The repair solution is applied to a damp surface (wet on wet) and rubbed thoroughly.
Priming with “milk” is much more effective than wetting it with water. The cement contained in it penetrates along with water into the pores of concrete and improves the process of connecting the cement mortar with the base being repaired.
Special primers penetrate into the ceiling in the areas being repaired and crystallize there, blocking the outflow of water from the solution. On the penetration surface they form small scales that ensure adhesion of the patch to the concrete.
Repairing floors in St. Petersburg and Moscow in pre-war houses has one feature - there are no concrete floor slabs. The interfloor ceiling is made of powerful metal T-beams. Therefore, preparing the base for the screed in such houses begins with filling expanded clay between the beams, on which a layer of cement mortar is applied.
Expanded clay base
Expanded clay is a lightweight, porous material. Ecologically pure. It is used for heat and sound insulation, as well as as a filler of spaces, to reduce the load on the load-bearing elements of the building.
Before filling the expanded clay, the base of the interfloor ceiling is covered with an overlapping polyethylene film (thickness 100 microns or more) or other waterproofing material. The seams are glued together with tape. At the walls, the film is laid above the floor level.
Beacons are being installed. Expanded clay is poured in and the surface is leveled with a long lath, preventing it from exceeding the beacons. We fix the leveled layer of expanded clay in this position using cement milk, which will prevent the expanded clay granules from moving when laying the screed.
Screeds in individual houses or cottages are carried out on the ground or on the subfloor.
Soil foundation
The soil is cleared of vegetation and leveled. Expanded clay is poured onto it, at least 5 cm thick above the foundation, to provide thermal insulation and a layer of sand of 10-15 cm. The resulting surface is moistened with water and compacted for dense shrinkage. This is the cheapest method of preparing a screed, and is not inferior in efficiency to more expensive options.
Wooden subfloor (subfloor)
The wooden floor used for the base of the screed must meet a number of criteria:
- do not have rotten boards;
- be firmly attached to the joists;
- do not contain traces of glue, grease or paint;
- do not creak;
- don't bend.
The shortcomings are easily eliminated. Preparing the floor for screeding comes down to replacing rotten and sagging boards. Removing dirty stains with detergents or using sanding (plane). Creaking boards are additionally attached to the joists. Places of possible leakage of the solution (under baseboards near walls, cracks, fallen knots) are sealed with parquet putty based on wood dust or oil paint mixed with sawdust in a ratio of 1:4.
Important: water-soluble putty is not used, as it can be destroyed by the moisture of the solution.
Skirting boards are removed. A thin strip is placed in their place. The gaps between the lath and the floor are sealed with putty. After installing the screed, the lath is removed, and the remaining gap between the wall and the floor will serve to ventilate the space under the floor, which will prevent rotting of the boards and joists. After laying the flooring, it will be covered with a plinth.
The next step in preparing the base for installation is hydro- and sound insulation. Waterproofing issues are covered in detail in the work: “Waterproofing the floor before screeding.”
Floor screed diagram.