Comfort in an apartment is important for any person. It allows you to relax after a busy day at work, forget about everyday worries for a while and simply have a pleasant leisure time. Creating a pleasing home environment begins with well-groomed walls. Wallpaper is still the most preferred cladding option. Many people know how to glue them. But only specialists know how to properly prepare a room for their application. In this article we will reveal all the secrets of the technological process of treating walls before decorating them with wallpaper.
Criteria for the suitability of surfaces for wallpapering
Before gluing wallpaper on walls, you should check its surface for suitability to a number of certain requirements, since the quality of the pasted canvases and their service life will depend on compliance with these conditions. At the first stage, an inspection is carried out. During the process, the complexity of the upcoming work will be determined and it will become clear how to treat the walls before the wallpaper. You can check surfaces after removing the old coating from them.
Having completed completely cleaning the walls from the previous finishing material, they must meet a number of the following conditions:
- Presence of a dry surface. Damp walls absorb a minimal amount of water, the basis of which is wallpaper glue. For this reason, the canvases will not adhere fully to the surface, and as the air temperature in the room increases and the dampness disappears, they will begin to lag behind.
- Clean base. Not only old finishing materials should be removed from the walls, but also if there are areas with mold, even where it is just beginning to appear. In any situation, it is not permissible to start wallpapering surfaces if there are any dark stains or other suspicious stains on them, since one day they can cause destruction of the canvases and will certainly appear on their outside. In addition, over time, mold covers more and more space and pollutes the environment with its spores that are harmful to human health. Paper wallpaper is a suitable place for them to suddenly multiply, so they will certainly form under canvases that were applied to an incompletely dried surface.
- There should be no cracks or other damage on the wall, since they can be noticeable after pasting, and if they possibly increase in the future, they can harm the coating itself, contributing to the appearance of tears or folds from warping.
- Evenness, smoothness and uniformity of the finished surfaces. Otherwise, unevenness will be noticeable through the pasted canvases, and if the selected wallpaper is of insignificant thickness and is made in light colors, then a wall of a different color will be visible behind it.
How to prime walls before wallpapering?
Inexperienced finishers often ignore the process of properly preparing surfaces before gluing wallpaper, believing that it is enough to just eliminate unevenness, but in reality everything is more complicated.
It’s easy to understand whether the walls need to be primed before wallpapering, by appreciating the advantages that this procedure brings:
- walls treated with primer do not support the spread of mold and mildew;
- impregnation ensures better adhesion - the wallpaper will stick firmly to the wall;
- the treated surfaces have higher moisture resistance, which also ensures strong adhesion of the wallpaper to the wall even at high humidity;
- The primer levels out minor wall irregularities and eliminates excessive surface porosity.
The listed beneficial properties of the primer make it possible to complete the work of gluing walls with higher quality, ensuring the durability of the coating, which is especially important when installing expensive products.
Types of primers and their characteristics
When choosing a specific type of primer, you should take into account the material that is the basis of the product. Manufacturers have developed special formulations that are optimally used for heavy and light materials. Based on their composition, soil is divided into several types:
- Acrylic. These impregnations are used for treating concrete surfaces, drywall and wood. Excellent for living rooms as they are odorless. Complete drying time is up to 24 hours. Impregnations of this type are considered universal.
- Alkyd. Used to prepare wooden and metal surfaces for subsequent painting or pasting. They dry quite quickly - up to 12 hours. Cannot be used to protect plastered walls.
- Glyptaliaceae. These impregnations are designed for metal products. It will take at least a day to dry.
- Perchlorovinyl. Prohibited for application in living rooms. Designed for coating mineral substrates and metal products. Drying time - up to 4 hours.
- Polyvinyl acetate. For high-quality impregnation under standard conditions, 30 minutes is enough. Used to cover walls before gluing with PVA-based products.
- Polystyrene. Also not recommended for interior protection. Designed to protect wooden and plastered walls.
- Phenolic. Designed to protect wood and metal elements.
Which one is better to use depending on the surface?
The undeniable advantages of impregnating walls using a primer prove that to obtain high-quality wallpaper, a primer for wallpaper is necessary. Which impregnation to choose depends not only on the composition of the rolled material, but also on the type of surface.
It is best to treat concrete These solutions, entering the concrete structure, create a slightly rough coating, which provides excellent adhesion when gluing both paper and non-woven wallpaper.
If the owners decide to paste over the ceiling, then these types of primers should also be applied to the surface of the floor slabs. Proper processing will not only increase adhesion, but will also impart water-repellent properties to the surface. N
Impregnation cannot be applied to concrete painted with water-based paint. To prepare such a wall, they clean off the old water-based emulsion, putty, level the base and only then treat it with a primer.
When it comes to covering wooden walls, paint primers based on oil solutions are used. for treating plywood or fiberboard .
For sheet materials (gypsum plasterboard, plasterboard, OSB) , which are often used in new buildings, it is recommended to use universal acrylic solutions with an antiseptic. Such a base will be poorly impregnated due to the characteristics of the material, but vinyl wallpaper and glass wallpaper can be reliably placed on the treated surface.
When choosing a primer, you should first of all focus on the material from which the wallpaper itself is made. So, the primer for liquid wallpaper can be either acrylic or quartz. For paper products, it is enough to treat the base with a latex compound. A special vinyl acetate primer has been developed for vinyl products.
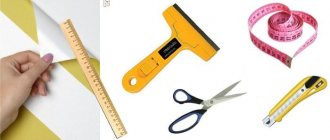
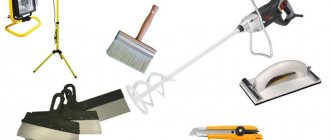
Required materials and tools
To prime the walls before wallpapering, it is recommended to acquire some material resources. You will need:
- primer suitable for the surface to be pasted;
- container for preparing the solution;
- bath with a ditch for rolling out the roller;
- brush 150 mm;
- roller with fur skin on the handle, 50-70 cm long;
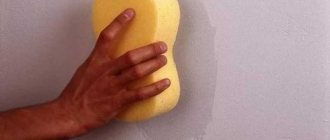
- damp cloth to remove smudges of primer.
You will only need to use a stepladder or any other elevated position when working on corners at the top of the wall that need to be treated with a brush. Applying primer to the main surface can be easily done with a long-handled roller directly from the floor. Using the listed tools, it will be easy to perform soil protection of the foundation with your own hands.
Preparing the priming mixture
The primer before wallpapering is prepared using the instructions that the manufacturer places on the packaging.
Primer in factory packaging is most often supplied ready-made and already prepared for use. Stir this mixture well enough. If necessary (for processing reinforced concrete bases), walls under wallpaper are primed with less concentrated compounds; for this, acrylic primers are diluted with water, and alkyd primers with white spirit.
Concentrated primers are adjusted to the required consistency according to the manufacturer's recommendations.
To dilute the dry concentrate, you will need a deep container, a mixer and the solvent provided in the instructions. The powder is poured into water and brought to a homogeneous state; a properly prepared primer should not have lumps.
Flow calculation
Primer consumption is influenced by many factors, so you should not rely solely on the rate per square meter recommended by the manufacturer. Increases consumption:
- increased indoor air temperature;
- surface structure (degree of porosity).
When calculating the required volume of material, you should follow the manufacturer’s recommendations, but there are average primer consumption rates for various surfaces:
- concrete surfaces – 350 g/m2;
- drywall, gypsum plasterboard, OSB and gypsum plasterboard sheets – 120 g/m2;
- plaster for painting – 100 g/m2;
- wooden surfaces, including plywood – 120 g/m2;
- metal surfaces – up to 120 g/m2.
The specified standards are indicative indicators, but in the absence of exact data, they can be used to determine the required amount of priming solution.
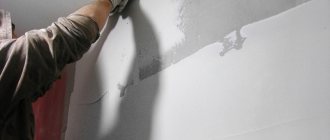
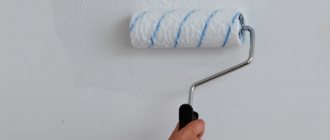
How to prime walls for wallpaper
Preparing the wall surface for gluing is quite simple. Any beginner in construction can master this task; the main thing is to follow the recommended sequence of actions:
- To successfully treat walls with impregnation, it is recommended to ensure the temperature and humidity conditions in the room. To perform work, temperatures from +5 to +30°C are allowed, and humidity is up to 75%.
- All tools are prepared before work begins.
- Before priming, you should clean the walls of old wallpaper and paint. To do this, use a spatula and hot water. If the old coating is difficult to remove, you can use special solutions to remove wallpaper.
- The cleaned surface is checked for cracks and irregularities, which are corrected with putty, followed by the application of leveling solutions.
- In a bucket or other container, thoroughly stir (with a mixer or by hand) the prepared solutions or prepare the primer according to the instructions. If you plan to cover the walls with wallpaper for painting, it is possible to add appropriate pigment compositions to the soil, which will create a higher-quality base that does not contrast with the main color of the coating.
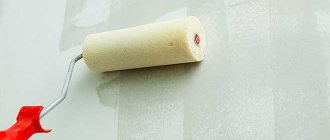
- Using a brush, first apply the prepared solution to hard-to-reach areas (corners, wall-to-ceiling junctions).
- The main area is covered with a roller. For ease of use, the primer is poured into a bath with a cuvette.
- Re-processing is possible after the previous layer has completely dried. For high-quality preparation for pasting, it is enough to treat the surface twice.
How long does it take for primer to dry?
The drying period for different types of material differs and can vary from half an hour to a day. Many finishers prefer not to wait the allotted time and begin work 20-30 minutes after applying the primer.
Such haste is not welcome, but in conditions where the room temperature is above +25°C, the primer dries really quickly, which allows you to apply wallpaper glue without fear.
Under standard temperature and humidity conditions in a room, the drying times for different primers are as follows:
- Based on acrylic – up to 8 hours.
- Oil or contact – up to 24 hours.
- Alkyd - up to 12 hours.
- Special quick-drying - up to 7 hours.
Step-by-step preparation of a wall for wallpapering
To carry out preparatory work, it is necessary to spend not only a lot of time and effort, but also additional expenses, so incompetent specialists, in an attempt to reduce costs and the period of implementation, as well as simplify the work process, often avoid them as much as possible, producing mainly only a few of them. However, in order for the canvases pasted over the walls to be reliably connected to the surface, have a pleasant appearance and a long service life, these procedures should in no case be skipped.
Wall preparation consists of a number of the following works:
- Removing previously applied finishing materials.
- Removing fungus and other negative phenomena from surfaces.
- Repairing identified cracks and other damage.
- Opening the walls with a primer.
- Bringing the surface to an even and smooth state through the use of plaster and putty mixtures.
- Sanding treated walls.
- Repeated application of a primer, which increases the level of adhesion of the finishing material to the surface.
Plaster should be applied to the walls if there are significant deformations on it. In some situations, an alternative solution is to use plasterboard sheets that are glued to the wall surfaces themselves.
Final priming
The final stage of preparing the walls is necessarily re-priming. But this time we need the soil for other purposes:
- The adhesive ability of treated walls to wallpaper increases;
- A smoother and less porous surface is formed, and any remaining imperfections are additionally removed.
The main task of this layer is to ensure the best adhesion of wallpaper. It is this step that will help the coating keep up with temperature changes, for example, at the beginning of the heating season.
You need to prime very carefully, making sure that the surface does not have defects that were missed earlier. If something still sticks a little, it can be corrected with a few more layers of soil.
When the materials have dried thoroughly, you can glue the wallpaper!
Proper preparation of the walls for the installation of new wallpaper is the key to ensuring that the coating will lie properly and will delight you for many years. It is not recommended to skip this step.
Unless you want to constantly lament the flaws of the walls and peeling corners visible through the canvases. After all, the joy of time saved on shoddy work passes much faster than the time for a new renovation!
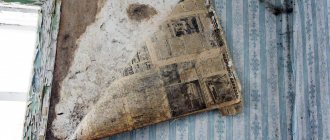
Removing old coatings
Initially, the wall should be cleaned of the previous finishing material, which may include whitewash, paint, wallpaper, etc. In addition, it is necessary to remove all existing nails, dowels or other fasteners.
Note! It is usually easiest to remove old canvases, but in some situations this task can be quite difficult if high-quality glue was used during their pasting.
Basically, wallpaper is removed in one of the following ways:
- In the first case, craftsmen often try to lift the canvas by using a spatula, with which they carefully remove it from the surface, trying to prevent the paper from tearing. At times, the sheets can be easily detached completely from the wall without creating any difficulties.
- The wallpaper is well moistened with warm water using a brush, roller or spray bottle. Moistening is carried out repeatedly several times, since the liquid must completely moisten the canvas and soften the adhesive substance. When using this method you have to put in some effort. Soaked trellises must be removed using a spatula.
- Vinyl sheets with many layers will need to be cleaned in 2 approaches. The first step is to remove the top decorative coating. The second step is to remove the paper backing, which is basically firmly fixed to the surface. This layer should also be moistened generously with liquid and removed using a spatula.
- You can also remove it by using a steamer or steam iron. The first option is mainly purchased by professional finishers, since it can significantly increase the speed of removal in large rooms.
If you paste over a painted surface, it will be much more difficult to remove the old paint. Its removal can be done using one of the following methods:
- Mechanical removal of old paint is carried out using an electric drill. Instead of a drill, a metal brush or an abrasive attachment should be installed in its chuck, which performs the removal.
- The thermomechanical method consists of carrying out 2 actions. One of them is to heat the paint using a hair dryer, and the second is to subsequently clean the peeled coating using a spatula.
- The chemical-mechanical method involves applying a special agent to the surface, which softens the paint layer and ensures its easy removal from the walls, which does not require any special effort.
Removing whitewash is not that difficult, but you should be prepared for a significant amount of dust. Taking this into account, before starting the removal procedure, it is advisable to cover the floors with polyethylene along the length of the treated surface. If the coating is a significant layer, it should be moistened generously with water and then removed in separate pieces. Thinly applied whitewash can also be washed off with it, but it is additionally necessary to add a small amount of vinegar, which will degrease the surface and facilitate easier removal.
Preparatory work
Do-it-yourself priming of walls in an apartment for wallpaper is a simple process that anyone can do. But this does not mean that you can approach the matter carelessly. All stages of work, including preparatory work, must be performed in strict sequence.
- The premises being renovated are completely cleared of construction waste.
- The surface of the walls is carefully inspected. The remains of old wallpaper and plaster are removed, nails and screws are removed. Cracks and chips are covered with fresh putty. It must be remembered that the primer is applied only to a dry base.
- You should pay attention to dampness and mold that could appear in a damp room. Such places should be thoroughly cleaned with a chlorine solution, and a primer containing a fungicide should be used.
Do not neglect safety measures: primer mixtures contain chemical compounds that can cause allergic reactions, although the manufacturer assures on the packaging that the product is completely environmentally safe. Use a respirator or gauze bandage, glasses, a hat, gloves and clothing that covers unprotected areas of the skin in your work.
- Use warm water to wash away dust and fine dirt from the wall remaining after treatment.
Important! The primer cannot be applied at room temperatures below +5 degrees, especially on a frozen surface.
Elimination of fungi and other foci of biological damage
Removing mold found on the surface after removing the old coating will be quite problematic, but this procedure should be carried out in any situation, since otherwise it will certainly appear in the near future, causing harm to the new finishing material.
The difficulty in eliminating it lies in the fact that these microorganisms penetrate deeply into the structure of the walls themselves on which they are located. If the contaminated areas are removed only superficially without further treatment, then after a certain period of time they will reappear on the front side of the finish and will require its replacement. To avoid this, after the initial removal of mold in these places, you should use special products that can penetrate deep into the wall material.
The first step is to find out the reason for the formation of fungus or other unwanted microorganisms in order to take measures to remove them. If this is not done, then removing the stains from the surface will soon not only appear in the same places, but will also quickly begin to increase in size. For example, if fungal growths are located on a wall that borders the kitchen or bathroom, then treatment must be carried out specifically in these rooms. If mold occurs on the outside, you will need to check the ventilation system of a private house or apartment, and also check the corners for the presence of through cracks.
If fungal formations are on a layer of plaster, then it is easier and better to completely remove it, avoiding treatment.
In specialized stores there is a huge variety of compositions for sale to eliminate various microorganisms. These products can be applied to the surface using brushes or rollers, or sprayed.
Mold removal compounds are supplied in containers of various sizes. Most of them are produced on the basis of chlorine, therefore, when applying them, it is imperative to protect your hands, as well as the respiratory tract along with your eyes, from possible contact with them and in order to avoid negative consequences.
Basically, infected areas have to be treated again 5-6 times, since it is quite difficult to completely eliminate mold. After the applied composition has dried, rinse the surface with water, removing remaining stains using a brush.
After each re-opening, you must also thoroughly wash the walls with a disinfectant. If the surface is successfully cleaned, it should be thoroughly dried using a heater directed at the wet areas. The most suitable solution for this problem would be to use a heat gun, which has a directional effect.
If, after completing the work, it was not possible to get rid of the mold, then you will need to contact the appropriate specialists who will be able to complete this task, but their services will cost an order of magnitude more.
At home, you can also prepare your own product to remove these microorganisms without chlorine, which is hazardous to health. To prepare it, you need 200 g of slaked lime and 1 liter of water. If the composition is needed, you can prepare a larger quantity, but in compliance with the specified proportions.
Advice. When carrying out finishing work in a new building, in order to avoid the appearance of mold on the walls, it is advisable to first open the surfaces with a special primer, which will prevent its formation.
Carrying out repair work on wall surfaces
If cracks are found on the walls, which can often be seen in buildings built a long time ago, they should be sealed, since otherwise they can harm the appearance of the finishing material.
Carrying out repair work on surfaces is generally not difficult. The process itself consists of the following steps:
- The found crack is enlarged. This stage is performed to penetrate the material deeper into the surface of the wall, with the help of which the damage will be repaired.
- It is necessary to clean the crack with a brush, sweeping out dust, loose fragments and other debris.
- Next, the damaged area must be opened with a primer throughout its entire depth. For this work, it is recommended to use a spray bottle or a soft paint brush.
- The next step is to repair the damage with the selected material, which can be made from the same material as the wall itself. Modern polymer-based repair mixtures are also excellent for this task, and in particular for small crack widths. To eliminate widespread damage, you can use polyurethane foam that has a small magnification factor.
- Once the applied mixture has completely hardened, it is necessary to cut off its protruding excess. After this, it is necessary to grind these areas, which ultimately should not stand out against the background of the main wall covering.
Briefly about the main thing
When choosing the best way to level the walls for wallpaper, you must first determine their curvature and the general condition of the surface. If it is strong, stable and with slight deviations from the level, it is best to use putty. Curved walls with serious defects, as well as those in need of insulation and sound insulation, are leveled with plaster or plasterboard sheets. The plaster is applied not in one thick layer, but in several, gradually bringing the surface to the desired plane. Drywall can be glued to walls or attached to a pre-assembled frame.
Ratings 0
Opening the surface with a primer solution
Next, you need to apply a primer to the surface, which contains antiseptic additives. For some craftsmen, this procedure seems optional, but it should be borne in mind that it is by opening the walls with this solution that the adhesion to the surface and the durability of the finishing material itself increase, and a layer is created that provides protection against mold.
Primers come in various types. They are divided according to the base from which they are made and a number of other qualities.
| Criteria for separating primers | Types of primer compositions |
| Based on production | Acrylic, alkyd, mineral and others. |
| According to the level of penetration into the base | Deep and ordinary. |
| By purpose | For plastering walls, wooden, concrete and metal surfaces, as well as universal. |
| By area of use | For external and internal work, as well as universal. |
| By quality | Moisture-resistant, antiseptic, antifungal, fireproof, anti-corrosion and others. |
Based on the parameters indicated in the table, you can freely select the most suitable composition.
For treating surfaces of any type, the best solution is to use deep-penetrating solutions that can increase the strength of the base by filling the structure of the wall material. Acrylic compounds are considered the best option.
The primer is applied using a paint brush or roller. Basically, 2-3 layers should be applied to the surface, in between which each of them should dry completely.
Alignment of walls
The surface that will be covered with wallpaper must have a high level of evenness, and ideal smoothness is not necessary for it, as when painting with paint. In this case, minor roughness may be left on it.
Surface leveling can be done using 3 methods. Preference is given taking into account the quality of the walls themselves.
Wet method
The most popular plastering method uses a solution of cement and sand or a gypsum-based composition. This method helps to obtain an excellent result, however, it is not always convenient, difficult to implement, and its implementation requires experience in doing similar work.
It should be emphasized that not all novice masters are able to carry out such processes without first training their hands well. When giving preference to this method, you must also initially take into account that during its implementation a significant amount of dirt is formed, since the batch will be prepared inside the room in which repair work is being carried out, which is why the possibility of the applied plaster falling onto the floor surface cannot be ruled out. To avoid damage to the floor covering, before mixing the solution and plastering, it must be covered with polyethylene cellophane.
Most likely, the entire repair will not be completed with just one application of plaster and finishing putty will be required on top of this coating. In addition, the disadvantage of this method is also the duration of the work performed, since each layer will need to not only be applied, but also wait for it to completely dry on the wall before covering it with the next one.
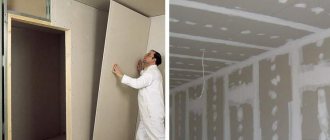
Leveling walls with plasterboard without frame
The most suitable option for beginners. Plasterboard sheets can be fixed to the wall using special adhesives, which are also made on a gypsum basis. This method is intended for use when surfaces have minor unevenness. It will be difficult or even impossible to change walls with quite significant defects for the better with the help of plasterboard sheets.
One of the most difficult steps when using drywall is to install it on the walls, since the material has large weight and dimensions, and can even break if handled carelessly. Taking this into account, it is unlikely that it will be possible to install solid sheets alone and an assistant will be required.
If the wall to be finished has a fairly flat surface, then the material used can be cut into more compact pieces, but in this case it will be much more difficult to achieve their uniform gluing. In addition, the amount of work will increase due to the need to perform reinforcement and apply putty to eliminate the many joints that arise after this.
The positive side of using plasterboard sheets is the formation of a surface with ideal evenness and smoothness. In addition, thanks to them it is possible to achieve an increase in the thermal insulation of walls, since the material has a low level of heat transmission. If mold growth was previously noticed on the surface to be leveled, and it was treated with an antifungal solution, then its leveling is best done using moisture-resistant plasterboard sheets.
Fixing plasterboard sheets to the sheathing
This method is used when there is a rather uneven surface or if there is a need to insulate it. Wall distortions are leveled using frame slats, which should be installed in the same plane. The empty cells between the components of the sheathing are filled with insulation.
The construction of a frame is not so easy, but if desired, even a novice master can build it with high quality. Assembling the sheathing requires the availability of the necessary tools, attentiveness and accuracy, as well as adherence to technology.
Preparation for liquid wallpaper
When preparing for liquid wallpaper, a perfectly flat surface is required, while when gluing non-woven wallpaper, some wall irregularities may become invisible. Preparing concrete walls for decorative plaster and liquid wallpaper is similar, but liquid wallpaper requires less time. It is no different from preparing for gluing regular wallpaper, except that liquid wallpaper tends to pull out stains and stains from concrete surfaces, so the walls must be coated with special products and several primer layers.
For concrete walls, such a product is gypsum. It protects the adhesive contained in liquid wallpaper, allowing it to reliably stick to the concrete surface. Gypsum clogs all small irregularities and pores; it can also be sanded. After it dries, the surface is primed and covered with white water-based paint so that the liquid wallpaper does not lose its color. Painting on concrete and plaster is ineffective - only on gypsum putty. Finally, a strengthening primer is applied to bond the liquid wallpaper and the wall surface. Liquid wallpaper is applied with a spatula in the same way as decorative plaster.
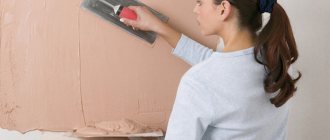
Applying putty to surfaces
Regardless of the previously chosen method of preliminary leveling, the next step is to bring the wall to a suitable level of evenness using a putty mixture. Many people do not understand why it is necessary to putty drywall if it is already smooth and highly smooth, but there are some factors due to which this work should be carried out without fail.
The mixture applied to the walls gives the material greater smoothness, and also helps to increase the interconnection of the surface with wallpaper of various types. In addition, the coating allows you to even out the tone of the drywall, and if necessary, it can be given a suitable color by adding the appropriate color to the composition. At times it is necessary to resort to the use of such means to maintain the color of the paintings.
Putty is usually applied 1 or 2 times, each of which must be applied no earlier than after the previous one has completely dried. Due to the quick drying of the putty mixture, the work carried out will not take much time.
After treating the surface of the composition, it should be grinded, during which it will be possible to remove irregularities that are not very noticeable. To perform this task, it is necessary to use a construction float with medium-grit sandpaper (P120-180) or an abrasive mesh installed, since the walls being prepared for wallpapering may have a slight roughness.
Final preparation
The final preparation of the walls includes sanding the putty surface with a metal mesh or sandpaper to remove small irregularities after the putty has completely dried, and final priming until it dries completely with the required number of layers.
This preparation of concrete walls is carried out by gluing paper, vinyl, non-woven wallpaper.
Final opening of walls with primer
It is advisable to re-treat the surface that has been leveled and puttied with a primer, which will not only connect the applied coatings to each other, but also increase the adhesive properties. This will be most effective when preference is given to vinyl or non-woven wallpaper for finishing.
The assortment of hardware stores also includes primers that can paint walls. They are used at the final stage if the surface has acquired an uneven color after applying the putty mixture.
In such a situation, this primer should be used to open the wall in one layer using a roller. If the surface has been properly prepared, then it can be processed fairly quickly.
On an almost completed wall, it is advisable to apply deep-penetrating acrylic-based compositions with antiseptic properties, but instead of them, the same adhesive compositions that are used when gluing canvases are often used for this purpose. Once the final primer layer has dried, you can begin finishing work. Having learned how and with what to treat the walls correctly before gluing wallpaper with your own hands and having carried out these processes, in the future you will be able to quickly carry out pasting, obtaining the desired result.
Conclusion
Now you know how to choose putty and properly prepare walls for wallpapering. If any difficulties arise during the work, write comments, and I will be happy to help you.
Did you like the article? Subscribe to our Yandex.Zen channel
October 16, 2022
Wallpaper, Construction Chemicals, Plaster and wall putty
If you want to express gratitude, add a clarification or objection, or ask the author something, add a comment or say thank you!