Protective impregnation for a wooden floor in a house
If wooden floors are made in a non-residential or residential building, then it would be wrong to leave them without a final protective coating. Without it, the surface will quickly become dirty, worn out, moldy, or even damaged by a microscopic organism.
Wood flooring is processed using various materials, and they will not only protect the surface and increase its service life, but also increase aesthetic performance, impart a glossy or matte shine, a certain shade or color, emphasizing the beauty of the wood structure.
To understand how to treat a wood floor, you should take into account the purpose of the room, the characteristics of the temperature regime and the power regime in it, as well as the properties of the coating. Let's look at what are the best impregnations for wooden floors in the house.
Antiseptics – protection against microorganisms
Antiseptics prevent the destructive effects of insects, fungi, viruses, putrefactive agents and other pests on wood. Often, antiseptics for outdoor use contain substances that protect the wooden surface from ultraviolet radiation and precipitation. It is important to pay attention to this when choosing an antiseptic for the flooring of a veranda or terrace.
Many modern antiseptics have water-repellent properties. This eliminates the possibility of warping, cracking and twisting of wooden floor elements during prolonged exposure to moisture.
Antiseptics can be prophylactic or therapeutic.
Prophylactic compositions represent the bulk of antiseptics. They treat undamaged wood for its subsequent protection during operation. A popular representative of such antiseptics is Neomid 400, which forms a colorless film on a wooden surface that prevents insects and bacteria from entering the tissue.
Therapeutic antiseptics contain more aggressive components that not only repel, but also destroy tree pests. These products are used on wooden surfaces that have already been damaged. Or where there are difficult operating conditions. For example, on wooden floors in bathhouses, where high humidity initially increases the risk of rotting. Here, medicinal antiseptics, to be on the safe side, are often used as preventatives.
The medicinal composition Neomid 100 Anti-bug has proven itself to be excellent, having a detrimental effect on bark beetles, shawls and other insect pests. The antiseptic Wood Healer DL-2 has a similar effect.
General Tips
Beams are supporting elements for the construction of a floor or ceiling; they must withstand maximum design loads and have a safety margin. Depending on the purpose and operating conditions of the premises, the thickness of the beams and the distance between them are selected. The materials can be used beams with dimensions of 50×50 mm or more or boards with parameters from 50×150 mm. On lumber with smooth surfaces, the subfloor can be attached from the bottom, side or top; on round beams - only from the bottom or top.
Characteristics of wood used for floor joists
Table. What elements does a classic subfloor consist of?
| Item name | Purpose and description |
| Beams or joists | The main load-bearing element absorbs all static and dynamic forces. In each individual case, individual calculations are made based on linear parameters and distance steps. They can rest on columns, foundation strip, floor slab, facade walls or load-bearing interior partitions. |
| Skull bars | Size - approximately 20x30 mm, fixed to the side surfaces of the beams, used for laying subfloor boards. |
| Hydro- or vapor barrier | The waterproofing is laid on the subfloor, which serves as the foundation for the finishing floor. Vapor barrier is used to protect insulation from increased relative humidity; it is used on the first floors or ceilings. |
Depending on the specific placement and purpose of the subfloors, the listed elements may be added or excluded. We'll look at a few of the most commonly used types of subfloors.
Floor beams
Fire retardants – fire protection
Fire-retardant impregnations protect wood from thermal destruction, that is, from ignition under the influence of heat or fire. The chemicals that make up fire retardants create compounds at high temperatures that prevent ignition or flame spread. Naturally, fire retardants are not a complete fire protection guarantee. They allow wooden surfaces to resist thermal aggression, but only for a short time (about 10-15 minutes when heated to 700˚C).
Fire retardants are recommended to be used to protect wooden floors in rooms where there is a source of ignition - a stove, fireplace, etc.
Based on their mode of action, fire-prevention impregnations are divided into 2 groups. The first includes fire retardants that prevent combustion. The second - blocking the spread of fire.
Fire retardants, which prevent combustion, begin to release non-flammable gases when the temperature rises. They push air away from the surface of the wood and thereby make combustion impossible.
Blocking flame retardants form a special film on the surface of the wood. When exposed to fire, this film swells and blocks the access of oxygen (necessary for combustion) to the protected surface.
Paints, primers, varnishes, plasters, etc. can be applied over fire retardants. Fire-fighting impregnations are often used in tandem with antiseptics. For best results, it is recommended to first apply a layer of antiseptic to the surface, then a fire retardant. For example, you can use the following scheme: the first 2-3 layers are Neomid 400 antiseptic, the next 2-3 layers are Neomid 530 fire protection.
Why is wood floor treatment required?
The plank floor in an apartment, private house, on a balcony or even in a non-residential premises is treated to protect against:
- Moisture.
- Damage to microscopic organisms.
- Mold.
- Sunlight.
- Impacts of low and high temperature.
Wood is particularly susceptible to deterioration by microscopic organisms and mold under conditions of high humidity levels, so protection against moisture absorption will be extremely important. When the temperature changes, as well as the level of humidity in the room, the wood will begin to absorb and release moisture, and because of this, the material will begin to shrink, deform and swell. Protective impregnation and coating with a varnish composition will to a certain extent reduce the impact of such aggressive factors on the material and help make the product much more stable. Cover the floor surface on an unheated balcony, loggia or even veranda to protect from sunlight and moisture. In addition, any type of coating reduces the level of surface contamination and increases its wear resistance and strength.
Particular attention to the composition!
The quality of impregnation and its functional properties depend significantly on the composition. Protective preparations can be made based on water, oils and organic solvents. What is the difference?
Water-soluble compounds are liquid impregnations that are deeply absorbed into the wood structure. They are easy to apply to the surface with a brush or spray; drying time is 2-3 hours. They have low toxicity, are odorless and are excellent for treating indoor floors. Both antiseptics and fire retardants can be water-soluble.
Important feature: some water-soluble compounds are easily washed out with water. Therefore, in damp rooms it is recommended to apply film-forming varnishes or paints over such compositions. Elements in contact with water are not treated with water-washable impregnations.
Oil impregnations are thick oils that create a dense film on the surface being treated. They are highly flammable, but protect the wood for a long time from insects, rot, and fungi. Some of the oil formulations are toxic and have a strong odor, so they are used only for external treatment. The drying time for an oil-based composition is about 4 hours. Oil impregnations are applied independently, without finishing with varnishes and paints.
There are oil-based, water-soluble compounds on the market. They are low-toxic and are used both outdoors and indoors. Unlike oils, they can be colored with finishing paints and varnishes.
Impregnations based on volatile organic solvents are another group of compounds that have water-repellent properties and protect wooden surfaces from house fungus, mold, and insects. Such compositions are easy to apply, but take a long time to dry - about 12-24 hours. With their help, wood can be given a very deep, rich shade.
How to choose
It is preliminarily determined where it is planned to apply the impregnation - inside or outside the building. Facade products may contain ingredients that are harmful to health, but are indispensable for more reliable protection of wood from the influence of climatic conditions. For products used outside the building, frost resistance and ultraviolet filters will also be required.
Pay attention to whether the shade has a protective coating. If they then want to cover the wood with transparent products - for example, varnish, oil, wax, then the final shade will be completely different from what was intended in the project.
They analyze what additional properties are still needed - protection from pests, fire, surface texture, etc.
Environmental friendliness and harmlessness to health are also important, especially when it comes to the treatment of walls or decoration in a children's room, bedroom, or kitchen. It should also be taken into account that not all water repellents for walls and ceilings can be used on the floor.
Often buyers choose products based on price, but do not pay attention to consumption. Thus, cheap compounds are sometimes recommended to be applied in 3–4 layers. When using products of a higher price segment, you can often get by with double processing.
Decorative properties of impregnations
Impregnations are produced transparent or tinted (in accordance with the manufacturer's range of tones). Only antiseptics have a decorative effect. Completely transparent (colorless) antiseptics perform an exclusively protective function without changing the natural color of the wood. The maximum they can do in decorative terms is to emphasize the structure of the wooden covering. A similar composition is Tikkurila Pinja W-Oil antiseptic. It is absolutely colorless, but can be easily tinted in any of the tones from the Tikkurila line.
Tinted antiseptics are originally colored. They are either produced in a specific color range, or are tinted upon sale, according to the color chart offered by the manufacturer. Such impregnations simultaneously play both a protective and decorative role. That is, they can replace other coloring materials: primers, stains, paints, varnishes. A well-known similar antiseptic is Pinotex Classic, its color card includes 10 main tones and 20 additional ones. In addition, the Pinotex Classic composition allows you to obtain many other tones by mixing existing shades in different proportions.
What about fire retardants? Most of them are colorless and once dry are not noticeable. Others are painted pink or red, which plays a controlling rather than a decorative role. By applying colored impregnation to a wooden surface, it is easier to monitor the quality of the coloring and the absence of gaps.
In addition to everything indicated, when choosing impregnation, pay attention to:
- Safety. Read the ingredients on the product label. Make sure that no highly toxic compounds are used in the manufacture of the antiseptic (fire retardant): arsenic, pentachlorophenol, fluorine compounds, heavy metal salts.
- Duration of fire and bioprotection. Fire retardants act on the treated surface for up to 7-15 years, antiseptics – for up to 10-20 years.
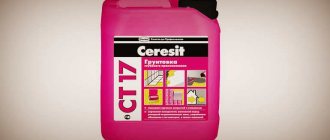
- Manufacturer. Well-known impregnating compositions that have a quality certificate and are appreciated by consumers are produced under the following brands: Pinotex (Finland), Tikkurila (Finland), Neomid (Russia), Senezh (Russia), Belinka (Slovenia).
Making your own product
This ancient recipe has been used for centuries. You can cook it yourself from available products. The impregnation is environmentally friendly, emphasizes the wood texture well, and protects against moisture due to the content of vegetable fats and wax.
What water-repellent impregnation would you use?
PurchasedHomemade
To prepare the product you will need the following ingredients:
- linseed oil - 0.5 l;
- beeswax - 50 g;
- a slice of pine rosin the size of a quail egg.
Step-by-step instructions for preparing the impregnation:
- Oil is poured into a pan that is no longer used for cooking.
- Grind the wax using a grater or a knife.
- Place the pan on the stove, add wax, and add rosin.
- Turn on minimal heat.
- Boil the oil solution, stirring constantly until the wax is almost completely dissolved.
- Turn off the fire.
Homemade water repellent is ready.
As a rule, home remedies are less effective than factory-made drugs. And the final cost of the “grandfather’s funds” may turn out to be higher. It’s a personal matter for everyone which option of water repellent to choose. But even the simplest impregnation will in any case extend the life of a wooden house and finishing made from this material.
Rules for applying protective compounds
Even the best antiseptic or fire retardant applied carelessly will not produce the desired effect. In order for the protective properties guaranteed on the label by the manufacturer to be fully manifested, you must adhere to the rules for applying impregnations. Follow the diagram:
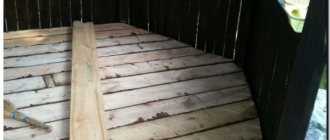
Stage #1 - drying the wood
The best protection effect is achieved when applying impregnation to wood whose humidity does not exceed 20%. The drier the wood, the more protective agent it can absorb. And, conversely, wet wood will not allow impregnation into its pores, and the protective layer will be of poor quality. A similar effect will be especially noticeable when using impregnations based on organic solvents and oils.
To achieve the required humidity, the wood is dried in a shady, dry place. Best of all - under a canopy in the yard.
Stage #2 - surface cleaning
The wooden surface ready for impregnation must be clean, uniform, without traces of early staining. Contaminated areas lead to a deterioration in the absorbency of the protective composition and to an uneven, spotty color (if there is a color scheme).
If the surface has already been painted, remove the paint or varnish using a hair dryer. The remaining coating is removed with a scraper and a stiff brush. All oil and grease stains are washed off with white spirit.
Go over the cleaned wood with sandpaper or a sander, and blow off the dust with a vacuum cleaner.
How to use
The wood is first cleaned and the resinous areas are scraped off. Remove mold using a scraper or wire brush. Then impregnation is applied - at least 2 layers.
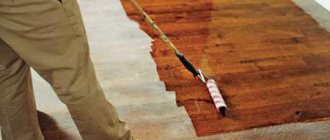
Impregnations are applied in several ways:
- immerse the wood in the solution;
- use a brush or roller;
- applied with a spray.
The use of a sprayer increases the consumption of the product. Organic-based water repellents are not recommended to be applied by spray due to their toxicity.
What should you consider?
Any problem is solved taking into account the type of board, its coating and the type of contamination.
The parquet floor should not be wetted with water, otherwise it will quickly become unusable.
Excessive moisture is unacceptable , even if the boards are varnished, since the parquet floor is laid from equally small boards. They are tightly fitted one to another. This cladding on a concrete or wood base has many joints that trap water and eventually destroy the wood.
The “For Parquet” product will provide high-quality cleaning and will not damage the expensive wooden flooring.
The products are also selected specifically for parquet. They form a shiny protective film, polish the boards and close cracks.
Varnished plank floors also require a special approach to cleaning.
And the boardwalk is made from large boards. Their sizes are different. And in order to clean the plank floor, its own nuances are taken into account. Namely, whether it is painted or not. Therefore, caring for wood flooring also depends on its treatment:
All joints can be cleaned with a regular vacuum cleaner with a floor attachment.
- First you need to vacuum the floor , that is, use dry washing. This applies to all wood flooring. After all, it is very difficult to wash out dust in cracks and joints, even using the most effective cleaning agent;
- Then wet cleaning of the wood floor begins.
Preparatory work
To get a beautiful and even coating, you need to go through all the necessary steps and strictly adhere to the application technology. Oil impregnation is absorbed very well into wood, so all the imperfections and defects of the floor will immediately appear under the oil. The surface that is supposed to be impregnated with oil requires more thorough preparation than when varnishing.
Preparing the old floor
Preparation is necessary for both new and old floors, but in the latter case the preparatory work is complicated by the fact that the previous paint coating must be completely removed. This is usually done using a sanding machine, but if you don’t have a sanding machine, you can use improvised means.
- You can use this method: put a sheet of paper on the floor and place a hot iron on it. When exposed to high temperatures, the paint will come off the surface and stick to the paper. The remaining coating is removed with a spatula. You can use special washes, which are available in a wide variety in stores.
- After removing the paint, you need to remove the top layer from the boards using a plane.
- Next, sanding is done with fine-grit sandpaper (150-180).
- All cracks and other defects must be repaired with putty to match the color of the wood.
Preparing the new floor
- Preparatory work for a new floor consists of sanding the surface. This work must be done very carefully, since any defects in the flooring will be visible under the oil.
- Three types of sanding attachments are used for sanding. First, the work is carried out using circles with coarse grain (20), then the base is leveled with a medium-grain nozzle (40). At this stage, you need to putty all the defects, and then perform final polishing with the finest abrasive (150).
- After sanding, the entire floor surface must be thoroughly cleaned of dust using a construction vacuum cleaner. Poor cleaning can also negatively affect the quality of the coating.
All work must be done not manually, but with the help of sanders, and for processing use special pads made of microfiber and felt. The quality of hand grinding is much lower than machine grinding; it is impossible to bring the surface to an ideal state by hand.