Putties have been known to mankind for many thousands of years. These compounds are used mainly for finishing leveling of various surfaces and sealing visible defects. Such solutions are used not only in dry rooms, but also for outdoor work, as well as for wet rooms, where special moisture-resistant mixtures that can withstand such conditions are especially needed.
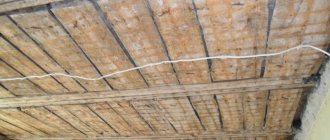
Sanding putty for exterior use
What mixtures are there?
The small dimensions of rooms with high humidity mean savings on repairs due to the small consumption of plaster, paint or tiles. It is wrong to reduce the budget for finishing at the expense of the quality of building materials. Especially when it comes to putty for wet rooms.
At the stage of preparing the surface of the floor, walls and ceiling, knowledgeable craftsmen make larger investments than in the final finishing. Finishing putty for wet rooms is also used as decorative plaster, applied to the primer with textured strokes.
Bathroom putty is used to level different surfaces and eliminate defects:
- Cracks;
- Clearance between the bathtub and the wall;
- Difference in level (hillocks are cut off, holes are filled);
- Gaps between walls and communications.
It is important to carefully study the material properties indicated in the instructions on the packaging to ensure the quality, aesthetics and durability of the coating. You cannot use the base for putty as you please; each release form has its own specifics.
Finishing putty for wet rooms is also used as decorative plaster, applied to the primer with textured strokes.
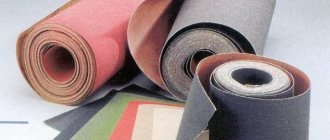
According to the method of release they are distinguished:
- Dry mixtures (packaged in small bags), the powder is diluted with water before use;
- Paste-like polymer waterproof putties (produced in plastic boxes), ready for use.
In the hot season, polymerization occurs faster. The finished concentrate can be diluted a little with water if it becomes more difficult to work.
Dry moisture-resistant bath putty should not be mixed completely. It is better to dilute part of the powder - in a volume that will not harden in a small area.
Ready-made paste is more expensive, takes longer to dry, but does not lose its properties until the process is completed. The ideal consistency saves time on preparing the composition, although it costs a little more than dry putties.
It is not recommended to leave the packaging open. It is better to put part of the mass into a ditch for collection with a spatula, the rest should be stored closed.
Ready-made paste is more expensive, takes longer to dry, but does not lose its properties until the process is completed.
The compositions are classified according to their scope of application:
- Starting putty for wet rooms (for leveling the surface and eliminating defects);
- Universal (used at any stage of repair as needed);
- Moisture-resistant finishing putty (for finishing).
The packaging should also indicate “moisture-resistant putty for bathrooms only” or universal - for use in an outdoor pool or an unheated room. The composition is applied without haste, since there is enough time for the mass to harden.
When preparing the solution, use a respirator and goggles. They will also be needed during the sanding process - after polymerization of the bath putty, when leveling the coating.
For the first 24 hours after working with any type of finishing moisture-resistant putty, you should not use running water or heating appliances. This may negatively affect the polymerization of the applied mass.
The composition is applied without haste, since there is enough time for the mass to harden.
Types of polymer compositions
Inexperienced craftsmen often refuse moisture-resistant coatings, but this “saving” results in repeated repairs. This occurs due to deformation of the decorative coating, peeling of the tiles or lack of airtightness of the room.
Questions often arise: why is moisture-resistant putty better than other types? What composition is ideal for brick, concrete or wood? When purchasing a mixture, it is important to look at the description, where the base is indicated:
- White plaster;
- Cement;
- Slaked lime;
- Polymer additives;
- Fine river sand.
In addition to the traditional composition of waterproof putty, specialized mixtures contain latex polymers and acrylates. The base is Portland cement and gypsum. However, their percentage differs in different compositions. The specific use of putties depends on this.
The polymer mixture contains raw materials that undergo a polymerization process upon contact with water and air. Any finishing decor fits well on an even hardened layer.
Among the most popular compositions are acrylic and gypsum moisture-resistant putty for interior spaces. They are produced on the basis of environmentally friendly raw materials and are easy to use. These compositions provide a durable base for any decorative coating:
- In bathroom;
- In the shower and toilet;
- In a kitchen with a lot of fumes;
- In the hallway facing the street.
Acrylic and gypsum moisture-resistant putty are produced on the basis of environmentally friendly raw materials and are easy to use.
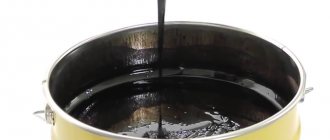
Budget-friendly oil-adhesive paste is a good option for utility rooms and basements. Some semblance of this composition is prepared with your own hands by mixing acrylic varnish and or PVA glue with filler (gypsum, chalk, lime).
Budget-friendly oil-adhesive paste is a good option for utility rooms and basements.
Universal pastes should fit well on any surface. They contain a large amount of plasticizers or latex additives, anti-corrosion components (to protect metal), fumigators (from fungus and mold).
Universal pastes should fit well on any surface.
Latex putties are used for modern finishing. The only drawback of bathroom putty with latex inclusions is that it is not intended for places with temperature changes and direct exposure to UV rays.
Latex putty is not intended for places with temperature changes and direct exposure to UV rays.
How to plaster the pool, walls and floor of the bowl using technology
When applying plaster, it is important to create a reliable connection between the concrete base and the waterproof layer.
Before plastering the surfaces of the pool and the walls of the room, the finishing technology is selected:
- manual application of plaster with preliminary reinforcement;
- plastering using shotcrete method.
Manual application with reinforcement
The technology provides for preliminary fixation of the reinforcing mesh to enhance adhesion characteristics. The advantage of this method is the simple technology of finishing work and applying plaster. However, the need for special treatment of the pool base is taken into account to prevent rust from appearing on the reinforcing mesh.
With prolonged use, the plaster layer may peel off and water may enter the fittings, resulting in the need to repair the pool base.
Step-by-step execution of plastering work:
- Preparing the walls and bottom of the pool bowl, cleaning from dust and greasy contaminants.
- If necessary, old decorative trim, paint, mold, etc. are removed.
- In brick foundations, the seams are deepened by 1 cm.
- Concrete pool bowls are covered with notches to increase adhesion. Cracks are corrected with putty, protrusions are cleaned off
- After washing and drying the pool bowl, a primer coat is applied.
- After the soil has dried, a reinforcing mesh is attached to the walls of the pool and the bottom using dowels or other fasteners. The fastenings are placed along the perimeter of the mesh with an interval of up to 50 cm.
- Beacons are being installed.
- The plaster solution is mixed.
- The plaster mixture is applied by spraying and single-layer coating methods.
- The layer of plaster is leveled along the beacons using a rule.
- After the mixture has dried, the beacons are removed and the openings are closed with a solution.
- The surfaces are leveled with a spatula.
- The plaster coating dries within 24 hours. After this, the surface is primed, dried, and rubbed.
- The plaster coating dries within 1-2 days.
Plastering a pool bowl with a solution using gunite method
When using shotcrete technology, an adhesive plaster coating with enhanced adhesion is applied to the surface of the pool bowl. The solution is supplied mechanically - from a cement gun under pressure. The coating gains increased strength. The advantage of the technology is the absence of metal elements on which corrosion may occur. This pool cover is more reliable and durable. The disadvantage is the complex execution technology. First the walls are plastered, then the bottom of the pool.
Mixing of the solution components is carried out in a special equipment container. You can increase the water resistance of the plaster mortar using mineral components (ceresite, etc.).
Before applying the plaster layer, the surfaces of the pool are wetted. Spraying is carried out from a distance of about 70-90 cm. The first layer should be 15 mm thick, subsequent ones - from 8 to 10 mm. The first coating is left for a day, then wetted, and the next one is applied on top. To prevent the appearance of shrinkage cracks, the plaster coating is regularly wetted for 10 days. The moistened layer is covered with film or tarpaulin.
Subtleties of choice
High-quality waterproof putty for the bathroom is a guarantee of a durable base. Without them, dampness quickly develops in rooms with high humidity, tiles peel off, and paint peels off. Expensive repairs will have to be redone.
A leveling compound in the form of putty for a swimming pool or bathroom must have the necessary properties:
- Resistance to negative factors, mechanical stress, temperature and humidity changes. Plasticizer additives protect walls from deformation due to expansion and contraction of the cladding;
- The moisture resistance of bathroom putty for painting or tiling should be without any complaints. Before the next renovation, in order to modernize the premises or improve the design, the starting base must perfectly perform its protective function;
- The service life or durability of the finished finish must be confirmed - 12-20 years without loss of quality.
When purchasing, it is important to carefully study the description of characteristics and recommendations for use. “Hydrophobic” compounds are applied in two layers. High-quality putty for wet rooms “Knauf” meets the stated characteristics, but is characterized by a high cost.
Waterproof putty for the bathroom with coarse river sand - only a starting layer on brickwork or concrete floors. For smooth bases - fine-grained sand, compositions with high-quality Portland cement or gypsum.
High-quality waterproof putty for the bathroom is a guarantee of a durable base.
Gypsum putty is suitable for finishing and for painting. The polymerization process must take place without high humidity. When puttying, be sure to drain the water from the pool and shut off its supply to the plumbing.
Ambient humidity does not affect the “setting” of cement-based waterproof putty for wet rooms. The strength of the cement layer becomes higher if hardening lasts longer.
Gypsum putty is suitable for finishing and for painting.
Types of materials for finishing.
Materials for lining pools can be very diverse. Each coating has its pros and cons:
- Pool plaster consists of a special waterproofing composition that is capable of preventing water from passing through. This is an inexpensive way to finish a pool. But the downside is its fragility. Sooner or later, water seeps under the plaster layer and leads to the destruction of the concrete screed.
- Tiles are the most reliable, beautiful and durable way to decorate a bowl. The disadvantage is the high price of consumables. Poor quality tiles can crack in the cold.
- Polyvinyl chloride coating is a quick and inexpensive method of waterproofing. After wintering the pool in an open space, restoration of the material is possible. But this can be easily fixed.
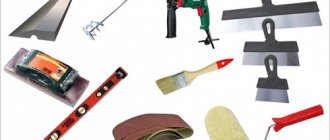
What tools are needed?
The set of devices for waterproof putty does not differ from the standard of a master finisher:
- Container for preparing the mixture;
- Ditch for putting the finished mass onto a trowel;
- Construction mixer or drill with an attachment, if it is a dry composition;
- Rule and set of spatulas;
- Sandpaper of different grain sizes or a sander (for a large area);
- Roller and brushes for priming;
- Wire brush (for cleaning the surface);
- Masking tape (cover adjacent surfaces, plumbing fixtures, glass, mirrors);
- Marking tool (plumb line, building level, tape measure).
This list may differ when working with starting and finishing moisture-resistant putty for the bathroom. Sand with fine-grained sandpaper at the final stage.
The set of devices for waterproof putty does not differ from the standard of a master finisher.
Putty the stove or leave it as is
Puttying the formed furnace is necessary to solve the following problems:
- Giving surfaces aesthetics. The leveled stove can be coated with heat-resistant dyes or whitewashed or lined with ceramic tiles.
- Maintaining safe operation of the structure. Due to heating, cracks may form on the bricks, through which hot steam and smoke will escape.
- Saving money. Fireproof putty is a more budget-friendly finishing material than facing tiles or decorative bricks.
- Preventing structural cracking. A layer of putty helps protect the home from carbon monoxide, which can penetrate through cracks in the brickwork. The mortar used when laying bricks or stone blocks loses its strength during operation, and cracks appear between the bricks.
- Maintaining the integrity of structures, reducing the number of necessary repairs.
- Easy cleaning. Surfaces treated with putty accumulate less dust and are easy to clean with a dry cloth or sponge.
- Applying decor. On top of the heat-resistant putty mixture it is possible to paint or paint with heat-resistant compounds.
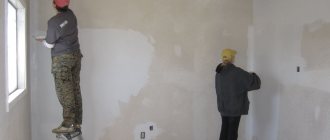
Surface preparation
A specialized putty is applied to the prepared surface. Fundamentally, the work algorithm is no different from cleaning walls in a bathroom or kitchen during a routine renovation:
- Remove all old crumbling and peeling coatings from the wall using a narrow spatula and a wire brush.
- Grind off bulges and repair rough defects.
- Wash the walls and completely remove any dirt, neutralize or degrease stains.
- Wait until completely dry and prime.
In an outdoor pool, finishing with a waterproof gypsum-based finishing putty should be carried out in dry, cloudy weather. Preparation can be done at a convenient time.
A specialized putty is applied to the prepared surface.
Importance of application
In the bathroom, kitchen or outdoors, if you use conventional putty compounds, the following will soon happen:
- The putty will absorb moisture in the air and swell.
- The adhesion of the putty mixture to the base will become weak.
- A weak connection to the base will cause the decorative finish to begin to crack or peel.
The recently completed renovation will no longer look perfect and will have to be redone. And these are additional financial expenses.
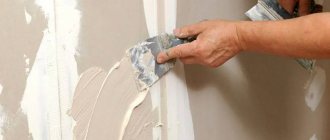
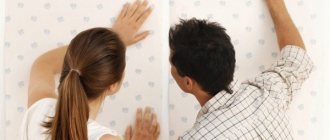
Carrying out puttying
The powder is diluted in the proportion indicated on the package. It is better not to take a lot of powder for one batch, so that you have time to apply the paste to the wall before it hardens. It is important to learn how to evenly distribute the putty in a thin layer using a rubber or metal spatula.
In old buildings with partial shrinkage, the walls are uneven, dents, cracks and bulges are noticeable. It will not be possible to level it carefully by stretching the putty. It is recommended to work out all defects in advance or align them with beacons until the wall becomes strictly vertical.
Usually they putty in 2 layers, but sometimes one application is enough if you have experience. It is important to apply each stage after the preliminary layer has dried.
It is recommended to work out all defects in advance or align them with beacons until the wall becomes strictly vertical.
Putty for painting
When the primer is completely dry, proceed directly to applying moisture-resistant putty for the bathroom for painting or other type of finishing.
Judging by the reviews of the craftsmen, for these purposes it is best to use a gypsum-cement base; any type of paint can be placed on it. It is more suitable for outdoor use. Acrylic and plaster - only for interior decoration. Gypsum-acrylic mixture is an excellent substrate for interior painting.
Consider the compatibility of the bases; for example, acrylic impregnation, putty and paint give excellent results. However, latex paints adhere better to concrete.
Gypsum-acrylic mixture is an excellent substrate for interior painting.
Puttying wooden surfaces
Compatibility is very important when processing adjacent surfaces made of different materials. Universal putty for the bathroom based on acrylates is well absorbed into the texture of wood.
It is permissible to use different compositions:
- Oil-adhesive mixture;
- Latex;
- Nitro putty for external walls;
- Specialized hydrophobic mixture for wood (water-repellent).
The process is simple - cleaning, priming and puttying with a suitable composition no thicker than 1.5 - 2 mm. After drying, carefully check for cracks and peeling. The process is completed by thoroughly sanding the surface.
Universal putty for the bathroom based on acrylates is well absorbed into the texture of wood.
Composition of polymer putty
The main components of this building material are plasticizers and film-forming polymers. In addition, the polymer putty contains fillers such as chalk, pigment substances, iborite and various additives of chemical origin.
- The composition of acrylic polymer putty contains as a main substance a component that is a derivative of acrylic acid (acrylic). In turn, latex polymer putties are produced on the basis of synthetic rubber.
- Thanks to its unique composition, this putty is easily applied to any surface. For example, it can be used to level concrete, plaster, wooden surfaces, as well as difficult-to-process surfaces made of polyurethane material.
Tips for saving mixture
High-quality Knauf-type mixtures cannot be cheap. You can only save on the amount of dry concentrate. If you calculate the consumption per 1 square meter before purchasing, it will be easier to determine how many kg of mixture is needed for one room.
Covering the walls with a thick layer of moisture-resistant putty will double the consumption. However, it is better to take a little extra (about 10%) so that you don’t have to buy an additional bag or box.
Knowing the total area (multiply the width of the wall by the height), you can calculate the consumption, working according to the standard. The packaging usually indicates the application rate of 1.5 - 2 mm. It is advisable to take starting mixtures for the first layer - they are a little cheaper.
It is advisable to take starting mixtures for the first layer - they are a little cheaper.
High-quality repairs of rooms with high humidity will only provide a coating of 2 layers. It is better not to skimp on the finishing coat, but slowly apply it in a thin layer. The use of moisture-resistant putties for the bath, kitchen and bathroom is a guarantee of protection from dampness and deformation of the decorative coating.
Basic DIY pool finishing work
After installing the pool bowl, it is necessary to level the walls and bottom, which gives the base waterproof characteristics, and perform decorative finishing.
It is necessary to carry out step-by-step work:
- cleaning the base from dust and grease stains;
- sealing cracks, tile joints;
- priming of surfaces;
- plastering;
- creating an additional waterproofing layer in the bowl;
- decorative finishing of the container (polyvinyl chloride tint film, ceramics, etc.);
- installation of special equipment.
conclusions
In conclusion, we can conclude that the putty mixture for concrete is the most versatile material, thanks to which, without much effort, you can quickly eliminate any defects that appear in the form of cracks, irregularities, and bumps.
But it is necessary to choose the right putty, based on the characteristics of the surface being treated. In Sevastopol, you can find the necessary type of putty in any department of stores intended for construction work. We also recommend that you read the article about tile adhesive Ceresit cm 11.