At cost, a slate fence is one of the most profitable designs, but even less money will be spent if site owners know how to make a slate fence with their own hands and how to properly paint a slate fence. The fence will have a very presentable appearance and a long service life when using material that has not been used, that is, new asbestos-cement sheets of corrugated or flat slate. Otherwise, used sheets with holes from nails, overgrown with moss and chipped in various places will scare away not only neighbors, but also animals and birds.
Materials
Materials for arranging a slate fence can always be selected from the remains of the construction of a house or other object on private territory. Surely there are pipes, sheets of corrugated or flat slate, wooden logs (beams), broken bricks and cement remains. If you decide to purchase all materials from scratch, you will need:
- Eight-wave slate measuring 1750 x 1130 x 5.8 mm.
- Metal pipes 2″ in diameter (67.0 mm outer diameter).
- Wooden beams at least four meters long.
- Bolts complete with nuts and washers M 10 – M12. Slate nails.
- Cement, sand, crushed stone.
- Slate paint.
The size of the slate sheet is given taking into account its greatest popularity. You can, of course, use a material of a different size, but then all other fence elements (pipes, joists) will need to be recalculated to fit this size.
The option of using flat slate cannot be ruled out, however, given the same dimensions relative to the wave slate, it has more weight, and therefore more attention needs to be paid to attaching it to the racks, and the racks themselves will need to be more durable.
Metal pipes must be strong enough to hold the slate sheets. After all, we must not forget that the load on the pipes will be not only the weight of the sheets, but also their windage. Diameter 2″ in this case is an ideal option, proven in practice.
It would be nice to have galvanized pipes, which do not corrode, but they are expensive, so metal pipes will need to be painted before installation.
Wooden beams must be selected of such length that two sheets of slate can be attached to them. Two and a half meters is just enough to save on pipes and provide sufficient strength.
You can take logs of shorter length, but then the number of pipes, fasteners, sand, cement and crushed stone will increase, and this is extra money.
Fastening elements must be selected of such length that it is enough to attach the logs to the pipes. It is impossible to say exactly what this length will be, since the thickness of the wooden beams is individual in each case.
It is better to paint a slate fence. How to make a fence from logs? This will make it more beautiful and prevent moss from forming on the surface.
Slate fence. There are more advantages than disadvantages
So, what is good about a fence built from flat or wavy slate?
- Firstly, such a fence is durable and easy to maintain. The service life of high-quality slate is measured in decades. At the same time, it does not rot, does not rust, and is not destroyed by frost and heat.
- Secondly, the price of a slate fence is low.
- Thirdly, the installation of this material is quite simple and does not take much time.
- Fourthly, with a creative approach, the appearance of slate fencing is not inferior to more expensive materials (stone, wood, polycarbonate, metal).
The only serious drawback of asbestos-cement slate is its relative fragility. It bursts from a strong point blow. The damaged sheet can be restored either by using steel plates (flat slate) or by replacement (wavy).
The choice of asbestos-cement slate options for the fence is not too wide. Anyone who wants to save money buys standard material with a sheet size of 1.75x1.125 m (8 waves) or 1.75x0.98 (7 waves).
In the range of flat slate used for fencing, sheets measuring 1.0 x 1.5 m are in greatest demand; 2.0x1.5 m; and 3.0x1.5 m.
Installation
The installation of a slate fence must begin with markings and determining the total length of the fence. Based on this, the number of pipes (racks) is determined, which require special attention, since they are the basis of the fence and the key to its strength. Therefore, the racks must be well concreted. To do this, dig holes at least one meter deep, prepare cement mortar (concrete) and fill these holes along with the pipes.
Do not forget to check the verticality of the racks using plumb lines.
Which is better: heated floors or radiators?
Warm floorBatteries
The length of the pipe should be: 1750 + 1000 = 2750 mm. If possible, weld metal plates 150 x 150 x 10 mm, the so-called “nickels”, at the bottom of the pipe. Why is it necessary to concrete the tubes and not just drive them into the ground? The second option is sometimes used, but it ended with the fence falling in the spring, or at best tilting.
The fact is that in summer or even autumn the soil is more dense, but after the snow melts, due to the presence of excess moisture, it (the soil) loses this density.
It should be noted that the correct installation of slate fence posts is a successful guarantee for further work. Next comes the assembly of the entire fence, although physically difficult, but still simple. Namely:
- Holes are drilled in the pipes for bolts and nuts. It would be more rational to do this in advance so as not to drag the cable for the electric drill along with you, but then it will be difficult to align all the holes in one line. So it will practically be correct to drill holes on the already installed posts along with the wooden beams.
- Then the logs are screwed to the racks.
- Slate sheets are nailed to the joists using slate nails. Here it should be noted that the nails are driven into the convex wave of the material, but not into the cavity.
Otherwise the sheet will split. The nails on the other side cannot be bent; they must be cut off with a hacksaw.
- It is best to do all work on installing a slate fence with an assistant.
- To prevent precipitation in the form of snow or rain from getting into the upper part of the pipe, put on caps cut from plastic bottles.
Where is it appropriate to install such a fence?
Slate itself is not a very durable material; its direct purpose is to install it on a roof. But its asbestos-cement composition from which it is made makes it practically durable.
Taking into account these characteristics, we can conclude that it is advisable to install slate fences:
- In places that do not require protection from unauthorized persons.
- Temporary fencing of something - a site, a site.
- Use for fencing enclosures for pets.
- Fence the land between neighbors.
As you can see, due to the fact that this material is not very durable, a permanent fence made of slate is not worth making.
Preparation for installation of the fence
When starting any important task, in our case it is installing the cheapest fence, we always need clear instructions for action. It is she who determines where to start and in what sequence.
Photo of fencing made of flat slate sheets
Let's start, of course, with preparing materials for our temporary, and maybe permanent fence. Here is the necessary material that we need to build a fence:
- The slate itself, you can use wave slate, or you can use flat slate. There is no particular difference here; the strength of these two types is almost the same. Only flat is a little easier to attach to the frame, unlike slate with waves.
- Steel pipe with a diameter of up to one hundred millimeters. A larger diameter should not be used, a smaller one can be used. The racks will be made from the pipe, so keep in mind that the smaller the diameter of the rack, the less durable the structure itself can be. Accordingly, the price of a larger pipe diameter will be higher.
- Wooden beam, size one hundred by fifty millimeters. It is to this beam that the slate sheets will be attached.
- A metal corner, size 85 × 50 millimeters, will serve as a frame for attaching a wooden beam.
- Fastening elements - this includes studs with a diameter of 10-12 m, self-tapping screws are best used for metal tiles, they have a wide head with a hexagonal head with a wrench.
- Cement, sand, crushed stone - for preparing concrete mortar and installing columns.
Theoretically, this is all the necessary material, with which you can safely begin installing a flat slate fence with your own hands.
Minuses
The only drawback, perhaps, is the fragility of the slate sheets, which require caution both during transportation and during installation of the fence and its operation.
Painting slate: preparing and priming the surface, choosing a coloring agent, painting directly
Slate is a visually unattractive building material, moreover, it is quite hydrophobic. However, this drawback can be easily corrected by painting; the only thing is that in order not to waste effort and money in vain, this procedure must be performed using a certain technology. Therefore, next we will look at how to properly paint slate with your own hands.
Slate roof painting
Tools
For construction you will need the following tools:
- drill and (or) shovel;
- “grinder” with cutting wheels for stone and (or) a hand saw;
- electric drill or screwdriver;
- hammer;
- concrete mixer;
- welding inverter;
- personal protective equipment: safety glasses, gloves, respirator or its equivalent;
- nails, screws, electrodes.
Tool
General information
Owners of country houses and country houses are most often interested in how to paint slate on the roof of a house. The fact is that in this way you can not only transform the roof and the entire structure, but also increase the durability of the material. In addition, moss does not grow on a painted roof and less debris accumulates.
This operation may also be required to make a featureless slate fence more attractive. How to weave a fence from branches with your own hands? Flat slate is often used to cover gazebos, shower stalls and other structures. In this case, painting is also relevant.
At first glance, it may seem that the process of painting slate is extremely simple and not worthy of attention. However, if this operation is performed in violation of the technology, the paint may come off, for example, from the roof, along with the first melting snow.
In practice, this happened not only with do-it-yourself slate, but also in production conditions. True, in these cases, the manufacturer repainted the roof at his own expense under warranty. If you paint it yourself in violation of the technology, of course, no one will reimburse all the additional costs.
Work order
Frame made of T-shaped profile or angle
A beautiful slate fence is made using a T-shaped profile. This material combines two types of rolled pipes of different diameters.
T-shaped profile for making a frameSource vorotnet.ru
The profile is cut into sections corresponding to the width and height of the sheet. Supports with ears are also made from it.
Frames for slate sheets are welded from individual sections. The master who uses this building material does not have a question about how to fix the slate to the fence.
The sheets are screwed to the base with self-tapping screws. Each segment is manufactured separately, then the frames are bolted to supports installed on a concrete foundation.
This design has significant weight. It requires a high-quality strip foundation.
Painting technology
The slate painting process consists of several main stages:
- slate preparation;
- surface priming;
- selection and preparation of paint;
- directly painting.
Below we will familiarize ourselves with the nuances of each of these stages.
In the photo - cleaning slate with a wire brush
Slate preparation
The process of preparing slate involves cleaning it of any debris. It should be noted that even new material often needs this procedure, since it may contain adhered particles of asbestos cement, which are invisible at first glance. To remove them, you can use a regular small spatula.
Advice! Before painting a slate fence, you should break through the grass that usually grows along it and interferes with painting.
If the slate has already been used, then it needs to be cleaned more thoroughly. To do this, you need to use a stiff metal brush, treating every centimeter of the surface.
When cleaning slate, it should be wiped with a damp cloth to remove dust and small debris.
Spray application of primer
Padding
The next step is priming. For these purposes, it is best to use an acrylic universal primer. Instructions for applying it look like this:
- first of all, the canister with soil must be thoroughly shaken;
- then the liquid must be poured into a container into which it will be convenient to dip the brush;
- Next, you need to moisten the paint brush in the soil , lightly squeeze it against the walls of the container and then apply the liquid to the surface of the slate. The soil should be laid down in a uniform thin layer, so it is necessary to avoid drips and large accumulations of liquid in certain areas.
If you plan to paint flat slate, you can use a paint roller to apply the primer;
- After the surface has dried, the procedure must be repeated again.
Advice! If you need to cover a large area with soil, you can use a spray bottle or sprayer.
This completes the priming process.
Roofing paint Tikkurila
How to decorate a slate fence - step by step diagram
Step 1: Cleaning
If the slate is old, it needs to be cleaned with a metal brush to remove the layer that has already been damaged by time and is characterized by a dark color.
Step 2: Primer
New slate can be immediately primed with a regular primer, which increases the adhesion of the concrete surface to paint and varnish compositions. For greater reliability, you need to prime the slate twice. After allowing the final coat of primer to dry, begin applying the base coat of paint.
Step 3: Painting
If the paint is too thick, it will slow down the work and require more effort, so if necessary, you need to thin the paint. It is better to find out what type of solvent is suitable for a particular composition when purchasing the paint itself, but if you missed this point, carefully read the instructions on the package. In any case, do not experiment; modern paint compositions have quite complex formulas that should not be violated.
To work, you need a regular brush of a width that is convenient for you. In this case, applying paint with a brush is technologically more justified than other painting methods - the composition is better absorbed and adheres to the slate. Three coats of paint should be applied to the slate, allowing each layer to dry thoroughly before applying the next one. Nothing prevents us from combining several different colors on one canvas or placing bright spots of a different color on a single-color surface.
Selection and preparation of paint
Before you paint flat slate or corrugated material, you need to decide on the paint. The best choice in this case is polymer water-dispersion compositions. Moreover, it is necessary to use paints that are intended for covering the roof or facade.
It should be noted that polymer compositions come in three types:
- acrylic;
- silicone;
- latex.
Silicone facade paint The most durable are silicone and latex paints, however, their price is very high -
4000-5000 for a 10 liter bucket. Therefore, you can use acrylic paint, which is much cheaper, but is also quite durable.
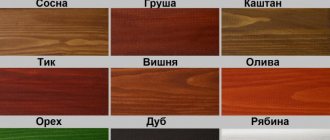
As a rule, water-based paints are sold white and require tinting. This process consists of adding the required amount of tint of the desired color, which allows you to achieve any shade.
As a rule, stores that sell paint and varnish coatings have special tinting machines. They allow you to paint the entire batch of purchased paint in the same color of your choice.
Note! When painting a roof, you should purchase paint coatings not only for slate, but also for other surfaces. For example, anti-corrosion conductive paint Zinga is suitable for fencing and flashings. To paint chimneys, it is better to use fire-retardant metal paints Polistil.
If it is not possible to perform tinting when purchasing paint, you need to independently decide on the proportions of the color, first painting a small amount of the composition. After this, the same amount of color must be added to all containers with paint and mixed thoroughly.
Spray painting the roof
Painting
The final stage is painting, which is performed in the following sequence:
- The paint must be mixed before use;
- then it should be poured into a container into which it will be convenient to dip a paint brush or roller (if painting flat slate);
- After this, the painting tool must be moistened with paint, squeezed lightly and applied to the surface. How to paint a slate fence? This stage is the most critical, since you need to ensure that the coating is applied in an even, thin layer, and there are no unpainted areas left;
- when the paint dries, the procedure must be repeated again.
This completes the slate painting process. It should be noted that this operation can also be performed using a spray bottle.
How to paint a fence
SLATE FENCE
It is still one of the most popular. It is best to update it with acrylic-based paint. It is very light-resistant, has excellent protective characteristics, uniform coverage, does not appear on it with lichen and moss, and dries quickly.
Acrylic paints are imported and domestic. The first ones, of course, are more expensive. So, covering 1 m² will cost about $10. Ours are no worse, but cost several times cheaper. Moreover, slate needs to be painted in two layers, so significant savings are evident.
Conclusion
The process of painting slate is quite simple and quick. However, it must be taken into account that the quality of the work done depends on the preparation of the surface. Therefore, it is necessary to pay special attention to cleaning slate from dirt and priming.
See the video in this article for more information. If after reading the material you have questions, leave them in the comments and we will be happy to answer them.
How to treat the surface → Room decoration → How to choose the right paint → Surface treatment technologies → Leveling and finishing the walls → Selecting and applying a primer → Removal from the surface → Stretch ceilings and technologies → Reviews and testimonials