Is it possible to glue wallpaper on fiberboard? What problems may arise during the sticker process? How to avoid them? In this article we will look at several solutions of varying complexity that will help the reader with repairs.
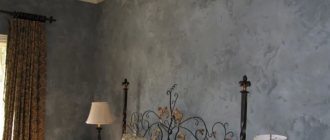
Stacked particle board does not look like a reliable base for wallpaper.
Wallpaper on fiberboard: simple and complex methods of sticking
Is it possible to glue wallpaper on fiberboard? What problems may arise during the sticker process? How to avoid them? In this article we will look at several solutions of varying complexity that will help the reader with repairs.
Stacked particle board does not look like a reliable base for wallpaper.
Is it necessary to prime under wallpaper?
The walls are not perfectly smooth. There will always be roughness and irregularities on them that can spoil the appearance of the finish. Primer comes to the rescue. It not only eliminates external defects, but also improves performance:
- prevents cracking and shedding of the base;
- strengthens porous and loose surfaces;
- increases the adhesion (adhesion) of wallpaper to the surface;
- prevents the appearance of mold and mildew in treated areas;
- reduces glue consumption when gluing wallpaper;
- reduces moisture absorption;
- maintains a favorable microclimate in the room without blocking the pores of the processed material.
- Walls
How to prime walls before puttying: simple instructions and tips on choosing a material
Solutions
So, how to glue wallpaper, taking into account the above?
Painting
The problem of excessive absorption of water from the glue, and at the same time rusting of the fasteners, would be completely solved by a layer of soil separating the wallpaper glue and the base. The “would” particle is not superfluous here: traditional deep penetration primers on hardboard should not be used in such cases.
Remember their composition. Most of the soil volume is the same water, contact with which we try to avoid.
But alkyd primer or paint (for example, inexpensive and accessible PF-115) is quite suitable for our purposes. They will cover the fiberboard and fasteners with a thin and waterproof film; The matte surface of this film, after minor adjustments we made to the adhesive composition, will ensure acceptable adhesion quality to the final coating.
Actually, the instructions consist of only two points:
The only unresolved problem will be the seams, the relief of which will be noticeable through the wallpaper. What to do?
Puttying on the mesh
Plan “B” – puttying the entire hardboard-covered surface. It is clear that there will be no talk about reliable adhesion of inexpensive gypsum putty to the fiberboard surface. Dead end?
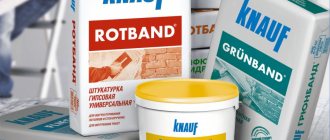
Two materials will help us out:
It is more profitable to buy a large package of glue.
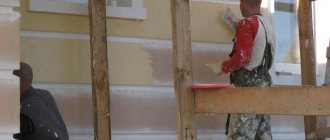
How to prepare the surface for wallpaper with your own hands?
Puttying with gypsum on reinforcing fiberglass mesh.
Please note: as a bonus, we will be able to easily remove the wallpaper during the next renovation. It will be enough just to wet them with water - and entire canvases will separate from the base with minimal effort.
Primer with drying oil
The previous method of surface preparation has one drawback. Hardboard will be protected from moisture only from the front side; high humidity in the room will still lead to its deformation.
A radical solution, which is used even at the stage of wall upholstery for finishing, is hot impregnation of fiberboard with drying oil on both sides.
The work can be done in two ways:
Impregnation with drying oil will turn fiberboard into a moisture-resistant material.
After drying and polymerization of the drying oil, our material will no longer be afraid of either high humidity or direct contact with water. However, a surface treated with drying oil is not the best basis for putties; PVA will also stick to it rather weakly. How to paste wallpaper in this case?
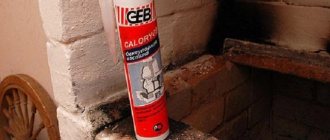
Concrete contact will come to the rescue - an adhesive primer with the addition of quartz sand. The polymer base provides reliable adhesion to the most problematic surfaces; sand will make the base rough enough for any plaster to lay on it.
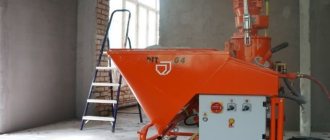
Several types of quartz adhesive primers.
The technology for further finishing differs little from the previous version:
Technology for gluing rolled products
You can wallpaper wood panels only with your own hands. In order for all procedures to be performed correctly, it is necessary to observe accuracy and sequence of actions.
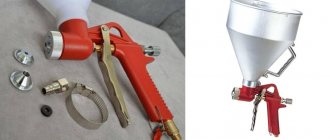
Materials and tools
For pasting work you will need the following materials and equipment:
- Primer. It is necessary to choose a composition with deep penetration. The best option is polymer mixtures. You can also use “concrete contact”.
To treat the base, exceptionally deep penetration soil is used. - Wallpaper. The variety is selected based on the wishes and style of the room. Single-layer paper products should be abandoned.
- Glue. For each type of material there is a special composition.
- Putty. It is recommended to purchase acrylic or oil-based putty for chipboard that is elastic. This is especially true for newly built houses. Ready-made solutions are preferred.
The putty must be intended for wood or wood-based materials - Serpyanka mesh. Required for reinforcing slab joints.
- Brushes and roller. To apply primer and glue, several types and replaceable nozzles should be provided.
- Set of spatulas. You will need a small, medium and wide tool.
- Containers for mixing solutions.
- Devices for smoothing wallpaper.
Minimum set of tools for wall putty
Everything you need is purchased in advance. If used tools are used, they are first cleaned of previous materials.
Surface preparation
The application of roll products to different panels may vary slightly, so it is necessary to proceed from the specific situation. Preliminary work includes a number of procedures, individual for each type:
- Chipboard. This base needs sanding. The fact is that the upper structure is not always uniform, particles can flake off. To prevent them from interfering with work in the future, they are removed with sandpaper.
- Fiberboard. Gluing wallpaper to fibreboards is much more difficult. This is explained by the fact that the front side of the hardboard is impregnated with a paraffin-based composition to increase moisture resistance. When gluing decorative products, this creates difficulties, so the slabs are processed with a grinding machine, evenly removing a very thin layer.
- Chipboard. The laminated coating also makes adhesion difficult, so this surface is carefully sanded - as in the previous version - until a rough base is obtained.
All wood-based materials must be sanded before finishing. - MDF. To hang wallpaper on an MDF panel, you will need to perform similar procedures, but be careful: the surface only needs light sanding.
General preparatory processes after completion of preliminary work:
- Padding. Using a roller, the surface is covered with two layers of the composition, each one is dried.
The primer is applied with a brush or roller - Sealing seams. When working with fiber boards, the edges of adjacent ends are cut at an angle with a construction knife. Chipboard walls are not subject to jointing. Next, the seams are filled and the excess is removed.
The seams and fastening screws are puttied first. - Laying serpyanka. It covers the front and corner joints (there is a special variety), and a thin layer of the mixture is applied on top, completely covering the reinforcing mesh.
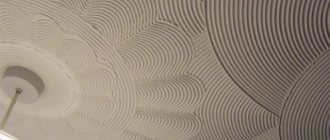
Serpyanka fiberglass mesh significantly increases the level of adhesion to the surface - Puttying. The base should be puttyed as follows: the solution is scooped onto the blade of a wide spatula and distributed over the surface using arcuate movements from top to bottom. The procedure is repeated, after which the coating is primed.
The putty dries for at least 2 – 3 days
The walls are left until completely dry.
On a note! If the vertical structure has a deviation, then it is initially recommended to plaster the surface, and then lay the finishing layer of putty.
Pasting
Work begins with assessing the adhesion of the putty; for this, the surface is tapped a little. If there are no delaminations, proceed to the process:
Wallpaper pasting tool
- The work area is pre-prepared and all unnecessary items are removed. Wallpaper should be cut taking into account the fit of the pattern.
- It is recommended to start gluing from the window opening. The first strip is carefully measured, since the remaining fragments are oriented towards it.
- The glue is evenly applied to the underside of the wallpaper, after which the sheets are folded in half. This will avoid drying out and ensure the desired level of impregnation. If required, the wall is also treated with the solution.
- The strip is placed in its place, adjusted from above and pressed. For smoothing, use a rag or rubber spatula.
- The remaining elements are glued in a similar way.
The algorithm for gluing wallpaper does not change depending on the type of base
There is a recommendation that surfaces should be varnished. Indeed, this can be done, but achieving the desired decorative effect will be difficult. In addition, the face layer will become heavier, which can lead to peeling.
You should know! If the strips are connected end-to-end, then it is advisable to attach a special intermediate tape.
Instructions
In fact, there is nothing complicated in the entire process of preparing and applying wallpaper on an internal combustion engine. But any renovation finish has its own nuances and features. In order to start wallpapering, you should first carefully prepare the fiberboard walls.
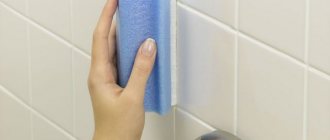
If there is old finishing material on the walls in the form of wallpaper, then they will have to be completely removed from the surface. For this procedure, you can use any sharp object. Sometimes it happens that the wallpaper comes off with great difficulty, and then you just need to lightly moisten the walls with warm water and the wallpaper will come off easily and quickly.
Once the old finishing material is removed, you can proceed to the next stage of preparation, which is priming the surface. As a primer, you can use either drying oil or any other alkyd composition. This action is necessary so that the fiberboard surface can no longer absorb large amounts of moisture.
Otherwise, in order to glue the wallpaper you will need to use a large amount of glue.
Often, fiberboard walls have irregularities, joints and protruding nails. Next, the process of preparing the surface of the walls will need to be thoroughly puttied. If this is not done, then all the irregularities and flaws will be very noticeable on the surfaces of the wallpaper. In addition, rusty spots will soon begin to form from the nails and therefore they and all defects will need to be carefully puttyed and wait until completely dry.
As soon as the putty has dried, the surface of the walls should be treated with a primer again. This will be necessary to ensure that the fiberboard becomes fully suitable for subsequent paper processing. And if all the above steps have been completed, then you can start wallpapering.
Just keep in mind that the glue will have to be applied directly to the surface of the wall, and not to a sheet of wallpaper. Because fiberboard quickly absorbs moisture and first you will have to coat the wall thoroughly and well and only then glue it to wallpaper.
After pasting the room, the wallpaper will have to dry for at least 2 days. Finally, it will be possible to coat the surface with a special water-based varnish to protect it from various external influences.
Source
What can be done with swollen fiberboard
Fiberboard, or, as it is also called, hardboard, is a budget-friendly finishing and building material available to the average consumer. Most often, fiberboard is used where it is necessary to level the surface or prepare it for finishing. Very often, manufacturers use sheets of this material as the back wall of furniture - cabinets, chests of drawers. Or they make bottoms for furniture drawers. Compressed fiber sheets are widely used for interior decoration of passenger train cars.
Fiberboard, among other things, is used to make beautiful wall panels that imitate natural materials - stone, wood, brick. With their help, you can “cheaply and cheerfully” level and at the same time decorate uneven walls.
Working with fiberboard is simple - even an untrained person can handle it. They do not require special care, nor do they require special conditions in the room. However, fiberboard has one significant drawback that can negate all its advantages - the material swells when exposed to moisture.
Reasons for swelling of fiberboard sheets and what to do about it
Hardboard is not a waterproof material and is highly susceptible to moisture, which, when it gets inside, softens the wood fibers. The sheet area begins to increase, it swells and becomes covered with “waves,” often together with the floor covering - linoleum, parquet or laminate. By the way, sometimes the cause of deformation of fiberboard can be the floor covering itself, for example linoleum. If the base on which the fiberboard is laid is slightly damp, then the sheet will allow a small amount of moisture to pass through without consequences. When linoleum is laid on top, moisture has nowhere to go; it accumulates inside the fiberboard sheet and leads to its damage.
What to do in such a situation?
In reality, there is not much that can be done. If the wall panels are warped, then their replacement and complete elimination of the source of moisture are clearly required. If the floor surface is leveled using fiberboard, then as a preventive measure it is recommended to treat the underside (the one that will lie on the base) with hot drying oil.
It should be noted that if the fiberboard is already swollen, then it is impossible to completely eliminate the defect, since the internal structure of the material is disrupted. You can only partially level the sheet by screwing the swollen area with self-tapping screws, or nail it.
Sometimes gluing the swollen sheets to the surface can give a good result. To do this, use PVA glue. The glue is taken into a syringe and pumped under the sheet, after which something heavy is placed on top for several days.
However, as practice shows, all these measures are ineffective - if there is moisture, the sheet will swell again, and no glue or screws will help here. Before installation in a damp room, fiberboard should be treated with drying oil or varnish, and if the sheets are swollen, it is best to dismantle them and replace them with another, more moisture-resistant material.
Is it possible to glue wallpaper onto wood boards?
There are two opposing opinions on this issue. Some of the craftsmen talk about the complete impossibility of carrying out such internal work, while the other says the opposite.
The fact is that non-woven, vinyl and paper products are usually glued without serious surface preparation. Often this is a simple matter of removing old coating. But this happens in the case of walls finished with plaster, which ensures the necessary adhesion of materials. If the work is carried out on a base of wood boards (chip and fiber), then problems arise. First of all, this is the subsequent peeling of strips in corners and at joints. Such defects arise due to poor surface preparation; it requires much more time and effort.
Indeed, gluing wallpaper on fiberboard, chipboard and MDF is not easy, but if everything is done step by step and correctly, the integrity of the coating will be ensured.
When gluing wallpaper on fiberboard, chipboard and MDF, some difficulties may arise
Why do you need putty?
This composition must be used if you want to install roll products on the walls in a high-quality manner. It performs the following functions:
- Creating the right clutch. In the production of wood-based panels, various resins are used, which ensure the unity of the canvas, but prevent the wallpaper from setting.
- Base protection. Due to the porosity of the material (especially untreated chipboard), the glue is quickly absorbed without creating a binding film, so application must be repeated many times. The use of a water-based composition may lead to surface deformation.
- Leveling the coating. For filing vertical structures, panels of not the highest class are used, and puttying allows you to eliminate existing shortcomings (depressions, chips, scratches).
It is impossible to glue wallpaper onto a wood base without preliminary putty.
Also, a significant problem is stains that can appear on the decorative layer due to the presence of resins in the composition of the sheet. They appear even after a significant amount of time and spoil the appearance of the walls.
Features of applying liquid wallpaper
Working with this material differs from the previous process in the technology of the last stage. This variety must be laid with a spatula and a trowel according to a pattern identical to puttying. To do this, the pre-prepared mixture is distributed into sections in an even layer.
The technique of gluing liquid wallpaper is similar to applying putty
There is an opinion that when using liquid wallpaper, putty is not needed, but the technology should not be violated.
Source
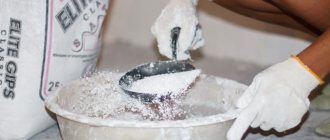
How to dilute glue
Before preparing the adhesive mass, read the instructions on the product packaging. Each manufacturer writes their own methods for preparing glue; the process is similar in action. Proportions vary.
- Pour water into a previously prepared container.
- Stirring slowly, add the dry mixture. To prevent lumps from forming, glue is poured continuously, in a small stream.
- Leave the mixture for 10 minutes to mature. To determine readiness, stir the glue - it should resemble jelly.
- Dilute with water, add dry mixture to desired consistency.
For inexperienced builders, the manufacturer has provided two scenarios:
- Liquid glue for glass wallpaper.
- Products with an applied layer of glue. Before gluing, wet the canvas with water.
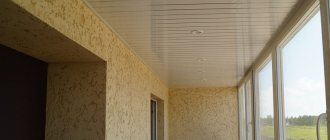
Wallpapering on fiberboard
Wall cladding with materials such as fiberboard is usually done in country houses, attics and other similar rooms.
The sheets are secured to wood surfaces with nails or screws. If the walls are brick or concrete, then create a frame from a metal profile. That is, they form a structure the same as a frame for cladding walls made of plasterboard. Fiberboard sheets are attached to the profile with self-tapping screws. Wallpaper glued to fiberboard will be one of the best options for covering walls. How to glue wallpaper onto fiberboard so that it forms a durable and reliable wall covering.
Kinds
Today there is a large selection of mixtures on sale that differ in the composition of the additives. There are these types of putties:
Acrylic
There is no need to add solvents to use it. The composition is a thick paste that can be easily spread over the surface. The disadvantage of the product is poor elasticity at temperatures below zero. But the putty has good adhesion properties. The composition effectively processes seams, does not emit harmful chemicals, and is resistant to high temperatures.
Polymer
It is made based on water. Suitable for leveling the floor before applying wood coating. It is enough to putty in one layer, since the composition does not shrink. It is highly environmentally friendly.
It is made with the addition of solvents and various plasticizers. A special feature of the product is its pungent odor.
Oil putty
It repels water well and gives durability to the surface. It is suitable for treating floors in indoor and outdoor areas and terraces. The composition includes chalk, oil and water. Quite durable and practical product.
Gypsum mixture
They are used in dry rooms, but this composition is not durable because it is susceptible to moisture.
Two-component epoxy
It is applied to provide additional strengthening to the base. Can improve the quality of a concrete floor due to the presence of epoxy in the composition. The putty leaves no marks after drying and does not peel off the floor;
Has a low cost. The drying process takes about 6 hours.
Waterproofing mixture
Suitable for leveling surfaces in bathrooms, washrooms and other similar rooms.
The group of ready-to-use products includes acrylic and polymer mixtures; most often they are packaged in small buckets. The advantages of such putties are that: there is no need to waste time and effort preparing the solution, and they can be stored longer than dry compounds.
There are also some downsides to such materials:
- high price;
- they cannot be stored in places with low air temperatures;
- Do not use when working with thin layers.
Water-based putty has become widespread. This product is safe for human health as it contains a minimum of chemical additives. It is odorless and easy to use.
The water-based composition has a number of other positive characteristics:
- high quality when repairing surface defects;
- convenient for working in rooms with high temperatures;
- not susceptible to moisture;
- has high elasticity.
Preparing the fiberboard surface for wallpapering
To glue the rolled material, it is necessary to process the fiber boards in the following sequence.
Pre-priming
The entire surface of the walls is coated with a primer using a roller or wide brush. As a primer for fiberboard, it is better to use ordinary drying oil, after which it dries, they begin to putty the walls.
Coating with drying oil will increase the adhesion of the fiberboard and prevent the boards from absorbing moisture from the putty.
Wall putty
Fiberboard puttying is carried out in three stages:
Subsequent work should begin after the leveling coating has completely dried. The final layer of putty should not exceed a thickness of 1-2 mm.
Final priming
After the leveling coating has dried, the slabs are primed again. For final priming, it is better to use a water-based product.
The primer is applied with a wide brush or sprayed with a spray bottle.
Opening with varnish
Varnishing will protect the coating from damage.
This will protect the coating from temperature changes and high humidity. Transparent furniture varnish is suitable for this. In addition, you need to prepare the following tools and materials:
- box for filling with varnish;
- wide brush or roller;
- solvent;
- rags.
Opening with varnish is done as follows:
- fill the working compartment of the box with varnish;
- I pick up varnish with a brush; the excess mass is squeezed out on the bath platform;
- apply varnish to strips of wallpaper using smooth movements;
- Use a roller to level the varnish coating, removing drips;
- Upon completion of work, the tool is cleaned of varnish with a solvent. For more information about manipulating wallpaper, watch this video:
After this, the quality of the coating is checked. To obtain a durable varnish surface, the coating with a protective agent is repeated.
Wallpapering fiberboard walls
To solve the question of how to hang wallpaper on fiberboard, you need to decide on the type of coating. This can be paper-based wallpaper, non-woven or vinyl rolls.
Standard adhesive is suitable for paper-based cladding. Non-woven and vinyl coverings require a special adhesive composition.
Covering fiberboard with wallpaper consists of several operations:
Level the canvas in all directions
When working with non-woven fabric, glue is applied not to the strip, but to the wall.
Wallpapering on fiberboard occurs according to the following scheme:
The numbers in the diagram indicate the order of priority for gluing the wallpaper strips.
At the end of the pasting, the room is closed for a day until the glue dries completely.
How to cover walls?
The technique of covering walls in this case is simple and unpretentious. To do this, you will need sufficient quantities of old newspaper issues and glue for paper wallpaper. You can even make and use a paste of potato or corn starch as an adhesive. To level the newspaper layers you will need a spatula and a roller. Any publication can be used as a wall covering.
- Newspapers are glued directly to the wall, which means that all its flaws and irregularities will appear through them. Therefore, it is better to glue them in advance with special paper or a layer of newspapers.
- Then an adhesive composition is applied to their reverse side. The newspaper sheet is immediately applied to the wall and smoothed with a roller. You can apply glue to the wall and then apply newspaper to it.
- Glue the sheets overlapping each other to obtain a seamless coating.
How to glue wallpaper onto hardboard with your own hands
Many owners think about how to put wallpaper on hardboard before starting renovations. After all, if the job is done incorrectly, the coating will not last long and will quickly peel off.
Today we will tell you how to stick wallpaper on hardboard and at the same time do everything efficiently and reliably. You can see some moments in photos and videos and then you will finally understand everything.
Mistakes and ways to avoid them
Only correctly fixed sheets are plastered. If the slabs are poorly fixed, there is a risk that the plaster will crack and crumble.
When plastered with liquid solutions, fiberboard swells and bends. Therefore, thick mixtures with low moisture content are used for work. They should dry quickly. They are applied in a layer of no more than 5 mm.
Fiberboard can be plastered, and many people do so. But most craftsmen say that the fiberboard should be removed and the room sheathed with plasterboard or other modern material.
We develop options for solving problems
How can we carry out wallpapering despite all the shortcomings?
Painting the walls
The difficulty of hygroscopicity and the appearance of corrosion can be avoided if we prime our surface, which serves as the boundary between the adhesive and the base. The particle itself takes its place here, so there is no need to prime too deep into the surface.
Many people ask the question, is it possible to glue wallpaper onto fiberboard and for what reasons should this not be done? Let's go over its components. Most of the entire volume of primer is a water base. But we want to have less contact with her in general.
And if we take alkyd primers or paint material for our work, then they will work best. They will cover all fiberboard and fasteners with a thin film that has excellent waterproofing properties; its surface itself, after making small changes that we will make when preparing the glue, will give us the opportunity to ensure good contact with a clean surface.
In general, the design itself includes two points:
True, we have a significant drawback, because the relief of the seams is clearly visible through the wallpaper. How do we cope with these difficulties?
putty
Our backup option is that we will putty the entire hardboard surface (see Puttying walls under wallpaper with your own hands). It is noticeable that you shouldn’t even think about good and tight contact between this layer and the fiberboard. Is this a hopeless situation?
No, that's not true. The following materials will help us:
How to paste wallpaper on hardboard at home and carry out preparatory work for repairs using the above materials:
An interesting fact is that during the next renovation, the wallpaper can be removed very easily and simply. It will only be necessary to moisten them a little and entire layers of them will be torn off quite effortlessly.
We use drying oil as a primer
The previous method of preparatory work has one obvious flaw. We protect our surface from liquid only from the front part, however, if the level of humidity in the room is high, then visible changes will appear sooner or later.
The best way to eliminate this effect is to soak the fiberboard with drying oil on both parts.
Such repairs can be carried out using two methods:
After such work, the material is no longer afraid of either excessive amounts of moisture or direct contact with water. Let's not forget that drying oil does not interact well with putty, and glue will also not lie well on it. What should we do in such a situation?
To help, we take contact concrete, its composition includes quartz sand. The base made of polymer substances gives good contact with the most complex surfaces, while sand tends to create unevenness and roughness. Thus, any plaster will lie like a glove.
Next, we finish the surface according to the standard scheme:
Properties of furniture glue
Furniture adhesives ensure the strength of the connection and their composition is optimal. The masses correspond to the following parameters:
- Resistant to temperature changes. Furniture structures are often used outdoors, placed near radiators or stoves, ovens; the adhesive is able to withstand temperature changes while maintaining its original properties.
- Withstand heavy loads. This applies to bookshelves, chairs, sofa seats, etc. Such structures are constantly under pressure, but high-quality adhesives cope with it.
- Vibration resistance. Furniture is often installed near washing machines and various equipment. In order for the connection to be strong, the fact of stability is taken into account.
- Resistance to chemical elements. Furniture items undergo constant cleaning and are often subjected to chemical attack.
Technical data is discussed using the example of a thermoplastic adhesive composition:
- The composition includes resins, rosin, synthetic rubber. Some brands contain solvents; they are added to reduce setting and drying time.
- Operating temperature is within 120–200 degrees.
- Hardening occurs 40 seconds after application.
Tips for buying wallpaper glue
All construction and repair work directly depends on the quality of the glue:
We glue wallpaper onto fiberboard ourselves
The process of wallpapering on fiberboard in no way differs from the same types of work on other surfaces made of a wide variety of materials.
Problems when wallpapering our surfaces
Any person who has glued wallpaper understands that the process of such work itself is very necessary and sometimes does not come without difficulties of one kind or another. You need to spend a lot of effort and energy during repairs.
Attention: We would like to note that a clear standard method for this type of finishing work has not yet been invented or created. It can be transformed due to different materials, surface colors, and the presence of images.
Thus, you already know whether it is possible to glue wallpaper on fiberboard; this is a very responsible job where you need to take into account all the complexities and subtleties. If you do everything yourself, then the final price will not be high.
Source
Why don't they apply glue to non-woven wallpaper?
Non-woven wallpaper is the most popular finishing material. The high demand for this type of canvas is due to the fact that they are convenient in terms of gluing and care. Compared to traditional paper wallpaper, non-woven wallpaper has many advantages. In addition, this finishing material is not coated with glue, and this greatly simplifies the gluing process. To install wallpaper correctly, you need to know the main points of this procedure, and the skill will already appear after gluing the first canvases. So why, when gluing wallpaper with non-woven fabrics, you don’t need to smear the canvases themselves, let’s figure it out.
Preparing the walls for gluing non-woven wallpaper
Why you shouldn't smear
The range of wallpaper products presented today is huge. There are wallpapers that are coated with glue before they are installed. They must swell, otherwise it will be impossible to stick them or after a while they will come off on their own. But non-woven wallpaper does not require compliance with this clause. All you have to do is measure the size of the canvas and apply glue only to the wall.
At the same time, you must ensure that it does not have time to dry before gluing the finishing material. For this reason, apply glue either in two layers or pre-treat the surface with a weak adhesive solution.
But before gluing, it is recommended to carefully study the markings on the roll. If you see an icon with a brush that is parallel to the wall, this indicates that the glue is applied directly to the wall. When the brush is depicted parallel to the horizontal plane, the adhesive composition is distributed onto the canvas.
Chipboard board
This material has an extremely strong and even structure, and also, which is invaluable for self-repair, it is light and easy to install and decorate partitions or walls with it. But not everything is so simple with wallpapering it. There are a number of features that, if taken into account, will make the process more successful.
Since it is impossible to use the slab for finishing in one piece, you will have to cut it into several parts. Because of this, joints appear between the plates and fastening points with screws or nails. These problem areas can cause a number of unpleasant consequences in the future: swelling, cracks in the wallpaper and unflattering red spots (due to rust on the screws). To avoid this, you need to prepare the slabs in advance and very carefully for gluing wallpaper on them.
Preparation
- The first and most important step is to thoroughly dry the chipboard. To do this, you can open all the windows in the room, creating a draft. If you are carrying out repairs in the fall or winter, then before doing this you need to first warm up the walls twice (between the first and second time, wipe the surface with a damp cloth or rag).
- After the slabs have completely dried, they need to be treated with a primer mixture and all joints formed during the finishing process must also be sealed with wood putty. Finally, when the surface is dry, it needs to be sanded with fine sandpaper and coated with white oil paint.
- The heads of the nails must be driven deeper into the slab and covered with drying oil or oil paint - this will prevent rust and, as a result, unsightly stains on the walls.
- The joints between the parts of the slabs must be sealed as follows: fill the cracks with gauze attached to them, and then apply paint. This will not only prevent swelling, but also strengthen the wall.
Of course, there is no need to explain that you must remove the old coating, if any, before gluing wallpaper on chipboard - this recommendation will save you from many unpleasant consequences.
Required Tools
How well you prepare for the wallpapering process determines how well the repair work will be completed. Therefore, do not do it carelessly - you are working for yourself. So, to finish the walls or partitions you will need:
- long ruler;
- well sharpened scissors;
- sharp paper knife;
- glue container;
- roller and/or brush for using glue;
- a simple pencil;
- cleaning material (soft rags).
And, of course, the most important thing is the wallpaper. We advise you to choose non-woven or vinyl options for chipboard, as they are resistant to slight deformation and will perfectly hide any unevenness on the surface.
Process
So we have come to the point for which, in fact, everything was started. You also need to glue the wallpaper correctly and according to a certain sequence, namely, start from the corner closest to the window and move towards the door. We also recommend drawing two vertical lines on the wall using a plumb line along the width of the strip in order to glue it as evenly as possible. This can help guide you when gluing the remaining strips of wallpaper.
A separate topic is adjusting the pattern: in this case, cut off the strips gradually, allowing at least 10 cm for the ceiling and floor in order to avoid inaccuracies. If the wallpaper is without a design or pattern, cut the entire roll at once into strips of the required length.
The glue also needs to be carefully selected and applied in accordance with the material of the wallpaper you choose. For example, if your choice fell on non-woven or textile wallpaper, then the glue should be applied exclusively to the wall. If the wallpaper is paper, then glue is applied both to the wall and to the strip. Don't forget to let the glue soak in for about 15 minutes, folding the wallpaper surface inward. At this time, tackle the wall.
Rules for gluing
Prepare a soft rag, it is necessary to avoid bubbles and remove excess glue. Start gluing the wallpaper from top to bottom, smoothing the strip with a rag: working on the top part, the bottom should be gradually straightened. Remember that you should start gluing door and window openings last. Also, the process of gluing wallpaper depends on its quality: if the canvas is thin, glue it overlapping, and if it is denser, glue it end-to-end.
Be especially careful and attentive when gluing the corner: make sure that the canvas does not deteriorate or tear, and also extends onto the second wall by at least 15 centimeters. If you still don’t understand how to apply wallpaper to chipboard, the video below will clearly demonstrate the technique: