Natural wood lining is again gaining popularity; it can be seen not only in country houses and on balconies, but also in the interior of kitchens, bedrooms and living rooms of city apartments. And this is not surprising, because its advantages over other finishing materials are obvious and undeniable. It is durable, helps retain heat, and maintain an optimal level of humidity in the room. And everything has been said a long time ago about the aesthetic properties of the lining and the incomparable woody smell. However, wood requires special care, which includes processing and coating with various compounds. In addition, painting the lining solves the problem of a boring color or an undesirable association for someone with a sauna or a summer house and allows you to change the style of the interior without giving up this excellent natural material.
How and why is the lining painted?
The lining may need painting, varnishing or other compositions for several reasons, which determine the choice of a specific product:
- A tree needs protection, which can be different. For example, for lining on a balcony, you need to think about enhanced protection against UV rays, which cause photoaging (greying of wood). Some compositions make the lining more fire and moisture resistant and protect against pests.
Pine is often used as a material for interior decoration. If left untreated, the wood may darken over time.
- You need to preserve the color of the wood and make the design more expressive.
- It is necessary to change the color of the lining, but at the same time maintain the structure of the wood.
- The interior of the room does not involve the use of natural wood color.
The following products can be used to paint or otherwise process the lining:
- Protective compounds. Can be intended for different purposes. To treat lining on a balcony, especially one located on the sunny side, it is better to use a composition for external work. For the ceiling and walls indoors, a product for interior work is suitable.
Important! When choosing a protective product, carefully study the information on the packaging. Some compounds paint the wood pink and green, which can only be painted over with a very dark tint or opaque paint.
- Stains (compositions for tinting). They give the lining a certain shade, preserving the wood texture. By applying different numbers of layers, you can adjust the intensity of the coloring.
- Lucky. For lining, aqualacs are best suited - water-based compositions that allow you to maintain the vapor permeability of the material and protect the surface from absorbing contaminants. Varnishes can be glossy, matte, semi-matte, contain bactericidal additives and UV filters, and you can add color to them to change the shade of wood.
USEFUL INFORMATION: Making a masterpiece out of a wall: decorative plaster for wall decoration
- Paints. They can have a wide variety of compositions and are designed to completely paint over wood by creating a dense film on the surface.
- Wax compounds. They can be solid, liquid, water-based, provide excellent protection, and retain the distinct structure of the tree.
Important! In order for the wax to spread evenly, the surface of the lining must first be primed.
- Special oils. They can be transparent and pigmented, protect the wood from dirt and abrasion, and emphasize the structure of the wood. They do not create a film on the surface, like varnishes, but penetrate into the top layer of wood. Creates a matte finish or silky shine effect.
Depending on the purpose of application, these products can be used either independently or in combination with each other. For example, impregnation and paint can be used to protect and achieve a uniform painted surface.
Dyeing process
Painting wood with your own hands is not a difficult task, but in order to achieve a high-quality result at the finish, the instructions must be strictly followed. As already mentioned, the general algorithm for such work is similar. Therefore, as an example, we will talk about how to paint a wooden table.
White bedside table.
Preparing the base
Painting furniture, like any other product, is best done disassembled, of course, if possible. All trims, handles, locks, metal or plastic parts, and stained glass must be removed or covered with masking tape and foil.
Working with a construction hairdryer.
Next you need to remove the old coating. We immediately reject the use of chemical reagents; wood is a hygroscopic material and, having absorbed the chemistry of solvents, such furniture will become harmful to health. If you have a hair dryer, then heating the surface with it and using a metal spatula can quickly and easily remove the old paint. You can take a blowtorch, but it will leave scorch marks.
Those who do not have a hairdryer can use sandpaper, although it is time-consuming and difficult. It is much faster and more convenient to take a relatively inexpensive attachment for a drill or grinder, made in the form of a metal brush.
The principle is shown in the photo. In this way, the old coating can be removed quickly enough, but there will be a lot of dust. And be careful with the veneer, it is easy to wear out.
When the old coating is removed, the surface needs to be leveled. Experienced craftsmen recommend using a grinder or regular sandpaper with a number of 180 or more, stretched over a block.
Advice: all work of this kind involves the need to periodically remove dust. So, for this it is better to use a vacuum cleaner, dry rags or brush. After sanding, the pores of the array open and with a damp swab, you will simply clog them with fine dust.
Do-it-yourself sanding.
Choosing paint
If we are talking about painting directly, you will need paint for the lining of one of the following types:
- Oil paint. Penetrates deeply, protects from external influences, and is suitable for painting lining on the balcony. Disadvantages: takes a long time to dry, fades over time.
- Alkyd enamel. A universal paint that creates a dense, most often glossy coating that is resistant to external influences and durable. The disadvantage is the limited selection of shades.
- Acrylic water-based paint. Used more often than others, it creates a matte, translucent coating. When applied in a thin layer, it allows you to preserve the structure of the wood.
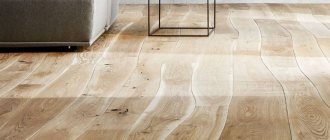
Classification of varnishes for parquet boards
Paint and varnish products are classified according to different parameters:
- Method of application: there are varnishes for exterior and interior use.
- Technological properties - viscosity, hiding power, fluidity, method of application.
- The ability to tint wood (completely colorless, giving additional richness to the texture, colored and dark pitch varnish with a golden tint).
- Resistance to stress and abrasion, resistance to adverse conditions, chemical reagents and temperature fluctuations.
- Duration of operation.
- Chemical composition (on different bases) and polymerization method.
- Degrees of light reflection (matte, glossy, velvety, silky, semi-matte varnish).
- Environmental safety and recycling options.
Choosing the color of the lining
We found out how to paint the lining; it’s time to decide on the shade of paint. Many of the shortcomings of the room can be advantageously turned in the other direction if you “play with color” a little. Need to expand your space? Choose paint in white or light beige shades. But remember that they are susceptible to rapid contamination. A dark tone, on the contrary, will visually reduce the size of the room.
You cannot make the ceiling, walls and floor contrasting in color. It is best to leave natural wood in the bedroom, and choose paint in subdued tones to decorate the office.
We paint the lining according to all the rules
Painting lining involves a certain sequence of actions that must be followed.
- Cleaning from dirt and dust.
- Surface grinding.
- Application of antiseptic and primer.
- Coating the lining with paint or other selected composition.
Ideally, the lining should be painted before installing it on the wall, painting each board separately; it is extremely difficult to properly apply paint on a ceiling or walls already covered with lining. Painting the finished surface is allowed only when the paint is renewed.
Preparing lining for painting
If the lining is painted for the first time, the front side of the individual planks is sanded until smooth using a sanding machine or sandpaper mounted on a block.
USEFUL INFORMATION: DIY plasterboard niche
In the event that already painted lining on a wall or ceiling is to be varnished or painted, the sequence of actions will be as follows:
- Using a scraper or brush, remove dust and remnants of old paint, and use sandpaper to make circular movements to completely clean the surface. If the varnish or paint holds firmly, you should wash the lining with a soda solution (take 300 grams of powder per bucket of hot water). There are special chemicals available to remove mold.
- If the dirt cannot be washed off, you can use bleach or stain. To ensure that paint or antiseptic sticks to the surface better, we treat the ceiling, floor or walls with detergents that contain alkali.
- We sand the wood. In order not to miss a single section, mentally divide the wall, ceiling or floor into several squares and rub them sequentially. You can’t press hard and grind one piece for a long time.
- It is not necessary to treat with a primer antiseptic, but it will increase the durability of the lining.
- All irregularities are covered with a special putty.
It is better to take a spatula made of plastic; unlike metal analogues, it does not leave scratches on the surface.
- We apply a layer of drying oil, which will perform a protective function.
- Finally, a primer is applied. It will protect the lining from temperature changes (if we are talking about an unheated balcony) and will fix the already applied putty, in addition, it allows you to achieve a more uniform distribution of paint.
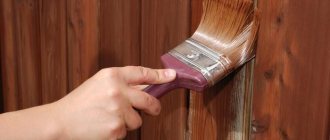
We paint according to all the rules
After finishing the surface preparation, it's time to figure out how to paint the lining.
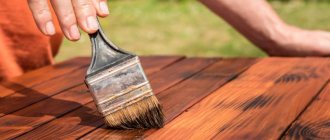
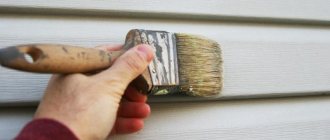
- Depending on the area, you can use either a brush or a roller.
- Painting lining with paint or a pigmented product involves applying the composition in small portions. You can only wet the brush generously when using transparent impregnations and primers.
It is important to mix the paint thoroughly both before and during painting so that the color applies evenly.
- Movements should be made along the boards, applying the composition with strokes, and then rubbing and shading until a uniform coating is obtained.
- It is better to apply several thin layers than one thick one.
- When working with opaque paint or varnish, after the first layer has dried, you need to sand the surface again.
- Do not start painting a second time when the first coat has not yet dried.
USEFUL INFORMATION: Mesh for applying plaster to walls: types and scope of application
In order not to be mistaken with the final result, you can first paint a small area of the board to check what color you will get in the end.
Preparatory work
Painting doors to look like bleached oak is not difficult. Before you begin such operations, you should stock up on several tools and materials:
- primer. Experts recommend selecting only special compounds that are suitable for the door material;
- varnish and white enamel. Buy only high-quality products that will be easy to apply and have the desired tone;
- sandpaper and brushes. Here it is better to use products that will not shed lint. Paper is needed to brush the surface of the door.
Please note that the structure of oak can be imitated on almost any surface. Here it is only important to choose the right tones of paints and varnishes.
Painting while preserving the structure
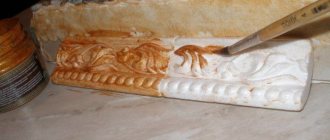
How to paint the lining to change the color but maintain a pronounced wood grain? You can use the brushing technique, which in this case involves processing the lining in several stages:
- First, pigmented oil, wax or glaze is applied to the surface.
- Then the selected varnish or paint for the lining is taken in a small amount, applied along the entire length of the board and gently shaded.
- After 10 minutes, use a soft, lint-free cloth to remove most of the oil.
The result of such manipulations will be a bright and expressive wood pattern, emphasized by the pigment remaining in the grooves and recesses. This method is great when using lining in different interiors: country, Provence and many others.
How to make your own stain
It is not necessary to buy ready-made stain. By mixing dyes such as coffee, a few drops of iodine or black bark shavings, and some chemical elements, it can be made at home. Homemade stain is not only effective, it is also natural.
A few tips on how to make your own stain:
- Boil a glass of larch bark in a glass of water. The resulting product can be used to coat birch products; it will give them a beautiful reddish tint.
- Grind the dried walnut shells into powder and boil for ten minutes. The resulting decoction must be mixed with soda. Apply the solution to light-colored wood and it will turn brown. If you want to change the color of the product, you can treat it with vinegar or potassium bichromate. In the first case, the shade will be gray, and in the second, red.
- Brewed tea or coffee can give the wood different shades. The intensity of the colors depends on the strength of the brew.
- Using a solution of potassium permanganate you will paint the product cherry color.
- A red tint can be achieved by soaking rusty nails in vinegar for several days. Black stain is obtained by adding a decoction of oak or walnut leaves to a vinegar solution.
To properly make stain with your own hands, you need to first watch the instructional video
They make their own stains quite often. They turn out to be environmentally friendly and harmless. Unfortunately, they all tend to fade, so to preserve the color of the product, you need to apply a layer of varnish over the stain.
Bleached oak effect
The lining painted white looks very stylish and modern. If white wood is used in a Scandinavian or rustic interior, it is advisable to create not a dense, impenetrable coating when painting, but to preserve the structure of the wood, achieving the effect of bleached oak. This can be done using different means:
- Tints (stains) with the appropriate name - “bleached oak”, “frost”, etc. To create the desired effect, the product is applied in several layers, each of which must be very thin.
- Oils with wax of the required color. Can be applied in two layers to obtain a virtually opaque finish, or in one layer, which is subsequently wiped down with a cloth to obtain a distinct wood grain pattern.
Now you know how to paint the lining and how to process it correctly. On the one hand, this process is quite labor-intensive, on the other hand, it is exciting and enjoyable.
Advantages of oil-based stains and wax and acrylic stains
Oil-based stain comes in a wide range of colors and shades. It costs more than water sprays, but it also has more useful properties. This preparation can be used not only to change the color of the product, but also to emphasize its texture.
Treating wood with oil-based stain is easy and convenient; it is applied in a thin layer and does not lift the fibers of the product. Also, this tinting does not fade under the influence of sunlight, makes the wood resistant to temperature changes and protects it from moisture. Oil stains can be removed using white spirit solvent; it can also lighten painted wood a little. It differs from compositions with similar properties in that it does not require varnish to secure it. The disadvantages of staining with oil include: long drying of the tint and its toxicity.
Oil-based stain can be applied using a regular brush.
It is very important to find a stain from a responsible and conscientious manufacturer. Judging by the reviews, the most popular companies are Vartan, Latek, Novbytkhim and Herlak.
Acrylic and wax stains are very easy to apply; they apply in a uniform layer and do not leave stains or streaks. However, due to the rapid drying of such stains, you need to work with them very quickly.
Wax stain is used to protect wood from moisture. It can be used to treat parquet. This stain is not resistant to mechanical damage, so to extend its service life, it is better to use varnish.
Acrylic, also known as rustic, stain perfectly emphasizes the texture of wood. With its help you can get a variety of shades, which is why this drug is so popular. Wood painted with such stain will still need to be opened with several layers of varnish.