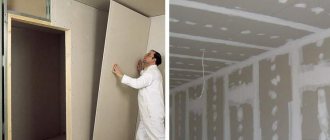
How to glue
Before you start gluing onto a gypsum plasterboard surface without putty work, you need to carry out preparations.
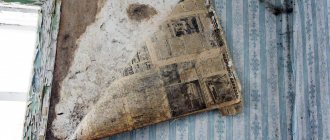
If there is old wallpaper on the walls and ceiling, remove it using liquid products, a sponge, or a spatula. After removing the remaining finish, cracks in the old putty may be discovered. It is removed with a scraper.
Where does gluing begin?
If the plasterboard surface is new, carry out the following work:
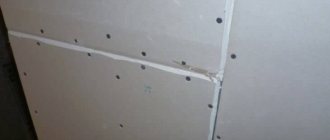
- It is necessary to inspect the entire surface for flaws - protruding screws, no chamfer at the joint. All defects are eliminated.
- The next step is priming the gypsum board. The mixture coats joints, corners, and fasteners especially well.
- The joints are reinforced with sickle tape or KNAUF paper tape using a mixture of FUGEN, UNIFLOT. The surface is completely dry.
- Afterwards, the applied KNAUF mixture is cleaned with sandpaper to remove small lumps and stripes.
- The fastening points are also covered with Uniflot putty. After drying, clean it.
- All putty joints, corners, and fasteners are covered with a second layer of primer mixture for good adhesion.
- All pencil and marker marks are also covered with a thin layer of putty to avoid the appearance of black spots on the finish coat.
When the surface is prepared, using a laser level or rule, draw an even vertical line on the wall. The length of the strip is transferred to the wallpaper. A section with a margin of 5 cm, that is, if the length of a strip of wallpaper is 2.5 m, then cut off 2.55 m.
12 hours before work, dilute the glue and leave it to dissolve. This is done strictly according to the instructions on the packaging.
Glue is applied to the surface and to the canvas. There are options (non-woven) that do not require you to apply an adhesive composition to the strip, just to the surface.
They begin gluing the strip from top to bottom, gradually smoothing it with a rag from the middle to the side and releasing air, adhering to the mark.
The next strip is glued end-to-end with the first, also smoothing and releasing air.
How to glue in corners
Next, measure the distance from the corner to the last glued strip. The width of the canvas should be equal to this distance plus the approach to the adjacent wall: internal corner 5-15 cm, external corner 2-3 cm.
Often the canvas on the adjacent wall has an uneven border.
Having glued the canvas in the corner, measure the width of the canvas on the adjacent wall and also draw a vertical line along this mark as a guide. Aligning with it, glue the strip with an overlap onto the previous canvas. If the wallpaper has a pattern, select the borders by cutting off the unnecessary strip.
How to stick under the baseboard
There is a wide variety of ceiling skirting boards. All of them are divided into 2 types: soft and hard. Each type has its own principles of pasting.
Flexible and soft skirting boards are glued to the trellises after the surface has dried. To do this, use transparent glue - liquid nails.
The hard ones are fixed to the wall, and then there is pasting, or the finishing coating is already on the surface, but you need to fix the plaster molding to the wall. Then the wallpaper is cut so that 1-2 cm remains under the baseboard. After this, the strip is removed, leaving only drywall. A solid baseboard is fixed to it with gypsum plaster or glue.
If the baseboard is already on the wall, the wallpaper is glued slightly over it. After that, use a spatula to move the plinth a little and insert the canvas. This creates an even angle on the strip, along which the excess is trimmed.
The floor plinth is placed on the cut trellises from the floor. There remains 1-2 cm under the baseboard.
Processing process
The primer is applied to the plasterboard surface several times. The first time - on a newly installed structure, before sealing joints and puttingty. A regular acrylic primer is suitable for the job, or you can purchase products that say “for drywall.” Acrylic mixtures are usually presented in the form of an aqueous dispersion, so they are environmentally friendly, hypoallergenic, and therefore applicable indoors.
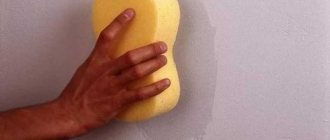
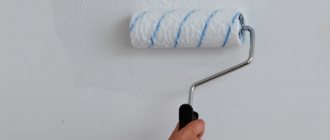
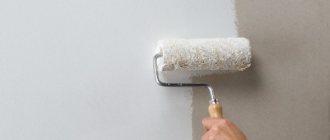
It is necessary to treat the entire surface of the drywall so that the putty solution adheres better. At the same time, the walls already receive some protection from the formation of fungus. The solution is applied with a nap roller or a wide paint brush. Rub the primer mixture well over the surface.
If the solution is too concentrated, it can be diluted in the proportions specified in the technical specifications. For acrylic primer mixtures, plain water is used as a solvent.
Putty walls are sanded to give the surface a perfect smoothness. After this you need to prime again. Here the primer plays a very important role. Of course, ensuring adhesion of the base with subsequent finishing materials. And another important task is to minimize the absorption of wallpaper glue by the wall. To increase the protective properties, it is necessary to prime in at least two layers.
The work also uses a roller or brush. The solution is thoroughly rubbed over the surface. Before applying the second layer, you need to wait for the previous one to dry.
From this it becomes clear why it is necessary to prime plasterboard walls before installing wallpaper materials. By the way, the primer solution not only improves the quality of wallpapering, but also simplifies their dismantling during subsequent repairs.
Finishing drywall for wallpaper - stages of success
For your information! Some advocates of strict technological principles insist on installing such corners on the internal corners of plasterboard structures. As practice shows, they have nothing to do there.
Serpyanka and putty are excellent materials for internal corners.
Spatulas. At least three types are useful here: wide, medium and narrow. A wide spatula is for working on the wall space, a medium one is for applying mortar to wide and narrow spatulas, as well as for working on external and internal corners, a narrow one is exclusively a corner spatula.
Advice! When choosing spatulas for working on walls, flexibility will not play a decisive role. Standard factory-made metal spatulas with medium flexibility will work just fine. But to work at the joint, you need a soft spatula, which will not so much level as drive the mortar into the joints. For these purposes, you will need a soft spatula or rubber one.
And further! Medium and narrow spatulas for working corners
Choose the one that is most convenient for you to work with as your main one. Please note! Each time you apply a new portion of the solution to the spatula, make sure that there are no traces of the previous putty left on it.
Otherwise you will get a lump effect. And one more practical recommendation in the same vein. For the remnants of old putty, prepare a container or bag, this is where you will dump it. This simple technique will save you from excess debris on the floor. That's it, the second stage is completed, wait for it to dry and watch the next thing.
The assorted plasterboard structure has disappeared and in its place is a completely white room with perfectly smooth walls. The game was still worth the candle.
Required tools and materials
Tools for finishing gypsum boards
The preparation of gypsum plasterboard walls is carried out in several stages. Before priming the drywall before gluing, you will need to carry out a number of important measures.
To carry out this work, you need to prepare tools, devices and purchase the necessary materials. All of them are presented in the table.
| № | Tools and accessories | Working materials |
| 1 | a set of spatulas (3 pieces are enough - 1 narrow and 2 wide) | antifungal solution |
| 2 | construction or stationery knife | putty |
| 3 | roller (preferably with an extension handle), brush (for inner corners, hard-to-reach places) | primer |
| 4 | gloves, respirator | tape for joints (serpyanka) |
| 5 | sandpaper, grout float | glue for her |
How to prepare gypsum boards for different types of finishes
Novice finishers doubt whether it is necessary to plaster drywall for wallpaper, painting and other types of decor. Let's consider each option.
Wallpaper
They can only be glued to a leveled base without noticeable defects or flaws. Especially if the panel is thin. Therefore, all the preparatory measures described above are mandatory. Then priming. You may have to prime the surface twice, depending on the type of product. For thick, loose fabrics this may be sufficient.
They will hide minor irregularities. It will be enough to seal the joints, dents and decorate the corners. If the wallpaper is thin, you will have to carry out a continuous treatment. If there are minor differences, they start with plastering with a universal or starting composition. Then the finishing putty is applied. For even surfaces, the first stage can be omitted.
Instagram v_remonte_krasnodar If the wallpaper is thick, plastering the wall is not necessary
Dye
Before painting, the surface must be leveled, otherwise a good result will not be obtained. The preparation process is similar to that for thin wallpaper. However, there are slight differences. If necessary, it is possible to apply more than one layer of the starting mixture.
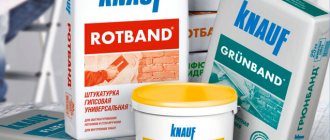
Finishing putty is mandatory, and it can also be repeated. After the base has completely dried, it is carefully sanded to remove even minor flaws and irregularities. For work, use only gypsum compounds, for example, rotband
They have less mass, and after hardening they acquire a pure white color, which is important for painting.
Decorative plaster
The material is dense and can hide small flaws in the base. But, given that it is quite expensive, it is more profitable to remove defects using conventional mixtures. It will be enough to decorate the joints and corners and remove dents from the caps. This can be done with your own hands. After this they begin to lay the finishing. Only for the Venetian, which is a composition with a fine structure, will need complete leveling of the base.
Instagram pavel_caireac A perfectly leveled base is essential for painting, thin wallpaper and Venetian plaster.
In conclusion, it should be noted that it is not always necessary to plaster drywall. When deciding whether this procedure is necessary, it is worth considering all its pros and cons. Only then make a decision. If you have any questions, it’s worth watching a video in which errors during the installation of gypsum boards are corrected using plaster.
Simplified step-by-step instructions
The putty is applied in two layers to the entire surface, so there will be enough time for practice.
To understand how to finish drywall for wallpaper, we suggest you read the simple step-by-step instructions.
- We check whether the sheets of drywall are laid evenly. They should create one plane and not protrude above each other.
- The screws are tightened if the caps are not recessed. It is necessary to move the spatula over the surface. He shouldn't cling to anything. If it catches the screw, then it needs to be tightened.
- At the joints of the sheets, a chamfer is removed if this has not been done previously. There is no need to touch the factory edge. The chamfer is cut only at those joints where the gypsum core of the sheet is visible.
- The screw heads and cut joints are primed and then puttied. The joints are additionally reinforced with serpyanka.
- The entire surface is primed, and then the starting putty is applied.
- The surface is rubbed with sandpaper.
- Everything is primed again, and then the finishing putty is applied.
- If necessary, the wall is sanded to make it as smooth as possible. This step is usually done when painting the wall further.
Next, we will consider all these stages in more detail.
Procedure for priming
After the installation of gypsum boards is completed, proper preparation of drywall for finishing work is necessary, i.e. the surface should be primed. When all the slabs are screwed to the frame (or glued to the wall, depending on the choice of installation method), we proceed to putty. To ensure that the mixture lies smoothly and efficiently on the sheet, and the consumption of it and finishing materials is minimal, you need to use a primer.
To apply the primer mixture, you must prepare the following:
- the selected primer mixture (the quantity depends on the area of the gypsum board surface to be coated; consumption for mixtures from different manufacturers may differ);
- brush or roller for applying primer to the wall;
- container for the primer mixture (plastic containers specially designed for paint with a corrugated surface and a recess for the mixture are suitable).
Drywall ceiling primer scheme.
You need to prime the wall following the following sequence:
- First you need to answer the question of which primer to choose for the wall. Here it is necessary to take into account several points: is it possible to prime drywall with this mixture, is it suitable for interior work. It is best to take acrylic primers, which are ideal for drywall; they do not contain harmful substances. Such compositions are diluted in water before applying to the wall.
- The question of which primer to choose is decided based on what type of finishing material will be used. The simplest option is wallpapering or painting with water-based paint. To do this, primer should be with a mixture that does not penetrate deeply. But if heavy wallpaper is used, then a deep penetration primer should be used. This will make the bonding of the glue and the base coating more reliable, that is, the wallpaper will hold stronger and longer.
- Once the solution has been selected, you can begin priming the drywall. Such work must be started before puttying. The mixture is diluted with water and poured into the prepared container. The roller is dipped into the solution, after which the surface must be primed very carefully, the layer must be even. The entire surface of the drywall is coated, then the first layer is left to dry completely (time depends on the type of primer). The second one is applied only after the first one has dried. For hard-to-reach places, use a paint brush. When determining the time required for drying, it is necessary to take into account what type of primer is used. If heavy wallpaper is pasted and a compound with deep penetration is used, then the question of how long it should dry is decided a little differently: you need to wait several hours longer.
- After the primer mixture has dried, putty is applied to the drywall; before doing this, the joints of the plates must be glued with serpyanka to ensure a strong connection and no cracks. The putty must dry completely, after which the surface is treated with sandpaper and all dust is removed.
Now you need to prime the surface with a strengthening layer, after which the finishing material dries.
When repairing and finishing walls, many people believe that a layer of putty is enough to ensure that the finishing coating lasts well, reliably and for a long time. But this is far from true. A primer, a layer of which must be applied before puttying, not only improves adhesion, but also allows you to extend the life of the finish. Most often it is recommended to do this if you plan to glue wallpaper, but other finishing materials, for example, paint, will lie on the drywall much smoother and of better quality, and the consumption of glue and putty will be much less
It is important and correct to determine how long the primer will dry, it depends on its type, the thickness of the applied layer
First, let's choose a wallpaper
Today, countless factories and factories create for us a huge assortment of wallpaper in the most bizarre colors and prints, which can be three-dimensional, flat, or change color depending on the incidence of sunlight. All these factors in wallpaper design are important when purchasing, because you should take into account the style in which the rooms in your home are, or will be, designed.
But the main difference between wallpapers seems to be their types, which are intended for different purposes.
The following types of wallpaper are common on the modern market: paper, non-woven, vinyl, acrylic, textile, and photo wallpaper.
Among this variety, the cheapest are paper wallpapers, which have a short service life, about three years, low strength, that is, they tear very quickly, and in addition, they cannot be washed. But this wallpaper tempts with its low price, which ranges from 40 to 150 rubles for each roll, and ease of gluing. Another drawback is that the design on them fades due to direct sunlight.
Another type of inexpensive wallpaper is non-woven wallpaper. Essentially, these are the same paper wallpapers, only fabric threads are added to them, which increases their strength, reduces the fear of moisture, and hides minor wall defects, such as scratches and small cracks. A pleasant bonus is the fact that they, like paper wallpaper, have absolutely no effect on human health. They can also allow air to pass through, like paper ones. Service life up to 5 years, with good care. The price range for such wallpaper starts from 550 rubles and ends at about 4,000 rubles. As it turned out, the price of one roll depends on its print, i.e. the more complex the pattern, the more expensive the finishing material. At the lowest prices, the same type of wallpaper with a boring ornament of simple figures is available, while expensive copies are decorated with more complex designs.
Vinyl wallpaper consists of paper with the addition of non-woven fabric. This type of wallpaper has many advantages, among which we should highlight moisture resistance, thanks to which they can be washed as they become dirty, durability, colors that do not fade in the sun, and they can also be repainted. Naturally, they have shortcomings. Perhaps the most significant drawback is airtightness. Service life more than 5 years, with proper care. The price of such almost perfect wallpaper is approximately 950-13,300 rubles. Again, the price depends on the complexity of the design; if you try, you can find copies for 32 thousand rubles. per roll.
Acrylic wallpaper can last up to 5 years, subject to good care. They have good breathability, but less strength. Their price ranges from approximately 300 rubles to several thousand, it depends on the complexity of the design and its relief.
Unique textile wallpapers allow you to decorate your room with special chic, because the front part is made of expensive fabrics, silk, velor, linen, and the back part is made of paper, but more often from non-woven fabric. This wallpaper works as a heat insulating and soundproof barrier. Disadvantages include such factors as the complexity of installation, fragility, i.e. they are afraid of dirt, dust, pets, etc. But the most controversial factor is the price, because it sometimes repels the consumer, and sometimes attracts. This is explained by the fact that textile wallpaper is designer, so the price is so high, but tolerable for a connoisseur. The cheapest ones cost about 5,500 rubles.
And finally, photo wallpaper. Such wallpapers have become popular recently, largely due to the fact that they are able to transport a person inside the picture, because, often, they are glued to the entire area of the wall. Their price depends on the design and its size. So, the cheapest options can cost from 500 rubles, and the most expensive more than 8,000 rubles.
Proper preparation of drywall for wallpapering
Before wallpapering the drywall, the surface must be treated in several stages.
1. Priming The primer will prepare the surface for uniform application of a layer of putty and provide protection from mold and mildew. For drywall, you can use a universal acrylic impregnation or a penetrating primer for gypsum plasterboard.
It is most convenient to work with a roller, dipping it into the solution and removing excess using a ribbed surface on a special container for paint or primer - drywall does not need excess moisture. After priming, the surface must dry.
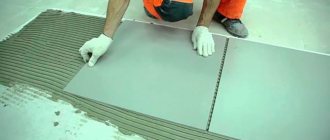
2. Putty Using putty, you first need to treat problem areas - recesses in places where drywall is attached and connecting seams. It is advisable to cover the joints with tapes of self-adhesive serpyanka - fiberglass mesh or lavsan - with it the alignment process will be easier and faster.
Then the putty is applied using a spatula and leveled over the entire surface of the drywall. The number of layers depends on the color of the sheets and wallpaper. For snow-white walls, you will have to apply 2-3 layers (starting with the starting layer and ending with a finely dispersed finish), for normal leveling 1-2 is enough. Each subsequent coating can be started only after the previous one has dried.
3. Sanding and finishing primer All that remains is to treat the surfaces first with coarse, then fine-grained sandpaper to hide all the unevenness and smears of putty (for thick non-woven or fiberglass wallpaper this step is not necessary, but for thin vinyl or silk it is highly recommended). Finally, the walls or ceiling are primed again - this will help reduce glue consumption, remove dust and improve adhesion.
Wall putty and gluing
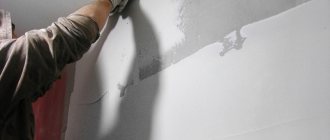
Wallpaper cannot be glued onto an unputtyed surface of a plasterboard wall without complete prior puttying. The mixture is applied using a trowel or wide spatula, which will help to evenly distribute the composition.
By holding a spatula in your hand correctly, you can avoid the appearance of uneven surfaces.
The plasterboard wall is already flat and after the primer dries it is absolutely smooth. The putty applies quite easily to such a surface. For those who already have certain skills in performing such work, it will not be difficult to apply the composition to the walls. The first base layer does not exceed 3 mm. It dries quickly and after 4-5 hours you can start applying 2 layers. Its thickness does not exceed 1 mm, which allows you to completely hide the border between the areas that were putty one by one.
Pasting the walls begins after all the seams and places where putty is applied have been treated with sandpaper, and the entire surface of the walls has been re-primed. In some cases, it is allowed to cover plasterboard walls immediately after the primer has dried. This is possible when using wallpaper:
- vinyl;
- non-woven
If we are talking about paper canvases or silk-screen printing, then you will need to apply 2 layers of putty to the entire surface to be pasted. For the first, you can use a regular mixture, and for the second, a special ready-made finishing composition. Dried, smooth walls are sanded with the finest sandpaper and treated again with a primer. This treatment prevents excessive absorption of moisture from the adhesive solution and ensures excellent adhesion of materials.
Before you start gluing wallpaper, you need to use a building level, with which you beat off the horizontal and vertical, retreating from the far inner corner of at least 5 cm. By covering the seam with a sheet of wallpaper, you can be sure that there will be no rupture or deformation even after a long period of time.
Strength is guaranteed by early and timely fixation with reinforcing tape. All wallpaper sheets are glued with an approach to the ceiling and an overlap to the floor. The excess is cut off with a stationery knife after drying. While working, firmly press the edges of the sheets at the joints. More details on the process in the video
It is possible to properly glue wallpaper onto plasterboard walls only if proper, complete surface preparation has been carried out before gluing.
External and internal corners
External and internal corners on plasterboard walls and partitions are made using:
- reinforcing paper;
- serpyanka;
- perforated aluminum corners;
- special metal corners Shitrok with paper.
Paper and serpyanka are most often used to decorate internal corners - the junction of walls, as well as walls and ceilings. The technology is similar to seam sealing. A certain amount of putty is applied to the corner, paper or sickle is glued onto it, the reinforcing strip is pressed into the composition with a narrow spatula, and excess putty is removed. After this, they go through the corner again, applying a thin layer of putty on top.
Perforated corners are used to design external corners - slopes, protrusions, etc. First, a piece of the required length is cut. The metal is very thin, it can be cut even with ordinary large scissors, but if you have metal scissors, the work is easier. Edges are cut at an angle of 45° or less, rather than at 90°. So, when puttingtying drywall, the edge will not curl up.
Decorating the outer corners of plasterboard walls using a perforated corner
Putty is applied to the outer corner on both sides in small islands approximately every 10 cm (can be done in a checkerboard pattern). A perforated corner is pressed into the solution, its installation is checked whether it is vertical or horizontal, and adjusted. Use a spatula to pick up excess mortar, aligning the edges in one plane with the surface of the sheet. The installed corner is left for some time until the putty dries, after which it is sanded and puttyed again if necessary.
What is different about the metal corner Sheetrock? Thin strips of metal are applied to a paper base. They are more rigid than simple reinforcing paper, but it is more convenient to work with them than with conventional perforated ones, since due to the presence of paper the transition to plane is smoother.
Features and Recommendations
The process of gluing wallpaper will not be difficult if you follow the recommendations:
- The plasterboard surface does not have small stones or wave transitions.
- All containers and tools must be clean.
- When working with wallpaper, you need to remove all the shortcomings, otherwise it will be impossible or difficult to do this later.
Tips for working with wallpaper on a plasterboard surface:
- The work of wallpapering a room begins with a doorway or window.
- Wallpaper should be measured and cut on a horizontal, clean surface - a clean floor, a large table.
- During gluing, the canvas is completely free of air bubbles. Do this carefully with a soft rag or rubber spatula.
- Excess glue that comes to the surface of the canvas is removed immediately with a damp sponge.
- If the wallpaper has a large pattern, then the consumption of the pattern at the joint is allowed to be no more than 2 mm.
- Trimming of excess trellises is done strictly along a ruler with a sharp knife.
- During work, windows and doors must be closed.
Having familiarized yourself with the recommendations and tips, the work of gluing a plasterboard surface will not be difficult or time-consuming. To avoid unpleasant consequences, such as dark stains from moisture-resistant drywall on trellises, the surface still needs to be covered with putty and primer. This guarantees the appearance of the room and the durability of the trellis covering.
Preparation work
As you know, in construction and renovation one of the most important stages is preparatory work. Often this stage lasts even longer, and its implementation is more complex than the main stage.
It's easy to hang wallpaper yourself
So, preparing the surface for gluing wallpaper on drywall (gypsum board) includes several stages. Let's take a closer look at each of them.
Primer
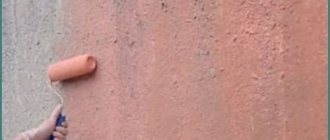
Before you start gluing wallpaper onto drywall, regardless of whether you intend to glue non-woven, vinyl or paper sheets, you need to prime the surface. The purpose of the primer is to provide reliable protection against the effects of various negative factors, such as mold, mildew, moisture and others.
The primer consumption, as well as the rules for applying it to the working surface of the plasterboard, must be indicated by the manufacturer on the packaging. Applying it is quite simple, so anyone can complete this task on their own. Using a wide brush, paint the surface of the plasterboard with light vertical movements. It would be enough.
Processing joints using serpyanka
Serpyanka will help cope with two main problems:
- Hide various damage, incl. and cracks.
- Make invisible seams at the joints of plasterboard sheets.
Serpyanka is smooth, invisible joints
In its appearance, the serpyanka resembles a tape made in the form of a mesh and is made of a strong material similar to fishing line or thin fiber. Its working surface is treated with a special glue, making it possible to easily stick and firmly fix it at the joints between sheets of plasterboard.
Next stage: what you need to know about putty
This stage should be carried out carefully and carefully, since it largely determines how smooth the future wall surface will be. If you are going to glue paintable wallpaper or thin canvases onto drywall, then the quality of the putty is especially important, since if the job is poor, the final result will also be negative, since all the flaws in the putty will “come out” to the surface. You risk literally seeing all the joints, chips and scratches that protrude outward and are clearly noticeable even through the wallpaper sheet.
Puttying drywall before wallpapering
After you've been to the hardware store and purchased drywall putty, you may need to prepare it before you begin. To do this, take the putty base itself and mix it in a certain proportion with water. The consumption of water and putty must be indicated by the manufacturer on the packaging or in the instructions for use.
What to do in cases where wallpaper is already glued to the drywall, but you want to glue new sheets on top of the old ones? In fact, this is allowed (under certain conditions)
At the same time, in order to avoid the old layer showing through, we advise you to ensure that the new wallpaper is darker than the previous ones. Here's how to properly putty drywall:
- We take 2 spatulas, narrow and wide.
- Using a wide spatula, take a little putty and carefully apply the first layer at a medium angle.
- Then, using a small spatula, remove the remaining putty and large one and smooth out the seams.
- If there are sufficiently deep seams or cracks, it is necessary to apply several layers of putty, allowing time for each previous layer to harden.
- After completing this work, wait about 24 hours and begin the next stage: sanding with sandpaper.
Sandpaper treatment
So, before gluing the wallpaper onto the drywall, we still need to carefully process the almost finished surface using sandpaper. At first, especially if the putty protrudes significantly, it is advisable to use coarse sandpaper. As for the final finishing, it is done using fine-grained paper.
Criteria for the suitability of surfaces for wallpapering
Before gluing wallpaper on walls, you should check its surface for suitability to a number of certain requirements, since the quality of the pasted canvases and their service life will depend on compliance with these conditions. At the first stage, an inspection is carried out. During the process, the complexity of the upcoming work will be determined and it will become clear how to treat the walls before the wallpaper. You can check surfaces after removing the old coating from them.
Having completed completely cleaning the walls from the previous finishing material, they must meet a number of the following conditions:
- Presence of a dry surface. Damp walls absorb a minimal amount of water, the basis of which is wallpaper glue. For this reason, the canvases will not adhere fully to the surface, and as the air temperature in the room increases and the dampness disappears, they will begin to lag behind.
- Clean base. Not only old finishing materials should be removed from the walls, but also if there are areas with mold, even where it is just beginning to appear. In any situation, it is not permissible to start wallpapering surfaces if there are any dark stains or other suspicious stains on them, since one day they can cause destruction of the canvases and will certainly appear on their outside. In addition, over time, mold covers more and more space and pollutes the environment with its spores that are harmful to human health. Paper wallpaper is a suitable place for them to suddenly multiply, so they will certainly form under canvases that were applied to an incompletely dried surface.
- There should be no cracks or other damage on the wall, since they can be noticeable after pasting, and if they possibly increase in the future, they can harm the coating itself, contributing to the appearance of tears or folds from warping.
- Evenness, smoothness and uniformity of the finished surfaces. Otherwise, unevenness will be noticeable through the pasted canvases, and if the selected wallpaper is of insignificant thickness and is made in light colors, then a wall of a different color will be visible behind it.
Is it necessary to prime drywall before puttying: under wallpaper, tiles or before painting?
Another important property is the increase in strength of sheets that are treated with a primer. This, in turn, helps maintain the integrity of the coating during impacts and other damage. When creating walls or ceilings from plasterboard in a room, it is often assumed that it will be further processed by one of the options, this could be painting the walls, wallpapering or laying tiles
Based on each material, you need to treat the surface of the sheets accordingly for further work. The first step in this will be working with the primer.
There is a difference of opinion whether it is necessary to prime drywall before puttingty, wallpapering or plastering, but there are quite objective reasons that indicate the advisability of such a procedure. The advantage of this treatment is the disinfection of the surface, which will subsequently prevent the appearance of fungus or mold on the coating. In addition, such gypsum boards are protected from all kinds of pests and are not afraid of mold or mildew. Due to additional initial processing, this material is more durable than simple sheets and can withstand high loads.
If walls are built using such material, then you can then glue wallpaper on them, lay tiles, and even paint them, but all these tasks must be correctly implemented. According to manufacturers, wallpaper can be glued to plasterboard sheets. But, before this, the surface should be carefully prepared.
Without following all the instructions, you cannot avoid the following consequences: Applying plaster will not only help make the walls perfectly smooth, but will also increase repairability after wallpapering, and will also allow you to use rolled materials of any shade and color. Plasterboard construction can be found in any room. Ceilings, walls, shelves and niches - everything can be leveled and made from plasterboard and a metal frame. Drywall has a perfectly flat surface, which, when prepared, allows for different decor.
Before you start wallpapering, you should prepare it well. Modern adhesive compositions are made from mixtures that perfectly create an adhesive effect, but without a primer these components will be absorbed into the base and will not give the expected result. Soil mixtures prevent the composition from penetrating inside and create the basis for wallpapering.
Surface inspection and preparation
Preparing drywall for wallpaper begins with checking the suitability of the working surface. If the frame was assembled correctly and no errors were made in installing the sheets, then at this stage there will be a minimum of work.
The sheets must be laid evenly, creating a single plane. At the installation stage, a mistake could have been made, due to which some sheets would protrude above others. If you can’t press them, and you no longer have the strength to redo the frame, then such a defect can be corrected later, due to a thicker layer of putty. The wall will not be perfectly flat, but at least you will be able to get rid of the differences.
Unlike the previous problem, which is quite rare, protruding screws are a much more common occurrence. If a bit with a limiter was not used or the work was carried out by a beginner, then often several screws will not be screwed in completely properly (the head should be recessed into the surface of the sheet by 1-2 mm).
During puttying, such self-tapping screws will interfere with the entire process. Therefore, it is necessary to run the spatula along the wall in advance. Where there was contact with the screw, it needs to be tightened.
Is it possible to glue wallpaper on drywall - expert opinion
Sometimes the question arises: is it possible to glue drywall to wallpaper? But in fact, it should be asked the other way around. And the answer to this question is clear. Wallpaper is an excellent finish for plasterboard walls and partitions.
In terms of wallpapering, plasterboard has a number of advantages over walls made of other building materials. The walls finished with plasterboard are even and smooth, the wallpaper fits perfectly on them.
Photo of plasterboard walls covered with wallpaper
Another question that often arises is whether you can immediately glue wallpaper onto drywall or not? In this case, it is impossible to answer unambiguously.
In principle, you can hang wallpaper right away, because treating the entire surface of the drywall with putty is not a mandatory requirement. But you definitely need to glue the mesh to the seams and putty them.
Puttying plasterboard walls
After finishing work on small areas of the surface, re-treat everything with primer. Now the base is ready for finishing with wallpaper, but you need to know that gluing finishing material onto such a base is undesirable. Sooner or later the question will arise of how to remove old wallpaper without damaging the drywall sheets. Therefore, wall putty is simply necessary.
Apply a finishing layer of putty 2-3 mm thick to the walls. When working, use a large and medium spatula. Apply the solution using sweeping movements. Without waiting for it to set, use a medium spatula to level the surface, forming the desired thickness of the putty layer.
Sand the dried surface using fine-grain sandpaper. During the sanding process, be careful not to remove the applied layer of mortar. Otherwise, you will have to repeat the process of plastering the surface. Then the walls are treated with a primer. After it has dried, you can begin to decorate the surface with wallpaper.
The following types of plasterboard can be found on sale:
- GKL is a regular drywall used for finishing rooms with normal humidity and temperature parameters. These are gray sheets with blue markings.
- GKLV is a material with increased moisture resistance. The gypsum used for its manufacture contains silicone granules and antifungal additives. These sheets are green in color and have blue markings.
- GKLO is a fire-resistant plasterboard that has increased resistance to open flames. This is achieved through the introduction of reinforcing components into the gypsum composition. The leaves are gray in color with red markings.
- GKLVO - combines the properties of moisture and fire resistance. Almost universal material. The color of the sheets is green, the markings are red.
If it is not possible to apply putty
For various reasons, sometimes it is not possible to do puttying work:
- there is no skill or experience in carrying out such work (although it seems that putting putty on surfaces is simple; only a specialist can achieve high quality of such work);
- deadlines are running out, and applying putty takes time both for the actual work and for subsequent drying of the walls.
You can disguise minor defects in the plasterboard surface using dense wallpaper in a bright shade on a fabric base. But you shouldn’t skip all the other stages of work, except for putty. You will have to prime the surface twice. The second time, preferably with the addition of water-based paint
It is also important that the seams of the wallpaper do not coincide with the seams of the plasterboard sheets
Primer for drywall: why, what and when
The primer performs two different functions. The first is that it improves the adhesion (adhesion) of two materials. As a result, when puttying, the chances of bubbles forming and material peeling are reduced. The second function is that it evens out absorbency. The result is less material consumption, and when puttying, a more even surface. So it is not advisable to skip the primer.
In theory, priming during finishing work should be done before each new operation. For example, before puttying, plasterboard sheets need to be primed to improve adhesion to the putty. Before painting or wallpapering - to reduce the consumption of paint and glue. You also need a primer before applying the finishing layer - the starting layer has to be leveled, which is why the surface turns out dusty. Without primer treatment, the finishing layer does not apply well, rolls off and may even fall off.
Primer for drywall from Ceresit is also suitable for interior work.
What primers are needed? Depends on the stage and the type of finishing material:
- Before puttying gypsum board (starting and finishing layers), use a deep penetration primer or for porous, highly absorbent surfaces.
- The same composition can be used before painting and wallpapering.
- The putty surface of the plasterboard under the wallpaper can be primed with wallpaper glue diluted with water. The proportions are indicated on the glue packaging.
- When painting, you need to look at the manufacturers' recommendations. Sometimes the primer is paint diluted with water. If there are no other instructions, use a deep penetration composition.
To summarize, it is worth saying that priming is a necessary operation. It allows you to get good results and reduce material consumption.
Preparing plasterboard walls for pasting
When the installation of drywall is completed, the walls look smooth, but the pleasant impression is spoiled when looking at the screw heads and joints. Beginners may think that the best option would be to cover these defects under the wallpaper. But any specialist will tell you that this should not be done. After all, the wallpaper will not last long in this case, and the flaws will be very noticeable. Therefore, before gluing wallpaper, it is necessary to prepare the surface.
Features of arch finishing
Plasterboard arches, complex radius structures, are made from arched design sheets (GKLD / GN 6.5 mm). They differ in that the slabs are reinforced with fiberglass and bend under a certain radius. The perimeter of the arch is fastened with a perforated arched corner.
All types of finishing materials are applied in the same way as on a regular surface made of plasterboard sheets. Quite often, the arched opening is additionally decorated with wooden trim, brick tiles, and mosaics. For their installation and fixation, it is better to use silicone transparent liquid nails.
Arch made of plasterboard A simple arch made of gypsum plasterboard is also made from ordinary wall plaster.