Literally 10 years ago, when drawing up estimates for repairs, home craftsmen, in order to save the family budget, mercilessly crossed out the primer: grandfathers and fathers did without it, so can we. Now another extreme has appeared: the need to treat surfaces with a primer for intermediate finishing is not disputed. But where it is necessary and not necessary, and even to the detriment, “Concrete Contact” is used. But there are other types of primer, with other properties that do not freeze some problems for a while, but completely eliminate them. For example, deep penetration soil.
The editors of the StroyGuru portal decided to show home craftsmen the difference between these types of soil in composition, functions, strengths and weaknesses. Explain what is better, “Betonokontakt” or a deep penetration primer, in each specific situation.
What and in what case to choose
Despite the fact that it is recommended to treat a fairly large number of materials with its product, the primer is indispensable only on smooth surfaces to which plaster solutions do not have adhesion (concrete, ceramics, glass, metal and wood). In all other cases, preference should be given to deep penetration primers. As an option, you can use a combined method when processing porous concrete: first apply two layers of deep penetration primer, then a layer of “Concrete Contact”.
Comparison
Comparing contact group and deep penetration concrete soils is the same as comparing a wheeled tractor and a passenger car. They have in common: an engine, wheels and a cabin. But the tasks are different. In our case, there are several situations when the comparison is correct. For example, which is better, “Betonokontakt” or a primer before decorative plaster. Both options are eligible for use with almost the same quality of finishing. Here you can catch the nuances of the differences. We will compare according to the following criteria:
- material price;
- consumption;
- difficulty of application;
- adhesion force to the base;
- penetration depth.
Which is cheaper?
Life shows that first of all, most buyers look at the price of a product. In this regard, Betonkontakt loses greatly. The minimum price is 50 rubles/kg (“Axton”), the average price is over 130 rubles/kg.
A deep penetration primer can be purchased for 19.5 rubles/l and more (average price - 40-50 rubles/l).
Conclusion: deep penetration primer is in the lead by a huge margin.
Consumption
The cost of repair work is also affected by material consumption. Here, too, primers have an advantage - 100-200 ml/m2, while for the elite Betonkontakt brands this figure starts at 0.3 kg/m2 for smooth surfaces. With increasing porosity, the indicator increases by 2-2.5 times.
If you prime in two layers the difference is even greater. At the same time, it is necessary to take into account the following point: on a smooth surface, the consumption for the first and second layers of the concrete contact group of primers is almost the same, but on deep penetration primers you can save money - for the first layer the composition can be diluted with water.
Conclusion: the lower consumption and lower price of deep penetration primers leave Betonokontakt out of competition in situations where it is possible to use ordinary soil with the ability of the composition particles to penetrate deep into the base.
This is where the analysis can end. But curiosity drives progress. So let's continue.
Difficulty of application
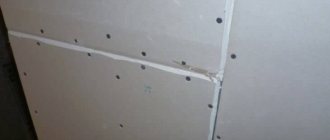
Due to the thick consistency and quartz sand in the composition, applying “Ground Contact” is difficult. Primer (deep penetration) has another problem: the indication does not work well - bald spots (unprimed areas) are not always visible.
Conclusion: Despite the difficulties, primers with penetrating abilities still have a slight advantage.
Adhesion force to the base
“Concrete contact” was created precisely to improve adhesion between smooth surfaces and intermediate finishing. Therefore, the deep penetration primer loses significantly according to the above criterion.
Conclusion: in the absence of adhesion between the base and the plaster layer (tile adhesive), there is no alternative to contact concrete soils.
Penetration depth
“Betonokontakt” penetrates a maximum of 2 mm deep into the base, while the primer penetrates at least 5 mm, and on porous and loose surfaces up to 10-15 mm (in wood up to 10 cm)
Conclusion: to strengthen the surface, a deep penetration primer is needed.
General conclusion: it is better to apply “Betonokontakt” to concrete, ceramic and wooden surfaces when plastering with decorative compounds. In all other cases (cement and gypsum plaster, plasterboard, fiberboard, chipboard, OSB, plywood, etc.), a deep penetration primer will do the job no worse, and in some ways better. It all depends on what problem is being solved.
Advantages and disadvantages
Both materials compared are very different from each other not only in composition and functions. They have different strengths and weaknesses.
Deep penetration primer
Deep penetration soil has its advantages and disadvantages.
- affordable price;
- there is good adhesion to the base due to the penetration of latex into the pores;
- strengthens the surface of loose materials;
- prevents the base from absorbing moisture from plaster mortars, tile or wallpaper adhesive;
- reduces the consumption of paints, enamels and wallpaper glue;
- binds dust;
- can be applied to smooth, porous and loose surfaces;
- used inside and outside the building;
- easy to apply - a beginner can quickly do the job with a roller;
- prevents the appearance of microcracks;
- during operation, withstands temperatures from -40oC to +60oC;
- dries quickly - work can be continued after 2-3 hours;
- durable - service life of at least 30 years;
- enhancing the strength and hardness of the top layer, protects against mechanical damage;
- can be diluted to the desired consistency or for the first layer in order to save composition;
- allows vapor molecules to pass through, allowing materials to “breathe,” which is important for walls and ceilings.
- indicator tinting is invisible on cement and concrete;
- lays down unevenly - stains and streaks appear;
- does not always hold the plaster - there is not enough adhesion with the solution.
"Betonokontakt"
Primers from the concrete contact group have shown their strengths and weaknesses well during use.
- excellent adhesion to concrete, glass, metal, ceramic tiles, porcelain stoneware and natural stone. The plaster solution also holds well on wood;
- easy to apply;
- the drying process does not take much time (usually 3-4 hours);
- long service life;
- good resistance to alkaline and acidic solutions;
- do not allow water to pass through - in some cases they can successfully replace waterproofing materials;
- have vapor permeability;
- do not contain harmful substances and allergens;
- can operate in a wide temperature range - -40oC-+60oC;
- do not serve as a basis for the development of harmful microflora: mold and mildew;
- can be used not only inside the building, but also outside;
- have indicator coloring to control the quality of surface treatment.
- high price;
- special storage conditions are required;
- at temperatures above +70oC, polymers turn into a viscous state - adhesion to the base completely disappears;
- place increased demands on the condition of the treated surface.
Composition of concrete contact
The primer contains:
- styrene-acrylic dispersion as a binder;
- quartz sand fractions from 0.3 (for putty) to 0.6 (for plaster);
- Portland cement;
- fillers.
The primer is a viscous liquid suspension, usually pink (sometimes blue or purple) without a distinct odor. The dye is added to the composition to make it convenient to control the application and not leave bald spots.
Concrete contact mixes with water, but after drying it becomes water insoluble.
The primer is non-toxic and does not require the use of protective equipment when working with it; but it is advisable to wear protective gloves and ventilate the room.
Important!
When frozen, concrete contact loses its qualities. There are types of primers that can withstand several cycles of freezing and thawing without loss of properties.
What not to do
Sometimes you can find reviews that plaster or some other type of finish does not adhere to the concrete contact. If everything is done correctly, this will not happen.
Also, do not apply the material to surfaces that are not intended for this purpose. In addition, you should not do the following:
- Don't add a lot of water to the mixture. Be sure to read the recommendations from the manufacturer, which will be indicated on the packaging of the material. Of course, it is much easier to work with a more liquid concrete contact, but in the end the primer may fall off.
- Do not apply the composition to substrates that are frozen.
- Do not apply to the surface if it has not been prepared. It is imperative to remove all those parts that are crumbling, degrease and remove dust and dirt.
- Concrete contact should not be applied to wet surfaces.
- When using the composition, it must be stirred from time to time so that sand particles do not settle to the bottom.
- Do not work until the applied primer layer is completely dry. Further finishing is possible only after the concrete contact is completely dry, but no more than a day will pass after its application.
- Work cannot be performed if the air temperature is below five degrees. Of course, this does not mean that the material is not suitable for outdoor work, but it is still better to wait until it gets warmer outside.
- Every effort must be made to ensure that dust does not fall on the treated surface. The layer is quite sticky and therefore the dust sticks well, but it may soon fall off along with the primer. In the event that dust does get on the walls, then it is necessary to apply another layer of concrete contact.
- You cannot use mixtures that have expired or that have been stored at low temperatures, with the exception of frost-resistant compositions.
- Even if the composition seems very thick, you should not add water to it. This can only be done if the manufacturer has indicated this option on the packaging.
It is also very important to purchase really high-quality concrete contacts. This is the most important condition for the material to adhere well to the surface of the walls and be able to cope with the assigned tasks.
"Betonokontakt"
Adhesive-type primers, which include Betonkontakt, have their own composition, characteristics, functions and modes of action.
Compound
Water-based dispersion of concrete contact primers consists of the following components:
- acrylic copolymers - binder;
- solvent - water;
- cement M500;
- quartz sand;
- modifiers and plasticizers;
- driers - accelerate the polymerization process;
- antiseptics.
Specifications
Primers from different manufacturers differ in composition. Therefore, we present the average characteristics:
- share of non-volatile substances - 40-57%;
- specific gravity - about 1.37 g/cm3;
- quartz particle size - 3.0 and 5.7-6.0 microns;
- acidic environment - 8.0-9.0 pH;
- penetration depth:
- concrete M 300 - ≥ 0.5 mm;
- brick - ≥ 1.0 mm;
- cement-based plaster - ≥ 1.5 mm.
- drying time - 1-12 hours;
- storage and transportation temperature - +5°C and above (only frost-resistant compounds can withstand slight freezing for a short time, no more than a week);
- ambient temperature during application - +5-+35oС;
- operating temperature - from -40oC to +60oC;
- consumption - from 200 g/m2 to 750 g/m2.
More details about the composition and technical characteristics here.
Functions
The primer is designed specifically to create adhesion between smooth surfaces and intermediate finishes. Additionally, it creates a waterproof barrier between the solutions and the base (they do not draw out water) and prevents the destruction of gypsum by the “cement bacillus” when applying gypsum to cement or vice versa.
How does it work
During polymerization, polymers adhere to any smooth surface. The adhesion force of the film to the base reaches 0.4-0.5 MPa. In turn, quartz sand creates good adhesion with applied plaster or tile adhesive.
Instructions for use
In order to get the maximum benefit from using concrete contact, you must follow certain instructions. If all the steps are performed correctly, the coating will last quite a long time and there will be absolutely no problems with it.
Surface preparation
First you need to prepare the surface to be treated. To do this, if possible, remove the old coating and degrease it. Dust and dirt must be removed so that the surface is perfectly clean. It is necessary to carry out work only at positive temperatures.
The ideal temperature would be 20 degrees Celsius in the room.
In this case, the solution will adhere better and not set immediately, which makes it possible to level it normally and make a layer of the same thickness.
What and how to apply
At first glance, it may seem that there is nothing complicated in the process, but it is very important not only how, but also with what to apply the mixture to the surface of the walls. The composition should be quite thick, approximately like kefir. Since there are grains of sand or crystals in the concrete contact, you should try to distribute them as evenly as possible over the surface, which will significantly improve the characteristics of the finished coating.
There are also a few important tips to consider.
- It is best to wear protective clothing for the job and cover all areas of skin if possible. Washing concrete contact from the skin is very problematic. If it is not possible to cover a certain area, then you should first generously lubricate it with rich cream or some kind of oil.
- If you are processing a large room, you can use a roller for the job. You should choose a tool that will fit perfectly into a bucket or tray with solution. Preference should be given to a fleecy roller, where the length of the pile is 12-18 mm. Of course, a small amount of the composition will be absorbed into the roller itself, but it is much more convenient to work this way, because foam rubber products very quickly become hard.
- If you need to treat a small area, then a wide brush with medium or short bristles would be the ideal option. You should not take brushes with long bristles, because sand will clog them and make them hard. If the amount of work is large enough, then it is worth preparing several brushes in advance, as they quickly wear out and become unsuitable for further use.
You can also fix a brush or roller on a long stick. In this case, you will not need to use a stepladder to process high walls and the tool itself will be further away from your face, which will protect it from drops of concrete contact.