Technology and nuances of laying gypsum fiber board on the floor under tiles
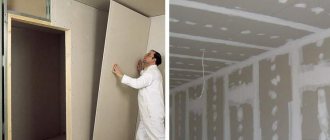
Gypsum fiber materials have proven themselves to be excellent when performing work on horizontal foundations. Due to its stable characteristics, the resulting surface is suitable for cladding with various products. Most often, the installation of gypsum fiber board on the floor under the tiles in the house is complemented by the installation of heated floors. But to obtain a high-quality result, certain rules must be taken into account.
Features of the gypsum fiber base
Gypsum fiber sheets are the same drywall, only in a more improved form. These coatings have a number of identical properties. However, there is a difference and it concerns the structure: GVL does not have a double-sided frame with cardboard. There are reasons for this. In this case, strength is imparted to gypsum through reinforcement with cellulose components, as well as through special additives with moisture resistance and fire resistance properties (these characteristics of gypsum fiber board are higher than those of gypsum board).
The strength of gypsum fiber board is an order of magnitude higher than that of gypsum plasterboard, and therefore gypsum fiber sheets are recommended for use when constructing a leveled dry screed base. When a dry screed needs to be done in a bathroom or toilet, then a special moisture-resistant GVLV is used.
To lay a high-quality floor with your own hands, it is important to follow the technology and have an idea of how to lay wall or floor tiles. Creating a new floor involves the following sequence of actions:
- dismantling the old coating, repairing the base;
- arrangement of dry screed made of gypsum fiber board;
- laying tiles;
- grouting joints.
It is possible to lay a sheet of gypsum fiber board on top of a wet screed. However, such work is difficult and is almost never used in modern home finishing practice.
Disadvantages of gypsum fiber
- Price. GVL sheets are an order of magnitude higher than gypsum board sheets. But considering the technical characteristics and service life, it is better to overpay once than to change the floor every few years.
- Rigidity. Gypsum fiber is a very hard material. Therefore, it will not be possible to use it in a curved form. For figured coverings it is better to use plasterboard.
Such modern material as gypsum fiber is widely used on an industrial scale. It has positively established itself in the construction market. Therefore, in the modern world it is in great demand, despite the price.
How to prime GVLV for tiling?
Hello, dear forum users.
Tell me how to prime the GVLV sheets for gluing tiles on them. What kind of base should the primer be on (acrylic, silicone, etc.), can you tell me specific brands of manufacturers? Or can I glue the tiles without a primer?
I tried to prime a piece of unused gypsum fiber with acrylic-based concrete contact - after drying, the primer peels off like a stocking, that is, it turns out that it does not penetrate deeply. Is this normal?
Maybe my acrylic-based concrete contact is bad? =( why is it easily separated from the GVLV? It’s called Contact “Olympus”
Nimalo wrote: maybe my acrylic-based concrete contact is bad? =( why is it easily separated from the GVLV? It’s called Contact “Olympus”
I'll tell you my secret! If I don’t have a primer on hand, I use peel-off tile adhesive. Brands of primers are all from onion!
Maybe my acrylic-based concrete contact is bad? =( why is it easily separated from the GVLV? It’s called Contact “Olympus”
Nimalo, you guessed it - this primer does not penetrate at all and adheres well only to smooth, non-absorbent substrates. Like tape.
Nimalo wrote: could you tell me specific brands of manufacturers?
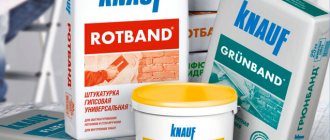
Tseresit 17, Volma Universal
To prime GVL ku is already a perversion. Brush off the dust and that's it.
remboks wrote: GVL ku primer, this is already a perversion. Brush off the dust and that's it.
You can also use a damp sponge
There are two types of primer, for absorbent surfaces (brick, drywall) and for non-absorbent ones (concrete, old tiles). Concrete contact is for non-absorbents, it tends to stick on top. You want a penetrating acrylic primer that will bleed into the material.
Gnawer wrote: You need a penetrating acrylic primer that will bleed into the material.
The “trick” is that practically nothing penetrates into the GVL (and even -B). The primer just drips down in drops. I still use the primer
.Lightly, like “beat the dust.”
I primed it with Ceresite 17. But GVLV itself, unlike putty at the joints, really does not absorb the primer. Therefore, I don’t know whether there is any point in priming, but if you’re not lazy, it won’t hurt. I have GVLV glued and in some places also nailed with dowel nails. So these sheets, unlike gypsum boards, shrink quite a lot as they dry. My tiles are cracked here and there at the joints. I had to beat it off and peck it again, the tile was fine. But the adhesion of the glue to the GVLV was excellent; it came off along the glue and tiles. Therefore, my advice: GVLV preferably in 2 layers with offset joints; if possible, let it dry before gluing the tiles; and strengthen it more often.
Thanks everyone for the advice! Today I'll try to prime it, but not too hard.
Types of primer
Priming drywall before puttying is an important step, but to ensure maximum efficiency it is necessary to choose the right type of building mixture. On the modern market you can find the following types of primers:
- Acrylic-based mixtures that adhere perfectly to almost any substrate. Another advantage is that acrylic compositions dry fairly quickly. It is recommended to apply acrylic solutions both before and after filling.
- Phenolic solutions are actively used for finishing wood or metal bases. Such mixtures cannot be applied to putty, but phenol is considered one of the most optimal means for finishing drywall.
- Alkyd primers - can only be used for treating wooden surfaces.
- Glypthal mixtures are the most powerful, but they are not allowed to be used for treating drywall, as they contain toxic substances.
How to make penetrating waterproofing
Nowadays, penetrating insulation is used almost everywhere, in any room where there is a high level of humidity. When the mixture penetrates the pores and reacts with the structure of the material, crystals are formed, preventing liquid from penetrating inside. The material is suitable for any surface, reliably protects against moisture, increasing the service life of structures several times. Compared to brick and concrete, penetrating waterproofing does not penetrate very deeply into drywall. It is of great importance to treat not only the front side of the sheet, but also all its joints with the wall; it is important to apply insulation to the ends of the material.
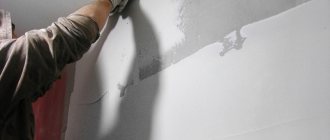
- Before starting work, the surface is carefully prepared - cleaned of dirt and dust, primed.
- The dry mixture is diluted with water following the instructions. Then they are applied to the wall with a brush, roller, or even a spray gun. They usually write on the packaging what is best to use. You need to make several layers less than 10 mm thick, do not smear or rub in.
- Let each layer dry for about an hour and a half.
Before applying a layer of waterproofing, clean the surface
In what cases is whitewash cleaning required?
If the whitewash is old, applied in several layers, and still does not hold firmly, crumbles or “breathes” in some places, then there is only one way out - you need to get rid of it. To do this, clean the surface with a spatula and warm water slightly acidified with vinegar. A small area (approximately 1 sq.m) is moistened with water, and then the whitewash is cleaned with a spatula - and so on, meter by meter.
After the whitewash has been completely removed from the surface of the walls or ceiling, it is necessary to apply a primer and wait until it dries completely. This will take about a day. Further, if necessary, the surface is puttied, covering cracks and irregularities, and primed again.
Primer coating technology, how many layers are needed
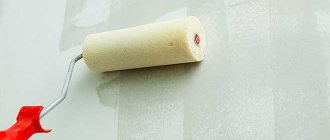
To apply the primer you will need a roller, brush and tray. The process itself is precisely described in the instructions on the package. The steps must be strictly followed.
- All hard-to-reach places and corners of the room are coated with a brush.
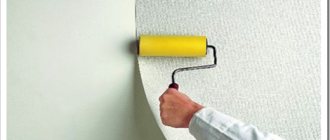
- The main plane of the walls is treated with a roller.
- The applied composition must dry. The drying time is also indicated in the instructions.
- The second layer is applied in the same sequence, which must also dry before laying the tiles.
- If the surface of the walls is very loose, for example, plastered with a lime-sand mixture or brick, then a third layer can be applied.
Primer for walls under bathroom tiles is available in two varieties on the market: liquid, ready-to-use, and dry powder, which must be prepared before use. Preparation of the latter is diluted with water in the proportions specified in the instructions. You cannot save by adding more water, that is, by diluting the mixture. This will affect the quality of the material and its characteristics.
The second tip is that you shouldn’t dilute all the powder. In liquid form, the primer cannot be stored for long. Therefore, it is worth calculating the required quantity, for which pay attention to the consumption of the starting material, which is indicated in the instructions.
Priming walls before painting
Applying paint on an unprimed base is also fraught with adverse consequences.
Priming of putty walls, in addition to improving the characteristics of the base, is used to identify surface defects that are not visible on the white gypsum coating.
Using the first coat of paint instead of a primer also allows you to identify problem areas. But paint, like primer, is absorbed by the porous base to different depths in different areas of the surface, and therefore does not provide a coating that is uniform in color and texture. Thus, the first layer of paint, like glue when gluing wallpaper, is used for other purposes, which means overuse of material that is more expensive than the primer solution.
On dirty and dusty areas of the walls, the adhesion of the first layer of paint and varnish to the base will be weakened, and these defects will not be corrected with subsequent coatings. As a result, in areas of poor adhesion, the paint will begin to peel off the walls after a few months, forming bubbles or falling off.
After finishing leveling for painting, the walls also need to be primed.
Applying a grouting compound to the masonry surface
The grout cannot be applied immediately, as soon as the tiles have been laid on the surface, several days must pass (for floor slabs - from 72 hours, for walls and ceilings - from 48 hours, depending on the thickness of the adhesive layer).
At the same time, the level of humidity in the room should be reduced as much as possible - it is necessary to limit contact with moisture as much as possible. Otherwise, the substance will not set and the tile will fall away from the surface.
Grouting is the final stage in finishing work, masking the gaps between the slabs and securing the entire masonry to the surface. To apply the composition to the surface of the masonry, a rubberized spatula is used, which will not damage the integrity of the slabs.
Additional recommendations from professionals
Many years of professional experience shared by specialists indicate that some manipulations should be done in a certain way, and not in any other way. After all, the secret to successfully creating a high-quality floor lies precisely in such nuances.
- Tying GVL sheets together will provide them with greater resistance to stress. Fixing with self-tapping screws will allow you to hold on better;
- Before laying the tiles, the gypsum fiber flooring is kept indoors for about 3 days, and only then covered with a primer;
- When buying tile adhesive in a store, be sure to find out its capabilities regarding gypsum fiber;
- Laying tiles begins only on a completely dry primer. This is done using a hammer, beacons and a spatula. In this case, all the rules described above are taken into account.
These are all the nuances that you will encounter in your work.
Laying tiles on gvl: how to lay them correctly?
Gypsum fiber is a very convenient material for laying tiles. It is especially practical on imperfect floor surfaces. The method of laying tiles on gypsum fiber is used in bathrooms, toilets and kitchens, as it has good waterproofing ability.
It is necessary to calculate the amount of material needed before starting work. This is easy to do if you know the area of the room. Floor tiles and gypsum fiber are sold in square meters.
Advantages of gypsum fiber
- Strength. Gypsum fiber is the same as drywall. But it does not have a cardboard layer. Shredded cellulose is added there. Thus, gypsum is reinforced with cellulose fibers that grip it.
- Moisture resistance. Gypsum fiber is produced on the basis of gypsum and special mixtures. They are added for good moisture resistance of the material. Therefore, it is popular when laying tiles in rooms where there is constant contact with moisture. GVL sheets are also used when cladding walls in the bathroom and toilet.
- Fire resistance. Due to its structure, it has high fire-resistant qualities.
- Ability to level the surface. Tiles cannot be laid on an uneven surface. To level the floor or walls, use GVL sheets.
- Application. GVL tiles are suitable for laying on floors and walls. The surface doesn't matter. Gypsum fiber fits well on both concrete and wooden bases.
- Weight. GVL sheets have a low specific gravity. They do not weigh down the structure. This property is relevant for high-rise buildings and balconies.
- Easy installation. Laying gypsum fiber board sheets does not require any special skills. Their installation can be done without the help of a specialist.
- GVL is used for heated floors. It is ideal for this.
- Environmental friendliness. It is made from gypsum and crushed cellulose. These materials are not harmful to human health.
Drywall sheets come in regular and enhanced moisture resistance. It is better to use gypsum fiber for bathrooms . It is more moisture resistant. Its cost will be higher. But by using this type of material, you can be sure that there will be no mold or mildew in the bathtub.
Gypsum fiber sheets are produced in a fixed size. For renovation of residential premises, smaller sized gypsum fiber sheets are used. Large sheets are suitable for cladding industrial premises.
Before proceeding directly to laying the tiles, you need to carry out preparatory work.
- Remove old floor covering.
- Level the surface using a wet screed method if there are large uneven areas.
- Carrying out dry screed using gypsum fiber board sheets.
After all the above manipulations, you can start grouting the joints.
Necessary stages of work before laying gypsum fiber board on the floor
- The room should be free of furniture and equipment. It is easier to lay out gypsum fiber sheets in an empty room. They are of impressive size.
- Before laying gypsum fiber boards, the condition of the old floor should be assessed. If the base has become unusable, it must be dismantled and the defects corrected.
- Remove all construction debris.
- If there are bumps, they need to be removed by grinding. Fill deep holes with wet solution. If the depth of the holes is more than 2 cm, they are covered with expanded clay, and then the screed is poured.
- On a wooden floor, it is necessary to check the boards for integrity. To prevent them from creaking, it is advisable to tighten them with self-tapping screws. Self-tapping screws are screwed in a checkerboard pattern into wooden joists.
- Large gaps between the boards are foamed with polyurethane foam.
- If the floor is rotten, gypsum fiber board cannot be laid on it. In this case, in order to save money, you can make a wooden sheathing. A beam is attached to the logs. The thicker the timber is laid, the greater the load the floor can withstand. You can pour expanded clay into the cells between the beams or put insulating insulation.
- Then the GVL is laid on the floor. Gypsum fiber sheets are attached to the beams using self-tapping screws.
Algorithm for laying GVL on the floor
Gypsum fiber must be laid along the room. This method will reduce material consumption.
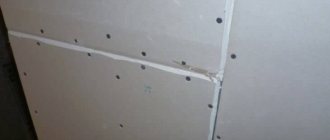
The sheets are attached to the wooden floor using self-tapping screws, at a distance of at least 15 cm from each other. The tighter they are screwed, the lower the likelihood that the GVL will begin to vibrate.
Gypsum fiber sheets must be primed. The primer will help fix the putty more firmly. The adhesive mixture adheres better to primed materials.
GVL sheets are glued together with a special glue. For this purpose, the sheets have grooves that are stacked on top of each other when the sheets are installed.
To improve waterproofing, a thick polyethylene film can be placed under the gypsum fiber. Its seams must be taped with masking tape.
Scheme and order
Gypsum fiber sheets have a sufficient number of useful performance characteristics. The main advantage of such material is environmental safety, i.e. it does not pose any problems for human health. In addition, the material has good fireproof protection, which is very important for products used in finishing. GVL sheets can withstand open fire for about 20 minutes.
In relation to this, other materials cannot boast of such results. In addition, the material does not contain harmful substances in the form of various resins or formaldehydes. Although, for example, in chipboard or fiberboard panels they are contained in sufficient quantities to cause very serious damage to a person in the event of a fire. Due to its general safety, GVL enjoys stable popularity among consumers in the domestic finishing materials market.
vote
Article rating