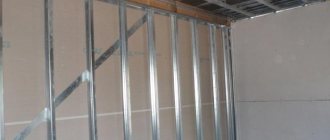
Drywall hangers are an important element of many drywall structures. These products are used for reliable fixation of profiles on a load-bearing surface when leveling walls with gypsum plasterboard and gypsum plasterboard sheets, for laying insulating materials, and creating simple and multi-level suspended ceilings. Several types of suspensions are available, differing from each other and used in different situations.
Recommendations for choosing Euro suspensions for suspended ceilings
The suspension allows you to adjust the height of the suspended ceiling from the base, thereby hiding its unevenness or creating different levels of the ceiling plane. When installing a suspended ceiling, in cases where, due to communications under the ceiling space, ventilation, fire extinguishing systems, it is necessary to lower the frame of the suspension system at a distance of more than 1 m from the base of the ceiling, we recommend using suspension rods of different lengths.
We recommend choosing a longer rod with a ring that is attached to the base of the ceiling. And the rod with a hook, which is attached to the system profile, is shorter. In this case, it will be much more convenient to adjust the height with a suspension, since the spring will be closer to the level of the frame.
Important: choose high-quality fasteners. The rods (spokes) should be made of galvanized steel, which will extend the life of the suspension and prevent the spread of rust
There are often cheap Euro suspensions where the rod is not galvanized. The very next day after installation it becomes covered with rust. The service life of such Euro-suspensions is extremely short, and the danger of ceiling collapse is extremely high.
How to insulate a room's ceiling
In order for a layer of mineral wool to work normally and not get wet, it must be securely protected from the side of the room with a vapor barrier, and ventilated from the attic. A layer of mineral wool 15 cm thick is suspended from the ceiling. The mineral wool slab is punched in several places with hangers and fixed with pins inserted into holes in the hangers or by bending them. Wooden beams can only be used dry, otherwise the wet beam will bend, which will lead to damage to the suspended ceiling.
Also purchased are hangers, screws, dowels, insulation, and a vapor barrier - a special polypropylene membrane. The recommended spacing of the beams is no more than 30 cm - to reliably support the insulation and prevent the hanging panels from sagging. Suspensions along the beams are installed in increments of 0.7 - 1.0 meters.
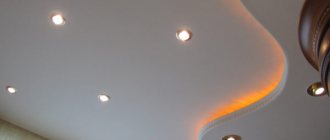
Overhead lamps or a chandelier in the middle of the room, which can be suspended from a pin mounted in the ceiling, can also be used.
Composition of the Armstrong suspended ceiling frame
How to independently calculate an Armstrong ceiling
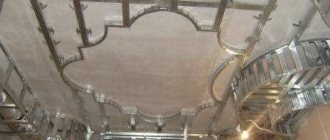
Formally, the suspension system consists of three main parts - a set of hangers, a lattice frame made of galvanized steel profile and decorative panels. Suspension designs can be quite different in structure and load-bearing capacity; up to 10 models are used in total, depending on the size and purpose of the ceiling.
Appearance of the frame
In turn, the frame is assembled from four basic components:
- Molding or wall corner for Armstrong ceiling;
- The supporting profile is the basis of the lattice frame; hangers are attached to it;
- Longitudinal profile, same functions, but without hangers;
- Crossbars or jumpers that increase the rigidity of the supporting system;
- Clamps holding the panels to the frame.
To make 1 m2 of rectangular ceiling 1:2, you will need 80 and 160 cm of 370 cm load-bearing and longitudinal profiles, crossbars - 80 cm, corner - 50 cm.
Stage three. Marking
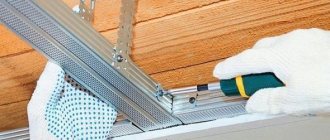
Prepare a marker and tape measure to mark the ceiling. First, measure the height of the future ceiling (excluding drywall) and make 3-4 marks on each wall. Connect these marks into a continuous line using painter's thread. It is along this line that you will install the ceiling profile.
Also mark the ceiling itself for the main profile (6x2.7 cm) and suspensions. Step back from the walls at the distance indicated above, make a few marks and beat off a line (in the same way as before). Repeat the same procedure for all planks, i.e. every 60 cm. Mark along the lines the points where the hangers will be attached.
Markup example
Suspension for false ceiling Armstrong
Subtleties of lining the ceiling on wooden beams
The frame can be installed on several types of hanging devices. The main characteristics are shown in the table below.
For small-sized ceiling structures, wire fasteners AP1 are most often used, consisting of two spokes and an adjusting bracket. In terms of adjustment accuracy, it is inferior to models with threaded adjustment, but is noticeably easier to install and operate.
Four main types of suspension
The minimum mounting height is 15 cm, the maximum is 60 cm. Unlike threaded rods, wire models do not sour and can be easily dismantled and reused.
Scheme of fastening on threaded rods
Conclusion
Choosing the optimal type of suspension will allow you to build a ceiling structure of any complexity. The video in this article will help you understand some of the nuances described above; if you still have questions, write them in the comments below.
Did you like the article? Subscribe to our Yandex.Zen channel
October 10, 2016
Fasteners, hardware, meshes and membranes, Ceiling installation, Operations with ceilings, Ceilings, Ceiling structures
If you want to express gratitude, add a clarification or objection, or ask the author something, add a comment or say thank you!
Euro-suspension for a suspended ceiling: hiding flaws under the frame
Rules for choosing materials for finishing a bathroom ceiling
The Euro-suspension is distinguished by its versatility, which allows the use of this type of fastening when installing various types of suspended ceilings. Most often they are used in cases where the installed ceiling is located at a distance of more than 150 mm from the base one. The suspension is fixed in the base ceiling using a rod with an eye, and the suspended ceiling is suspended using a rod with a hook. The rods are connected with a spring part, which allows you to subsequently adjust the height of the frame.
A universal euro-suspension is a great opportunity to hide all the shortcomings and flaws of the ceiling surface
This type of suspension has undeniable advantages:
- Does not require much effort during installation and replacement;
- Used to install sloping and domed ceilings;
- Withstands loads up to 10 kg.
Purpose and design of the Eurosuspension for the Armstrong suspension system
Euro-suspension is used as a fastener for the suspension system to the base of the ceiling. The most commonly used sizes are 500 mm and 1000 mm. In general, the standard sizes of Euro hangers vary from 250 mm to 3000 mm.
Armstrong ceiling hangers are a universal fastening element. Most often, hangers are used when installing suspended ceilings, for example, grilyato, metal, mineral slabs, etc.
Suspensions are used when installing a suspended ceiling, when the distance between the base and Armstrong suspended ceilings is significant.
Armstrong ceiling suspension in a specialized environment is called Euro suspension.
The Euro suspension consists of the following elements:
- rod with a ring - attached to the base of the ceiling;
- rod with hook - attached to the supporting profile of the system;
- a spring that allows you to adjust the height of the frame.
High-quality Euro suspension is a fastening element of the suspension system, made of galvanized steel. It is passed through the holes of the main profile. Euro-suspension provides reliable fastening of the suspended ceiling. With the help of Eurosuspension, additional under-ceiling space is provided for placing and hiding communications, as well as for their maintenance.
The main function of the Eurosuspension is to attach the entire suspended ceiling mounting structure to the base element of the building.
Thanks to the use of Euro-suspension, the surface of the suspended ceiling is smooth, and differences in the base ceiling in the room are hidden.
Purpose of Euro-suspension for suspended ceiling:
- reliable fastening of the suspended ceiling;
- organization of under-ceiling space for convenient placement of communications and their maintenance.
Features of ceiling hangers for plasterboard
Ceiling hangers are a universal product, the functional purpose of which is to provide reliable fastening of drywall and perform certain decorative functions for the coating.
These elements not only help to obtain a perfectly flat surface of the ceiling covering, but also give the structure special stability and strength, significantly improve heat and sound insulation characteristics, and help in creating a design of any complexity.
Armstrong ceiling pendants: what is it
Armstrong ceiling hangers include 6 mm metal rods, which are connected to each other by a curved spring with holes. These rods can be moved and the height of the product can be adjusted. If she is released, then she fastens them very tightly. The upper part of the reinforced suspension rod is profiled in order to securely fix it in the fastening unit.
Correct installation of the Armstrong ceiling involves hanging it from the guide profiles at intervals of 1.2 m. The nodes should have a distance of no more than 450 mm from the wall. In this case, the line of the suspension device is located along the length of the room with a shift in one direction and the other, so that the suspension units are arranged in a checkerboard pattern. The components are supported by additional elements, which are located diagonally from the main one. The massive liners of the system are reinforced at the corners and, if possible, are located tightly to the wall.
Application of suspensions
Suspensions in slatted ceilings
Installation of suspensions in slatted ceilings
- We attach one side of the suspension with a dowel-nail to the base ceiling.
- We insert the other end into precise engagement with the special stringer of the frame: it has factory-ready special holes.
Hangers for sloping ceilings
The special fastening of the suspension to the ceiling creates its slope.
We make such sloping ceilings by simply extending the suspensions:
- We install the building level at the ends of 2 stringers;
- align to the horizon;
- We move the level to the other ends of these stringers, leveling them to the horizon, but slightly higher or lower than the first two ends.
Suspensions in plasterboard ceilings
Suspensions for mounting multi-level ceilings
- Suspensions are convenient when installing large boxes when the length of an L-shaped direct suspension is not enough, as well as when installing leveling plasterboard ceilings.
- This is especially necessary when new ceilings need to be located at a large distance from the base ceiling for technical or design reasons.
- The technology for manufacturing a suspended plasterboard ceiling or plasterboard box involves the use of not only direct hangers, but also rod ones; vernier hangers are also acceptable.
It is better to place the frame into the horizon not with homemade, but with factory-made direct hangers. A correctly selected ceiling suspension guarantees the reliability and quality of the structure, and will also extend its service life.
Stage six. Sheathing with plasterboard sheets
The sheathing procedure is quite simple and does not require a detailed description.
Step 1 . To cut drywall, mark the required size, attach a rule or profile, and then cut the material with a knife. Hang the cut part out and break it, cut the paper from the bottom. Use a plane to straighten the cut line.
Drywall cutting
Expert opinion
Sergey Svistunov
Specialist in the design of buildings and sewer systems. Knows everything about construction and renovation.
Before starting installation, chamfer the edges that will adjoin adjacent sheets at an angle of 22.5° (using a knife or plane). Thanks to this, in the future it will be possible to properly putty the joints.
Tighten the screws evenly, avoiding distortions
Step 2 . To install drywall, you will need an assistant. Together, lift each sheet and install it in place, attaching it to all profiles along the contour. Tighten the screws evenly, without distortion. The caps should not stick out above the surface, but they should not be recessed too much either - they should be located flush with the surface or 1 mm lower. Tighten the screws in increments of 15 cm, departing from the open edges by 1.5 cm, and from those covered with paper by 1 cm. It is also important to offset the hardware on adjacent sheets by about 10 mm relative to each other.
Step 3 . After completing the installation, putty all the joints, first cleaning them from dust and treating the cut edges with a primer. Take a spatula, fill the seams with it, glue the reinforcing mesh in the center of the joint and press it in. Apply a second layer of putty over the mesh. Similarly, treat all the places where the screws are screwed in.
Step 4 . After sealing the seams, you can begin finishing. A plasterboard ceiling can be covered with wallpaper, painted, or you can apply decorative putty.
After sealing the seams, the tiled surface is ready for any type of finishing
Performance characteristics of Armstrong ceiling components
Structurally, panel cladding is just slabs of a certain composition and material, laid on a supporting frame made of galvanized profile. This entire mass of parts and components for the Armstrong suspended ceiling is held on the concrete floor using adjustable hangers.
The frame is assembled like a construction set from individual planks
The main difference in the different types of Armstrong ceilings is the material of the slabs. The specific type of panel is selected according to operating conditions:
- For premises of public institutions, shops and offices, warehouses with constant temperature changes, high dust loads and special fire safety requirements, mineral boards based on pressed granules of mineral wool, latex, gypsum and cellulose fiber are used;
- In medical, sanatorium and hospital institutions, in kindergartens and schools, panels with metal coatings that are highly resistant to ultraviolet radiation and sanitary treatment are used to decorate Armstrong ceilings;
- For swimming pools, baths, laundries, kitchens, slabs made of polymer compositions are used that can withstand humidity up to 98% and temperatures up to 120°C;
- In retail and entertainment establishments, Armstrong ceilings are used with slabs of cellular structure made of mineral wool and fiber, which block noise and sounds well and at the same time have excellent fire-fighting characteristics.
With rare exceptions, when decorative slabs are made of glass, plaster or wood, the characteristics of Armstrong ceiling panels with components allow them to be used in almost any room.
Important! They were especially attractive for production and technical facilities, where the ability to repeatedly dismantle the ceiling trim means easy access to communications hidden in the ceiling space.
Thanks to the suspension system, the slabs are easily removed and just as accurately returned to their place, on the supporting corner profile, so repairing the Armstrong ceiling is considered one of the simplest and most affordable.
Attaching hangers
All suspended ceiling hangers attach the profile to the base ceiling.
Installation of a non-adjustable suspension
Fastening direct hangers for supporting profiles of any length.
- We drill holes for anchors in the ceiling according to the markings and screw the hangers.
- Then we bend down each side of the attached suspension.
- Then, to check reliability, we will pull them with some force.
- We mount it in guide profiles.
- We bend the sides of the suspension to an angle of 90 degrees.
- We set the desired profile level with a stretched cord.
- We drill the profile on both sides of the suspension, then fasten it with self-tapping screws.
- We bend the protruding edges of the suspension to the sides so that they do not interfere with the installation of the sheet.
Adjustable Gimbal Installation
Rod hangers allow the frame to be lowered.
- We drill holes in the ceiling for the anchor.
- We screw a special rod to the ceiling.
- We install the ceiling profile in the guides on opposite walls.
- We put the suspension on the rod.
- We insert the suspension into the profile.
- We set the required profile level by moving the suspension along this rod.
- We fix the suspension.
Suspensions in the form of a bracket
Direct ceiling hangers for plasterboard consist of a backrest and perforated shelves. The back hanger is attached to the base surface, the shelves are designed for attaching special profiles of plasterboard construction. When using direct hangers, the distance between the main ceiling and the frame of the suspended structure does not exceed 12 cm, which in the case of shortened hangers is reduced to 7.5 cm.
How to fix a ceiling suspension
All types of hangers, including hangers for suspended ceilings, are designed for attaching a profile to the main ceiling.
Armstrong suspended ceiling components
Suspension systems are elements made of mineral fiber of different thicknesses and lengths, which are installed on Armstrong guides; they can be fixed with a fastening element to the base of the ceiling. Our company offers a wide range of Armstrong components. These products ensure easy installation and prompt execution of ceiling installation work. As components for suspended ceilings, we can note such elements with the help of which a load-bearing frame is formed.
Armstrong guides are products that ensure a strong installation of a suspended ceiling. To securely fix them under the ceiling, wall corners are used on which a metal profile is installed. To add rigidity to the supporting structure, there are suspensions included in the components for the ceiling. The metal structure is supplemented with strips; they are required to ensure reliable fixation of mineral fiber slabs.
Homemade options
If necessary, pendants can be made with your own hands from available materials. For large-scale work, this will take a lot of time, so self-production is more suitable if there is an acute shortage of conventional components.
Options:
- Using UD fragments. The distance to the wall is measured, an element equal to the thickness of the rack profile is cut off with a margin of 5–6 cm. At the level of 50–60 mm, the ribs are trimmed and the product is bent. Overlapping areas are screwed with self-tapping screws. The resulting corner is set and secured.
- Manufacturing of parts from steel sheets. From leftover material with a thickness of 0.5 mm, strips of the required length and width are cut out. The plank is drilled out and a U-shaped figure is formed. For rigidity, you can insert a fragment of a wooden board into the center.
- CD pendants. As in the first option, the required size is determined, but with a large margin. The edge facing the base is trimmed along the ribs. The sections are bent so that three support legs are obtained, in which holes are drilled for the dowel. The other edge is formed using the same algorithm, but only the back of the profile is bent. The two remaining ribs will extend onto the frame post.
Making homemade hangers is justified only for small volumes of work; they can also be used on large structures, but time losses can reach up to 30%.
Homemade parts will complicate the process a little, but will allow you to achieve the desired result.
Ceiling suspension system Armstrong
For ceilings made of mineral fiber on an invisible suspended structure, you can install strips with an edge: SL2 or K2S2.
If you choose a semi-hidden system, then the best choice is the slabs:
- Mineral fiber;
- Metal;
- Tree with edge vector.
Armstrong ceiling design
The suspension system includes a steel frame that includes locking guides assembled in a square or rectangular shape. The main side of the guide profile has a white coating, which is produced on technological equipment. Lamps that are suspended from the base are built into the suspension system. The important guide rails of the hanging device are equipped with vertical slots along the length at a certain interval to secure the slats. The suspended system can be used to install metal, mineral fiber, fiberglass tiles.
The T-shaped profile is made of android aluminum, the ceiling design using the suspension system is of good quality and is durable in use, as well as corrosion-resistant design. Aluminum wall corner is used for installation in many rooms.
The wall corner is considered a horizon-forming component of the frame, which provides the product with an attractive appearance. Suspensions allow you to adjust the level of the suspended ceiling from the main one, covering damaged areas, they create levels of the ceiling surface.
They can be of the following types:
- Rods with springs;
- Brackets;
- Wire.
One of the most common suspension options are products consisting of rods and a spring bracket with holes.
To install the suspended structure, a standard scheme is used, allowing craftsmen to install the product quickly and accurately. The suspended ceiling will serve for a long period of time and is durable in use.
Everything about installing and repairing ceilings with your own hands
- The decision is made on a case by case basis . There is simply no single recipe for all occasions.
By the way, if the attic ceiling is insulated, then lathing may not be needed at all. In this case, its role can be played by the rafters, between which the insulation is laid. If, of course, there is a small step between the rafters.
- To line the ceiling, you can use any type of board: deck, facade, parquet, even laminate, which until recently was used only as a floor covering.
- Or take a clapboard board. It is narrower, the texture of the wood is not so pronounced on it, but the surface design is achieved in a different way. One of them is different methods of coloring, for example: alternating dark and light shades, as in the example below.
This includes: sealing joints between gypsum board sheets; puttying the points of fixation of sheets to the frame in order to hide the prominent screw heads; Puttying the entire surface of the ceiling if it is to be painted. Speaking about false ceilings, it should be noted that the most interesting and varied decor can be created using various wood materials.
- using the wrong profiles;
- use plasterboard with a thickness of 9.5 mm;
- The frame of the suspended ceiling is assembled according to the principle “the narrower, the stronger,” that is, a step of 30–40 cm is taken between the main profile over the entire surface.
- the supporting profile and gypsum board sheet are secured with screws to the guide profile (PN);
- the seams are sealed incorrectly: they use the wrong putty, bad reinforcing tape and do not make a covering layer.
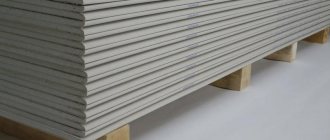
Let's start the sheathing, using KNAUF sheet with a thickness of 12.5 mm. It is impossible to use material of a different thickness (exceptions are side curved surfaces). To secure the sheets, we use a special lift, which greatly facilitates the work of constructing the ceiling - you can work alone.
Euro hangers made of galvanized steel from
offers high-quality Euro hangers for suspended ceilings made of galvanized steel.
Advantages of our Euro-suspensions:
- Euro suspension is universal for various suspension systems;
- The zinc coating of the Eurosuspension guarantees protection against corrosion;
- The Euro-suspension does not require painting, as it is located in the closed part of the suspended ceiling system.
We also manufacture custom suspension rods of the required length (from 125 to 2000 mm).
Technical characteristics of the Euro-suspension for suspended ceilings
| thickness (mm) | 0.45; Ø 3.00 |
| length (mm) | 250-2000 |
| standard size (mm) | size (min-max) 100-350, 400-800, 850-1600 |
| equipment | 25x24 — 0.6, 1.2, 3.6 |
| steel | HDGI; steel OTs 08ps 08kp |
| maximum load (kg/m2) | up to 10 kg |
At the buyer’s request, the order may include not the Euro-suspension assembly, but an adjustable spring single Primet suspension and suspension rods made of galvanized wire with a diameter of 3 mm with a ring or hook in packs of 100 pcs.
Euro-suspension made of galvanized steel for suspended ceilings is designed for a long service life and meets the requirements of Russian and international quality standards.
Technical characteristics of Armstrong ceiling panels with components
The standard size of decorative slabs is 60x60 cm; for high-rise ceilings, for example, in industrial premises or entertainment facilities, Armstrong panels measuring 60x120 cm can be used. Structurally, this ceiling is no different from the previous one, the only thing is that there are fewer transverse strips and more installed wire hangers.
Main characteristics of standard mineral fiber board:
- Thickness - 12-15 mm;
- Moisture resistance – water vapor content in the air up to 70%;
- Thermal conductivity – 0.05562 W/m*oC;
- Sound insulation – up to 54 dB.
For your information! Fiber panels are the cheapest, lightest and most accessible, so half of all Armstrong ceilings are built on vermiculite and mineral fiber.
Disadvantages include extremely low mechanical strength and moisture resistance. As soon as you drop the stove once or fill it with water, the material completely or partially fails.
Calculation of the number of components for Armstrong
Armstrong ceiling weight with components per m2
The thickness of the panels may vary, depending on the material and category of the room. The standard thickness is 12 mm, but can be 8 mm or 22 mm. Accordingly, the mass of the structure also differs. For example, the weight of an Armstrong suspended ceiling per 1 m2, when using PVC or mineral fiber cladding, is 2.75 kg, metal panels are tightened up to 6 kg.
The weight of 1 m2 of Armstrong ceiling with panels in a vintage design, for example, made of mineral glass, can reach 11 kg. Decorative panels always come complete with a supporting profile. The edge of the slab must match the shape of the supporting shelf, otherwise it will be impossible to lay the material on the frame.
Of the most popular models, Stepped, Tegular, Square, the latter is most often used for making Armstrong ceilings yourself due to its simple installation scheme.
Types of suspensions and their descriptions
Now I will talk in detail about each type of product and describe its advantages. You just need to read the information and choose the solution that best suits your ceiling. All options have been tested in real conditions and proven to be reliable.
Type 1 – straight suspension
This is the most common and popular option, which is used in almost all plasterboard structures. The product has the following features:
This is what the classic version of direct hangers looks like
- The total length of the products is 300 mm and the width is 30 mm, this configuration is not accidental and was designed specifically for the 60x27 mm plasterboard profile;
- The products are made from galvanized steel sheets with a thickness of 0.4 to 1 mm. On my own behalf, I will say that you should choose options made of steel with a thickness of 0.6 mm or more, as they have high rigidity and will reliably hold the structure . Also pay attention to the quality of the galvanic coating - there should be no untreated areas or other flaws on the surface;
- If you need to secure the structure at a great distance from the ceiling, you can use extended hangers. There are special options that can be up to 520 mm long . They are most often made to order and have a fairly high cost, but if you need to significantly lower the level of the ceiling, then you can use this particular solution;
Special suspension options allow you to mount the frame at a great distance from the base
- The hangers are fastened through two holes in the middle, and the elements are attached to the profile using self-tapping screws. Everything is quite simple and at the same time very reliable, the main thing is to position the nodes correctly and securely fix them. The distance between the suspensions on the ceiling should be no more than 600 mm, this is the step with which they are most often located;
The work is simple, which is why hangers are so popular among those who do the work themselves
Summarizing all of the above, we can conclude that this option is excellent for standard situations when the structure does not need to be lowered much and the ceiling is not particularly complex.
Another huge advantage is the affordable price; standard options cost from 5 to 8 rubles, depending on the manufacturer and the thickness of the metal from which the suspension is made.
Type 2 – anchor suspension for PP profile
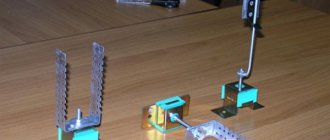
If you need an adjustable ceiling hanger, then this option may come in handy. It is very different from the above option:
The structure consists of these components
- The main element of the product is the fastening part, which has grooves so that it is inserted into the protrusions of the main profile and securely held in them without any fixation. At the top of the suspension there is a spring clip for the pin, thanks to which you can adjust the position of the unit; when the plates are compressed, you can move the suspension up and down, and when you release them, they will be securely fixed in the required place;
Thanks to the shape of the structure, the pendant holds securely without screws
- The second component is the suspension rod; it is a product made of steel wire with a diameter of 4 mm with an eyelet in the upper part for attaching the element to the ceiling. The rod is inserted into the clamp and positioned at the level you need. The length of products can vary in the range from 350 to 1500 mm; you need to select a specific option based on the characteristics of the object;
The structure is very easy to assemble
- Products must be made of steel with a thickness of at least 0.7 mm; their configuration may differ from one manufacturer to another. Personally, I use products from the Knauf and Metalist brands, they have proven themselves on the positive side;
This is what the anchor suspension looks like from
- The cost of the product consists of two parts: the price of the suspension (approximately 11-13 rubles) and the price of the rod (it is selected individually and costs, depending on the length, from 5 to 20 rubles). As you can see, this option is more expensive than the previous one, but it is not the most expensive either;
- Fastening with the help of these hangers is carried out as follows: first, the position of the elements is marked; they are located along the profile at a distance of 60 cm from each other. Then you need to drill holes with a diameter of 6 mm and a depth of 50 mm . Special 6x60 ceiling anchors are inserted into the holes, which are a fastening element with an eye for the suspension rod;
This is what a ceiling anchor looks like
- When the anchors are installed, rods with hangers are hung in them, after which they are inserted into the profiles and the ceiling suspension stand is adjusted to the desired level. The result is approximately the same design as shown in the photo; here it is important to set everything level.
Suspended ceiling structures of this type are quite reliable, each suspension can withstand about 20 kg
Type 3 – vibration suspensions for the ceiling
This type of product, such as a vibration suspension for the ceiling, has a number of features:
This option is used where it is necessary to improve sound insulation performance
- The products are designed to reduce noise in the room, and the design always contains a vibration-isolating element, which can have a variety of configurations;
- The cost of suspensions of this type is very high, so you should not use them unnecessarily;
- To achieve the best result, it is not enough to use only hangers; you need to isolate the frame and the space under the structure.
For maximum efficiency, vibration suspensions should be used in combination with other materials.
Let's look at the main product options, I would divide them all into 4 types, although I think that you can find many other options that are less known on the market.
Here are the main types of vibration suspensions
| Product type | Design Features |
| Standard vibration suspension | The simplest and most budget option, which is most often used in the private sector. The dimensions of the ceiling vibration suspension are similar to the usual options; its main difference is the presence of a vibration damping element, which is located between the ceiling and the fastener itself and reduces the vibrations that come from the building. The price of such products is about 90 rubles per piece |
| Vibration suspension with a polyurethane platform | A better and more reliable option, which is a damping pad with fasteners attached to it, as in a conventional direct suspension. This type has high soundproofing characteristics and is used in public buildings and structures where the noise level is high and needs to be eliminated. The cost of such products starts from 250 rubles |
| Removable vibration platform | This type is a design in which a bracket with a mounting platform is connected to a suspension through a vibration-isolating element. The advantage of this solution is the ability to mount hangers of different lengths, that is, you can turn standard mounts into soundproofing ones. The cost varies from 300 to 400 rubles |
| Anti-vibration mounts | This option differs from all those described above and belongs to the category of professional fasteners. Unlike all the options described above, the design consists of a fastening unit like an anchor suspension and a threaded part on top into which an M6 pin is screwed. That is, the fastening is inserted into the grooves of the profile, but for reliability there are eyes on the side for self-tapping screws, and the connection to the ceiling is made through a pin. The cost is about 350 rubles |
Such fasteners dampen vibrations well and can withstand high loads.
For the private sector, the simplest option is quite enough; it is well suited for domestic conditions and costs several times less than others.
Type 4 vernier suspension
This option is least familiar to both developers and professional specialists, however, it can be used to securely secure complex ceiling structures. The product consists of the following parts:
This is what the assembled product looks like
- The lower part is needed to fix the structure on the profile; it can be made in the form of a clamp, or it can be a fastening element with protrusions for grooves in the profile. There are many holes in the upper part that are needed in order to align the structure in the required position;
The lower part is needed for mounting on the profile
- The upper part is necessary in order to attach the vernier suspension to the ceiling; for this purpose, an eyelet is made there. The element itself is a bar with many holes in order to accurately set the level of the ceiling structure. The length can vary, most often it ranges from 400 mm to a meter;
This is what the top looks like
- The third important element is clamps or fastening brackets; these products are necessary in order to secure the entire structure in a certain position. Their design may vary depending on the manufacturer.
The bracket is needed to fix the vernier suspension
As for the workflow, the instructions for using this option are as follows:
The installation diagram is not complicated
- First you need to mark the position of the fasteners on the ceiling; they are located in increments of 60 cm along each profile;
- Next, you need to drill holes according to the size of the dowels, after which the upper part of the suspension is taken, its eye is bent, and this element is fastened to the ceiling through the hole;
- Then you need to insert the lower part into the profile, set the level of the ceiling and secure the structure with one or two brackets. The result of the work is shown in the photo below, everything is simple and reliable;
This is how the structure is fixed
- If there are fastening eyes, screws are tightened; this should be done only after the ceiling frame is fully aligned.
The cost of the structure consists of three components: the lower part will cost 30-35 rubles, the upper part, depending on the length, will cost 25-50 rubles, and the bracket costs approximately 10 rubles. One element can withstand weight up to 40 kg.