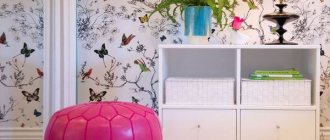
For many, wallpapering is the best option for renovating a room. To obtain a decent result, it is necessary to carry out the process correctly. The appearance of the material will look more attractive if there are no seam zones or other flaws. Therefore, direct joining of wallpaper is often chosen, which requires care and skill from the master. The article will describe in detail the direct joining of wallpaper, what it means, and how to do it.
What it is
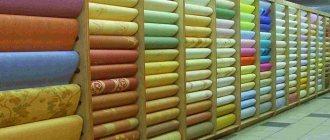
There are different types of wallpaper, for this reason the material remains in demand for a long period. You can glue wallpaper with your own hands, which significantly saves the family budget, but to get a high-quality result you need to know how to properly join wallpaper.
Usually the best option is to join the panels end-to-end, joining pattern 64, what does this mean, many beginners ask. We are talking about working with the popular wallpaper width of 64 centimeters, or the step of the pattern through this distance. This is a standard size and most often you have to work with this type of canvas.
The complexity of the entire process depends on the chosen method of joining the wallpaper. If you are going to glue the wallpaper end to end, then this means gluing them close to each other, without leaving any gaps. This is not an easy option, but it gives the optimal result in terms of aesthetic beauty of the finish.
Preparing walls for gluing
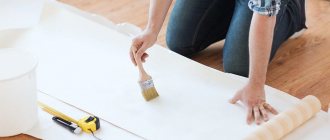
Wallpapering at the joint requires careful preparation of the walls. It is necessary to remove old wallpaper, fasteners used for hanging shelves, and decorative elements. The cracks and irregularities are puttied, and then the walls are coated with a primer. After the coating has dried, you can proceed directly to gluing, after first turning off the power to the sockets.
When doing this kind of work for the first time, it is better to choose light wallpaper. Even if a small gap appears at the joint, the white primer underneath will make the flaw invisible.
Wallpapering
Decoding the markings on the wallpaper
There are special markings on the wallpaper in the form of letters and symbols that help the buyer understand what type of wallpaper is in front of him. Knowing their meanings gives you an understanding of what rooms they are suitable for, how they will need to be looked after, and what properties are typical. So there are the following marking divisions of wallpaper:
- By constituent elements;
- According to the specifics of gluing;
- According to light resistance;
- By water resistance;
- According to the specifics of removal.
The letter marking below indicates the materials from which the canvases were made:
- A- acrylic;
- B – paper;
- BB – foamed vinyl;
- PV – flat vinyl;
- RV – relief type of vinyl;
- TKS – textiles;
- STR – structural, which should be painted afterwards;
- STL – glass fiber type.
There are special markings on the wallpaper in the form of letters and symbols that help the buyer understand what type of wallpaper is in front of him.
The most difficult case
It is most difficult to hide joints with a gap when the edges of the panels have diverged so much that the wall is visible. To hide the unmasking seam, you need to try to move the edges and fix the canvas using proven glue. Many two-layer wallpapers react differently to moisture. Most trellises swell and become plastic when liquid glue is applied. After gluing to the wall and smoothing, the width of the canvas can increase by several millimeters, and after drying the reverse process occurs.
To hide the resulting gap, you first need to moisten the edges of the canvas using a spray bottle or spray bottle. After 10-15 minutes, the wallpaper will become soft, and you can lightly press the canvas with your hands and try to connect the edges of the panels. The seams are glued with PVA glue and rolled with a rubber roller.
If it is not possible to hide the joint in this way, for example, joints on paper wallpaper are very difficult to hide in this way, you can try to decorate the seams, as in the photo.
Colored stripes and individual fragments are suitable for decorating joints; you just need to stick them on the panel so as to hide the defect and at the same time distract attention from the problem area. Wallpapers of different patterns will help to ideally hide a frayed seam, since a brighter color always attracts the eye. Before you make a joint from different wallpapers, you need to plan an overlap transition. The glued new trellis does not even need to be cut.
Designations on the wallpaper - joining the pattern
There is a separate version of the symbol showing how to combine the wallpaper on the wall when gluing it. The symbols selected are the pattern of arrows; depending on their direction, the method of gluing the pattern is determined. There are the following options:
- Without joining, the material can be glued freely, there is no need to monitor the alignment of patterns;
- Connection at 1st level. It is required to glue the canvases to each other at the 1st level, that is, when the pattern is connected through a certain segment. This is exactly the answer to the question: what does joining a pattern on wallpaper 64 mean? 64 this is how many centimeters the pattern is repeated;
- Stepwise gluing, the new one is attached to the glued sheet halfway up;
- Counter gluing is indicated by arrows directed in different directions, then each strip is glued with a 180-degree turn;
- Straight sticker, arrow points straight. Then you need to glue strictly in the 1st direction;
- An option can be used when you need to precisely move the canvases when gluing. Then the numerator is the height of the pattern, the substitute is the value of the wallpaper offset.
There is a separate version of the symbol showing how to combine the wallpaper on the wall when gluing it.
We work with non-woven material
We found out what direct joining of wallpaper 64 means - this is a way to get a seamless wall surface. To better understand how to perform such a task, let’s consider the process using non-woven wallpaper as an example.
Let us briefly recall the advantages of canvases:
- differ in tensile strength;
- do not ignite;
- retain thermal energy in the room, protect from extraneous sounds;
- not susceptible to ultraviolet radiation;
- differ in reasonable cost.
Let's figure out how to hang non-woven wallpaper without seams.
To begin with, vertical markings are made on the wall. In this case, a fifteen-centimeter indentation is made from the corner plot.
If the wallpaper material does not have a bright pattern, it is allowed to cut several strips.
Turning them face down, coat them with glue one by one and allow time for impregnation. We lay the canvas on the surface, smooth it from the ceiling to the sides, squeezing out the air.
How to properly join non-woven wallpaper? We apply the next strip to the glued strip exactly along the joint, and carefully move it over the area with a spatula.
How to combine wallpaper with a pattern? The combination of patterns is checked when cutting the canvases. It is possible that the stripes will come out with a certain margin, which is cut off after the glue has dried.
To adjust the pattern, there are several joining methods:
- offset - the picture is shifted by half, the installation resembles a chess board;
- loose – does not require adjustment, the designs look chaotic;
- counter docking - what is it? The material is adjusted by oppositely gluing the next strip to the previous one;
- repeat pattern - repeating patterns require adjustment and repetition through each stripe, because they are present on all the walls of the room. The repeatability of the pattern gives the walls a sense of continuity.
- shifted alignment is used to adjust the next canvas with a vertical shift;
- What does direct joining of wallpaper 64 cm wide mean? This refers to canvases combined at the same height with direct application of the pattern.
Types of connections
Typically, wallpapers are made not only in different colors, but also in patterns. Drawings are made with repetition at a specific distance, this value is called rapport. And there are different types of gluing canvases, based on this parameter.
Drawings are made with repetition at a specific distance, this value is called rapport.
Direct docking
This technology is selected when the patterns in each roll at the beginning of the strip have the same appearance, and the repetition occurs evenly along the entire length. This type is indicated by 2 arrows that are directed towards each other. A number is written next to it, indicating how long the pattern is expected to be repeated. Using this figure, they calculate how long the strip will need to be cut in order to match the patterns perfectly.
This technology is selected when the patterns in each roll at the beginning of the strip have the same appearance, and the repetition occurs evenly along the entire length.
Displaced
This type is prescribed when geometric elements are depicted on the canvases. The symbols used are two arrows facing each other, but one stands slightly lower to the other. Then in different rolls the pattern begins with different fragments. When gluing the wallpaper, it moves to the floor of the repeat indicated on the package.
To reduce emissions, experts recommend cutting strips from two different rolls.
This type is prescribed when geometric elements are depicted on the canvases.
Free
In this case, the drawings do not have a specific order and are a chaotic image. Then, when cutting strips, there is no need to monitor rapport; it is not prescribed. It will be possible to glue the canvases simply one after another without joining the elements.
You can simply glue the canvases one after another without joining the elements.
Counter
Suitable for a variety of patterns. A sign of arrows is drawn on the packaging, each directed in its own direction, opposite from the other. Each new strip is glued opposite to the previous one.
Suitable for a variety of patterns.
Mixed
In this case, it will be possible to use different gluing options during repair work. The main area is glued with one of the selected types of gluing, and hard-to-reach areas, such as corners, can be glued with a lighter option to speed up and simplify the process.
In this case, it will be possible to use different gluing options during repair work.
How to make an even seam if the edges of the roll are slightly frayed?
It often happens that as a result of damage to the packaging or due to improper storage, the wallpaper can become frayed on one or both sides of the roll. What should you do if you come across just such a product? How to glue the joints of vinyl wallpaper (or other types) so that they remain invisible?
In such situations, the first strip is glued using the standard method, and the second strip overlaps the first strip. To do this, on a strip that has a curved and disheveled edge, you need to draw a straight line (stepping back 1-2 cm).
The second stripe must be placed exactly along the applied markings. Now, using a ruler and a knife, carefully remove the excess part from the top and bottom layers. This way you get an even and invisible seam. Additionally, it should be rolled with a roller.
Pros and cons of different types of docking
If you compare the options for butt gluing, they are selected according to the type of image, and then you need to take into account their features when choosing wallpaper. The easiest method to perform is free gluing; even a beginner can easily handle it.
The direct and offset option involves throwing out some of the wallpaper, which can increase its consumption. But often the patterns themselves are more attractive.
The size of the ejection depends on the length of the repeat; the smaller it is, the more canvases will have to be discarded.
If you choose between working end-to-end or overlapping, then the second method is more striking and is usually used only for working on problem corners. If you choose a thick type of wallpaper, the result may become too noticeable and untidy.
If we compare end-to-end gluing options, they are selected based on the type of image.
How to join the edge of wallpaper
First you need to prepare materials and tools
The connection of two canvases depends on many factors. First of all, you need to consider the working material. If paper wallpapers allow for overlapping pasting, then with vinyl wallpaper such pasting is impossible due to the fact that vinyl does not stick to itself.
What types of connections can be used when combining two canvases:
- Wide overlap - this combination of canvases is used if the space being pasted has a strong defect (usually the corner part). This method is used extremely rarely, as the result is a too noticeable, thick seam.
- Narrow overlap - in cases where end-to-end gluing is not possible due to a small surface defect, then this method can be used, with adjacent strips overlapping each other by no more than 3 mm. The main disadvantage of this method is the violation of the pattern, as well as the visible trace of the seam.
- Butt connection is the most optimal connection method, which is recommended for use when gluing. The edges of the two canvases must be pulled towards each other until a small tubercle is formed. Once the canvas has dried, the mound will be smoothed out, and the seam location will be perfect and invisible. It is advisable to use this method only on straight and perfectly flat planes.
Useful tips
Many people prefer to glue wallpaper themselves. It’s useful to know the tricks of professionals that help you understand how to glue wallpaper end-to-end without gaps. The following operating principles are highlighted:
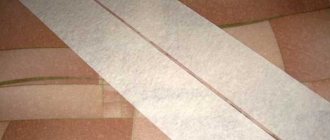
- To prevent the edges from bending or bending, you can use a special tape for gluing wallpaper at the joints;
- The edge area of the strips must be coated well with the adhesive solution;
- After connecting the canvas to the wall, a rubber roller is rolled on top to strengthen the coupling;
- When gluing, you should not stretch the canvas; the moment leads to peeling areas after drying.
After connecting the canvas to the wall, a rubber roller is rolled on top to strengthen the coupling.
Gluing wallpaper will be easier if its markings are studied in advance when choosing a material, then the master will know in advance what method of work will need to be performed. If rapport is observed, you can easily get a single pattern on the walls, pleasing the owners of the room.
Five ways to hide joints
Correctly hiding a defect at a joint is often even more difficult than gluing wallpaper correctly. You can learn how to work with trellises from the instructions, while you have to come up with and look for ways to hide defects on your own.
You can hide joints using one of the following methods:
- Clean the edges of the wallpaper from any remaining glue;
- Shade or paint the walls to hide the background, revealing the gap between the joints;
- Try to flatten the wallpaper panels after first slightly moistening the trellis material;
- Paint the wallpaper or hide the joint using a special tinting paste.
Advice! Before trying to hide joints with paint or tinting compound, you will need to practice in a closed area, for example, behind a closet, where the furniture is covered by wallpaper.
The easiest way to hide revealing light spots is to try to paint over them with special paint or pencil. To do this, you will need to buy a special coloring composition.
To hide the white stripe between the panels, just apply a tinting color to the seam using a brush or ear stick. Wipe off excess paint with a clean napkin.
Unfortunately, hiding the joints in such a simple way is only possible with plain wallpaper, if you can choose the composition of a suitable color.
The riskiest way to hide seam problems is to use tinting paste. To prepare it, you will need to trim the wallpaper, from which the surfaces with paint are removed with a sharp knife or sandpaper. Colored paper dust is mixed with glue and the joint is rubbed. In this way, restorers restore old books and paper products; the method is complex, so it is not always possible to hide the problem.
In particularly difficult cases, owners decide to use polyurethane decorative strips that are glued to the joints. In this way, you can hide any defects, even if the shade of the panels is different.
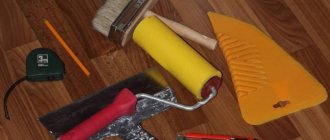
What equipment will you need for your work?
If you hire experienced workers to complete the work, you will have to spend about the same amount on services as on material. You can save money by gluing yourself, but you will have to familiarize yourself with the process of performing the work and everything necessary.
Seamless wallpapering
Joining plain wallpaper
Inventory:
- wallpaper;
- wallpaper cutting knife;
- glue;
- glue bucket;
- brushes of different widths for applying glue to wallpaper;
- wallpaper spatula;
- plumb line
You can start working on wall coverings only if you have all of the above.
Joining wallpaper with window casing