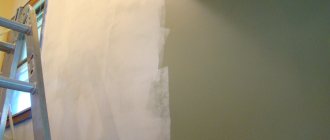
What determines the drying time of the primer?
It is impossible to answer this question by simply stating that the primer takes so many minutes or hours to dry. And that's why:
- primers come in different compositions: water-based, acrylic, alkyd, etc.;
- walls can also be made of different materials: wood, concrete, brick, plasterboard. In addition, when finishing them, a primer is often applied to each rough layer - plaster, starting and finishing putty. All of these materials have different absorption properties;
The choice of soil depends on the wall material - the primer can be applied in one layer, or maybe in two or three. Primer layers of different thicknesses do not dry equally;
- finally, in the room where finishing is carried out, there may be different air humidity and temperature - parameters that directly affect the drying speed of any “wet” materials.
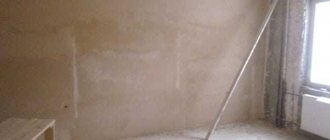
Indoor conditions affect the drying speed of the composition
Note! On the packaging of the primer, manufacturers, along with other recommendations for use, always indicate its drying time. But it is approximate and, as a rule, maximum. Under favorable microclimatic conditions, the primer can dry much faster. This can be important if the time frame for work is limited.
The problem involves several unknowns, and it will not be possible to solve it without proper experience. To do this, you need to know the properties of materials and understand why primers are used in general, which one will cope better with the task.
Compositions of primers and their setting period
Priming is necessary to reduce the cost of paint, disguise damage to walls, protect against pathogenic microorganisms and increase adhesion between elements. But all the benefits can be negated by not allowing the suspension to dry. There are several compositions, and in order to understand how long after the primer you can glue wallpaper, you need to pay attention to the components.
Based on the polymerization rate, the coating is divided into:
- Quick drying. After applying this primer, you can begin further work within an hour. These include alkyd types. The downside of the coating is its high toxicity. Suitable for outdoor use;
- Dries normally. Ready for further use in half a day;
- Long-drying. Dry in a day. These include oil-based soils.
Priming is necessary to reduce the cost of paint, disguise damage to walls, protect against pathogenic microorganisms and increase adhesion between elements.
Curing times for various mixtures
Based on their composition, the following types are distinguished:
Quartz primer
One of the components of a quartz or contact primer is quartz sand. There are three types:
- Based on synthetic resins. Suitable for smooth surfaces. Apply a thin layer. Dries at a temperature of 19-23 degrees for up to a quarter of a day;
- Water-dispersed with the addition of acrylic and latex. Not afraid of harsh operating conditions. Dries in the range of 20 degrees for 180 minutes due to the fact that the components included in its composition quickly evaporate;
- Silicate based. The drying period will be long. Finishing work can be continued after 12 hours. The advantage will be frost resistance. The mixture sets at five degrees above zero.
One of the components of a quartz or contact primer is quartz sand.
Acrylic primer
The soil is used to strengthen walls, ceilings, and floors. The composition consists of mineral components. Penetrates into surfaces up to 3 mm. On porous surfaces, one layer of the mixture dries up to half a day at temperatures above zero, air humidity up to 65%.
When applied to wood, acrylic primer dries for six hours at a temperature not lower than 100 C, relative humidity up to 70%. It is not recommended to carry out finishing work in the open sun, because... the surface will crack. In addition, it will not be possible to treat the ceiling with acrylic. The composition will constantly drip.
If the microclimate differs from the recommended one, acrylic dries in a day!
On porous surfaces, one layer of the mixture dries up to half a day at temperatures above zero.
Alkyd primer
Used for wood or metal. Replaces topcoat. It protects the material from mold, dampness, and corrosion. To understand when you can paint after an alkyd primer, pay attention to the coating. It shouldn't look wet. Based on the composition of the alkyd mixture, the drying time differs:
- Glypthal primer is needed for any metals. Forms an anti-corrosion coating on the material. Dries in 24 hours at 200 C;
- Perchlorovinyl coating is used only for exterior finishing in air, because... releases substances harmful to humans. Used for iron, including those covered with rust. Dries in 60 minutes at a temperature of 21-25o C;
- The alkyd-urethane mixture protects surfaces from mechanical damage. You can continue work a quarter of an hour after application;
- Alkyd-acrylic coatings penetrate deeply into surfaces. They are made on a water basis, drying time is an hour at a temperature of 19 to 23 degrees.
It protects the material from mold, dampness, and corrosion.
Shellac primer
Suitable for damp, untreated wood surfaces. Prevents resin from protruding. The composition contains an alcohol base and resins. The maximum drying time is half a day under recommended climatic conditions.
Suitable for damp, untreated wood surfaces.
Water based primer
Suitable for brick. Polymerization takes place quickly, the waiting time is 120 minutes. Can be applied immediately before finishing.
Polymerization takes place quickly, the waiting time is 120 minutes.
Fast drying primer
Special composition, ready for further work in 15 minutes. If you need to apply more than one layer of solution, first wait until the previous one has dried. Multilayer soil dries up to a quarter of a day.
Special composition, ready for further work in 15 minutes.
How long does it take for a deep penetration primer to dry on a wall?
Deep penetrating coatings are needed to strengthen loose surfaces. They connect the particles to each other and prevent the wall from collapsing. A deep split that may form in the wall is sealed and the crack does not spread further.
Soil mixtures based on minerals or quartz have deep penetration. They cover walls with a large number of pores. They strengthen surfaces and give them a rough structure to increase the adhesion of materials. Drying time is up to a day.
They strengthen surfaces and give them a rough structure to increase the adhesion of materials.
How long does it take for primers to dry?
First, let's tell you why it is so important that the primer applied to the walls dry before finishing them.
If it is a penetrating primer, then it needs oxygen for the polymerization reaction. A layer of putty or paint applied too hastily will prevent this reaction from completing, and the product will not perform its function properly.
Water emulsions applied to plaster or putty soften their top layer. And when you try to paint the wall, the solution will stick to the roller, ruining all the work.
Priming walls: process
It is also not recommended to glue wallpaper onto still damp walls - it will take longer to dry and may fall off.
Therefore, it is better not to violate the technology and follow the manufacturer’s recommendations, giving the primer enough time to dry. It, as mentioned above, depends on its type and base material. We provide data on the main types and compositions. The time in the table is indicated for air temperature 15-25 degrees and humidity 50-60%.
| Type of primer | Drying time, hours |
| Penetrating primers | 1 |
| Universal adhesive primers | 1-3 |
| Acrylic and latex primers | 2-4 |
| Strengthening water-repellent primers | 1-2 |
| Alkyd primers | 8-12 |
| Concrete contact | 12-24 |
| Polyvinyl acetate primers | 0,5-1 |
| Drying oil | At least 24 |
| Bitumen primer | 3-4 |
These are the recommended times for drying one coat of primer. If it was applied in several layers without completely drying the previous ones, the time may increase by 2-3 times.
Advice. If after the first priming there are traces of putty or plaster on the palm, it means that one layer is not enough and you need to apply another one and check the quality of the surface again.
But adjustments are also made by the primed surface itself, its initial moisture content and ability to absorb. For example, dense, hard and smooth materials take longer to dry, while cement-based plaster dries literally before our eyes.
Wall primed with wallpaper
When finishing external walls, weather conditions are important: after rain, the walls will dry longer, and in the wind faster.
But you shouldn’t determine the degree of dryness by eye. There are special devices for this – moisture meters or hygrometers. Of course, there is hardly any need to purchase them for one-time cosmetic repairs in the apartment. But it will be very useful for professional finishers. If there is no such device, it is better to follow the recommendations of the primer manufacturer and maintain the time specified in the instructions.
If the room is cold or damp, you should think about how to correct the situation - turn on the heaters, open the windows to remove excess humidity.
Priming walls before wallpapering
Wallpaper peeling off surfaces, rust or fungus appearing - such negative phenomena are encountered when you refuse to pre-prime the walls. The procedure does not require a long time, its technique is simple, it does not involve expensive materials or complex instruments. Treated surfaces absorb less glue and the finishing coating adheres more firmly to them.
Why do you need to prime the walls before wallpapering?
Impregnation mixtures contain film-forming polymers (oils, resins, adhesive components), drying stimulants, and strengthening additives. Preparation using special compounds allows you to solve several problems at once:
1. The top layer of plaster is secured, thereby preventing cracking and crumbling. If you glue wallpaper onto unprepared surfaces, the coating begins to peel off after a short time: the edges of the panels curl up and the seams between them open up.
2. A polymer layer appears, which reduces the consumption of the adhesive mixture.
3. Dust particles that impede effective adhesion of the adhesive to the base are eliminated. The primer wets dust, dries quickly, and allows you to apply the adhesive solution not only to plaster, but also to metal and wood. The wallpaper lays flat, sets quickly, and there are almost no air bubbles or voids left underneath.
4. The compounds fill all unevenness and holes, level the wall, and mask stains.
5. The primer contains antiseptics that protect the substrate from the influence of moisture and the appearance of fungus. The outer walls of corner apartments are more susceptible to it than others. To reduce cost, glue is sometimes used. This option is very common when doing DIY work, but it has a significant disadvantage: the lack of an antifungal effect.
Pasting with preliminary preparation allows you to keep the coating unchanged for a long time - at least 10 years.
Thanks to the unique selection of components, they fit well on wooden walls. An ideal option for thin non-woven wallpaper, since it contains a lot of pigment that creates a semi-matte film on the base. The scope of application is limited: it is incompatible with drywall and putty, which is applied to gypsum boards. The surface takes quite a long time to dry: at least 15 hours. When choosing, pay attention to the list of ingredients: it’s good if it is supplemented with anti-corrosion and antifungal agents.
They can be used to prime metal substrates; they are also suitable for wood. Disadvantages: the walls will take even longer to dry (at least a day), and there are also restrictions on operating conditions. In damp rooms, glypthal solutions lose their qualities.
The most popular, environmentally friendly, do not smell, dry in only 5 hours, and are not used only for metal processing. There are two varieties: regular action or deep penetration. The second is optimal for unprepared surfaces. This is an ideal option for gluing heavy wallpaper.
When choosing a mixture, pay attention to whether it is recommended for interior work. Perchlorovinyl, phenolic, and polystyrene varieties are not suitable for such purposes.
Primer application technique
Prepare the necessary tools: a roller with a long handle, a special plastic tray (tray) with a recess for removing excess, a brush for treating hard-to-reach places.
1. Remove the old coating from the surfaces, identifying cracks and irregularities. Those places where the plaster holds weakly are tapped with a hammer and the falling off layer is removed. The cracks that appear are cut to a width of 1 cm and lubricated with soil. Defects are covered with cement-sand mortar, leveled, and allowed to dry. It is not necessary to sweep dust from the walls.
2. Since the plane is heterogeneous in structure, areas with a large number of pores should be identified. For this purpose, spray with water from a spray bottle. Those areas where water evaporates faster will have to be primed more thoroughly. To reduce surface roughness and apply evenly, it makes sense to apply a thin layer of putty.
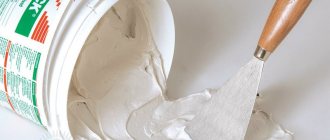
3. Dilute the mixture according to the attached instructions, shake and pour into the tray.
4. The roller is dipped into the solution, rolled along the inclined part and lightly squeezed. Thanks to this technique, it will not flow down the walls.
5. The coating is laid with smooth movements, dipping the roller into the composition from time to time. Corners and joints are treated with a brush. Taking into account how long the primer takes to dry, wait a break before applying the second coat.
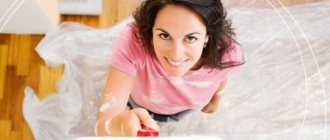
6. You can establish readiness in a simple way. A 15x15 cm square is cut out of plastic film. The fragment is glued to the wall with tape for several hours, and then checked for the presence of condensation. If drops of moisture appear on the polyethylene, it is too early to apply glue. This procedure begins when the flap remains completely dry.
Wear safety glasses and gloves while working. If splashes do get into your eyes, wash them immediately with running water.
Recommendations for choosing and using a primer
Before purchasing, calculate the need for the solution. The average consumption rate is 0.1-0.3 l/m2. For reliability, primer coating is carried out twice (if the wall is not puttied).
1. Experienced finishers advise buying concentrate and adding water to it in a smaller quantity than indicated in the instructions (for example, not 6 parts, but 3). This mixture will be of higher quality.
2. Carefully read the label on the package. Sometimes unscrupulous sellers sell cheap PVA glue. Although sometimes it is specifically used for impregnation, it does not always allow wallpaper to be firmly glued. If PVA is chosen deliberately, it must be diluted with water before processing.
3. If preference is given to a powder primer, the mixture is prepared using a mixer so that there are no lumps, filtered through a metal or nylon mesh.
4. Take into account the location of the walls. For the room adjacent to the bathroom, it is worth using Ceresit 16, which can cover the rust that appears due to corrosion of the reinforced concrete base.
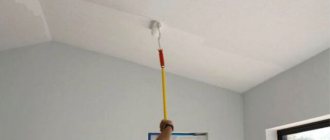
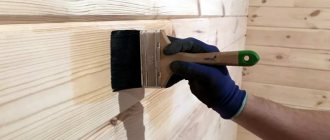
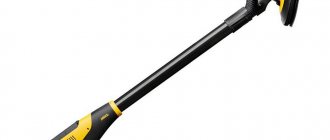
5. You can also prime with a wide brush: it prevents the solution from splashing and applies it in an even layer. But this method is used only before wallpapering. If you use a brush before painting, the grooves from the bristles will remain visible. To simplify the work, the maclave can be attached to a telescopic pipe - this will make it easy to reach the highest areas under the ceiling
6. You should not apply impregnation to non-woven wallpaper before painting: after this, the dye will not be absorbed well, and the decorative coating will be uneven. It is the walls that need to be treated so that they do not absorb moisture from the glue.
7. If you do not apply primer after putty, it will draw moisture from the glue and firmly adhere to the top layer (for example, drywall). As a result, when replacing wallpaper, the gypsum boards will be destroyed.
It is advisable to purchase all materials from one manufacturer.
Priming walls before wallpapering How to choose a primer for walls before wallpapering? Methods and rules for preparing surfaces. Features of applying primer compositions.
How long should I wait for the primer to dry before wallpapering? This question is often asked by amateur craftsmen who have undertaken to do their own repairs. However, there is no single answer to how long it takes for a primer to dry, because different compositions polymerize differently.
For example, there are quick-drying primers. And you can start gluing wallpaper in just a few hours. In other cases, you need to wait 10-12 hours, or even the whole day, before you start gluing wallpaper.
Priming the walls before wallpapering is necessary for this reason:
- Initial impregnation of the walls is required to strengthen the structure of the base materials. A deep-penetrating solution is used here. After polymerization, a durable protective film is formed that protects the walls from moisture and fungus.
- The primer, used immediately before gluing the wallpaper, is needed to ensure that the wallpaper stays on the wall better and longer.
- Almost all primer mixtures increase the adhesion (adhesive ability) of base materials and subsequent coatings. In our case we are talking about putty and wallpaper glue.
- It has been proven that when wallpapering on primed walls, less installation materials are consumed.
- Priming of putty walls is required. Putty materials are too susceptible to moisture, and here impregnation performs an important protective function: it prevents the penetration of liquid from the wallpaper glue solution into the putty wall. As a result, your repair is not at risk of swelling and peeling of the putty.
How to prepare walls for wallpapering
When you decide to replace old wallpaper with new ones, you should not ignore the correct technology for this process. Even if the walls were perfectly prepared during the previous renovation, during operation and when removing the old coating they could lose some of their properties.
The primer is also included in this process, and it is applied twice. Let's describe it in detail.
Step 1.
Removing old wallpaper. To make it easier to remove them from the walls, you need to use special solutions. They evenly moisten the surface, allow the wallpaper to soak, and peel the whole canvases off the walls, preserving the integrity of the finish as much as possible.
Removing old wallpaper
Step 2.
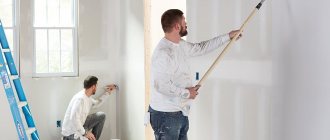
Primer. The product is poured into a special container, a roller is moistened in it and rolled over the walls, leaving no gaps.
How to dilute primer for walls?
Primer in a tray
Applying primer to the wall
Step 3.
Plaster defects. After the primer has dried, all potholes, cracks and uneven walls are filled with plaster or starting putty solution. He is also allowed to dry.
Plaster defects
Step 4.
Continuous alignment. It is applied in a thin layer over the entire surface using finishing putty.
Methods for applying finishing putty
Prices for popular types of putty
Putties
Step 5.
Primer for wallpaper. The putty surface does not have sufficient strength - this can be confirmed by running your hand over the dry wall. You can strengthen it with wallpaper glue diluted with water. But not in the concentration required for wallpapering, but much thinner.
Primer for wallpaper
Step 6.
Drying. Before starting the final finishing, you need to wait 3-4 hours.
How to choose?
How long it takes for the primer to dry on the walls is not affected by its cost. We do not recommend purchasing cheap impregnations , especially those that do not have manufacturer’s instructions. Pay special attention to those where there is one entry “for wallpaper” without indicating on which surfaces the impregnation should be used.
Large quantities of water and PVA glue indicated on the package should also alert you, and if there is also a note “For all types”. Remember well that each surface should have its own approach. We advise you to calculate in advance how much finishing material you will need, and take into account the type and porosity of the surface.
Of course, it is better to order the work to be done by professionals who will ideally calculate the amount of material. But you can do the primer work yourself, you just don’t need to rush. The best option is to start priming in the afternoon and leave the surface to dry overnight, and in the morning you can glue the wallpaper.
Benefits of using a primer
The base becomes stronger due to the formation of a reinforcing film on its surface. The wallpaper will adhere securely to the walls due to impregnation. As a result of treatment with a primer, the walls are cleaned of fine dust and particles of fallen putty. Subsequent surface finishing will become easier. Glue consumption is reduced as the absorbency of the substrates decreases. Using a primer makes it possible to reduce the amount of materials applied. It has antiseptic properties due to the additives included in the composition, which prevent the appearance of various bacteria and fungi.
Floor primer: choosing a suitable solution and features of its application
Concrete floors have high porosity and poor adhesion, which prevents the high-quality fixation of most finishing coatings. Paint, tiles and even self-leveling mixtures will cause you a lot of trouble if you do not apply preliminary priming. We will look at which primer is best for the floor and how to apply it in this article.
DIY concrete floor priming
How long does it take to prime before painting?
They form a loose waterproofing layer on the treated surface, which effectively resists the penetration of moisture into the wall.
Deep penetration primers are used on porous and loose surfaces that need to be strengthened before subsequent decorative finishing. This primer reduces the drying time of the glue, due to the fact that when applying glue to the primer, the composition becomes more viscous. The wallpaper sticks quite firmly to the walls and ceiling. Primers with a mineral base are used as the initial material for leveling the surface. They contain cement. A special feature of this mixture is deep absorption, which allows it to tightly bind the surface. They are odorless, non-toxic, and perfectly fill the pores of loose substrates, giving them the desired density. Ideal for walls finished with chipboard or crumbling plaster. Complete drying time is about 5 hours. Primers for highly specialized applications are produced for treating metal and concrete surfaces.
Primer - what functions does it perform?
A completely reasonable question that may arise in any person’s head is why do you need a primer at all? The purpose of this procedure is to prepare the ceiling or any other surface for further finishing work. Such work can be: puttying, painting, applying liquid wallpaper and much more.
This repair operation performs a very important function – protective:
Ceiling primer performs many important tasks
Liquid paint instead of primer - is this acceptable?
In certain situations, when performing construction work, paint, rather than primer, is used.
In such a situation, the paint is pre-diluted so that the composition is as liquid as possible. Many people ask the question: is it even possible to do this, if this makes any sense?
Liquid paint is not an alternative to a full-fledged primer composition
First of all, when the paint is liquid, it not only penetrates well, but also compacts the surface remarkably well - no worse than primers created specifically for this purpose. But this is only that small part of the iceberg that you see with the naked eye. But what if we look at the process in more detail?
Liquid paint, in fact, contains many large particles of fillers and solvents - they are part of the material. It is because of this that the paint will only interact with the top layer of your surface. At the same time, it will definitely seal all micropores and will not penetrate inside under any conditions. That is, it is better not to prime the surface with paint - not a single specialist will recommend this.
Which primer is better for puttying and painting?
The choice of type of impregnation for walls depends on the material being applied, the type and structure of the surface.
- Prime the walls before painting with water-based or acrylic paint. Before applying water-based or acrylic compositions to concrete, plastered, puttied or previously painted surfaces with similar compositions, it is recommended to use liquid acrylic primers for painting.
- The same impregnating liquids can be used for putty, but the bases must be dense and have good adhesion to them. In the presence of paint and varnish coatings, it is advisable to use concrete contact.
- Pigmented compounds are used to even out the overall color background - to lighten a dark base. Suitable for paints and decorative coatings - wallpaper, plasters, putties.
- The antiseptic composition must be used, regardless of the coating used, in the presence of temperature changes and high humidity.
We do the repairs correctly: grouting tile joints with your own hands.
We learn how to make a decorative panel from decorative plaster here.
Artificial decorative stone for interior wall decoration in an apartment: https://tv-peredelka.ru/decor/elements/iskusstvennyi-dekorativnyi-kamen.html
Factors affecting drying
A primer mixture is a special product that can be used to increase the adhesion of the treated base to the coating. Thanks to the use of such a layer, finishing materials will stick to the walls much better, and the quality of repairs will noticeably increase. As the primer dries, a fairly thin film begins to form on the surface. It is very important to apply it in such a way that there are no smudges, bubbles or lumps. It is worth noting that the drying time of the soil can vary significantly. However, there are several factors that can affect the duration of the process. The main ones include the following:
In most cases, on the packaging of the purchased soil you can find the main characteristics of the material, which are indicated by the manufacturer. The waiting time for the process to complete will depend not only on the type of mixture used, but also on its composition. Before you start applying the primer, it is worth finding out what drying time and features were specified by the manufacturer.
How can you speed up the drying process?
Sometimes there is not enough time to sit and wait for the primer applied to the surface to dry on its own.
In this case, there are some tips from experts that will help speed up the process, perhaps even several times. Each of the proposed options has its own advantages and disadvantages. For example, the main advantages of using quick-drying soil are the following:
At the same time, such products have several huge disadvantages.
In most cases, the composition contains toxins, so the material can be used exclusively for outdoor use.
If, however, the primer is used for interior decoration, then the room must be very well ventilated, and all work must be carried out in special protective suits.
It is worth noting that if you speed up the process of drying the soil, you may not achieve the desired adhesion rate, because the material sets too quickly and does not have time to absorb well enough into the surface being treated.
Quite often, when improving the characteristics of substrates using a primer, a heat gun is used. In this case, you need to follow certain tips.
A heat gun will significantly speed up the process, but if it is used incorrectly, there is a high risk that the primer will lose its important characteristics and will not strengthen the base, but will only make it more vulnerable.
The drying time of the primer may vary and in this case it is important to take into account a huge number of factors. But due to the variety of such products, you can easily choose the most optimal material option that dries quickly enough and has suitable characteristics.
Source
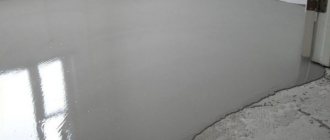
Caring for self-leveling floors during setting and strength gain
First you need to create the required temperature and humidity conditions in the room being renovated. In this case, such an atmosphere will have to be maintained for as long as the self-leveling floor must dry according to the instructions on the package. The surface itself needs to be thoroughly leveled.
A special needle roller will get rid of cavities and air bubbles formed during pouring, and a regular roller or brush will help to evenly and quickly distribute the mixture over the floor.
Sometimes craftsmen recommend covering the floor with film after the poured solution has set. This will help avoid uneven or premature drying. Rapid evaporation of moisture is not always a plus.
On the one hand, you can start laying tiles earlier, but on the other hand, the strength and durability of an improperly dried surface is reduced.
What you need for proper drying
Having specified on the packaging how long it takes for the liquid floor to dry after pouring, it is important to create a suitable environment in the room:
- Air temperature 20-25 degrees.
- Relative humidity is 60-65%, and for polyurethane compounds 80-85%.
- There should be no drafts, sunlight, or sudden temperature changes. To do this, you need to close the windows and doors; the glass can be covered with wooden shields or foil to close the room from the sun.
- It is unacceptable for underfloor heating to be turned on or additional heating devices to operate. The radiator can only maintain the required temperature.