When preparing walls for coating after leveling with putty, it is important that sanding is done quickly and efficiently with precise alignment of planes and angles, and in some cases, curved surfaces. And the more expensive the object, the more complex places there are (“thanks” to fellow designers and architects) and the more demanding the customers are, both in terms of execution time and quality.
Final polishing stage
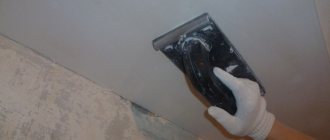
When the main work is completed, you can check the resulting result. To do this, you should point the light along the wall; all unfinished places will be immediately visible. Also, we must not forget about the construction level. It is applied to the surface and moved along it. Any bulges will be visible. If they are insignificant, then you can use a sanding block to correct them. This is done until everything goes smoothly. The putty is very soft and must be handled carefully.
The evenness of the sanded surface is checked with a building level
Advice! It happens that it is not possible to avoid pressure, then small depressions appear. They can be removed using a rubber spatula. A small amount of the consistency is applied to the warped area. She gets smeared and rubbed. The surface must be wet.
You just can’t say that at this step the work is completed. There was a lot of small dust left on the walls and ceiling. It needs to be removed, otherwise the upcoming finishing will be stupid. There are several options for this, which are best combined:
- a vacuum cleaner is used;
- dust is brushed off;
- Use a soft cloth (slightly dampened) to wipe the surface; do not allow it to become over-moistened.
After each wipe, the function must be repeated. To obtain a smooth wall, we must not forget about rubbing the surface.
Sanding the ceiling and walls is not such a difficult task, but it requires good preparation. It is also important to take into account that such work requires accuracy. It’s quite easy to correct the defects that appear after puttying, but if flaws appear after sanding (pits, ruts), then you’ll have to tinker with them. The main thing is to immediately choose which tool will be used.
Excellent and high-quality repairs involve performing a huge amount of complex work that requires certain abilities and experience. In order to speed up and facilitate this process, manufacturers produce special equipment. Such options include a machine for sanding walls after applying putty and a station for making mixtures.
Sander
This is a very comfortable device. With such equipment you can do the job in a short time. It is very important to choose the right model that will meet all the necessary characteristics. Sandpaper is also used here as grinding materials, but you can get ready-made “consumables” that will be much more effective. The convenience of the machines lies in the fact that they are not so difficult to work with; you don’t have to put in so much effort, especially at heights.
READ Which tile is better to lay on the floor
The process of filling the abrasive is individual, it depends on what brand (manufacturer) of the tool is used. For proper operation, you should read the instructions.
Voting for the best grinding machine “Giraffe” for walls and ceilings
Which sanding machine would you choose or recommend?
Mirka LEROS 950CV
10.00 % ( 6 )
Angle grinder Flex GSE 5R
10.00 % ( 6 )
FLEX GE 5
3.33 % ( 2 )
EIBENSTOCKELS 225
16.67 % ( 10 )
METABO LSV-5
20.00 % ( 12 )
HUGNER H-1
1.67 % ( 1 )
ASPRO ASpro-C3
3.33 % ( 2 )
ASPRO ASpro-C6
8.33 % ( 5 )
HYVST - A1
0.00 % ( 0 )
KRESS KU630
10.00 % ( 6 )
GRAPHITE 59G261
3.33 % ( 2 )
Einhell 4259930
10.00 % ( 6 )
Tool selection
Leveling the walls (ceiling) involves two types of finishing work - plaster and putty. After plastering the surface, even if everything was done as best , there are still various uneven areas on it. This is due to the fact that the tool for such work has sharp corners. Even if you work only with a wide spatula, you cannot avoid this. Therefore, before final processing, the suitable area should be carefully leveled.
The choice of grinding tool depends on the area of the surface to be processed
Fundamentally! Sanding walls after puttying should only be done on a dry surface. The applied solution must be given at least a day to dry completely. It is impossible to apply primer before leveling (sanding, grouting), it is simply stupid.
Based on the area that needs processing, the choice of the best method and the necessary tools is made. How to sand walls after puttying:
- a small surface can be processed with a sanding block;
- the presence of large areas of work requires the use of a power tool (flat grinder), but you need to understand that all hard-to-reach places and corners will have to be finished by hand;
- on complex structures where there are bends and protrusions, it is advisable to use an eccentric grinding machine;
- The ceiling can be sanded evenly only with a power tool.
Equipment Features
A putty sander is a more convenient way to work. Using the mechanism, you can quickly and efficiently clean the surface for applying other finishing materials. Based on power supply, equipment is divided into:
During operation, pneumatic models are more comfortable due to their low weight, small size and affordable price. The operating principle is based on the participation of a compressor in the process. The device creates a stream of compressed air, which, under pressure, starts the mechanism. However, the compressor unit itself is much more expensive than the grinder itself. Therefore, if large areas have to be processed, this option is not economically justified. Currently, they are more often used in auto repair shops.
Electric cars are heavier. Their price is higher than pneumatic analogues. However, many craftsmen prefer such mechanisms, taking into account the availability of the electrical network in every home. The only disadvantages are the large dimensions and heavy weight. But they are more convenient for performing repairs in a residential area.
TOP 13 best grinding machines
| Photo | Name | Rating | Price | |||
| Premium Grinders | ||||||
| #1 | Mirka LEROS 950CV | ⭐ 5 / 5 6 — votes | Find out the price | |||
| #2 | Angle grinder Flex GSE 5R | ⭐ 4.95 / 5 6 — votes | Find out the price | |||
| #3 | FLEX GE 5 | ⭐ 4.9 / 5 2 - votes | Find out the price | |||
| Mid-budget sanders | ||||||
| #1 | EIBENSTOCKELS 225 | ⭐ 5 / 5 10 — votes | Find out the price | |||
| #2 | METABO LSV-5 | ⭐ 4.95 / 5 12 — votes | Find out the price | |||
| #3 | HUGNER H-1 | ⭐ 4.9 / 5 1 - voice | Find out the price | |||
| #4 | ASPRO ASpro-C3 | ⭐ 4.85 / 5 2 - votes | Find out the price | |||
| #5 | ASPRO ASpro-C6 | ⭐ 4.8 / 5 5 — votes | Find out the price | |||
| Inexpensive grinders | ||||||
| #1 | HYVST - A1 | ⭐ 5 / 5 | Find out the price | |||
| #2 | KRESS KU630 | ⭐ 4.95 / 5 6 — votes | Find out the price | |||
| #3 | GRAPHITE 59G261 | ⭐ 4.9 / 5 2 - votes | Find out the price | |||
| #4 | Einhell 4259930 | ⭐ 4.85 / 5 6 — votes | Find out the price | |||
| #5 | Einhell TC-DW | ⭐ 4.8 / 5 2 - votes | Find out the price | |||
Which sanding machine would you choose or recommend?
Take the survey
Dust protection
Sanding walls after puttying involves the presence of a large amount of dust. If you work with a grinder in a closed room, it will soon be filled with lime, and it will be completely impossible to stay in it. Also, dust will penetrate everywhere and it will be very difficult to get rid of it. Therefore, it is advisable to prepare in advance for dust removal. Of course, small works can be carried out without this.
It would be a good idea to cover all pieces of furniture, windows and more. If the work is carried out with machines, then they have a special connector for connecting a vacuum cleaner. It will suck out dust while sanding. This will also be useful for manual work. Such activities are carried out exclusively in a respirator and special clothing.
Safety precautions when working with a grinding machine
To avoid injury during work, you must follow the safety rules:
- You can only work with working equipment;
- wires must be suspended so as not to damage them during operation;
- wear special clothing, glasses, a respirator, ears must be protected from noise;
- the work area must be illuminated;
- work in an area where there is no water nearby;
- the workplace should be cleared of unnecessary items;
- People should not be nearby, they should keep a distance from the work area;
- monitor the direction of sparks during operation; do not allow them to hit wires, sockets, etc.
There should be no people nearby, they should keep a distance from the work area.
A wall sander is equipment that requires compliance with safety precautions during operation. By choosing a machine with the necessary properties, you can achieve a smooth and even surface.
How to grind (sand) a surface
The tool has been selected, the necessary measures have been taken, and now you can sand the walls after puttying. It is important that there is good lighting, then all the irregularities will be visible. It is better the flaws immediately. A simple pencil is suitable for this. Sanding starts from the top corner and then goes down. In this case, an area of up to one meter is captured. The movements should be spiral-shaped, with slight pressure. The same applies when working with the ceiling.
When sanding putty, avoid applying strong pressure to the surface.
Excessive effort should be avoided. By pressing hard, you can create dents that can only be removed with new putty. The main thing is that in order to get a flat (smooth) surface, you cannot change the abrasive material. The more appropriate the work is to finish, the better it is to start. When sanding a ceiling, it is very important to maintain uniformity of effort.
READ Tool for plastering walls with your own hands
Putty application technology
The application of putty is carried out in several stages with preparation. Before applying the mixture, the surface is cleaned of old materials. Can be removed and sanded using sanding equipment. In the future, these rules will be followed.
sanding walls for painting with a Bosch PEX 300 sander
- The putty is prepared manually or with the help of a special station.
- The solution is distributed evenly, starting from the corner, and gradually moving along the entire wall. The base layer is the starting mixture, the final layer is the finishing mixture.
- Level the mass using a rule to create a smooth base base.
- Each layer must be primed for better adhesion of the material.
- After application and drying, each layer of putty is carefully sanded by hand or using a grinder.
A grinding machine greatly facilitates the work of any craftsman, allows you to make high-quality repairs and save time.
Repair is a complex process that requires a professional approach at every stage.
Having completed all the stages efficiently, at the finish line we get a perfectly renovated room.
Not least in terms of level of responsibility is occupied by such a stage as sanding the walls after puttying.
Firstly, it is worth understanding that grinding, as a process, is bringing a surface that has been subjected to putty work to a smooth state.
This is how the walls are prepared for painting or wallpapering. When grinding, all minor imperfections are removed from the surface. Even the best plasterer will not be able to plaster the walls without having to treat them later.
To minimize flaws, experts recommend using a spatula that does not have sharp edges when applying finishing putty. It can be started no earlier than a day after applying the last layer of putty.
This time period is necessary for the entire surface to dry to its full depth.
Experts recommend: after applying the last layer of putty, you should refrain from applying a primer if you are going to sand .
Sanding will remove most of the wall primer! Prime the walls only after completing the process!
Surface preparation
I have already written about the fact that you need to start working only when the base is completely dry, but I will remind you of this nuance once again. If the composition has dried, then you can begin the preparatory measures; they are simple, so you can handle them without problems:
- Since the work is very dusty, it is necessary to remove everything unnecessary from the room, this will make it easier for you to clean up later. If it is not possible to remove the same furniture, then you need to do this: if the walls are being processed, then all the objects are moved to the middle and carefully covered with a special film. When working with the ceiling, you need to think about the location of the furniture so that it does not interfere with work; again, you need to carefully cover it;
The better you cover your furniture, the less cleaning you'll have to do.
- Then you need to carefully sweep the surface and inspect it. Sometimes there are situations when, due to finishing errors, cracks appear in some places or the composition shrinks very much. You should first check whether everything is in order, so that if necessary, you can repair problem areas immediately, rather than leaving them for later;
In no case should you prime the surface before sanding, this will cause great harm, because the surface will harden and we will have to apply much more force to level it. And you can achieve an ideal result only by working with an elastic layer.
- The last stage of surface preparation is cutting off all sagging and adhering pieces of mortar with a spatula. To do this, you take the tool, apply it at an acute angle to the surface at the location of the bead and, moving forward, carefully cut off the excess. This will greatly simplify our further work and save sandpaper, because we will not need to erase all the major flaws.
READ Thickness of mineral wool for wall insulation
All dried deposits can be cut off very easily with a spatula.
The best “Giraffe” grinding machines for premium walls and ceilings
Among the premium-class Giraffe grinding machines, we can highlight the Mirko Leros 950cv model. This option has the highest rotation speed (of those presented in the list of grinding machines). In addition, this model stands out for its excellent quality. Mirko Leros will be a wonderful tool for renovation work in an apartment or during the construction of large objects.
Grinding machine Mirko Leros 950cv
Video – Grinding machine MIRKA LEROS
Power tools for sanding walls after puttying
Control by touch
The most sensitive areas of the palm
Run your palm over the sanded surface and the nature of the sensations will tell you where and what defects there are. If the sensations do not change, then the surface is flat; if they change, then there is still something to work on.
There is nothing special to describe here, you will feel everything yourself. In the painting business, trained fingers are highly valued. There is something to train!
Vibration models
This is perhaps the most common type of grinding tool. Its most typical representative is the surface grinder. It is a device equipped with a rectangular sole, onto which a sheet of sandpaper having the required grain size is attached using special clamps. Different grades of sandpaper are used for different types of putty. Another type of such tool is a delta sander. According to the principle of operation, it is no different from devices of the previous type, however, it has a triangular working sole, which can become indispensable when working in hard-to-reach places (for example, when grinding corners).
Summary
- Before you start sanding, cover parts and parts of the body that may be damaged with paper and masking tape.
- Sanding of putty should only be done dry. The use of water is excluded!
- Sanding is carried out using eccentric, surface grinders and hand planes.
- For initial processing of putty, abrasive material of P80-P120 gradation is used, for preliminary processing - P150-P180, for processing under primer-filler P220-P240. The border zone is processed with P320 abrasive.
- When sanding, use a development coating - it will make it easier to identify defects.
- Carefully remove sanding dust before each new application of putty and upon completion of sanding work.
Types of grinding machines
Manufacturers produce several types of devices for grinding putty after application and hardening, powered by mains power. On the construction market they are represented by the following options:
- tape;
- flat vibrating.
- orbitally eccentric;
How to sand walls quickly and easily. Preparation for wallpaper
Equipment Features
A putty sander is a more convenient way to work. Using the mechanism, you can quickly and efficiently clean the surface for applying other finishing materials. Based on power supply, equipment is divided into:
During operation, pneumatic models are more comfortable due to their low weight, small size and affordable price. The operating principle is based on the participation of a compressor in the process. The device creates a stream of compressed air, which, under pressure, starts the mechanism. However, the compressor unit itself is much more expensive than the grinder itself. Therefore, if large areas have to be processed, this option is not economically justified. Currently, they are more often used in auto repair shops.
Electric cars are heavier. Their price is higher than pneumatic analogues. However, many craftsmen prefer such mechanisms, taking into account the availability of the electrical network in every home. The only disadvantages are the large dimensions and heavy weight. But they are more convenient for performing repairs in a residential area.
Eccentric models
Eccentric or orbital sanders have a rounded working sole, which moves synchronously around its axis, rotating with a small radius. This feature of the sandpaper contributes to high-quality surface processing. The felt-based abrasive is attached using Velcro.
Photo: eccentric sanders
Unit weight – 1-3 kg. Has soles in two sizes:
- 125 mm – for small areas, delicate grinding;
- 150 mm – for large spaces, rougher processing.
Electric motor power – 200-900 W. The speed of translational movements is 4000-14000 revolutions/minute for models with adjustment, without a speed regulator – 12000 rotations.
This type of tool is the most effective and is considered universal because it can be used for grinding and polishing.
The vibration amplitude of an ESM is 2-7 mm; the lower it is, the weaker the device vibrates, the softer the abrasive works, ensuring clean grinding. Orbital vehicles have the lowest noise and vibration levels.
Application
Due to their versatility, ESMs are used for a variety of jobs, including carpentry and automotive:
- rough and soft grinding of large surfaces;
- processing of interlayer areas of coatings and materials;
- polishing and grinding planes along and across the grain;
- finishing of profile, volumetric and curved surfaces.
Which sander is better for sanding putty on walls - MOREREMONTA
Using a grinder for ceilings and walls significantly speeds up and simplifies the work on processing bases. Even if you putty very carefully, there will still be stripes from the spatula on the coating, all kinds of sagging and other small defects that will be especially noticeable after painting.
Sources:
https://givoydom.ru/raznoe/elektroinstrument-dlya-shlifovki-sten-posle-shpaklevki.html