The final stage of repair work on finishing walls for painting or wallpapering is the grouting of putty. The purpose of this procedure is the final correction of unevenness remaining after applying the finishing layer and smoothing out excess grain. The choice of materials and grinding method depends on the structure and area of the surface being processed. Even those who have never done repairs before can cope with the task.
Sandpaper for putty: marking, purpose and application features
Grouting the walls after puttying is an important stage in surface finishing, especially when the walls are being prepared for painting. However, in practice, it is sometimes difficult to figure out which sandpaper to clean the putty with, because there are quite a lot of varieties of this material. We will tell you about the rules for selecting an abrasive and the features of working with it.
It is important to know which sandpaper to use to sand the putty.
Sanding the putty layer
Purpose
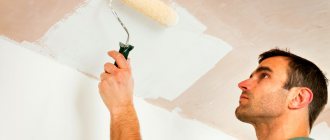
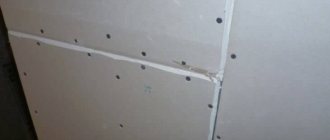
The photo shows the process of grouting a wall with your own hands.
Sandpaper for puttying walls is needed for final leveling and sanding of the putty surface before painting or wallpapering. Moreover, if paint is used as a finishing touch, sanding is required to be as thorough and fine as possible. The wall does not need to be sanded for wallpaper, with the exception of glossy varieties and silk-screen printing.
In the process of leveling the walls, it is possible to eliminate large differences in level with the help of plaster, then the starting layer of putty performs a more thorough leveling, and finally, the finishing layer of putty allows you to perform the most delicate work and achieve smooth walls.
However, subtle differences in level, bumps, depressions, marks from the ends of the spatula blade, scratches and other imperfections and defects still remain on the surface. To eliminate them, it is necessary to carry out final processing of the last layer - sand it with an abrasive material.
Only grinding can achieve acceptable results.
For these purposes, various methods are used: sandpaper and fabric, diamond mesh and other abrasive surfaces. The work can be done either manually or using machines.
Materials
The result of the work depends on what sandpaper you use to rub the putty.
So, we have figured out the purpose of the grinding procedure, now we need to figure out what to rub the putty with.
There may be options here:
- Sandpaper by hand. This is the cheapest method that gives excellent results with the right approach. The paper is fixed on a wooden block with a smooth and even sole using clamps or fingers, as well as in another way that allows you to quickly change the abrasive, and then the surface is sanded in a circular motion;
- Using an abrasive mesh by hand. The difference here is that it is not paper that is used as an abrasive, but a mesh that does not become clogged with dust and lasts longer. The price of such a mesh is higher, however, this is compensated by lower consumption and convenience, which increases overall labor productivity;
- An electric grater in which the paper moves on shafts like a belt. Due to the length of the sanding strip, its wear occurs more slowly, and the mechanics allow you to work faster;
- An electric grater in which a mesh is installed, and friction occurs due to vibration and displacement of the rubbing surface from side to side relative to the handle;
- An electric grater, where friction occurs through a rotating plane with an abrasive coating. Both mesh and paper can be used here.
The simplest way to fix paper on a block.
Important! As you can see, both paper and mesh can be used for work, and the mesh seems to be more convenient and effective, although more expensive. Be that as it may, both materials have the right to life.
It is more convenient to use a block with clamps.
In addition to paper and mesh, you can find various stones such as pumice, diamond coatings, surfaces with notches and applied stone chips. However, the first two materials are most often used, so we will focus on them.
Marking and selection of abrasive
The surface of sandpaper in multiple magnification.
Let's move on. Sandpaper and mesh come in different forms: depending on the size of the stone chip particles or mesh cells, these materials are labeled differently and used differently.
Paper marking (we call any rolled material with an abrasive layer on the surface paper) is marked in two ways: domestic and foreign.
- Domestic marking according to GOST 3647-80 USSR begins with a number (from 4 to 80), followed by the letter “N” separated by a hyphen. The higher the number, the larger the grain. For grinding putty, grades 20-N, 16-N, 12-N are used, as well as 10-N for fine processing;
- Foreign markings (except for the USA, Canada, Japan and China) in accordance with the FEPA or ISO 6344 standard (corresponds to the modern Russian GOST 52381-2005) use the letter “P” at the beginning of the marking, followed by a number from 24 to 600. Here everything is the other way around: than The lower the number, the larger the grain. For our purposes, grades P60, P80, P100 and P120 are used for fine processing.
The abrasive mesh is marked in the same way as foreign paper. The marking is usually applied to the back of the material using printed ink. The code may include various additional symbols indicating the origin of the abrasive, the method of its application, moisture resistance, wear resistance and the purpose of the material.
This is what the P100 diamond mesh looks like.
Important! To sand the putty layer, four main grades of sandpaper or mesh are used: 20-N, 16-N, 12-N, 10-N and P60, P80, P100 and P120, respectively.
Execution of work
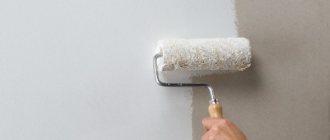
Grouting putty is easy.
We have found out why and how to sand the walls, now let's figure out how to rub the putty.
The instructions are simple and obvious:
- If the wall is uneven and there are many defects on the surface, we start with the largest grade (P60 or 20-N). We clamp a piece of paper or mesh on the grater and begin processing, do not press too hard, move the grater along the plane in a circular motion;
We work in circular movements.
- We work until the surface becomes homogeneous and there are no visible flaws left on it. Then we change the brand to a smaller one and go through the wall again. For a perfectly smooth surface required for painting, we complete the process with the finest paper 10-N or P120;
For fine finishing we use fine mesh or paper.
- During the work, we use safety glasses and a respirator, since there will be a lot of dust, and it will not allow you to breathe and see normally;
Protect your eyes and respiratory tract.
- In corners and hard-to-reach places it is better to work with your hands without using a block or grater. You can also use special bars with sharp corners;
Be careful in the corners - a rectangular grater will leave scratches.
- It is advisable to use electric graters for large volumes of work and short deadlines. To treat one apartment, it makes no sense to buy such a device;
It makes sense to use a power tool only for large volumes.
- At the end of the work, wipe the walls with a rag or sweep away the dust with a brush. You can go over them with a vacuum cleaner.
Finally, we clean the walls and ceiling from dust.
How to sand the walls after puttying?
The first step is to acquire the necessary tools and consumables. You will need:
- Several types of abrasive mesh or sandpaper.
- Sanding block.
- Sanding sponge (used for hard-to-reach places).
- Ladder.
- Good lighting: spotlight or pendant lamp.
- Small construction spatula.
- Personal protective equipment: respirator, safety glasses, hat.
Related article: Mistakes when laying tiles on a wall
Experts recommend sanding the walls after puttingtying them, before painting the surface or before gluing wallpaper. Grinding is often carried out for other types of construction work. The grinding process is relatively simple, but quite labor-intensive and dusty. How to sand walls after puttying? When sanding by hand, you can use sandpaper or a special abrasive mesh. The choice of material depends on the personal preferences of the master.
- Abrasive (grinding) mesh for putty - its advantage lies in its perforated structure. All construction dust will pass through the holes, so during work it will not clog as much as regular sandpaper. The mesh needs to be changed when it wears out, which can be determined by its appearance: if it starts to tear or you feel that the grinding process is no longer as effective, then it should be replaced. As a rule, the mesh for grouting putty is sold on the market in pieces, the sizes of which correspond to the size of the bars, so all you have to do is install it and get to work. But remember that the bars are also different, so when purchasing a mesh, take this factor into account. The disadvantage of the sanding mesh is its higher price than sandpaper.
- Sandpaper for putty - its main drawback is that during work it will constantly become clogged with construction dust, so it will have to be changed much more often than the mesh. You can purchase sandpaper in a variety of options: ready-made pieces, small rollers or large rolls. If you decide to go with rolls of sandpaper, you need to decide how you will cut it based on the size of the bar to ensure minimal waste. Of course, you can buy already cut pieces, but such a purchase will cost much more.
In addition, sandpaper has such a concept as grain size, which is indicated by a number marking. The choice of grain causes some difficulties for inexperienced craftsmen. The higher the serial number of the sanding belt, the higher its grain size (the number of grains per square centimeter), and vice versa. For example, coarse-grained tapes include tapes in the following range: from P20 to P220, and fine-grained sandpaper labeled from P240 to P2500.
Sanding the walls after puttying is carried out in two stages. Here you need to remember that the first grinding is done using coarse-grained sandpaper, and the final grinding is done with fine-grained sandpaper . To carry out renovation work in an apartment, sandpaper with a grit size of P80–P280 is mainly used. Not so often (for “jewelry” processing) smaller abrasives can be used – P320–P360. After treating the surface of the wall with starting putty, it is recommended to polish it with a rough grinding stone P100–P180. Sometimes, for initial processing, sandpaper marked P80 is used, but this is too coarse material and, for example, it is not suitable for painting. After treating the walls with finishing putty, the surface is sanded with fine-grained sandpaper P220–P280.
Putty sandpaper - how to perfectly level the surface without experience
In the photo: sanding allows you to bring the surface to perfection
In this review, I will tell you how to properly prepare the ceiling and walls for painting. If you think that when finishing the main thing is to apply the putty perfectly, then you are mistaken. Flaws on the surface can be very easily removed by grinding, and how to do it efficiently, read below.
It’s more difficult to sand the ceiling, but if you want, you can handle this job without any problems
If everything is done efficiently, then even without painting the surfaces will look great.
Workflow Description
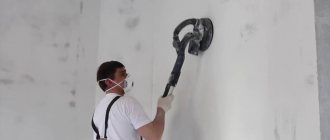
We will consider the manual method of carrying out the work. This option is best suited for novice craftsmen, since it is difficult to ruin the finish when working by hand. Another advantage of this method is the ideal result, which cannot be achieved when using a power tool.
Power tools require certain handling skills
Stage 1 - collecting the necessary tools and materials
Sanding the walls after puttying is done using a standard set of devices. All of them are sold in construction stores and cost little, which makes the sanding process even more affordable.
For work we will use the following:
- The sanding block (also called a manual skinner) can be made in two versions. The first option is a classic design with a handle and metal clamps, the second is in the form of a bar with grooves for fingers in the upper part and semi-automatic clamps. Width varies from 85 to 105 mm, length from 165 to 230 mm, price ranges from 170 to 300 rubles;
This is what the simplest device looks like
A more modern version with semi-automatic abrasive clamping
- To accurately mark the corners, a special abrasive sponge with a beveled end is used. Use options with a grain size of no more than P120. The cost is about 80 rubles;
This sponge makes it easy to work on corners.
- Sandpaper or abrasive mesh. I will discuss all aspects of grit selection in detail below;
- Spotlight or carrying lamp. Necessary not only for general lighting, but also for control of the work process;
The lamp must be mobile
- A stepladder or table from which you will reach all the surfaces to be leveled;
- A putty spatula, it will be used to cut off all the sagging mortar to make sanding easier;
- Sanding putty is a very dusty process. For work, be sure to stock up on a respirator, safety glasses and a cap . It’s better to wear a special protective overall so as not to spoil all your clothes.
These two elements are required, the rest are optional
How to sand walls after puttying?
Before sanding the walls after puttying, you should make sure that the finishing layer is completely dry and ready for processing. Take care of good lighting in advance - it is necessary that the light falls on the treated area at an angle and only from one side. Remember to take care of your personal safety, always wear goggles, a hat and a respirator. There will be a lot of dust!
Large overhangs can be removed or trimmed using a small, clean putty knife. After this, secure the rough sandpaper to the sanding block. You always need to sand the wall in the direction from top to bottom and from left to right; in this case, not the entire surface is processed at once, but is divided into small sections.
If you have never sanded walls before and are not sure whether you have chosen the right abrasive grit, then first be sure to practice on a small area somewhere in the corner. After a short grinding, check the result - if you find scratches on the surface, it is better to replace it with an abrasive with a finer grain.
It is still permissible to use coarse-grained emery for wallpapering, but it will no longer be suitable for painting walls, since even minor defects cannot be allowed to appear - they will show themselves very clearly after painting.
When grouting, you should not press too hard on the sanding block, although, of course, you will still have to put in some effort. It is not recommended to grind in one place for too long, so as not to overdo it: sand it, inspect the surface for unevenness, and move on to the next area. If large depressions are found during the initial polishing process, it is better to skip them and treat them with putty later.
After sanding the main surface of the wall, you need to start processing corners and other hard-to-reach places. In this case, the use of a sanding bar can only harm the putty layer. Therefore, it is best to use sanding sponges that have beveled corners. If this material is not available, the corners can be sanded with a sheet of fine sandpaper folded in half.
What to do if you need to add putty
During the plastering process, the solution is applied and spread with a wide spatula. On its blade, the volume of the mixture is not uniform, which leads to its uneven smearing over the base. Because of this, bulges and depressions form on it. When a thick layer is applied, it slides down under its own weight, creating large horizontal sagging.
In such cases, sandpaper for putty or even an electric device will not save the situation. To remove such a volume of material would take too much time, effort and consumables. The best solution would be to fill the recesses, followed by leveling and polishing.
The fresh composition should harden well. Sanding off excess putty before reaching full strength is not recommended, as there is a risk of leaving new dents and grooves if moved carelessly.
How to sand a ceiling after puttying?
The ceiling attracts no less attention than the walls, and every flaw on its surface will be evident. The technology for sanding this surface is no different from sanding walls, except that working on the ceiling is much more difficult. Therefore, it is better to understand the question of how to sand a ceiling after puttying if you have grinding machines in your arsenal.
A mesh for grinding putty No. 60–80 is put on the machine if rough cleaning is being done; mesh No. 100 if finishing sanding is performed. To reach the surface, you need to use a stepladder. If a machine with a special rod is used, surface treatment is performed directly from the floor. The surface is sanded in a circular motion until it is perfectly smooth.
Primary grinding of the putty allows you to remove large defects. After its completion, you need to remove construction debris, debris, dust and check the surfaces for cracks and minor flaws, and then you can apply a layer of finishing putty. When the surface is dry, you can begin final sanding using a fine-grained abrasive. The technology remains the same as described above, but in this case all movements should be less sweeping and more accurate.
How to make putty with your own hands
A high-quality remedy for eliminating defects is expensive, but you can avoid expenses, especially since putting putty for parquet yourself is no worse. If you decide to choose a dry mixture, you should prefer a composition with small particles to create a homogeneous mass for a more even floor surface.
Making putties at home is possible using PVA, water-based and nitro-varnish. Here are three recipes on how to make parquet putty with your own hands:
- On PVA glue. Useful for floors where the boards are dense and worn. Take glue, fine chalk powder and crushed sawdust. Mix everything until smooth and has the consistency of thick sour cream (but not a lump). Fill the cracks and let dry. Pros: you can fill large gaps, excellent strength after drying. The downside is that it takes a long time to dry (up to 24 hours).
Advice! To give the desired tone, sawdust is added to the composition of the type of wood from which the parquet is made. Sawdust adds color and adds strength to the mixture.
- Putty is prepared on the basis of transparent varnish, just like with PVA. The advantages include greater elasticity of the composition and less shrinkage, and if there is no sawdust, it should be tinted with a pigment for water-dispersed paints.
- With nitro varnish, putty must be done using a larger amount of sawdust, and very little varnish and chalk are needed. It turns out that varnish and chalk are gradually added to the sawdust, the mixture is stirred to the desired thickness and applied. All work should be done quickly so that the mixture does not harden. Pros: dries quickly, holds very tightly, does not shrink. The downside is the strong smell.
Required Tools
How to sand walls after puttying? For this purpose, special tools are used for grinding surfaces. How to sand the walls after puttying to make the wall as even and smooth as possible:
- For sanding, a sanding block is most often used. This device acts like a grater with a manual base. The block is equipped with sandpaper or an abrasive mesh.
- It is better to use a grinder if grouting needs to be done as quickly as possible. The choice of device is selected depending on the required power - the higher the power, the faster the grinding will be completed.
How to sand the putty becomes completely clear. Now it is important to decide not on the device itself, but on the auxiliary materials. Therefore, the question arises: what kind of sandpaper to rub the putty on and what kind of mesh is needed for sanding the putty.
Related article: Rating of wall insulation
What kind of sandpaper to use and what advantages are determined here:
- Mesh for grouting putty. It is the most convenient option, since grinding is carried out efficiently and quickly, and most importantly, without dust. In this case, there is no clogging of the material, and its high wear resistance is maintained. The sanding mesh requires periodic change during active work. The dimensions and quality of the mesh can be determined before purchasing.
- Sandpaper for grouting putty. It is a less successful option, but quite effective. It is better to choose sandpaper with a grain number of 60, 80, 100, and then number 120. It is better to take the material in small quantities, as you should check the compliance. Most often, grit number 60 is suitable. For final sanding of walls, sandpaper with grit number 120 is used.
Sanding putty not only requires special tools and devices, but is also performed in accordance with a certain technique. It is important to carry out the treatment without using a primer.
On video: how to sand a wall after puttying.
Sandpaper for sanding parquet is a necessary consumable.
To begin with, let’s say that the concept of “skin” when sanding parquet is not the correct abbreviation. It is more correct to say sandpaper for sanding parquet, and even more correctly – an abrasive material.
Sandpaper for sanding parquet should be selected taking into account the condition of the floor.
The abrasive material for sanding is a base with small “pebbles” glued onto it, which provide an impact on the wood. The higher quality the material, the more expensive it is. Sandpaper for sanding parquet must effectively remove old varnish, remove the top layer of wood, and, at the same time, be functional for a long time. Poor quality sandpaper quickly becomes dull and “pebbles” fly off. It is difficult to do quality work with such material.
How to sand walls
How to sand walls after puttying so that the surface becomes perfectly smooth? It is important to know the technology and methods of how to sand walls after puttying. But first you need to decide on some characteristics of the walls in order to choose what to sand the putty with.
Grouting putty begins with choosing a tool. If the question arises about what kind of sandpaper to do the work with, then you should decide on the degree of processing: the initial sanding is 60 grains, and the final sanding is 120. How to sand the walls of a room with a large area? A machine is best for this, although corners, recesses and depressions will still have to be sanded by hand using sandpaper.
Sanding the walls after puttying is carried out in accordance with the following instructions:
1. First, the most visible irregularities and defects on the surface of the walls are highlighted. What kind of technology is needed for this? A powerful spotlight or lantern that is installed as close to the wall surface as possible. Thus, shadows appear on it from the protrusions or depressions of the putty. These places should be circled with a pencil.
2. How to rub putty correctly? It is better to start cleaning the putty from the corner. You need to move from top to bottom, occupying a strip of about one meter. After processing the designated strip, you should proceed to the next one. The movements should be spiral.
3. The putty on the walls should be sanded carefully, without applying much force. In this case, it is better to use sandpaper. Do not press too hard on the canvas to prevent holes from appearing in the putty. And there is no need to align the recesses with the general level.
4. Cleaning the finishing putty consists of the same steps as the starting one. In this case, polishing is done carefully, but with extreme caution so as not to damage the putty layer. It is better to sand the finishing putty using sandpaper.
To sand walls, you do not need to have experience in the construction industry. It is enough to adhere to a certain technology that is very easy to learn and apply.
How to minimize defects
You can completely get rid of them only by sanding, but there are solutions that can significantly reduce their number. Moreover, these solutions make leveling possible in principle. Let's look at them in more detail.
Choose the right material
To get rid of defects, you should use a universal or finishing putty. The universal one can be applied in one layer on plaster or other prepared base, the finishing one can be applied only on the base layer. They differ in composition, which affects their properties.
The determining factor when choosing is not only the material, but also the manufacturer. It is better to use a good gypsum mixture than a poor cement one.
Correctly laying the mixture
So that the work does not have to be redone or corrected for a long time, it is better to do everything correctly from the very beginning. Sanding walls after puttying is a rather tedious task. During the grinding process, a lot of dust is generated, so it is better to focus most of your efforts on high-quality installation of the mortar.
It is necessary to choose the right tool. Professionals work with a wide spatula with a blade of 30 cm or more, applying the mass on it with a narrower one. It is quite difficult to hold it in your hand. An unevenly distributed force will cause the mixture to ripple, and one of the edges will definitely leave a deep furrow at the most inopportune moment, when everything is ready. For beginners, it is more convenient to load the mixture onto a wide blade, and use a narrow blade to remove and level it. This will save time and achieve good quality. To make the corners even, you can use a special corner spatula.
You should move from bottom to top, laying strips 1 m wide and making overlaps of about 5 cm. To increase the elasticity of the layer, you can put a thin reinforcing mesh of plastic in it. Errors must be corrected on the spot before the solution hardens. Before you start sanding it, you need to let it dry. Typically, a layer several millimeters thick dries within 24 hours.
Ceiling sanding rules
How to sand a ceiling after puttying correctly, what tools and methods should be used for this? The ceiling is sanded using almost the same technology as the walls. To perform the work, you should prepare sandpaper. An abrasive mesh may also come in handy.
Wet grinding is ideal in this case. But in this case, the procedure takes much longer, since after each session you should wait until the surface dries.
The ceiling is usually rubbed using a tool such as a grinder. Sometimes the procedure is done manually. How to properly sand the ceiling:
- The sandpaper for puttying the ceiling is the same as for puttingtying the walls. First, with 60 grit, and 120 sandpaper as a polishing tool. If you use the surface for wallpaper, then sanding is done thoroughly and completely.
- It is necessary to produce illumination, which will highlight all the defects against which the skin will be produced. The grater is carried out along a designated strip from one corner to another.
- Secondary putty should be disposed of in the same way. The choice of tool is the same as for the first layer of putty surface.
- After this, the ceiling is primed and treated with antifungal agents. It does not matter whether the ceiling will be painted or wallpapered in the future.
- To process the corners between the walls and the ceiling, use a tool such as a round sanding block. We use this technology for rubbing protrusions and shaped objects.
In any case, the grout base should be sandpaper or graters in the form of a sanding mesh. If it is necessary to paint the ceiling, it is necessary to carry out the treatment with puttying.
In places where depressions appear, it is necessary to carry out secondary treatment with putty.
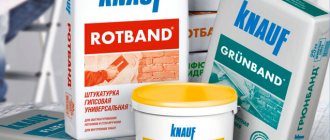
Types and choice of finishing putty
Finishing putties contain two main components: a binder and a filler. Additionally, additives are added that increase both the working properties of the mixture and the performance characteristics of the finished coating.
They can be objectively divided only by their connecting component. These can be mineral substances or polymer compositions. From minerals, only two options are possible:
- Plaster;
- Cement.
Polymer binders are represented by a wider range, including:
- Alkyd;
- Vinyl;
- Acrylate;
- Latex;
- Acrylic;
- Epoxy;
- Varnish;
- Oil-glue.
Almost all of them are narrow-profile, intended for use in a limited segment of repair and finishing work. The only product that should be highlighted is latex compounds. Their special advantage is the elasticity of the finished coating. Cracks up to 1-1.5 mm are not capable of damaging the integrity of latex plaster. But if you stick wallpaper on top, the advantage is reduced to zero.
In 95% of cases, polymer compositions are supplied ready for use, in buckets or plastic sealed bags. This quality is put at their advantage, with the motivation of saving time. Looking at it objectively, it takes 10-12 minutes to dilute the dry finishing mixture. And for this pseudo-time saving, the price of such a product is increased 5 times.
Compare finishing putties with mineral binders in the table:
| Shrinkage | Water resistance | Work time | |
| Plaster | Hardly ever. | Absent. | 45-60 min. |
| Cement | Yes, small. | Excellent. | 90-120 min. |
The weak point of cement mixtures is leveled by applying a thin layer of the finishing coating. Because the thinner the layer, the less shrinkage appears.
But with hydrophobia of gypsum compounds, a deep penetration primer helps to cope. The short life of the solution will require speeding up the pace of work. It can be added that gypsum putties have better hiding power, since their whiteness after drying is due to the color of the gypsum. Pigment is added to cement mixtures to give whiteness.
Surface treatment after grinding
After surface treatment, further finishing cannot be started immediately. First you need to remove all construction dust that has settled on the walls and ceiling during the sanding process. To do this, you can use a tool such as a construction vacuum cleaner.
You need to walk around the entire perimeter of the surface and carefully remove all dust. If it is subsequently mixed with paint or wallpaper glue, lumps and lumps may form.
The second method of cleaning surfaces from dust does not require the use of a special tool, so it is the most acceptable in many cases, although it is much more labor-intensive. The methods used are as follows:
- Use a wide brush with soft bristles to brush off as much dust as possible. You can use a regular broom. The main thing is not to press too hard, since putty is a very plastic building material.
- After this, a secondary cleaning method is performed. Wet a cloth in cool water and wring it out well. Run the cloth over the walls and ceiling. Textiles should not fade, otherwise marks and stains will remain, which may subsequently appear through the paper layer or paint.
- You need to wait until the putty is completely dry, and only then proceed with further finishing. To avoid washing out the construction mixture, the fabric should be slightly damp.
In any case, dust must be removed completely to avoid corrosion of secondary building materials. You should not use only a rag, as it is almost impossible to remove dust in this way.
After cleaning, you need to proceed with further actions: priming and treatment with antifungal agents.
High-quality grinding and further processing before finishing is the key to a successful repair. The sanding surface can be several types of sandpaper or mesh.
Sanding after plastering the walls must be done, as this solution will be an ideal option for a good basis for repair work. Even if the leveling was initially performed poorly, then with the help of further finishing it is possible to visually compensate for this defect. It is possible to carry out such a procedure, that is, to rub the putty, without the involvement of specialists - independent processing is quite suitable.
Recommendations for cleaning walls (2 videos)
Why do you need to sand walls?
All the procedures that we did before: plaster, putty - these are all procedures for leveling the wall. Plastering is rough, puttying is fine. And now the process of sanding or polishing the walls begins.
Related article: How to glue moldings to a wall with wallpaper
Even after applying a thin layer of putty, in any case, small irregularities and tubercles remain on the wall, formed mainly by the sharp ends of the spatula, which remain when we disperse the putty and connect one part of the putty wall to another.
That is why when putting putty it is better to use a large spatula so that the area of leveling the wall is maximized. But the joints, no matter how hard we try, can still be traced. Therefore, after you have puttyed the wall, you need to let it dry (at least a day) and you can start sanding the walls.
Don’t try to accidentally prime the wall after puttying! Sanding begins immediately after puttying!
What tools and materials are needed to sand walls?
So, let's look at what we need to have to start sanding the walls.
A sanding block is usually used for sanding walls:
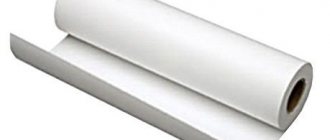
In addition to the block, for grinding you need to have sandpaper or a sanding mesh, which is fixed into the block before starting work:
The sandpaper is on the left in the picture, the sanding mesh is on the right.
What to consider when choosing a whetstone and grinding material (sandpaper, mesh)
There is no ironclad recommendation. Some people use a sanding mesh, others use sandpaper.
Sanding mesh
The advantage of the sanding mesh is that it does not become clogged with putty dust during operation. The mesh itself is perforated and all sanded off putty will pass through the mesh. It must be replaced during normal wear and tear, which is determined by the appearance of the mesh used. If the mesh is torn in places or you already feel that sanding is not as effective, replace the mesh with a new one.
Usually the mesh is sold in ready-made pieces directly to the size of the block and all you have to do is install it on the block and work. But, you need to remember that the size of the bars is also different, as shown in the picture. Therefore, when taking a mesh, immediately select a block to match its size. Mesh is more expensive than sandpaper.
Sandpaper
During operation, the sandpaper will become clogged with sanded off dust and the sandpaper will have to be changed more often than the mesh. You need to be aware that sandpaper, although cheaper than mesh, is also not a cheap material. It is sold in completely different versions: large rolls, small rollers, rectangular pieces.
By reading my blog, you are probably making repairs.
this page to your bookmarks .
This is where all the useful home improvement stores are located. If you decide to sand with sandpaper, then you need to figure out how you will cut it, taking into account the size of the block, so that there is as little waste as possible. You, of course, can refuse to cut the sandpaper and buy pre-cut pieces ready for bars, but this will be more expensive! There is a concept of sandpaper grit (paper with different grains).
In order not to blow your mind on this topic, buy paper with grain 60, 80 and 100 in small quantities at the store and try to work with it. There is no exact recommendation on what grain to take. But it’s better not to take less than 60 for sure, because it will be very rough sandpaper. More than 100 is also not very good, because it will become very clogged with dust during processing and will have to be changed very often.
There is one more recommendation. If you have sandpaper with a suitable grain from old stock, then of course use it. No need to run to the store for a sanding mesh.
IMPORTANT! The walls that you will sand usually go on to either wallpapering or painting. In case of painting, the wall should be absolutely smooth, I would even say polished. In this case, the craftsmen sand the wall 2 times. The first time, for example, with 60-grit sandpaper, to remove obvious large frozen pieces of putty, and the second time, take even finer sandpaper, for example, with 120-grit sandpaper and polish the wall with it. But in the case of wallpaper, this is clearly a redundant operation. For wallpaper, just go over the wall once.