Anyone who has done renovations knows for sure that it is a hectic and expensive business. There will definitely be costs. And not small ones.
Of course, you want to save on repairs. And by the way, this is quite possible to do!
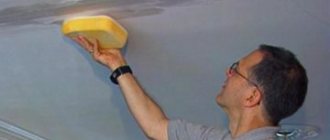
For example, putty. It is simply necessary for repairs, and not only major ones, but also cosmetic ones. Putty is a building material that eliminates minor defects and unevenness on various surfaces in the house.
The cost for putty is quite high. And if you do it yourself, you can really save money.
Purpose and application
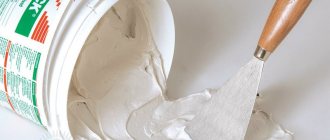
Putty is a mass with the consistency of sour cream, white (gray) in color. Needed for applying wall leveling at the final stage of repair. Gives smoothness and covers unevenness and defects.
This is a universal remedy. Thanks to the applied material, the walls are leveled, and how everything is prepared determines how the wallpaper is pasted, paint is applied, or ceramic tiles are laid. There is ready-made putty, as well as dry. From which you need to prepare a solution according to the instructions.
Instructions for applying a homemade solution with your own hands
The homemade solution is applied in the following order:
- Prepare the work surface. The coating is leveled, overhead elements, fastening material, and bulges are removed from it.
- The putty composition must be prepared in advance. If it contains sawdust, wait until it is completely swollen. The entire mixture must be consumed within a few hours. Otherwise it will have to be thrown away.
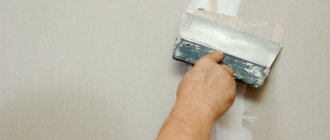
- A spatula, brush or roller is required for application. The surface must dry completely.
- The coating is sanded with an abrasive material and protective compounds are applied. This measure will prevent the appearance of rust, fungus, and condensation.
- The last stage is applying paint, varnish or wallpaper.
- The remainder of the mixture is disposed of.
Important
It’s easier to buy ready-made putty in a store, but sometimes its quality leaves much to be desired. This is especially true for wood putty.
Composition and technical characteristics
The main distinguishing property of this building composition is the ability to apply it in a very thin layer.
And also, excellent adhesion, strength and rapid hardening.
Divided by:
- readiness;
- composition;
- purpose.
Types of putties according to level of readiness:
- dry;
- putty ready for use.
Dry types are the most popular among the population. Available in packages.
Ready putty for use is a liquid mixture based on latexes, dispersions and is produced in containers (buckets, barrels).
Type of putty according to composition:
- based on cement, gypsum (dry types);
- acrylic (ready for use). Water resistant;
- based on drying oil - oil-adhesive (easy to use, cheap, but environmentally unsafe, weakly durable and poorly compatible with different materials);
- based on PVA. Not moisture resistant.
Department by purpose:
- specialized (to perform a specific task);
- leveling. Durable, levels walls and ceilings well;
- finishing. Apply before decorative finishing;
- universal. Suitable for many surfaces.
Important! When choosing a putty, you must read the instructions for use in detail to avoid surprises.
Surface preparation
A specialized putty is applied to the prepared surface. Fundamentally, the work algorithm is no different from cleaning walls in a bathroom or kitchen during a routine renovation:
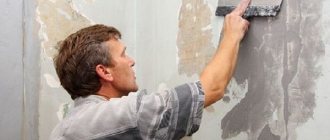
- Remove all old crumbling and peeling coatings from the wall using a narrow spatula and a wire brush.
- Grind off bulges and repair rough defects.
- Wash the walls and completely remove any dirt, neutralize or degrease stains.
- Wait until completely dry and prime.
In an outdoor pool, finishing with a waterproof gypsum-based finishing putty should be carried out in dry, cloudy weather. Preparation can be done at a convenient time.
Peculiarities
In the building materials store you can find ready-made decorative putty, which, after drying, gives the treated side a different texture. Which creates a beautiful and unusual look. The downside here is the high cost and small selection of products.
However, to make the wall design original, craftsmen have learned to create decorative elements from ready-made finishing putty.
Recommendations on how to make decorative elements correctly:
- prepare the surface in advance, apply a layer of leveling mixture, and then prime;
- mark the wall and cover the borders with masking tape;
- apply a finishing solution one centimeter thick to the wall;
- then apply crumpled cellophane to it, creating a texture;
- after drying, remove the cellophane and allow it to dry thoroughly;
- to get a chaotic pattern, you can apply different objects to the wall. For example, foam rubber, trowel and more;
- the resulting relief can be emphasized by painting the protruding elements using pigment dyes.
Popular brands
Developers and repairmen who do not want to bother with purchasing cement, sand and other components for making their own cement putty can purchase ready-made dry mixes from the following popular brands in Russia:
- Founded by Bazsilk Putty. A universal material that can be used for exterior and interior use. Packing: paper bag weighing 20 kg. Average price – 340 rubles per bag;
- VOLMA-Aquastandard. Starting putty for wide application. Packing – paper bag weighing 22 kg. Average price – 260 rubles per bag;
- Cement putty Ceresit ST-225. Finishing putty for wide application. Packing – paper bag weighing 25 kg. Average price – 756 rubles per bag;
- Cement putty “Magma”. Universal putty for external and internal work. Packing – paper bag weighing 25 kg. The average price is 385 rubles per bag.
How to make putty?
You can prepare the putty yourself. For example, asbestos. It is used for puttying ceilings and more.
Ingredients for asbestos mixture:
- asbestos - six hundred grams;
- kaolin - five hundred grams;
- chalk - one hundred grams;
- kaolin – five hundred grams;
- quicklime - one hundred gr.
All ingredients are mixed.
Before use, add water to obtain a creamy consistency.
Stages of work
As with classic wall puttying, processing a wooden surface includes several standard steps.
Preparatory.
Before starting dirty putty work, you need to remove the furniture if possible and cover the rest with polyethylene. Lay out film or old newspapers on the floor, put a mask and goggles on your face, and thick rubber gloves on your hands.
Cleansing.
In order for wood putty for painting or varnish to lay smoothly and beautifully, the surface must also be flat. To do this, you need to prepare a door, parquet or window: remove old paint or plaster (with sandpaper or solvent), coat metal parts (nails, staples) with enamel to prevent rust from appearing in the future. Then you need to go over it with a brush to remove stuck particles, then with a damp sponge.
Sealing self-tapping screw marks with a putty mixture
Primer.
For wood, priming is important in the same way as for a regular wall - before applying putty to the wood, go over it with a special liquid composition (acrylic, mineral or alkyd based). This will ensure the greatest adhesion and protect the wood from rotting and mold.
A little advice.
To get the highest quality coating, choose a primer that matches the composition of the base mixture. If the putty is oil-based, use a drying oil primer; a nitro primer will work well under nitro putty.
Advantages and disadvantages
Advantages of dry putty:
- convenience and ease of preparation;
- the ability to obtain a solution of different thicknesses;
- easy to store and transport;
- does not depend on temperature conditions;
- can be stored for quite a long time without losing its qualities;
- low cost of goods.
There are relatively fewer disadvantages than advantages.
Flaws:
- preparing the putty only strictly according to the instructions and takes additional time;
- after preparation, the material has a short shelf life.
Advantages of ready-to-use putty:
- is safe;
- has a long shelf life;
- after application – it gives greater smoothness (compared to dry), which will require less sanding of the wall.
Flaws:
- higher price for goods;
- Suitable for fine finishing work only;
- not used for pre-alignment.
What is latex putty?
Putties are produced using fillers, plasticizers and various additives that affect their properties. Latex putty, in which latex acts as a binder, is no exception to this rule. What it is? We are talking about a polymer dispersion of colloidal particles made from synthetic rubbers. Latexes can be of different natures and are based on polyurethane, acrylic butadiene polymers. It is the binder that determines the technical characteristics of the finishing putty. All types of latexes are characterized by high elasticity and strength, which was the reason for the creation of high-quality building materials based on them.
Each putty, depending on its scope of application, is improved with polymer additives. These can be substances with antiseptic properties; such putties are relevant for bathrooms, kitchens and when leveling slopes. Hardening regulators allow putties to determine the lifetime of the solution within optimal limits. Additives provide adhesion to certain substrates and improve their ductility.
Tips and recommendations for use
When preparing putty yourself, it is important to take into account the sequence of actions in the instructions written on the package.
Prepare a clean, wide container of the required volume in advance. For example, a paint bucket.
Important! To prepare a homogeneous mass, it is better to use a drill with a special attachment or a mixer.
Sequence and rules of preparation:
- the amount of prepared material should be small. For example, to use it up in half an hour of work, since the product dries and hardens;
- Fill 1/4 of the container with warm water (at room temperature);
- according to the instructions, add the required amount of the mixture;
- Using a mixer, stir the mixture evenly until a homogeneous mass is obtained;
- then let it sit for fifteen minutes and stir again;
- The consistency of the solution should be no thicker than sour cream, as it will not adhere well to the surface and crumble. And not very liquid, as it will begin to flow and leave sagging on the surface;
- You can actually save the remaining putty until next time if you pour water on top, and before use, drain this liquid and mix.
For your information! For better uniform application of building material, it is convenient to use a mortar sprayer. It must be purchased with compression equipment. This is only relevant if a large amount of work is being carried out.
Choosing a manufacturer
Be sure to pay attention to the manufacturer when purchasing. It is better to opt for well-known brands. The most popular are Rotband and Vetonit. Such compositions are offered for sale in special packages, bags, and buckets. The container is designed for a certain area, which is indicated on the packages. Manufacturers clearly prescribe storage rules and preparation proportions. The material for the final layer has small volumes - up to 1.5 kg. A smaller quantity is required, which is why manufacturers offer such a container weight.
Do-it-yourself wall putty
The skill of puttying is not that difficult to learn. The putty skill is useful and will come in handy in the future. After all, repairs are done more than once in a lifetime.
To work you will need tools:
- two spatulas;
- capacity;
- drill (with mixer);
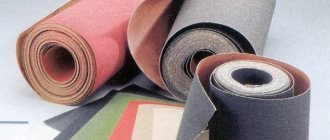
- sandpaper (a block wrapped in it) or a sander.
Stages and nuances of work
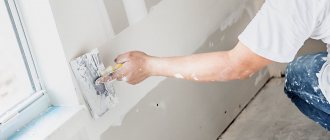
Puttying walls consists of several stages:
- making a starting solution. It has large components and a rough texture;
- filling of damage on surfaces (cracks, cracks and joints between panels);
- applying a leveling layer with careful smoothing;
- daily drying of surfaces;
- applying a thin layer of primer;
- drying within several hours;
- eliminating unevenness with finishing putty applied in a thin layer;
- drying of the applied layer again;
- sanding to obtain a perfectly smooth wall.
For newbies! If the end result is the application of ceramic tiles, then there is no need to apply a finishing layer and sand the wall.
Of course, correct puttying of walls will take a sufficient amount of time and effort. But there is also wide scope for imagination and the realization of desires when renovating a house. And it’s quite possible to do it yourself!
What tools are needed?
The set of devices for waterproof putty does not differ from the standard of a master finisher:
- Container for preparing the mixture;
- Ditch for putting the finished mass onto a trowel;
- Construction mixer or drill with an attachment, if it is a dry composition;
- Rule and set of spatulas;
- Sandpaper of different grain sizes or a sander (for a large area);
- Roller and brushes for priming;
- Wire brush (for cleaning the surface);
- Masking tape (cover adjacent surfaces, plumbing fixtures, glass, mirrors);
- Marking tool (plumb line, building level, tape measure).
Conclusion
By doing the putty yourself, you can save money and be confident in the good quality of the material. Don’t be afraid to experiment, all the mixture recipes I’ve given are very simple and it’s impossible to make a mistake.
If you have any questions, ask them in the comments. So I say goodbye, and good luck to you in your endeavors!
Hello! Interested in the proportions of materials for putty (PVA, chalk, fine sawdust
Arseny, here are the recipes for homemade putties:
To make putty for linoleum, you need to mix ground chalk (120 g) with crushed sawdust (20 g) and add linseed oil or drying oil until a thick, homogeneous mass is formed. You can add a dye to this mixture that matches the color of the linoleum.
For wood, ground chalk is replaced with PVA glue.
When making putty, lead sulfate is required to be added to an aqueous solution of glycerin (water - 50 ml, glycerin - 50 g). Stir until smooth. The mixture hardens quickly, so it must be used immediately after preparation.
Preparation of putty for asbestos requires mixing quicklime (100 g), casein (150 g), chalk (100 g), kaolin (500 g), dry paint (200 g) and asbestos (600 g). All components must be thoroughly crushed. While stirring, add water until the required consistency is achieved.
To make putty, you need to mix magnesia oxide (200 g) and zinc oxide (20 g). While stirring, add water until a paste is obtained. The hardening process occurs quite slowly, but at the same time it is able to withstand high temperatures up to 1600 ° C.
Source
