Print page
Home \ Fasteners, rigging and accessories \ Fastening for beacons
Sort by: Name Price Reset
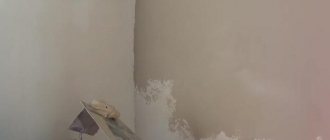
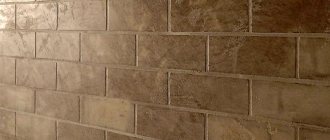
Leveling walls is one of the popular types of work in modern renovation. Smooth walls will greatly facilitate finishing (wallpaper, painting, decorative panels) and help avoid difficulties when installing furniture. The walls can be leveled using the “dry method” - using plasterboard, but it is much more practical and reliable to do this using plaster mortar. Plaster beacons and special fastenings to them allow you to apply plaster quickly, accurately and economically.
Installation of beacons for plastering walls in different ways
When installing, the main thing is to securely fix the beacon profiles to the wall.
To reliably, quickly and accurately install the beacon on the wall, use ready-made or home-made fasteners, for example, eared ears, clips. Often the installation of beacons for plastering walls is done using mortar. To prevent the solution on which the profiles were installed from serving as an accelerator for the crystallization of the plaster composition applied during plastering, the flashings are coated with a primer after installing the beacons.
Installation on plaster mortar or tile adhesive
Let's look at how beacons are placed, when they are installed and fixed using a plaster mixture. If you install the profile directly on the screw caps, it may rotate during the fixation process, deviating from the correct position. Therefore, piles of plaster composition protruding above the caps are laid around the hardware with a spatula.
Round or rectangular “bedside tables” are formed from the slides; the top is cut off along an auxiliary vertical plane at the height of the caps. On such hardened bedside tables, it is much easier to place beacons under the plaster and secure them with plaster mixture or tile adhesive.
After installing the plaster beacons on the marks, fix the position of the profiles between them. Pieces of cut drywall can be useful here, from which you can make a mark of the required height by gluing the pieces with a solution or adhesive mass. If the beacon profiles are located close to the surface of the base, it is enough to place a mortar mixture under them in the right places.
Installation of beacons without mortar
Since our task is the reliable installation of beacons with protection against displacement during the plastering process, we need quick, strong fastening of the profiles to the self-tapping screws. For this purpose, several types of fasteners have been invented.
You can install beacons on hardware using:
- clips;
- creamers;
- eared;
- cleverness;
- homemade brackets made from straightened and cut beacon profiles.
The advantage of such fastening is the speed of installation, the absence of the need to wait for the plaster mixture to harden. In other words, it is enough to install the beacon profile and secure it with the fixing parts on the screws, and almost immediately after installation you can begin plastering. Beacon profiles installed on the walls will no longer move.
The disadvantage of such fastening compared to fastening to a plaster mixture is that it requires the installation of additional hardware, as well as the purchase of clamps.
Lighthouses from solution
You can make your own beacons for leveling walls using a plaster composition, for example, gypsum or cement. Such paths, made from the same plaster composition that will be used for subsequent plastering, do not need to be removed.
The easiest and fastest method is suggested by Andrey Shaiter.
To make guides from mortar, only a rule, a spatula and a trowel are used. The axes of the beacons are first marked on the wall, the zero point is found using a laser device, an auxiliary plane is set, and marks are made on the rule. Before starting work, prepare a viscous elastic solution.
Step-by-step production of a mortar beacon using the Scheiter method:
- the rule is installed on the edge (fixed in this position on the scaffolding);
- use a trowel to apply a solution to the upper edge of the rule;
- apply the correct bar with the solution to the wall, pressing until the line on the rule and the laser beam are aligned;
- using a rectangular trowel, adjust the angle of contact between the rule strip and the wall (to achieve the formation of a perpendicular);
- use a spatula to remove excess mortar from both sides of the instrument;
- using cotton threads, cut off the edge of the rule from the created mortar path, remove the rule;
- Allow the solution to dry for a day, after which they lightly pass along the top of the beacon with a block of sandpaper.
This method creates mortar paths 2 cm wide. Made from gypsum, they dry out within a day and become suitable for plastering. During manufacturing, it is recommended to rest the lower end (heel) of the tool’s strip on a wooden wedge to avoid displacement of the strip when cutting with a thread.
Another method of making mortar guides and controlling their vertical level is somewhat more complicated.
- The rule bar is attached to the pre-installed screws to the wall (perpendicularly, on the edge).
- The gap between the plank and the wall is filled with mortar (without gaps).
- Use a spatula to remove excess plaster longitudinally from both sides.
- Gently tapping, shift the rule along the axis of the beacon, and then remove it from the formed path.
Everything you need - in one store!
Unfortunately, not all stores have mounts for beacons. Do you want to save time and not waste it on shopping trips or ordering from several sites? Come shopping at Stroyinstrum.ru!
We offer everything you need for wall leveling work:
- Rules, trowels (trowels)
- Construction levels, plumb lines
- High-quality beacon profile of different heights
- Fastenings for beacon profile
- Self-tapping screws in assortment
All products in our store can be purchased online (the electronic catalog makes this procedure quick and uncomplicated) and received at any address in Moscow or the Moscow region using our store’s transport. Delivery within Russia is carried out using transport companies. You can discuss the cost and delivery conditions with our manager when placing your order.
For all goods, pickup from our warehouse store at the Melnitsa construction market (41 kilometers of the Moscow Ring Road) is also available.
Methods of fastening profiles for beacons
Attaching beacons for plaster is carried out in the following ways:
- installation on gypsum marks;
- mortar mounting;
- installation of the “eared” fastening;
- installation of galvanized steel guides, etc.
The mount is installed using the following tools:
- perforator;
- rule;
- building level;
- hammer;
- metal guides;
- electric drill with a set of attachments;
- capacity;
- cords;
- markers.
Installation of profiles on gypsum marks
Gypsum marks can be used as fastening for plaster beacons. The method is simple to implement, efficient, and optimal for installing alabaster stamps, because the material hardens quickly. Once the plank has hardened, it is difficult to change the location. At the preparatory stage, vertical markings will be required. The gap between the wall and the last beacon in the line should be about 200-300 mm according to standards. A plaster mass is applied to the surface along the marks.
The distance between marks should not exceed 280-300 mm. Beacons are placed in the plaster mass, symmetry is adjusted using a level. Excess composition is removed. After the plaster layer has hardened, 2 threads need to be pulled between the profiles as a guide for fixing the planks. After preparation, they begin to apply layers of plaster.
Installation of “eared” fasteners
It is necessary to fasten the elements to create a holding system with the ability to adjust the guides. The method is efficient, high-quality, and is characterized by savings in finishing materials. Fasteners must be secured into the gaps; no gypsum mixture is required to secure the elements. After work, the parts can be easily removed.
How to properly install plaster mix fasteners
Fasteners for beacons under plaster can be made from plaster composition. The advantage of the method is environmental friendliness and the creation of a uniform wall surface. The plaster solution needs to be applied between the marks. Then the mass is given the required shape using a spatula or rule. The method is recommended for novice builders.
How to properly install galvanized steel fasteners
Galvanized steel fasteners are in demand when plastering surfaces. The profiles reach a height of 6-10 mm. When installed correctly, the beacons will ensure their stability and uniform application of plaster. The design is produced in lengths of 2.5 and 3 m. The minimum layer of plaster composition is calculated according to the height of the profile. The most rigid and reliable is 10 mm.
When installing, the minimum distance between the beacon and the wall is 1 mm. The maximum gap is 100 mm. The profiles are fixed using self-tapping screws and dowels.
How to use special mounts
Fastening elements of beacons for screeds may differ from standard parts in shape. Manufacturers offer a wide range of configurations and sizes. The parameters are determined by the finishing area, the quality of materials, and the condition of the panel. The clips are made of steel or durable plastic. These fasteners are selected according to their shape.
Clips for beacons are available for rigid fixation or for rigging work. The kit for rigid fixation includes studs and fittings. The rigging uses hooks, staples, and improved clamps for fixing beacons.
Manufacturers offer profiles made on a gypsum basis. The fixed gypsum version is durable and strong.
Why is it necessary to display beacons?
The beacons form a flat plane, which in the future will be the plane of the plaster. These elements create a kind of reference level. The lighthouses themselves are made of steel or wooden slats. In most cases, galvanized steel slats are used.
The beacons are attached to the wall with a certain pitch (800 - 1300 mm), the distance should not exceed the length of the rule, otherwise the whole point of alignment with the beacons is lost. A solution is thrown between the slats, then it is usually supported on two adjacent beacons and pulled from the floor to the ceiling. The rule cuts off excess plaster, resulting in a smooth surface.
Vibration motor for vibrating table
It’s even easier to make a vibration motor for a vibrating table, on which paving slabs, cinder blocks, and curb stones are made. Depending on the mode of use of the installation, the required electric motor is selected according to the shaft rotation speed. Any motor is suitable for making tiles and blocks on a vibrating table, but unlike an external concrete vibrator, an eccentric cannot be installed on the motor shaft. The fact is that the silumin housing of a household electric motor (unlike industrial vibration motors) may not withstand the load and will quickly fail.
To manufacture a vibration motor of this type, you will have to use an additional shaft with an eccentric, which will be rigidly attached to the vibration table. The unbalance on the shaft is attached in the same way as in a surface vibrator for concrete, and the motor can be mounted separately on the installation frame and transmit rotation to the vibration shaft through a conventional belt drive.
This way you can inexpensively and quickly manufacture a vibration motor for any purpose yourself, in a short time and without significant financial costs. And you can save a fair amount, since the price of a factory-made 220 V vibration motor from the Yaroslavl plant is from 10,000 rubles, depending on the power. Good luck to everyone!
Installing beacons correctly is not difficult
In those places where the beacons will be installed, it is necessary to make vertical marks - a simple pencil is perfect for this. It is along these marks that the plaster flakes are applied using a spatula. The size is about the size of a handful. Then they immediately place beacons - they should be at a distance of 150-200 mm from the corners. It is important that the cakes stick to the wall well; a certain interval must be maintained between them - 300 mm will be enough.
Now you can attach a beacon to the cake. It is pressed down with a finger - this must be done in turn on each flatbread. Next, a rail is attached to the beacon and you need to gently press it - while doing this, you should watch the level, because it should be positioned vertically.
Everything is almost ready. Of course, if a person has no experience, difficulties may arise
What to do next:
- If you identify a distortion, you should apply stronger pressure if necessary;
- This is necessary in order to install the beacon correctly;
- When a vertical position has been achieved, the rail can be removed;
- The solution is straightened - a spatula will help you with this;
- It is necessary to correct the solution on both sides of the lighthouse;
- Even after hardening, it must securely hold the beacon;
- Then all excess plaster is removed so that it does not interfere with further work.
If somewhere in some place the beacon has slightly moved to the side, just carefully correct it with your own hands. If there is not enough plaster underneath, carefully add it - while the beacon itself is slightly pulled away from the surface of the wall.
It is important that the plaster does not protrude higher than the lighthouse itself. If there are problems, place the leveling rod again and level the beacon.
When checking the correct installation, you should pay attention to the following: there should be no gaps or deflections between the beacon and the rail. Only in this situation will the vertical be accurate. To avoid mistakes, watch the video: correct installation of plaster beacons.
If the wall slopes outward and this complicates the work, the lower edge of the lighthouse is usually pressed directly against it. And if it is tilted inward, the upper edge is pressed, that is: you can find a way out of any difficult situation.
As a conclusion, we can say: to install beacons with your own hands correctly, you need some experience, as well as dexterity. If something doesn’t work out right away, don’t worry, it’s enough to set just the first couple of beacons and in the future you’ll work much faster, and the result will definitely be worthy.
Prices for clips
The main savings in the process of using fasteners for installing beacons is the reduction in plaster consumption. On average, a reduction in consumption by 1 sq. m can be up to 10 kg of dry mixture. The cost of plastic fastenings for beacons under plaster has a slight influence on the overall costs - about 30 clips will be needed for a wall measuring 3 x 6 m.
Prices for KDM-2 mounts are currently as follows:
- a set of 25 pieces can be purchased for 75–90 rubles;
- a set of 100 pieces will cost 250–300 rubles.
Installation Methods
This procedure can be performed using various technologies. So, below we will discuss all the ways to install fence posts. Today there are four of them.
Visual representation of all installation methods
Driving in
This technology is the most ancient and widespread today. It is as simple as possible, so almost anyone who is no stranger to working with their hands can handle it.
So, you need to do the following:
- The hole is made slightly smaller (10-12%) than the diameter of the post. This is necessary in order to ensure its reliable fixation, which is the guarantor of the strength of the fence.
- A fence post is driven into the prepared hole using a large sledgehammer. This procedure will require quite impressive physical strength.
- If you have problems with compaction, you can moisten the soil a little - this will make the work easier.
This method is suitable for lightweight structures that do not have a “sail” effect. For example, for fences made of welded mesh or chain-link. It is worth noting that installing fence posts with your own hands using this method practically eliminates the possibility of making fatal mistakes.
When working with a sledgehammer, do not forget about safety precautions - keep it at some distance from you
Of course, this method cannot be used to install posts for heavy fences made of panels or corrugated sheets.
Partial concreting
This method is very similar to the one described above, but it also has its own differences.
So, it is as follows:
- The same hole is made as in the previous example.
- A pole is also driven into it using a sledgehammer. In this case, you need to leave a little space between the soil and the pipe (profile).
- Next, concrete is poured into the resulting wasteland. It is also worth applying a little solution on top. If necessary, it can be removed later.
This technology is much more effective than the previous one, but it also has its limitations. So, it cannot be used on heaving soils. The fact is that moisture during the freezing process pushes the post out, which leads to the skew of the fence.
Full concreting
If you want a truly durable fence, then you should choose this method.
It consists of the following:
- Holes are drilled with a diameter 30-40% larger than the profile (pipe). It is best to use a gas drill, since it is quite difficult to perform this procedure manually.
- Next, the holes are completely filled with concrete and pillars are inserted into them.
Wait until the concrete has completely dried, and only then proceed with further manipulations.
- The result is a very durable structure that can withstand impressive weight and any external irritants.
This technology is most preferable on sandy soils and low groundwater levels. This is due to the fact that such a base is not capable of providing the required level of durability.
Compacting with crushed stone
This technology is an excellent solution when you need to install a fence on heavy and stubborn soils.
It's extremely simple:
- A hole is made 35-40% larger than the post.
- A support is installed in it.
- The entire remaining space is filled with small crushed stone.
- After which it must be compacted using a vibrating plate.
It is impossible not to note a very important advantage of this method: crushed stone allows water to pass freely, and it goes deep into the soil. This prevents moisture expulsion that characterized previous technologies
Visual diagram of the tamping method
Do I need to clean up after?
Since metal profiles or plaster beacons are made of metal, over time they tend to rust. Even in a dry environment, the material can oxidize and form rusty stains or cracks. Therefore, it is best to remove thin profiled beacons after pouring, when the mixture has not yet had time to dry and become extremely strong. For T-shaped beacons, their upper edge is clearly visible above the screed; you can pull them out with the corner of a spatula. If the floor is already dry enough and the mortar has set, then you will have to remove the beacon using a pick or chisel with a hammer.
After removing the plaster beacons, grooves remain in the flat floor, which can be easily leveled using the same solution that was used for the screed. You can also seal cracks after removing the profiles with gypsum plaster. Pointed beacons-benchmarks in the form of metal tripods are easy to remove from a fresh screed thanks to sharp legs with a smooth surface. Also, immediately after pouring, you need to remove the plastic markers.
It is quite difficult to remove tubular beacons from a poured screed. Typically, such thick guides are left in the finished floor, plus they additionally reinforce the concrete layer.
Installing guides on plastic mounts
Correct installation of beacons on clip mounts is carried out as follows:
- At equal distances from each other across the entire width of the ceiling, 5–6 dowels are installed into which self-tapping screws are screwed;
- The fastener caps are aligned in the same plane using levels;
- Plastic clips are put on the heads of the screws for installing beacons;
- The guides are installed (the lower part should rest against the sides of the base of the clips), and then fixed. The base of their fastenings is pressed using a plug, which is inserted into slots specially designed for this;
- After you have succeeded in setting up the beacons for the plaster, you can begin to carry out the main part of the finishing work.
When working, be sure to use personal protective equipment. These include gloves and special glasses, which are especially important when drilling the top of a wall.
Types of plaster beacons
Builders distinguish between several main types of plaster beacons.
It depends on the materials from which the lighthouse structure is made:
- mortar _ Lighthouses are some kind of paths, the upper part is a guide for the rules;
- metal _ The most popular type of lighthouse structures, which is made of aluminum or galvanized steel;
Important! Before use, such profiles are cut to size.
- plastic _ Not the most common material for a lighthouse, since it tends to bend strongly and often;
- wooden _ An even rarer lighthouse design, fixed with nails;
- strings.
Each design has its own characteristics, as well as pros and cons. Each builder chooses a material that is more convenient to use. For example, plastic beams tend to bend. Due to the material they are made of, it is very difficult to install them evenly.
Metal and wooden beacons, after use, must be removed from the wall after the solution has set and hardened. If this is not done, then metal beams will form rust spots, while wooden beams will begin to swell and spoil the overall appearance of the structure.
Beacons for walls: what are they?
A lighthouse is a name given to guide strips used to fix the level of plaster applied to a wall or ceiling by builders. After installing the elements, the surface being designed is leveled, increasing the service life of the room.
Beacons for plaster differ depending on the material of manufacture and are:
- Metal - when choosing these beacon profiles, take into account the height, which can be 3-10 mm. The advantage of the product is its easy mounting on a wall or concrete screed. The holder can be secured to the base using self-tapping screws or metal dowels, which are installed at the required height.
- In the form of pipe fastenings, they are used to level the floor surface. The advantage of the fastener is its high strength and the ability to make a monolithic screed. During installation there is no need to reinforce the wall. The element can be removed from the screed one day after finishing the floor. Pipe products can be deformed on concrete bases.
- Made from a cement-sand composition, they are difficult to install, but they allow you to adjust the evenness of the walls even if there is a difference in height. These fasteners can be used to level surfaces of different sizes.
- Plastic - inexpensive, lightweight, easy to install, but the products can be deformed, which will negatively affect the quality of the designed surface. The coating with decorative plaster may turn out to be uneven, with differences in height, and the shelf life of the decorative finish will be reduced.
Depending on the installation method, the elements are divided into subtypes.
The clips are made from a durable polymer composition; the products help to install the guides reliably and efficiently. It is still possible to adjust the position of the profiles by unscrewing or tightening the metal screws.
The products allow you to correct the surface even in the presence of unevenness and vertical differences. However, fasteners are used only in small rooms. Clips allow you to save money because... no special solution is needed for fixation. Installation work requires several times less time compared to other methods.
The “eared” holder is easy to install and is suitable for beginners in interior decoration. The fasteners are used to create a flat wall, floors, and as beacons for floor screeds. The work requires a small amount of plaster composition.
Crammer clamps are made from galvanized steel and have a rectangular plate configuration. There are holes along its edge, which are used to bend elements and simplify installation work. There is a hole in the center of the clamp for a self-tapping screw. The use of these parts allows you to adjust the location of the guides if the need arises.
According to the cross-section, the metal mount for beacons can be in the shape of the letters “L” or “T”. The first is 2.7-6.0 m in length. It can be used in residential or industrial premises, depending on the length of the product.
Profile type “T” is 6-10 mm thick, the width can be 18-20 mm. The elements are recommended for finishing work in a cottage or apartment.
When decorating a house, you can use string-type beacons. These guides are used in the absence of large differences in height, deformations in the coating and in small areas for finishing with plaster.
What are lighthouses?
These are limiting strips that help the master apply a layer of plaster. To install the beacon profile you have to spend a little time, but the surface will be smooth and the work will go faster. The products are made from galvanized metal or plastic and have a height of 3, 6 and 10 mm. The length is based on the walls in the house - 2.5 and 3.0 m.
The master saves the time it takes to constantly check the plane during the plastering process without beacons. The layer of solution is equal to the height of the profiles - there will be no overspending, only savings. Work using restraints is possible even without qualifications. They can be reused - they are removed and the grooves are sealed.
Beacon profile for plaster
There are few disadvantages, but they exist:
- metal guides are not very durable and sometimes bend during transportation;
- plastic flexible – when pressed, they can usually sag, which affects the quality of the surface;
- if you leave metal beacons in the wall, after a while they begin to rust, stains appear through the wallpaper and paint - they must be removed before such finishing;
- After dismantling, it is necessary to fill the uneven areas with a solution.
Beacons with a height of 10 mm are often chosen for tiles. They are left in the plaster. The six-millimeter profile is used mainly for surfaces that are painted or wallpapered. A height of 3 mm allows you to make the thinnest layer.
In the kitchen
The kitchen is a special place, which, on the one hand, should be fenced off from residential areas, but on the other hand, it must fit harmoniously into the interior. The ceiling in the kitchen is sometimes different from the ceiling in other areas. This is due to the fact that additional space is needed here for a hood, refrigerator and other household appliances. Some residents combine the kitchen and bathroom. For example, they place a washing machine and a kitchen oven on the same plane. Therefore, there will be special requirements for the ceiling.
- Beams or metal pipes in the kitchen may not serve a decorative role. You can safely conduct communications using them.
- Lamps should illuminate the workplace and not disturb other residents. You can bring a separate light bulb on a wire to the kitchen. It will look original and fit into the style.
- In the kitchen, in addition to the stove and refrigerator, there is a kitchen table. It can be used to install a support beam on it and mount an additional canopy.
- The main thing is not to deviate from the style. All materials should create the illusion of additional space. There should be nothing superfluous in the kitchen. The work and dining tables, chairs, gas (or electric) oven, and refrigerator should not interfere with each other.
Read in a separate article how to decorate a kitchen in a loft style.
Exclamation ATTENTION! Designers recommend using separate space for food processors, microwave ovens and multicookers. These devices are important, but they also take up space and must match in style
How to decorate a small kitchen or kitchen-living room in a loft style, as well as about color combinations for the kitchen, read in our separate articles.
We set up intermediate beacons
In some cases, it is also necessary to install intermediate beacons - Ushastik mounts will help you here too. First, let's figure out in what cases it is necessary to install an intermediate beacon.
This is necessary when the wall is too long or an intermediate beacon is installed directly between a pair of adjacent beacons - if the wall is problematic.
When the corner beacons have already been installed, install one intermediate one - if the width of the wall is much greater than the permissible distance between the beacons. It will just be much more convenient to work with a long rod.
There will definitely be a solution - the main thing is to try
It is logical that the additional beacon, which is located between the corner ones, should be in the same plane as them. To achieve exactly this effect, a long rail will always help you, which will be equal to the distance that is between them. If you don’t have such a strip at hand and the wall is long, and there are pipes or other obstacles on it, they usually pull the thread.
Using a rack for installation
To install an additional beacon using a batten, you first need to wait for the plaster that holds the corner beacons to dry. This usually takes several hours, and much depends on what the room temperature is.
To avoid wasting time, you can always place beacons on other walls during this period, and Ushastik mounts will help you with this.
When the plaster has hardened, make cakes for the middle lighthouse, and then place it on this solution. The bottom of the beacon should be pressed in using a horizontal lath: this is done until the edges of the lath lie on the corner beacons.
You need to place the rail vertically along the lighthouse and ensure that it takes a vertical position. To do this, press the rod onto the top of the lighthouse - the main thing is that its lower part does not change its position.
Mounts for Ushastik beacons are your faithful assistant for plastering work!
To make sure that the installation is vertical, the rail should be applied horizontally to the outer beacons - the central beacon should also be in contact with the rail - this is important.
These measurements are usually repeated at different heights - and to completely eliminate any doubts, you can even check everything once again diagonally - this will not take much time.
Thread for installing intermediate beacons
It is decided to use thread in cases where it is impossible to use a lath - for example, when there are pipes on the surface or the wall itself is very long. To tension the thread, a dowel is driven in at the bottom and top of the wall - immediately behind the corner beacons. A thread is stretched between them - it should lie on these beacons.
Using a finger or a rack, the intermediate beacon is pressed into the cakes until there is a barely noticeable gap between it and the thread. The level is used to check whether the intermediate beacon is installed correctly.
If there are too many pipes on the surface of the wall, it is better to act according to the situation. Intermediate beacons can be installed in fragments - between pipes. For example, a 150 cm section of a kitchen wall with pipes located here may well require the installation of 3 beacons.
Kremmer type fastenings
The Kremmer beacon mount is made in the form of a rectangular plate of galvanized metal with bending holes located along the edges and a central slot for fastening. The differences between this technology for installing beacons and others are in the following nuances:
- the ability to bend and fix fasteners on beacons even without a special tool (“crammer” is easily bent and pressed with your fingers) simplifies and speeds up their installation;
- using a “crammer”, beacons can be installed at a shorter distance from the base compared to other fastenings, which saves a significant amount of plaster;
- devices can be used together with any types of fasteners (from self-tapping screws to dowel nails) and guides (plastic, metal or made of plaster). Moreover, the thinner the beacon, the smaller the distance between the fasteners - for example, for a 10-mm thickness, the “crammers” are located approximately 30 cm from each other;
- tensioning the fasteners when installing beacons under plaster walls guarantees a more reliable fixation, after which you can immediately begin finishing work;
- The position of the guide can be easily adjusted even after installation. By sliding the fasteners and turning it to the side, you can first open access to the fasteners and then return the device back.
Method of installing beacons on the wall
One way to set beacons for plastering walls when using cremmer fasteners is to do the following:
- Screw self-tapping screws into the base of the fastenings;
- Adjust the fastener caps by levels;
- Center the fasteners along the guide, bending their edges. The bends in should be directed outward;
- Press the beacon tightly to the cap and move the fastenings onto the screws.
It should be noted that the fastener should not bend along with the fastener. Otherwise, the fixation may not be very reliable, and the beacons will move.
You can speed up the work of securing the “crammers” by using a screwdriver rather than a screwdriver. In this case, you should set the device to a slow speed. And when adjusting the position of an already installed guide, be sure to take into account the number of turns (screwdriver or screwdriver). To move, all screws must be unscrewed the same amount. Details about fastening the cremer.
Video: KREMMER Mounting for beacons Installation instructions Kremer
Fastener "Ushastik"
The “Ushastik” fastening is a special model designed for more accurate and quick installation of plaster beacons used for finishing walls, floors or ceilings. And the main advantages of this product are the ability to:
- spend a minimum of time on installing each beacon - from 3 minutes;
- increase the reliability of attaching beacons to the wall, due to which the likelihood of them falling off when plastering a wall or ceiling is almost zero;
- begin finishing work immediately after installing the guides;
- carry out work even in damp rooms. And, if for conventional fastening options it is desirable that the humidity does not exceed 65–70%, when using “Ushastik” its higher value is allowed;
- save about a third of the material.
The use of Ushastik fasteners increases labor productivity and allows you to quickly dismantle the guides and use them when performing other plastering work. And the performers do not require special training. Therefore, even a less experienced specialist can install such fasteners and mount guides on them.
The difference in fastening options affects the minimum thickness of the plaster
Technology for installing guides on Ushastik mounts
It is recommended to install such a mount for beacons under plaster on walls, observing the following sequence of work:
- Prepare the wall using a level or plumb line to determine the vertical plane. As a result, the thickness of the plaster layer is minimal (no more than 10 mm), material costs, and therefore the estimated cost, are lower;
- Drill the first six-millimeter hole from which the countdown begins. It is advisable to choose for this a point located 20 cm to the left and 10 cm below the upper right corner of the structure;
- Insert the dowel and, using a tapping thread, make a vertical marking;
- Mark in a horizontal direction;
- Mark and drill the same holes at a distance of 1–1.5 m from each other in the horizontal direction and about 400 mm in the vertical direction;
- Insert six-millimeter dowels into them, screw screws into them with the fasteners on and align the heads in the same plane (using a plumb line or the same level).
The final stage of work is cutting the beacon profile exactly to the height of the wall and securing it. To do this, the beacon is applied to the surface and crimped with “Ushastiki” using special round nose pliers. After all the profiles have been installed, you can begin plastering the wall - and, when finished, remove the guides for reuse on another wall. Learn more about the technology of fastening the ears.
Video:
Preparatory work
First, you should consider the process of carrying out preparatory work, since installing fasteners for beacons under plaster requires certain conditions, which will now be considered.
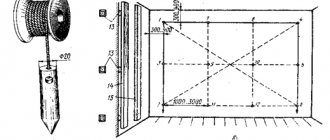
All beacons are installed so that they form a special grid with each other, and the plasterers will pay attention to it in order to carry out all the work as efficiently as possible. Here is a list of all the important preparatory work that you definitely shouldn’t neglect:
Before starting the process of attaching beacons under plaster, it is important to completely clear the surface of all existing sagging, because they very often remain after pouring solutions, as well as various concrete mixtures
Experts also advise completing in advance all work related to the installation of sockets, as well as electrical cables and other similar elements. Thus, you must hide all the wiring, because opening the surface of the plaster after completing the work to hide the electrics is not the best solution
Before starting the process of attaching beacons under plaster, it is important to completely clear the surface of all existing sagging, because they very often remain after pouring solutions, as well as various concrete mixtures. Experts also advise completing in advance all work related to the installation of sockets, as well as electrical cables and other similar elements.
Thus, you must hide all the wiring, because opening the surface of the plaster after completing the work to hide the electrics is not the best solution.
Now start a full check of the walls vertically; a special level or even an answer will do for this
After completing the vertical check, it is important to drive nails along the edges of the wall, and it is important to do this from each edge. Now pull the vertical line, but in no case forget that there is electrical wiring in the wall
For this reason, it is necessary to pull the fishing line at least one and a half centimeters away from the protrusions on the wall; do not ignore this rule, because it is very important! Now the horizontal check should begin, after which the main markings will be carried out. As you might guess, in this case the fishing line should be pulled horizontally, and if you notice that there is a deviation of one and a half centimeters, then you will need to move all the fishing lines at once to a certain distance.
The next stage should include intermediate marking, that is, you should divide the set aside distance into a number of parts. The basic rule for dividing is to create gaps of about 1 m. After this, you will need to drive nails along the line. Only in this way will a certain grid be formed. Now proceed to installing the guides.
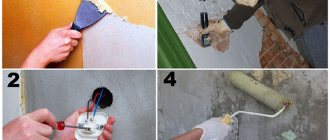
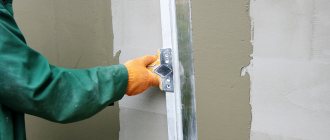
Surface preparation - cleaning, priming
A very important stage of work that should not be neglected, otherwise there is a risk of the plaster peeling off. There is no need to rush - remodeling is expensive and complicated. It is better to spend time and carefully prepare for the main actions. With old walls there is more trouble - there is still a coating with many defects that need to be eliminated. Particularly difficult is removing paint and whitewash; sand often falls out of the solution. It’s easier with new surfaces, but the wall is not always immediately ready for the masons to apply plaster - sometimes there is a protruding mortar left.
It is important to pay attention to some points when preparing the base:
- Using a building level, significant deviations from the vertical are identified. Large protrusions are removed with a chisel or axe.
- Check the old plaster by tapping it with a hammer for the presence of voids under the finishing layer. In the detected places it is removed.
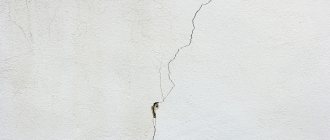
- Seal up the cracks. If they are wide, they are reinforced.
- Sand, wherever it crumbles, is swept away and thoroughly cleaned.
Before installing the beacons, prepare the surface.
Mandatory alignment of technological holes, large depressions, and grooves is required. Mixtures are used that will be used for finishing. In addition to slaps of mortar on the new wall, protruding reinforcement and wire are removed. There is no need to perform any operations with uneven masonry - it is corrected with plaster.
When cleaning is completed, craftsmen advise additional processing of the smooth surface. Use coarse sandpaper or apply notches using a chisel and hammer. When the wall is rough, the adhesion to the mortar will increase.
Then use a paint brush to prime in 2 layers, making sure there are no gaps. In rooms with high humidity, an antifungal composition is used. Plastering is carried out only after complete drying.
How to prepare
To know exactly how many beacons are needed for the walls, the surface can be roughly divided into vertical strips. In this case, the width of one strip can be 150 cm. It is along these strips that the beacons will be installed.
What is needed to properly install plaster beacons?
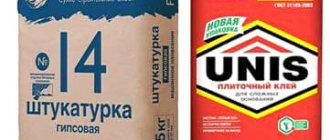
- Gypsum plaster has high plasticity and hardens quickly. The ideal option is Rotband products, which will perfectly hold your beacons, while the quality of installation of the beacons will be at the highest level;
- The work cannot be done without a paint spatula;
- Of course, you should have a bucket of water handy;
- Next, you need a rail (preferably made of aluminum). The length of this rail can be 240-250 mm. Some people prefer to use a hard block of wood or a simple planed board;
- Profile level 100 cm long.
Plastering with your own hands is not difficult. Especially if you have fasteners for Ushastik beacons at hand
The level is attached to the rail with mounting tape. This approach is really convenient - the vertical level eye on the rail is located at the edges, and in order to look at it, you either need to stand on a stool or kneel.
And if the profile level is attached to the rail, you will always have a peephole at eye level - a really convenient solution.
Mixing the mixture for attaching beacons
In order to make the plaster solution for attaching beacons correctly, it is advisable to use a low-speed mixer with a special attachment - this electrical device is really very useful in such work.
The mixture is mixed in the proportions indicated on the package
Some people prefer to use a drill, but this is not recommended - the power of the drill is low and the speed of rotation is high. When mixing the solution, it can easily fail. If you don’t have a mixer, you can make the solution manually: many novice craftsmen choose this option.
On the packaging in the instructions you will find all the proportions for kneading. If everything is done correctly, the result will be a soft, sticky, plastic mass. You should not mix too much plaster - all of it will need to be used before it hardens, and it hardens quite quickly.
Peculiarities
In order for the floor finish to look flawless, without wrinkles, cracks and unevenness, it is necessary to first level its surface. Most often, a screed is used for this - a special mixture that is evenly distributed over the entire surface of the room. It is difficult to visually bring even a few square meters under one level, so you have to install special rigid guides - beacons.
Placing beacons is only necessary in some cases; for example, when using a self-leveling floor, they are not needed, since the mixture itself, which has leveling properties, spreads evenly over the entire surface. But for concrete and cement-sand screeds, their presence is simply necessary. The minimum layer thickness for such solutions is 3 cm, and at the lowest points it can be more than 10 cm, so you have to use beacons.
Metal beacons look like hollow pipes, profiles or corners. They can be attached to cement mortar, gypsum plaster or self-tapping screws. Some make them from strong and smooth wooden beams or from the same mortar. The main condition is to maintain an ideal horizontal level on the entire surface of the floor in the room. After the beacons are installed and firmly fixed, they begin to pour the screed.
Using special fasteners
To simplify the installation of beacons, some manufacturers have developed original mounts made of metal or plastic.
They are designed to increase the speed of work and reduce labor costs. Looking ahead, we note that they are mostly used by beginners - professionals prefer to act the old fashioned way. Assortment of fastenings for beacons under plaster
| Name of fastener | Material | Approximate price per piece. |
| Kremmer | Metal | 1.3-1.5 rub. |
| Ushastik | 2-2.5 rub. | |
| Umka | 1.2-1.7 rub. | |
| Fastenings for lighthouses under plaster | Plastic | 1.8-2.5 rub. |
| KDM | 2.5 rub. |
From the video below you will learn not only how the Ushastik type mount is used, but also once again watch the process of marking the wall. We will leave all advertising messages at the discretion of the manufacturers.
And in this video we talk about the use of plastic fasteners. They are installed on self-tapping screws already screwed in and mounted level.
Another video about beacons and how good they are. Whether this is true or not is up to you to decide.
How profitable is such a solution? Let's figure it out:
Homemade fastening option
Looking for cost-effective options requires you to think outside the box. After all, anything can be used as a fastening element. The main thing is that this “something” fulfills its functions. Therefore, we suggest that instead of the fastening option described above, you use perforated steel tape 12 mm wide and 0.5 mm thick. It is often sold in rolls of 25 m and costs around 150-200 rubles. The cost of one bundle, taking into account the price of dowels and screws, will be approximately 1.7-2 rubles.
The idea is this:
- cut the tape into pieces of 35-40 mm so that in the middle of the elements there are holes for self-tapping screws;
- the cuts are bent to the width of the metal beacon used;
- a hole is drilled in the wall into which a plastic dowel is hammered;
- The U-shaped element is screwed to the wall, aligning the self-tapping screws;
- install a beacon;
- the protruding edges of the homemade fastening are bent with pliers, due to which the beacon profile is pressed tightly against the screw head
The pitch of such fastenings is set to 30-40 cm. For reliability, you can add several patches of plaster mixture in the spaces between the fastening elements.
Finally
As soon as you place the beacons on two or three walls, further work will proceed in a continuous mode - the main thing here is to understand the installation principle and decide on the most convenient installation method. Happy plastering!
Types of beacons for dry screed
The types of screed beacons are determined by its density, the load on the guides, the skill of the builders and the financial capabilities of the customer.
Dry screed is made from bulk materials and does not tolerate moisture. Therefore, the base of the floor is covered with a film and dry mixtures or expanded clay chips are poured onto it. This means that the use of self-tapping screws for installing beacons is categorically excluded - they will damage the film and break the seal of the substrate.
The use of point beacons and benchmarks is also undesirable. In the first case it is very difficult to level the surface, in the second there are difficulties in using the benchmark itself.
How to install beacons for floor screed using dry mixtures? Linear beacons are used here.
Metal U-shaped profiles can be used as guides. They are laid on the base of the floor with sharp edges up. Alignment along the screed line is carried out using alabaster, which dries very quickly, or by placing pieces of plywood, plastic, tiles and other similar materials under the profile.
For reference: profiles laid with their edges up do not conduct sound.
This type of beacon cannot be dismantled. Therefore, its height should correspond to the thickness of the backfill, approximately 27-30 mm, and the profile should be thick so that its edges do not deform under load. If this condition is ignored, the evenness of the screed is disrupted.
Beacons are used in individual construction:
- from reinforcement;
- slats;
- profile pipes;
- T-shaped profile.
All of them must be removed, and you can walk on the screed only on gypsum fiber sheets (GVL) having dimensions of at least 50 x 50 cm. There are some peculiarities in the construction of beacons for floor screed when using special Knauf dry building mixtures.
Here, guide rails are used to level the surface.
They are laid on the dry mixture and aligned along the backfill line. Work starts from the wall. After leveling the passage with a leveling bar, the far rail is removed and transferred to the other side, forming a second section. By shifting the slats alternately, the entire surface of the base is leveled. Moving along the loose layer only on sheets of plywood or gypsum fiber board.
Which beacons are better? The specific choice of their type depends on the family budget and the work experience of the performer.
Photo of beacons for dry floor screed.
Option 2: installing beacons using self-tapping screws
By using fasteners, builders and repairmen have the opportunity to securely and efficiently fix the parts of the enclosing structure. Incorrectly installed plastic fasteners cause deformation of the entire structure. To determine the zero and working planes you will need a laser.
The level will help you make the markings correctly. A laser level is a device that allows you to avoid working with other similar tools. To install the guide profile, you need to mark points on the beam line, departing from the floor and ceiling at least 10 cm.
Fastening with self-tapping screws under level control
Materials and tools
To carry out installation, you will need to prepare fasteners and a special tool, the choice of which depends on the characteristics of the fastenings. Modern installers use:
- Plastic fasteners.
- Legs of direct hangers used in assembling plasterboard boards.
- Plastic dowels.
- Drill with hammer.
- Screwdriver or screwdriver.
- Plumb and construction level.
When performing preliminary markings, it is difficult to do without a laser level. The red line shown by the level becomes a guideline for the introduction of dowels and screws. Lighthouse guides have a variety of shapes, but each has a perforated surface.
Marking the wall
Before installing the beacons, mark the surface. Specialists use a laser level and level, which simplify the process. Those for whom plastering is an infrequent or even isolated case use old methods.
The usual way of marking
A series of sequential operations are performed:
- Measure from the corner 30 cm, using a plumb line or building level, draw a vertical line. At intervals that are 20% less than the length of the rule that will be used, other lines are drawn.
- Stepping back 15 cm from the floor and ceiling, screw in the screws in the corners, immediately installing the fasteners. Horizontal threads are pulled between them, and the places of intersection with the verticals are marked. Drill holes and insert dowels with screws that secure the mount.
- Align the screw heads at the same distance from the wall. Take into account the height of the beacons and add 5 mm.
- Check that the screws are installed correctly. They are carried out with a profile strip under the threads stretched diagonally. If they touch slightly, everything is fine.
It is more convenient to carry out marking together.
No deviations are allowed.
The “spider” method is simple but accurate
The peculiarity of this option is that you do not need any measuring tools other than a tape measure. The proposed method allows you to determine the smallest thickness of the plaster layer, which saves the mixture.
Before installing beacons, the following operations are carried out:
- They retreat 15 cm from the corner, 5 cm from the ceiling. Drill holes, install dowels and screws, but do not tighten them completely.
- A similar thing is done near the floor, only they put a retainer and secure it well. Then a plumb line is attached to the upper screws at a distance from the wall equal to the height of the lower rail.
- Waiting for it to calm down. A mark is made on the fastening located below. A nylon rope is tied in this place, the other end is tied to the upper screw. The same is done at the opposite corner.
- A horizontal thread is pulled between the two cords so that it can be moved. By moving, determine the greatest obstruction of the surface, add the height of the beacon with a margin of 0.5 cm.
With the usual method of installing profiles, they are guided by self-tapping screws in the wall. The “spider” method assumes that you will have to constantly measure the distance between the slats with a tape measure.
The nuances of applying markings to the wall
The work is not difficult, but there are subtleties, the observance of which makes the process correct and convenient:
- It doesn’t matter what angle you start working from, the main thing is to retreat from it. If there is a door in the wall, it is better to mark it away from it.
- Next, the surface is divided into equal sections using a tape measure. It’s not very convenient to work with, so craftsmen use a rule with a dash on it.
- It is difficult to mark a wall with a window. They do it this way: they place beacons on both sides and plaster the top and bottom. When the layer dries, screw in the screws along which the profiles in the corners are oriented.
Marking a wall with a doorway
Threads are pulled between the outer slats to secure the intermediate guides. In all places they should barely touch the fishing line.