High-quality plaster of classic wooden walls inside the house has features that should be taken into account. The application process is labor-intensive and troublesome. The master needs time to get the desired result. Wood has a low adhesion rate. Standard finishing material does not adhere well to such surfaces, which significantly complicates repairs. To avoid common mistakes, experts recommend following basic rules.
Classic version using shingles
Features and purpose of the procedure
To figure out how to properly plaster a wooden wall, you need to understand that building materials have changed the idea of how to apply mortar to the base. Classic technology remains the same for aerated concrete, concrete, and brick. In relation to wooden structures, the standards established over the centuries apply - shingles are filled and plaster is applied to it. This solves several problems:
- Thermal insulation increases.
- The base is leveled for finishing (wallpapering, decorative plaster, painting).
- Sound insulation is significantly improved.
- The level of fire resistance rises.
Wooden walls are plastered to protect them from rotting and damage from rats and other pests. Plaster prevents the appearance of colonies of termites and ants. Reduces the development of pathogenic microflora dangerous to humans.
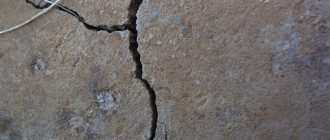
Attention! High-quality plastering of a wooden house will protect the logs from premature cracking as a result of drying out.
Requirements for work
When working with frame buildings, various solutions can be used; when processing log buildings, it is necessary to take into account the vapor permeability, elasticity and hygroscopicity of the coatings used. It is important to remember that wood changes its size depending on the level of moisture and temperature, so using a hard coating is sometimes impractical. Therefore, it is necessary to strictly adhere to the technology of applying plaster in order to reduce the possible risks of cracks. You can immediately begin finishing the walls only when working with ready-made frame buildings, since their walls do not bear the load, which means they will not deform over time.
Standard plastering can only begin after the shrinkage process of the wooden house is completely completed Source ro.decorexpro.com
When working with reconstructed or new buildings made of timber, you need to wait for the erected walls to shrink and only then begin plastering. During the shrinkage process, the wall material becomes denser as a result of contraction and stress on the seams. The shrinkage process takes 1-2 years, but only if the box is protected from the direct action of precipitation. The necessary work is carried out during a period of optimal humidity and temperature within 10-20°C. Frost or extreme heat negatively affects the setting of the solution directly to the base, which reduces the quality of the result.
If it is necessary to carry out interior finishing, it can begin to be done even before the completion of work on the facade. In winter, the 24-hour heating system must be turned on. At the same time, using heaters specifically on walls treated with the material is strictly prohibited. Drying of all walls, both external and internal, should be carried out under natural conditions.
Photo of the house inside - finishing is carried out only on dried surfaces Source ukrsnabpro.com
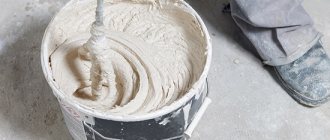
High quality cement base
Proper finishing will make the surface durable, resistant to precipitation and temperature fluctuations. Sometimes manufacturers add components to the composition that increase the final plasticity of the solution. Factory products contain copolymers and redispersible powders. This gives the finished solution plasticity, resistance to mechanical loads and wear.
The popular lime-cement plaster differs from sand plaster in that it is lighter in weight and has greater vapor permeability. After natural quenching, the solution is kept for at least 14 days. At this time, a chemical reaction occurs that prevents the plaster layer from swelling.
Attention! For plastering wooden houses, it is better to use a lime-cement mixture - this will prevent the development of fungal and mold bacteria. The material is a reliable antiseptic for natural wood.
Available lime and cement plaster
Drying plastered surfaces
Natural drying gives the best effect. This is especially important in the first three days after plastering is completed. Accelerating the process leads to uneven drying of the layers - the top layer dries out, but the bottom is still wet. This leads to cracks in the plaster.
The process of accelerating drying can begin on day 4-5. To do this, use additional heating of the room and provide ventilation. They increase the temperature inside the rooms by installing a heat gun and heating devices.
External plastered surfaces require special attention. They are affected by precipitation, solar heating and wind. To protect against these factors, a protective film is used to cover the facades with it.
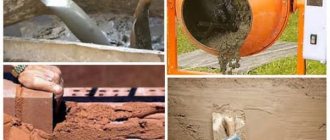
Clay based solution
This method of protection from wind or rain is ancient and proven. Clay is used in construction work because it has an affordable price. It is easy to use, safe for humans and the environment. To prepare a high-quality plaster mortar, sand, clay, water, and sawdust from coniferous trees are used.
Builders value the material for its high fat content. The property provides good adhesiveness. But if you do not add river sand, the surface will dry out and crack. The degree of readiness of the solution is determined as follows: roll a ball with a diameter of 4 cm, flatten it between two boards. If there are no cracks, the material is too greasy. When the ball crumbles, the mixture is not suitable for construction. The best option is that the cake will develop tiny cracks along the edges.
The video contains information on how to treat walls with clay yourself:
Video description
How to choose plaster for interior work, see the following video:
Gypsum and lime. In this case, lime, gypsum and sand are used, their ratio should be 1:1:3. Sand and lime are mixed and water is added. The peculiarity of this solution is that it can only be used for indoor treatment; it sets quickly, so the material is prepared in small portions. It is this solution that is most often used for plastering shingles.
To properly prepare plaster using lime, it must be extinguished first - a lot of gas is released in the process. You cannot use quicklime, otherwise the coating will crack.
Preparation of devices
To plaster partitions, you should purchase the following tools:
- Hammer.
- A portable stepladder for working at heights.
- A grinder or a classic hacksaw for metal.
- Phillips screwdriver or screwdriver.
- To shorten the length of the shingles, use a hand saw.
- A container with a construction mixer for mixing the solution.
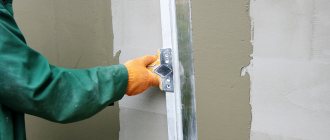
- Plaster spatula.
- Falcon for supplying solution.
- Construction marker.
- Plumb.
- Fishing line.
- Roulette.
- The rule is more than two meters long.
- Malku.
- Ironing iron.
- Half-grater.
- Grater.
- Self-tapping screws.
- Dranku.
- Metal profiles for lighthouses.
- Plaster nails.
Among the materials are:
- Liquid soap for gypsum plaster compositions.
- Clean water.
- Plaster mixture.
- PVA glue.
- Fiber made of polypropylene or fiberglass.
A must-have set of tools
What tool is needed
To plaster a wooden house, it is not enough to purchase the right type of plaster. You will have to spend money on purchasing:
- spatulas and trowels of various sizes;
- grater;
- brushes and rollers;
- rules;
- mixer, container for preparing the solution;
- shingles, hammer and nails for stuffing it;
- stepladders, scaffolding;
- beacons, plumb lines, construction laces, tape measures, masking tape;
- hacksaws;
- respirator, goggles and gloves to protect the skin of the hands.
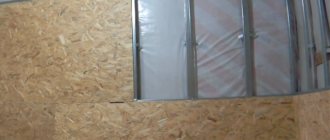
Fixing universal shingles
This wooden slats are stuffed crosswise. The commit process is simple:
- The shingles are immersed in water for at least 3 hours. This is so that it does not split under the nails.
- At an angle of 45°, shingles with a thickness of 4-6 mm are nailed. It's better to start from the top corner. The slats are attached at the same distance from each other.
- A second layer of shingles is carefully nailed on top of the formed structure. It is 2 mm thicker than the slats of the first tier. If there are no slats of the required size on sale, then you can buy shingles of the same thickness. The final dimensions of the structure are at least 5 mm.
Advice! To prevent the slats from cracking under the influence of several nails, the material should be shifted. Builders recommend leaving small gaps between the shingles and the wall.
Improving adhesive properties using wooden slats
How to plaster the outside of a wooden house
They begin plastering a year after construction is completed, after the house has settled.
Rigid structures of frame houses are plastered at any time.
It is also desirable that the building already has electricity, running water, and heat supply.
Required Tools
After selecting the material, check whether it is available:
- scaffolding or stepladder;
- power tools: screwdriver, mixer attachment, extension cord;
- construction utensils: for transportation, water, mixing;
- hammers;
- nails, dowels;
- plasterer's tools: trowels, usually, ladle, grater, spatulas.
Safety rules regarding working with power tools and working at heights are subject to mandatory compliance!
Preparing the walls
When plastering wooden walls, a certain technology is followed:
- Conduct a visual inspection of the surface. If cracks, chips, or other defects are detected, they are caulked or sealed with polyurethane foam.
- They remove dust and remove dirty spots.
- Treat the walls with an antifungal antiseptic.
- Adjacent non-wooden surfaces are primed.
- Adhesion of plaster to a wooden wall:
- the shingles are nailed from below at an angle of 45⁰, resulting in cells of 45×45, or 50×50; for fastening, nails are used, which are struck every 3 cells;
- the metal mesh is secured with special mushroom dowels; the mesh should be taut; if it turns out that the wall has a deviation from the vertical, after the first spray, another piece of mesh is locally attached for alignment;
- The polymer reinforcing mesh is screwed on with self-tapping screws with a wide head. It is stretched very tightly, the joints in the overlap areas are overlapped by 1 cell.
Important: insulating and decorating the facade involves working with damp material, so they are planned for the warm season. Then the workers will feel comfortable, and the material will retain its technical characteristics.
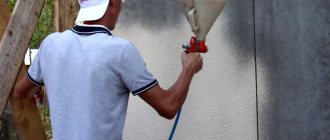
Plastering
Work on covering wooden walls occurs in the following sequence:
- Spray Prepare a liquid solution. Starting from the top, throw it onto the surface with a ladle and control the thickness. The result is a layer of about 1 cm. Further work does not begin until the first layer of plaster has dried.
- Applying the base layer. A solution of normal consistency is applied on top of the first layer. Beacons are used.
- The final layer is thin and serves to eliminate minor defects.
- Grout if necessary.
Decorative plastering
Modern houses are not only reliable, but also pleasing to the eye with an attractive design. After the coating has dried, they begin decorating.
The only disadvantage of facade decorative plasters is that you cannot prepare them yourself. But there are many options for durable, vapor-permeable, moisture-resistant mixtures on sale.
The “Wet facade for a timber house” system will not only give the building a presentable appearance, but also insulate it and reliably preserve the home from external factors. The multi-stage design consists of elemental layers bonded together: thermal insulation, reinforcing plaster, decorative layer. European wet façade technology is suitable for houses located in areas with harsh climates.
Plastering a wooden facade is a crucial moment. The final choice of materials depends on the goals. Insulation, leveling, and decor require different approaches to choosing plaster. Whether it is made with your own hands or purchased from a building mixture store is the choice of the owner, who is guided by the construction budget. It must be remembered that good facade materials cannot be cheap. The same applies to the choice: to plaster yourself or hire a team of experienced craftsmen who will do the work efficiently and quickly. In any case, the house will receive clothes, and the owner will receive satisfaction from the completion of construction.
Installation of beacons
Only qualified craftsmen refuse such parts. But novice craftsmen simply cannot do it without installing construction beacons. Installation steps:
- Screw the screws into the top of the wall at a distance of 10 cm from the ceiling. In the lower part, according to this principle, a second metal element is placed. The plumb line brings the beacons into one plane. Similar actions are performed on the opposite side.
- The fishing line is pulled vertically, horizontally, and diagonally between the screws.
- This is for identifying bulges on the wall. It is necessary to achieve a distance of 5 mm between the plane formed by the stretched fishing line and the mound. If you don't do this, it will be difficult to achieve your goals.
- A stretched fishing line is a tie line. Metal beacon guides are installed along it. The outer profiles are mounted at a distance of 11-16 cm from the wall, and the intermediate ones - no more than one meter from each other.
Types of plaster mixtures for wood
Plaster allows you to protect the wood and create a layer for further finishing. The construction market offers different options for plasters. Each of them has advantages and disadvantages. List of mixtures:
Acrylic putty is universal; it is used both inside and outside. However, its cost is slightly higher.
In addition, the following products may be suitable for plastering work on wood:
They have their own characteristics.
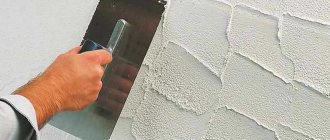
Textured plasters
Refers to decorative mixtures. The structure is viscous and coarse. The filler is flax or wood fibers, stone chips and mica. Suitable for wood, brick and concrete surfaces inside and outside. It has an excellent ability to eliminate defects and unevenness of walls. Thanks to fillers, after plastering, a decorative textured surface is formed that imitates stone, wood or fabric.
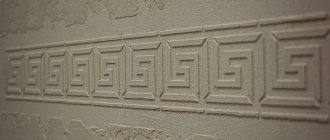
Structural plasters
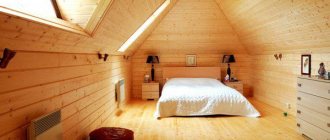
Combination of plaster and wood in the interior
This is a common technique for exterior decoration of houses. Often there is a combination of facades by floor: the bottom is plastered, the top is covered with a block house or clapboard. This option is appropriate if the property is built from different materials. And decorating rooms with plaster and natural wood is common if the owner seeks to emphasize his love for environmentally friendly, safe materials. Designers believe that wood fills rooms with comfort and tranquility.
More information on the topic is presented in the video:
Choosing a mixture for plastering wooden walls, video tutorials on applying the finish
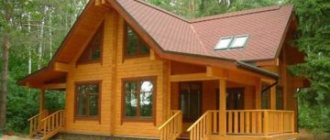
A house built from wood, be it timber or logs, meets the most stringent environmental criteria.
However, it is worth taking care of the “correct” plaster, which will provide additional thermal insulation and protection for the walls. This article will discuss the types of mixtures used for finishing facades, how wooden walls are plastered inside a house, the composition and proportions of raw materials for self-production of finishing materials.
Invalid Displayed Gallery
Insulation of log houses using homemade plaster
If the question arises of how to insulate a wooden frame, then this can be done using the same plaster. Ideally, it is better to buy all materials in the store, but to save money you can use the following instructions:
- Take a 6 mm wire and tie the lattice to a 10 cm cell. This is a very painstaking job, but it will save on the purchase of reinforcing mesh.
- Then you should make warm plaster. To do this, you need to mix clay, sawdust and scrap in equal parts, then add water (you should get a thick composition).
- The resulting solution is scooped onto spatulas and applied to the surface in a layer of no more than 3 cm.
- The last stage is the application of ordinary cement-sand plaster to level the coating.
Warm plaster made of clay and sawdust allows you to further insulate the house
On a note! After the homemade clay plaster dries, cracks will most likely appear; if they are small, you can ignore them. Otherwise, you should remove the coating and repeat the procedure.
Finishing work in wooden houses is no different in complexity from leveling concrete or brick walls. The main thing is to remember the above nuances, and also act in accordance with the manufacturers’ instructions and recommendations.