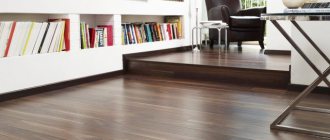
Today's building materials market can offer a large selection of floor coverings. If you choose between linoleum, laminate or parquet, then most people prefer wooden parquet, which has proven itself to be a reliable coating that has been proven over the years. But even he tends to have shortcomings.
One of these moments may be a creaking sound when walking on such a floor covering. Agree, it’s not so pleasant to hear a creak after every step you take. Therefore, owners of such floors are interested in two questions: how to get rid of squeaking, and what could be the reasons for this trouble?
Parquet is the most popular floor covering
Causes of squeaking
Despite all the positive qualities of parquet floors, they are characterized by some problems. The most popular is the creaking of wooden planks with every step. And before you start looking for ways to eliminate squeaking, let's look at the causes of this trouble.
It is important! Remember that if the parquet board is installed correctly, there should be no squeaking; this drawback is characteristic only of old parquet.
What can be done to prevent wooden parquet from squeaking? First you need to figure out why the parquet board creaks?
Old coating can sometimes squeak
The creaking of parquet boards can be caused by several reasons:
- the parquet board creaks due to the unevenness of the subfloors. If the rules for laying parquet flooring are not followed, sooner or later this will lead to subsidence of the base, which will cause creaking and loosening of the parquet;
- if, when laying parquet, the distance between the wall and the laid covering was not maintained. In other words, the wooden planks ended up fitting too tightly to the wall of the room. Without gaps, wood planks cannot expand naturally, which ultimately leads to squeaking. Unfortunately, even panel parquet is not immune from this;
- When the joists are deformed or placed incorrectly, the parquet base also creaks. Perhaps the rules of heat or vapor barrier were violated, which leads to the fact that the parquet boards seem to be walking and making a characteristic sound;
- The next reason for the creaking of wooden parquet is a violation of the temperature regime in the room or improper installation of the baseboards.
Regardless of the reasons for the creaking, repair is the only way to find silence in your home.
What to do: solutions
Let's say you have established why the panel parquet or board creaks. What to do? The answer to the question lies in the reason itself. Let's figure out what to do in various situations. Let's look at the most common sources of the problem.
Uneven base
The most common mistake is an unsatisfactory level of preparation before laying the decor. It is necessary to comply with the minimum installation requirements, in particular, to level the rough surface.
The floorboards are locked together or pressed very tightly together. When the floor is uneven, voids appear between the decor and the base. As a result, under load, friction between wooden surfaces occurs.
The floor, unfortunately, will have to be dismantled and started all over again. After sealing the unevenness on the cleaned base, it is filled with a new DSP or self-leveling mixture.
The height difference on the surface of the new subfloor should be less than two mm for every 2 m2. Otherwise, after some time the picture will repeat itself.
For better and more reliable results, it is recommended to cover the screed with chipboard sheets, but even here pitfalls may await you.
Thus, after taking measurements and identifying that the old parquet creaks precisely because of this, dismantling is done. This is the only way out of this situation. Depending on the material used to make the rough base, the following methods for leveling it are chosen:
- Concrete screed. Pouring the leveling mixture. It is important to choose the right type and prepare the solution. The thicker it is, the higher the maximum fill height;
- Wooden base. To level it, install sheets of fiberboard, chipboard or plywood. The lag level is pre-adjusted.
After dismantling the decorative coating, you should check the condition of each die. Their geometry and shape are controlled. Re-installation is carried out using standard technology. To improve the appearance, you can scrape and re-open with varnish.
If, due to a loose fit of the chipboard to the concrete base, the parquet flooring in the apartment creaks, how to fix it?
In this situation, it will most likely not be possible to get rid of the squeak without drastic intervention. However, if the floor defect is local in nature, you can use the method used by the craftsmen.
Tools you will need:
- chisel,
- drill with 10 mm drill with drill,
- CSP, prepared in a ratio of one to three,
- syringe.
Find the places where the sound is coming from. Remove some planks. Drill a hole in the opened area and pour in the solution using a syringe. Repeat the process in a day, and after another day, restore the boards to their places. In this simple way the problem will be resolved.
Ways to solve problems
There are several methods for eliminating squeaks from a piece of flooring, but first, let’s identify the most vulnerable areas of the parquet. To do this, you need to walk along the floor and mark those places that require mandatory bulkheading. To answer the question of how to remove creaking parquet flooring, you need to take all measures to restore it.
It is important! You can eliminate creaking floor coverings simultaneously with other work. You can varnish the parquet or perform other activities that will significantly save you time.
Rules for caring for parquet floors
You can avoid squeaking of parquet boards and planks by:
- Compliance with the rules for installing the coating, choosing the correct type and thickness of the substrate.
- Regular cleaning in accordance with the manufacturer's recommendations, using specialized products.
- Protects the floor covering from contact with too much liquid.
- Maintaining optimal indoor humidity conditions.
Compliance with engineering recommendations for the installation of parquet floors and operating conditions will allow you to avoid the appearance of unpleasant squeaks and the need for repairs. But if a problem does arise, then it is necessary to solve it at the initial stage, which will eliminate significant labor and financial costs.
Parquet dismantling
If you are interested in the question of how to get rid of creaking parquet flooring, then the simplest but most drastic method is to replace the wooden planks. In other words, you need to dismantle the problem areas and replace them with new material, and then varnish them.
This method is suitable if all wooden planks are walking. If creaking is observed only in a few places, you can solve the problem of wooden planks locally, without completely replacing the parquet.
Dismantling problem areas
Troubleshooting methods
Only after the reasons have been clarified are ways to eliminate the squeaking of a wooden floor selected. It’s easy to do at home:
- sealing structures with gaps;
- fastening or pulling;
- restoration with removal of the damaged area;
- additional flooring made of chipboard or plywood;
- apply building mixtures and sealants.
Any process requires opening the coating - at least one board is removed. Timely elimination of squeaks on a wooden floor in a bathhouse, house or apartment prevents the formation of fungus, condensation or mold.
Express methods
How to quickly get rid of annoying squeaking noises on a wooden floor? Carry out quick repair measures.
Construction of the deck
You can eliminate the sound by screwing sheets of plywood or chipboard over the deformed floorboards. The technology is based on redistributing the load over a larger area. Local repairs eliminate sagging of boards under 12 mm thick plywood plates.
Use of sealants
How to seal the cracks and at the same time eliminate the creaking of loose floorboards on an old wooden floor in a short time? Make a sealing compound based on sawdust, construction varnish, enamel paint in proportions 4:1:1 and seal all cracks. In order not to bother with preparing the mixture, you can purchase ready-made sealant and pour it into the voids. The product will be a kind of wedge that strengthens the coating and eliminates squeaking.
Work with putty
A mixture of PVA glue and sawdust will help you remove creaking sounds and repair the coating simply and at no extra cost:
- The synthetic cord is impregnated with the finished composition and laid in the space between the boards.
- Sawdust and glue are mixed until the thickness of construction putty.
- The putty is applied over the ridged cord.
- After the initial hardening of the glue, the bulges are cut off.
Simple repair work
If you have construction skills and if the creaking is caused by deformation of the coating, you will have to make repairs.
Screwing boards onto anchors or screws
You can get rid of the squeak yourself if you additionally fix the boards on the joists. Two types of hardware are suitable for work:
- self-tapping screws with full threads for rigid and durable fixation of elements with a small gap for the expansion of wooden floorboards;
- self-tapping screws with incomplete threads - the tongues are pressed against the joists so that there are no gaps, and the smooth part fits completely into the hole.
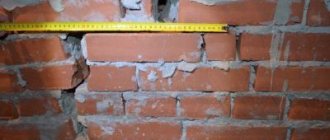
How to remove potholes and cracks
The most important problem for owners of old houses is squeaking wood flooring and troubleshooting. If the planks not only make unpleasant sounds, but also crack, then this indicates improper operating conditions for the floor in the room. The wooden parquet could have been damp, but after some time it dried out. To begin, treat the seams with putty, and apply a composition that imitates wood on top.
You can revive the old coating using casein glue with sawdust. After this, you need to sand the wooden planks and coat them with wood varnish.
If the gaps between the planks are very wide, then puttying will not help you; it is better to replace the wooden plank.
Replacing dried out planks
To do this, follow our instructions:
- Split the dried plank into several fragments and remove all parts. Remove the adhesive.
- Clean out the cavity left by this strip and prepare it for installing the next material.
- Take a new plank, cut off the ridge from it and process this area with a plane.
- If the damaged area takes up more space, several wooden planks need to be replaced.
- You need to pour bitumen mastic or other adhesive into the freed space, place a strip on top and press it down with something heavy.
Excess adhesive must be removed. After the glue has completely dried, sand the wooden planks, clean them of dust and coat them with varnish.
Parquet creaks due to a defect in the joists
If logs act as a supporting base structure, then in some cases they can become sources of unpleasant sound when walking on a parquet floor. For repair you need:
Free access to the problematic joist and the two adjacent ones - remove all the panels that rest on them. Carry out an inspection and act according to one of the scenarios:
- the structure is not damaged;
- the timber has defects in the form of cracks and breaks.
Integrity preserved
If this is the case, then the cause of the unpleasant sound may be:
- loose fit to the floor;
- the formation of cavities between the lag and parquet panels.
In the first case, the problem is eliminated by drawing the lag to the base. This is done using self-tapping screws. Another method is to support the joist by inserting a supporting element, such as a wooden block or a rubber layer with fixation to the screed.
If there is a gap between the floors and parquet flooring, this may indicate that neighboring joists are not aligned on the same plane. In this case, one or two logs are dismantled and then aligned along the third beam.
Tip: the level can be checked using a long, even rod at several control points along the entire length of the lag. Problem areas are found at those points where a gap is formed between the slats and the joist.
The log is destroyed, there are cracks and breaks
Here you can't do without a replacement:
- We dismantle the log.
- We check the integrity of the substrate under the damaged element.
- We install a new support board, aligning it with adjacent planes.
- We lay parquet.
Moving parquet planks causes squeaking
Individual parquet floors wobble, but they do not fall out completely. Creaks are detected by direct contact with a loose bar. To revive such elements, the following manipulations should be performed:
- The area on top of the parquet is covered with masking tape.
- Several holes with a diameter of 2-3 mm are drilled evenly over the area of the problematic parquet flooring.
- The adhesive composition is drawn into the syringe. This can be done by removing the piston.
- The syringe is inserted into the holes. The contents are squeezed out under the panel.
- A weight is placed on top of the parquet flooring and held for 24 hours.
- The masking tape is removed. If glue gets on the surface of the parquet, it can be removed with a solvent.
- After 24 hours, the holes can be filled with putty with a suitable color composition.
- The puttyed area of the floor is rubbed down with fine wax.
Base repair
If the question of what to do with creaking parquet is still relevant, let's look at a method on how to repair the base underneath it. For work, it is advised to take sheets of plywood and lay them on the old base. The direction of the sheets should correspond to the laying of wooden planks.
Unfortunately, getting rid of squeaks using this method can only last for a few years.
Parquet floor plan
There is another method to solve the problem. But to implement it, you need to know the type of base for parquet. If it was bitumen mastic, then use a hairdryer to warm up the parquet boards. This will lead to the dissolution of the bitumen, now the planks can be pressed against it until completely dry. Repairs made in this way can solve the problem in just a few minutes.
If your wooden plank floor creaks
This is usually done in country houses. If a wooden floor creaks, what should you do? First of all, you should stock up on the necessary set of tools. To work you will need:
- drill or screwdriver with drill function;
- jigsaw;
- hammer;
- self-tapping screws;
- sawdust;
- nail puller
It is necessary to establish the reason why the creaking is heard. Replacing nails with self-tapping screws often helps. The latter are screwed in next to the holes left after removing the nails.
The number of screws may be greater than the number of nails. If the floors in the apartment creak even after the work has been done, then there are other reasons. Let's look at ways to eliminate defects.
The logs are located at a great distance from each other. The optimal distance is in the range of 0.4 - 0.6 m, despite the fact that the thickness of the boards is at least 40 mm. In order to eliminate the creaking of floorboards, it is necessary to lay additional ones between the main joists. You will have to dismantle all the floorboards, and after installing the joists, return them to their place, replacing the nails with self-tapping screws. Thin boards were used for the floorboards. Such a defect can be corrected by laying sheet material in several layers. Moisture-resistant chipboard, plywood, OSB are used. Between adjacent sheets, as well as along the wall, a distance of 5 mm (compensation gap) must be maintained. The joints of the sheets of the top and bottom rows should not coincide. Gaps between floorboards can occur when poorly prepared boards “shrink.” To eliminate them, it is recommended to pour talc or graphite powder into the crack. It is effective to use wooden wedges: they are hammered into the gap, and then the gap is eliminated with putty mixed with sawdust. The boards are damaged by dampness, and that is why the floor creaks. How to eliminate such a defect? The cause of dampness should be determined. The waterproofing technology is probably broken. The boards must be dismantled and sheets of roofing felt laid over the logs with a slight overlap on the wall. After this, the boards (if they have not rotted) can be put back in place, treated with an antiseptic. All installation rules have been followed, but the floors squeak. What to do in this case? Perhaps the joists and boards are made of different types of wood and absorb moisture differently. Place fabric between the joists and boards. Such a “damper” will help either reduce squeaking or eliminate it completely. You can eliminate the creaking of one floorboard using polyurethane foam: it is squeezed into a through hole drilled in the place where the board “walks” the most
It is important not to step on the floorboard until the foam has completely dried. Thick boards can be fastened together with self-tapping screws, screwed in at an angle at the junction of the floorboards. If there is a joist at the joint under the boards, you can use nails instead of screws.
Wedge tamping method
If you are interested in the question of why a wooden parquet board moves after installation, then the answer lies in the incorrect installation of the parquet material. Often this is simply poor-quality fastening of the parquet planks to the beams. To solve this problem, you can use a method where you drive wedges between the beams and boards. The lower part of the board should be fixed to the joists from above.
Tamping wedges
If the creaking of the parquet is the cause of friction between the boards, you can use the simplest method: pour graphite powder between these planks.
Recommendations for choosing a substrate
A high-quality underlay for a parquet board will smooth out possible differences in the base (not exceeding two millimeters); it also has a soundproofing and waterproofing function.
Some tips:
- if you choose a substrate made of foamed polyethylene, then you will still need additional moisture insulation;
- paper and cork samples can rot due to volumetric leaks;
- A good option is a substrate consisting of two layers of film, between which is polystyrene foam.
The substrate will prevent the “flapping effect” and all kinds of squeaks.
Anti-creaking adhesive for parquet
To get rid of the squeak, you can take another method. All work is performed in the following sequence:
How to pour adhesive
- Mark the places where the parquet is damaged, mark points on them at a distance of 15 cm from each other. Place masking tape on them.
- In the marked places, holes with a diameter of 2 mm must be made in the planks.
- Using a syringe, pour in the adhesive so that it gets between the floor and the parquet.
- Wait an hour for the adhesive to dry.
- Remove the tape.
- Remove remaining adhesive using foam solvent.
- Press this place with a weight and let it stand in this position for a while.
- Take care of your wax crayons in advance.
- Every other day, fill the holes with wax.
- Polish the surface.
- Now we can say with confidence that the restoration was successful.
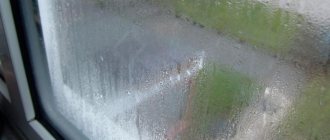
Humidity level mismatch
If you notice that this unpleasant sound occurs only during certain months, say, late autumn, then it is most likely due to a sharp change in the moisture content in the air. Over the summer, the boards seem to accumulate moisture, and when the heating season begins, the boards begin to release it and dry out, hence the sound.
It's very easy to get rid of it.
- Get a hygrometer and constantly check the humidity level. For parquet, this humidity indicator should be above 50–60 percent.
- Proper care of the floor: you cannot wash such a covering, because, firstly, the tiles absorb moisture very quickly, and, secondly, water, getting into the cracks between them, contributes to swelling and subsequent deformation of the tiles. If necessary, simply wipe the floor with a damp cloth.
- The conditions under which the flooring is laid also play a certain role: the humidity of the parquet should be about 9–10 percent, and the installation itself should be carried out at 15–20⁰.
The old coating has peeled off
- Mark all “creaky” places with chalk or a marker. This area is marked with small pieces of masking tape, placing them in 20 cm increments.
- According to the markings, holes are drilled (Ø 2 mm) deep down to the concrete base.
- Using a medical syringe, squeeze out a little glue there and let it dry. This will take about an hour.
Note:
As the glue dries, it begins to foam and, quite possibly, will partially come out. This is why adhesive tape is needed, it protects the parquet from damage. If adhesive nevertheless gets onto the surface of the coating, it can be removed using a solvent.
- The masking tape along with any remaining glue is removed.
- It would be a good idea to weigh down the areas being repaired with something heavy, say bags of flour or sand.
- Then the floor is restored. You can use pieces of wax chalk to match the color of the coating.
- You can walk around the repaired areas within 24 hours.
Lack of required gaps between the floor and walls
One of the most common mistakes in laying parquet is the lack of a temperature gap between the decor and the walls. As a result, when the rams expand, surface tension is formed. Extraneous sounds appear.
The only way out is to make the temperature gap yourself. If you find out why the parquet board creaks and what to do, you need to choose the right tools. A technological scheme for modernizing the coating is also being developed.
To create an even cutting line for excess material, you will need a jigsaw. It is desirable that it has a built-in chip collector. You will also need spacers that will fix the material along the wall. But their elastic material will compensate for the expansion of the tree.
The procedure for repairing parquet to eliminate squeaks is as follows.
- Removing skirting boards.
- Marking the future cutting line. The distance from the decor plane to the wall should be 2-3 mm on each side.
- Cutting the edge of the boards.
- Installation of elastic pads. The optimal distance between them should be 5-7 cm.
- Re-installation of skirting boards.
It is advisable to level the decorative floor again after making the cut using a special hammer. Only then can you begin installing the linings.
While performing the work, it is necessary to ensure that the front sides of the outer dies are not damaged. It is recommended to apply protective tape. Once the repair is complete, it can be easily removed.
Advice
If the area of the room is large enough, it is necessary to disassemble part of the parquet to remove surface tension.
Gaps between slats and base
Even with a flat floor, air gaps may appear between it and the decorative material. It is caused by the natural process of drying the dies and changing their shape. This is especially common for old material.
Under no circumstances should only one part of the coating be rigidly fixed. This will only help temporarily eliminate creaking parquet flooring in the apartment. Over time, the problem will arise again. The main thing is to find out the reasons for the phenomenon. Only then can you begin repair work.
You will need a wooden strip, a hammer and wood glue. The height of the slats should be 0.5 mm greater than the thickness of the decor. Having identified the “problem” area, the following work is done.
- With the help of several blows of the hammer, the planks are pressed to the base. A gap will definitely form between the dies.
- Installing the strip into the gap and fixing it with an adhesive solution.
- Using a plane or a sharp knife, the general plane of the floor is leveled, removing the excess height of the wedge.
This method can only be used if the cause of noise in the parquet is a change in the geometry of the planks. Similar defects are observed when the coating is installed incorrectly. But to solve them it is necessary to use another technology.
On a note
When gluing the slats to the ends of the dies, you must ensure that the glue does not get on the outer part of the decor. If this happens, it should be removed immediately with a damp rag.
Shriveled parquet
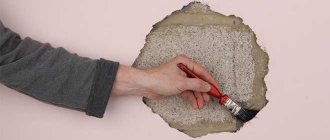
When talking about parquet floor defects, swollen tiles are often mentioned. However, drying out of the boards also leads to no less negative consequences. To eliminate squeaking in such cases, various methods are used.
- Old parquet is scraped and coated with varnish, which penetrates into the pores of the wood and the gaps between the boards. It “tightly” fixes the planks to each other and to the base, and the creaking stops.
- Creaky boards are removed and replaced with new ones. If the removed dies have retained their appearance, they can be used again. Clean out the opened cavity, cover it with a piece of thin cardboard and nail a die on top of it. Cover the nails with wax or putty and buff the area to be repaired.
- Wooden pins can be hammered in between individual planks in a special way. To begin with, a hole (Ø 8 mm) is drilled between them. The drill should make an angle of 45⁰ with the surface of the coating. Thin pins are lubricated with wood glue and driven into the prepared holes. Excess from the outside is cut off, for example, with a chisel. Defects are repaired with putty and polished.
Loose fastenings and joists
To begin with, access to the required area of the floor base is opened. Then additionally secure the joists in these places using one or two self-tapping screws. If the loose area is large, you can drive a wedge and secure it through the joist. The protruding edge of the wedge needs to be sawed off.
Cement mortar
This method involves using cement mortar to fix the fallen strip. Using a hammer drill, make a hole in the floor with a diameter of 2 cm. Carefully pour cement mortar into it until the plank touches it. Install the plug and fill in the hole with a wax pencil.
This method will be even more effective if the hole is opposite the joist. First, pour cement mortar into it, and after 24 hours, install a wooden stake in this hole. Its edge should reach the floor slab, the rest of the pin is removed, and the surface is leveled.
You can drill holes of a smaller diameter and use “liquid nails” glue instead of mortar. He will glue the strips to the base. All that remains for you is to treat the holes with putty.
Lubrication
The method does not require extensive repair work. To implement it, you need to drill very small holes in the parquet board. The lubricant must be special, which contains wax and solvent. Pour the composition into the drilled holes using a construction syringe. The procedure can only be performed in problem areas. The lubricant effectively removes squeaking and prevents friction. The composition is absolutely not harmful to the floor covering. The effect lasts for a long time; if necessary, lubrication can be repeated.
Polyurethane foam
In most cases, the gap between the floor is 9 cm. As a solution to the squeaking problem, you can fill it with polyurethane foam. But the disadvantage of this material is considered to be poor performance properties; over time, you will notice that the problem with squeaking may return, so this method is not so effective.
Polyurethane foam against creaking parquet
Repairing squeaks using wedges
Insufficiently strong fixation of parquet to beams or joists can cause squeaks. One of the options when a parquet board creaks is to knock wedges into the gap between the wall and the floor covering. If this is not done, the boards will begin to loosen and creak over time.
In cases where gaps have formed between individual parquet floorings, they should also be strengthened using wedges driven between the planks every 15-20 cm. Wedging is done using a hammer and a hammer. The remaining protruding wedges must be trimmed off.
One additional way out of the situation could be to fill the space between the parquet floors with graphite powder or talcum powder.
Broaching with self-tapping screws
The next method for solving problems with squeaking is broaching with self-tapping screws. It is suitable if creaking is heard in the places where the parquet boards come into contact with the joists.
First you need to find the log, make sure that there are no communications under it that could be accidentally damaged. Prepare a hole through the parquet board into the joist, drive a nail or self-tapping screw into it, the head of which must be recessed into the board.
Self-tapping screws are suitable instead of nails
Lags
If the parquet board crunches, then the reason for this may be the incorrect location of the joists or their poor quality, what to do in this case? First of all, you need to carefully inspect the logs for deformations and various damages. If there are no visible defects, the following actions can be taken:
- carry out a thorough check of the thermal insulation and waterproofing of the floor;
- find out what is the distance between the lags; if it exceeds 30 cm, then creaks and crunches of the parquet board may occur.
It is better to trust floor installation to trusted specialists to avoid unpleasant consequences of installation. But, if you have good experience, you can carry out the installation yourself, taking into account all the features of the technological process. Without disassembly, in this case, you can also fix the boards using self-tapping screws.
What correctly installed parquet floor joists should look like
Prevention
If you are interested in your wood flooring serving you for a long time, then try to follow some measures to prevent the formation of squeaks in the parquet flooring.
How to choose a parquet board
How to avoid problems with parquet:
- When choosing wooden material, give preference to valuable wood species.
- When choosing glue for its installation, remember that it must be a special composition.
- It is better if you entrust the work of laying wood flooring to specialists.
- Follow the rules for caring for and using wood flooring. If the thermal or humidity conditions are not observed, the parquet may lose its properties, which will sooner or later lead to its creaking.
- Renew the varnish every 5-7 years, depending on the level of traffic in the room.
Average score of ratings is more than 0
Share link
Comments There are no comments yet, but you could be the first...
What types of flooring are classified as parquet flooring?
To begin with, let us clarify that parquet flooring is a general name that combines several types of wooden flooring:
- Classic parquet, assembled from individual single-layer wooden blocks. The planks are attached to the base using glue or hardware.
- Panel parquet. This type of coating can be found in old houses. It consists of plywood panels onto which parquet strips were glued. This material is not used in modern construction.
- Parquet board is a three-layer material, the lower layers of which are made of less valuable types of wood, and the upper layers are made of more expensive types of wood. Most often, such a coating forms a “floating floor” (without rigid attachment to the base); less often, it is mounted on glue.
Problematic parquet base - how to improve?
If the previous method did not have any effect on eliminating parquet squeaks due to a problem not with the coating, but with the base underneath it, then you need to work in this direction.
To understand that the problem is with the base, it is enough to examine the surface of the floor.
When it is perfectly smooth with gaps near the wall, as required by the installation rules, then it is worth moving on to finishing the base. The thickness of the plywood sheets should be no more than 1.2 cm, only in this case the floor will withstand the loads during operation. The tools you will need to prepare are a drill, saw, screwdriver or screwdriver.
Plywood sheets are laid on top of the boards on the base, secured with self-tapping screws with a distance between them of 15-20 cm. The laying is carried out at an angle in relation to the mounted boards.
It is worth noting that to correct the squeaking problem in this way, it is not necessary to disassemble the entire floor. It will be enough to identify the problem area and work exclusively with it. This area is marked out with chalk in the form of a square and then cut out for the next stages of work.
The method can be considered radical, however, of all those listed, it is considered the most correct and practical.
Peeling parquet boards: what to do?
- When a parquet board comes off, it can make unpleasant sounds - skipping, crunching, popping, etc. This defect can, of course, be eliminated by replacing the entire floor. If this method does not suit you, you can resort to a simpler one, which will help save your money budget and the floor without resorting to disassembling it.
- To do this, you need to note for yourself those areas of the floor where creaking is clearly visible, and mark them.
- A tape is placed on top of the marked areas to protect the floor from damage. Then, using an electric drill and a large self-tapping screw, holes are drilled and filled with special glue.
- At the end of the hour, the glue is completely dry, you can remove the tape from the floor surface. After this, place something heavy in the places where the holes were made and leave it for a day.
- After a day, the objects are removed, and the holes must be sealed with materials correctly selected in color, designed specifically to get rid of visible defects in the parquet.
This technique allows you to get rid of the creaking of a parquet floor without completely disassembling it. And compliance with certain rules for the use and care of parquet flooring will ensure its long service life, beautiful appearance and the absence of extraneous sounds.
Reviews
Olga Kabaeva, 59 years old, Moscow
The parquet flooring in the apartment had been laid a long time ago, probably 20 years or more. Never had any problems with him. Once every 5-8 years it was scraped and varnished. But lately the floor has begun to creak in some places. I thought the time had come, the parquet was thin and couldn’t withstand the load, peeling off from the floor. I called the craftsmen, I thought maybe it needed to be replaced with another material. The technicians said that this happened after I installed an air conditioner in the apartment. The humidity has changed. So the boards began to expand and then contract. They did something there all day, but the creaking disappeared.
Petr Konstantinovich, 62 years old, Novosibirsk
My apartment is in an old house. Many years ago, while still a young engineer, I independently assembled parquet from Siberian larch on the floor. At that time it was chic, fashionable, not everyone had this gender, even rich people. I got the parquet, as they said at that time, through cronyism. Everything was fine, but for six months now, a creaking sound appeared at the entrance to the living room. At first the sound was quiet, seemingly pleasant, but now it’s impossible to get through it, it has become so unpleasant. I thought I could handle it myself, since I was the one who laid it. I started from the entrance. The parquet flooring came off easily, as if there was no glue there. Apparently it has dried out over time. I tore off several boards that seemed to me to be creaking. The plywood under the parquet turned out to be dry and clean; I scraped off the glue a little with a knife. And everything is fine. I cleaned the boards and put them back on glue. It's been two months now and nothing squeaks.
Ravil Musin, 55 years old, Kazan
I knew before that parquet could creak. But this is the first time I hear it so strongly and in different places. I have it in my house and in the living room and in the bedroom. Within a month, creaking appeared everywhere. I called the experts who did the styling. They decided to open up the floors. Beneath them lay plywood, which for some reason had delaminated in some places, and the edges were almost crumbling. So much for saving on cheap material.
Self-tapping screws - how does the method work?
Quite a budget option, suitable when panel parquet creaks in certain areas. Compared to nails used to eliminate squeaks, self-tapping screws are more effective. Unlike nails, which cannot affect the elasticity of sections of wood after splitting it, self-tapping screws will cope with this task better.
Fasteners destroy the wood structure less, since the screwing process is considered more delicate.