Home / Installation, repair, maintenance / How to stick film on glass without bubbles?
Decoration of windows, doors, or even car tinting is done using special films. Despite the fact that many consider such work to be complex and can only be done by professionals, there is nothing complicated here and everyone can cope with it if they do everything carefully. The most important point is how to stick the film on glass without bubbles - the main enemies of quality work in this case. To do this, you need a very short list of what you need and a little patience - it may not work out the first time.
Decorative films for windows. Features of choice and installation subtleties
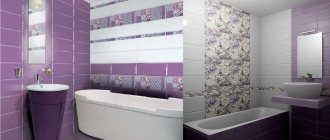
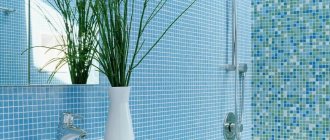
You can give your interior a unique flavor and uniqueness in various ways. One of them is window decoration. Currently, you can purchase decorative film for windows at any building and finishing materials store. Their range is incredibly rich, and manufacturers offer products that differ significantly, both in their technical characteristics and in price.
In order to confidently make your choice, based not only on the beauty and brightness of the design you like, but subsequently not to be disappointed in the choice, we will tell you in this article about decorative films, their characteristics and ways to decorate windows with your own hands.
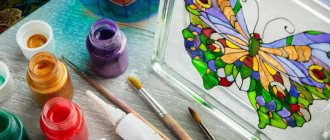
What is stained glass film
As mentioned above, stained glass is a very expensive finishing material, so not every person can afford it. However, stained glass looks simply magnificent in a home interior; even one stained glass can completely change the appearance of the room and the entire apartment. Therefore, at one time, a cheaper material was invented. The so-called stained glass film will cost much less and will look very bright and interesting.
At first glance, stained glass film does not even differ from stained glass itself, but at the same time it costs much less. One of the most important components of such a film is maylor. Mylor is a self-adhesive substance applied to such a film, which allows it to be glued to glass very quickly. Mylor is a completely transparent component that also retains its shape very well, which makes it a great solution in this case. Also, such a film usually contains a special filter that allows you to protect the pattern of the stained glass film from the negative effects of sunlight.
Coating features
Basically, everyone knows only the tint film, which appeared a long time ago. However, manufacturers are coming up with more and more options that can not only change the decorative side of the glass, but also serve as reliable protection. Another advantage of this product is the ability to glue the material yourself, which helps to economically upgrade windows and other glass surfaces.
Many are highly durable, practical and sustainable. But to get all these positive properties, you should know how to properly stick the film on glass.
How to glue self-adhesive film on glass?
Gluing decorative film to glass consists of several technological stages:
- Glass cleaning.
- Cutting the film.
- Pasting.
Let's look at the tools we need to carry out all three stages, as well as each stage separately.
Required equipment:
- Sprayer or spray bottle with soapy water.
- Rubber scraper for glass.
- Dummy knife.
- Raquel.
- Chamois leather, paper towels or lint-free rags.
Important! The film is applied to the glass surface both from the inside and the outside. The choice of application method depends on the type of film and the assigned decoration tasks.
Glass cleaning:
- First, the glass must be thoroughly cleaned of grease, dust and other contaminants. To do this, you can use soapy water or a special glass cleaner.
Important! Dust makes it difficult for the film to stick, and large particles that get under the film can ruin the appearance of the pasted surface. In addition, debris can cause bubbles, tears, and joints to separate.
- Lightly soiled areas can be cleaned with a lint-free cloth or napkin soaked in a solution of water and neutral dishwashing detergent.
Important! It is better not to treat with ordinary soap or hygiene products, since shampoos and soaps contain fats or alkalis, which can affect the durability and quality of adhesion.
- Moisten the fabric moderately to prevent dirt from being transferred from place to place. After cleaning, the surface should be wiped with a dry, lint-free cloth.
Important! Do not allow the cleaner to dry out spontaneously.
- You can complete the cleaning process by treating it with isopropyl alcohol, after which you should also wipe the glass dry.
Important! This completion of the glass cleaning operation cannot be done in all cases. For example, acrylic glass cannot be treated with alcohol. Therefore, always take into account the characteristics of the base material.
- To prevent streaks from forming, you can use a rubber scraper to remove water.
Important! Don't forget to keep your hands clean, as they can leave stains on the cleaned glass.
Cutting film
You should first measure the size of the glass, add 2-3 cm to these parameters on each side, and cut out an element of material from the film according to the obtained dimensions.
Important! By making an allowance on the films, you can compensate for possible errors during gluing.
The process of cutting out the film must be done using a metal tape or a breadboard knife.
Important! It is better not to use scissors, as they will not allow you to make an even cut.
Pasting the film
The process of gluing film to glass occurs in three stages.
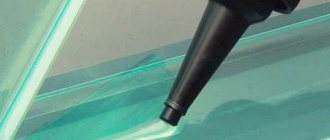
Stage 1 - preparing the soap solution and applying it:
- Add a few drops of liquid dishwashing detergent to the water. The proportion should be approximately 10 ml of product per 1 liter of water.
- Pour the prepared solution into the spray bottle. You can use the simplest spray bottle.
- Apply soapy water to the surface of the glass. Do not overdo it with the amount of solution, as this can significantly complicate the fixation of the material and prolong the final gluing time. Just a few drops will be enough to reduce adhesion.
Important! In some cases, it is not the glass that is wetted, but the adhesive layer of the film, but this option is considered less convenient.
Stage 2 - separation of the substrate from the film:
- Hook the backing on the corner.
Important! If problems arise with this, then use tape: stick one piece on the film side, the other on the backing side, and release the outer tails of the tape out. Pull the tape by its tails in different directions, the backing will easily come off the film.
- Remove the backing completely. If you have not wet the glass, moisten the adhesive layer of the film with soapy water.
Stage 3 - gluing the film:
- Take a piece of film and apply it with an adhesive layer to the glass. Place the film in the desired place; soapy water will allow you to do this without any problems.
Important! At the initial stage, you should not try to press the film tightly; it will stick due to diffuse adhesion.
- Spray the outer surface of the film. This will ensure good sliding of the squeegee.
Important! Make sure your squeegee is smooth and free of any burrs. Instead of a squeegee, you can use a regular plastic card.
- You need to start gluing the film from the top edge. Smooth the film horizontally, from the center to the right and left, not reaching the edges of the film approximately 10 cm.
- The last 10 cm should be smoothed from the center to the right and left. Be careful not to form water bubbles.
Important! It is necessary to completely squeeze out the soapy water that is under the film. If bubbles remain, then after gluing the film they will not be able to be squeezed out, and the result will be a defect. If any swelling appears, pierce it with a thin needle, release the air, and carefully smooth the fabric.
- Cut off the excess film around the edges with a breadboard knife.
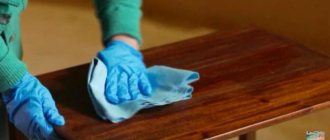
- Wipe the pasted film dry with a soft, dry cloth.
Important! Stained glass film is a colorful type of self-adhesive. How to glue stained glass film to glass? Yes, on the same principle as regular self-adhesive material.
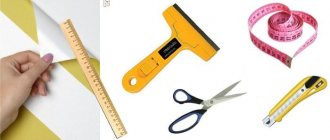
Tools for work
In order to cover the surface with film without any problems, it is recommended to acquire a number of tools that will be useful during the work:
- Two scrapers. One with a rubber tip, the other with a pointed metal tip.
- Spray gun for glass treatment. It is recommended to think through the issue of water in advance - if the water coming from the tap is very hard with a high content of chlorine, you should purchase purified water in bottles.
- Detergent. Almost anything commonly used will do, from dishwashing liquid to baby shampoo.
- Lint-free fabric.
- Stationery knife.
- Scissors.
- Ruler.
- Pencil.
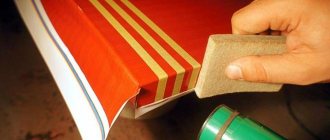
The above list of tools is not exhaustive. Additional products may be required to clean windows and apply film. For example, a hard sponge to get rid of traces of sealant previously used to seal cracks in the frame.
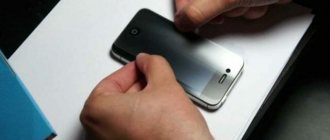
Let's start working with self-adhesive film
- The first and most important stage is surface preparation. It can be anything, for example, doors or walls, furniture or glass. The base for pasting must be thoroughly and conscientiously cleaned of any contaminants. An impeccable version of the prepared surface looks like smooth varnished boards. If this is not your option, then a rough, uneven or porous base must be primed with varnish or wallpaper glue.
- cutting the self-adhesive film is the most crucial moment. The convenient scale printed on its reverse side greatly facilitates the cutting process. In order to start work, you need to carefully cut the material into even pieces of the required length, preferably with a margin.
- To avoid mistakes when gluing the film, you must carefully read the recommendations on the protective layer. It shows in detail the stages of working with this material. First of all, you need to separate the protection from the paper. Calmly and carefully apply the decorative design to the base on which you want to glue and press the adhesive edge to the surface. So with your first hand, gradually removing the paper layer, stick the image completely. With your second hand, carefully press down the already pasted part, getting rid of air bubbles.
It is important to remember that if, when gluing the decorative material, you did something wrong, then until the picture has set, you have a chance to do it all over again. After complete attachment, which usually occurs within a few hours, nothing can be done.
Rules for caring for windows with laminated glass
When caring for laminated windows, it should be borne in mind that the polymer is much less durable than glass. If handled carelessly, it may be scratched prematurely. The following rules will help extend the service life of the coating:
- during the first week after pasting, do not touch the coating and do not wash it for a month;
- wash glass with mild detergents that do not contain ammonia;
- use only soft sponges and rags;
- do not remove dirt using abrasive powders or wire wool;
- Avoid contact of glass with cutting objects.
Covering the window sill with self-adhesive film
When the preparation is complete, proceed to the process itself.
Prepare for work:
- Selected self-adhesive;
- Knife, scissors;
- Long ruler, tape measure, pencil;
- Rags, sponge, rubber spatula.
The crucial moment is to cut out the film correctly. Ideally, this should be one piece with correctly cut corners and smooth edges. If you are in doubt about the calculations, then first make a pattern on paper and try it on the windowsill.
When cutting, take into account the height of the ends and the slight bend under the window sill board. If everything is perfectly marked, you can transfer the drawing to self-adhesive film. Lay it face down; on the wrong side there is a lined grid with a pitch of 10mm for ease of cutting.
Transfer your pattern to self-adhesive paper, lightly tracing the contours of the pattern on it. If you have a film with an imitation or pattern, then try to orient it so that the pattern is equally symmetrical on opposite slopes.
If there are several windows in the room, it would be correct to cut out canvases that are identical in symmetry. The self-adhesive film for window sills has been cut, the preparation has been completed, and you can begin the main process.
If this is your first time encountering this task, then before laminating the window sills, slightly moisten the base with water or a slightly soapy solution. I'll explain why. Then the film will not stick “tightly” to the surface, and it can be corrected, slightly shifted, eliminating the distortion.
Separate a piece of protective paper from the self-adhesive film by 5-10 centimeters to fix its initial location on the base. Place it on the window sill at its base and begin smoothing from the center to the edges, pressing the film well.
Peel the backing off the film in small sections and stick these sections onto the surface. And so the entire workpiece, the ends and folding under the window sill base. If there is a displacement, correct it, since you glued the film to a damp surface.
Smooth with cloths and a rubber spatula. Inspect the finished product for bubbles. They can be easily eliminated by piercing them with a needle and pressing to release the air. Usually the difficulty arises when you laminate the corners, but since you have everything cut out in advance and cuts are made at the folding points, there should be no problems.
Removing the film
When replacing the film, the question arises of how to quickly remove the self-adhesive film. The simplest method is to wet it several times with hot water, then the adhesive component will soften and easily come away from the base. Using a spatula, start removing the film.
An ordinary hairdryer can come to the rescue, as it heats the surface in a dry way and helps remove the self-adhesive. Warm up the area, and, lifting the film, pull it towards you, then the next area. Remove any remaining adhesive with alcohol or solvent.
This is how simple a self-adhesive film for window sills can transform its design. The main thing is accuracy when working, accuracy in measurements and adherence to sticker technology, then the quality will be at its best.
Advantages and disadvantages
The growing popularity of stained glass film is due to a number of advantages:
- Resistance to ultraviolet radiation - even after several years, stained glass windows will not lose the richness of their shades and will look impressive.
- Resistance to moisture and household chemicals - surfaces covered with stained glass windows can be treated with non-abrasive detergents and can be safely carried out with wet cleaning.
- High level of tensile strength - the material is difficult to damage, and the self-adhesive membrane itself serves as protection for glass and mirrors.
- Excellent decorative properties - thanks to the huge assortment, you can choose stained glass with any patterns, properties, colors and styles.
- Huge variability - by simply gluing or replacing the film you can easily bring something new to any interior.
- Durability - subject to proper use, self-adhesive stained glass film will last up to 30 years.
- Minimal optical distortion – the self-adhesive has the same thickness over the entire surface area, which minimizes the occurrence of aberrations.
- Ease of use - the film is easy to attach to the surface thanks to a special self-adhesive layer.
There are few disadvantages to film stained glass windows, but if you decide to use this decorative material, you need to know about some nuances:
- The transparency of stained glass is lower than that of ordinary glass - laminated glass units will transmit less sunlight.
- If the gluing technology is violated, defects may remain on the surface that will not be easy to eliminate.
- Polyester materials are highly flammable, so the film should not be used in rooms with a high risk of fire.
- Self-adhesive of dubious origin cannot boast of high environmental friendliness - low-quality material can release dangerous fumes into the atmosphere.
Reviews (12)
- 5 (2)
- 4 (2)
- 3 (2)
- 2 (4)
- 1 (2)
Already bought this product? Tell me what you think about him.
“Your opinion is important to us!”
- Sorting:
- by date
- by usefulness
- Positive
- Negative
Became three times thinner
The film has become three times thinner compared to previous years. The manufacturer saves on production. Because of this, it is not convenient to glue it even with tape. I ran out of three years' supply, so I decided to buy more. And in the end it turned out that it was something fragile, barely perceptible in the hands. Quality, accordingly, affects both results and expectations
Purchasing stained glass
The traditional procedure for creating a design on glass takes a long time and requires high skill. An ordinary person without art education and drawing skills is unlikely to be able to create a masterpiece. And the services of a professional master will not be cheap.
The way out of the situation is simple - stained glass film. Even a child can stick it on the windows. But for greater resemblance to natural stained glass, you need to work with extreme care.
First you need to decide what type of drawing will be. Single-color films and ready-made stencils are available for sale. By cutting out many small details, you can assemble them into an exclusive and unique pattern. But for this, again, you need to draw at least a little and have taste.
It is much faster and easier to buy a ready-made stained glass window with a solid pattern. Size is important here - it varies among decorative materials. It is optimal when the length and width of the canvas are slightly larger than the size of the glass. If such material cannot be found, you need to rely on at least one side - select the stained glass film so that there are no joints either along the length or width.
It is much more convenient and easier to glue thick stained glass film to windows, but thin film is cheaper.