Finishing a surface with a mosaic was invented a long time ago; before, the process itself was complicated; craftsmen had to select parts for a long time in order to put together the required pattern. Today, ready-made mosaic slabs are produced that can be installed quickly without losing their beauty. If you need to carry out repair work yourself, then you need to understand the features of how to glue mosaics to the wall correctly. This will be discussed in detail in the article.
The reason for the popularity of mosaics
Mosaic is a type of inlay that allows you to create amazingly beautiful images. Small multi-colored pieces of solid materials are arranged according to a pre-created sketch. There are two ways to perform a composition:
- direct set - mosaic elements are pressed into the ground;
- reverse set - the particles are placed face down on some kind of substrate, secured, the substrate is removed, and the seams are rubbed with adhesive.
To create mosaics, natural and artificial materials are used - glass, metal, enamel, pebbles, ceramics and others. When arranging the pieces, they lay out various patterns and drawings - thematic, folklore, geometric. People with creative abilities create real masterpieces of decorative art.
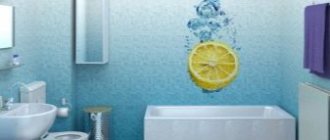
Laying mosaics on the wall is possible in any room with high humidity - in the bathroom, toilet.
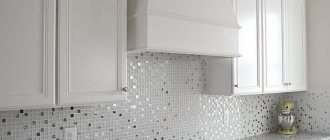
Mosaic inserts look good in the kitchen interior Source pinimg.com
The pattern does not change color and does not deteriorate under the influence of steam or high temperature. Mosaic is easy to care for - the surface can be easily cleaned with a damp cloth and detergents. Mosaic finishing retains its original appearance for a long time, but when installed correctly.
Let's figure out how to put a mosaic on the wall so that it pleases the owners for many years.
Manually laying out patterns with small stones and glass takes a long time. To facilitate cladding, tesserae were created - square matrices with mosaic elements fixed on a grid. Mosaic tiles vary depending on the material:
- ceramic - have the same properties as tiles. It is characterized by high wear resistance, moisture resistance, strength, heat resistance, and ease of maintenance. May have a matte or glazed surface;
- glass - spectacular, but requiring careful selection of glue so that it does not shine through the material. They require complex care, as they are not resistant to aggressive environments and do not tolerate cleaning with abrasive agents;
Glass mosaic Source stroipark.com
- metal - made of aluminum or stainless steel. Mosaic looks unusual and is used to create exclusive interiors. Difficult to maintain and install;
- made of natural stone - expensive, allows you to create a luxurious design. Installation is carried out using ordinary glue or cement-sand mortar.
See also: Catalog of companies that specialize in finishing materials and related work
What material is used?
Glass is a material that is heat-resistant and resistant to aggressive environments, strong and reliable. An apron made from glass mosaic will please the eyes for several decades. Thanks to the striking refraction of rays in the sun's rays and the richness of the color palette, this material looks very effective.
Real stone. Various format mosaics are made from real stone: in the form of squares, rectangles, circles. Sometimes they even leave small relief pebbles completely. The advantage of the material is that it is virtually permanent; the disadvantages are a limited palette of colors and a high price. Real stone mosaics are often black, brown or gray. For the most part, small parts are glued onto a mesh base so that you can very easily put it on with your own hands.
Smalt is made from small particles of glass, pressed at high temperatures with the addition of metal oxides. It has a wide range of colors, brighter and richer than glass. Smalt frescoes were made in Rome, but they have come to the 21st century without losing either integrity or beauty.
Subtleties of laying mosaics
Let's take a closer look at how to glue a mosaic on a wall. First of all, you need to prepare tools and materials:
- knife;
- grinder;
- glue;
- pencil;
- electric drill;
- bucket;
- grout;
- putty knife;
- mosaic tiles.
Laying includes the following steps:
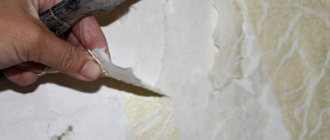
- cleaning, priming, sanding, drying walls;
- surface marking - mark the layout of the tiles with a pencil;
- applying the adhesive composition to the wall and sheets with a spatula;
- mosaic installation - the tile is pressed to the surface with glue and pressed with a roller or spatula;
- removing the backing - run a wet sponge over the surface and remove the paper backing diagonally, pulling at the corner;
Removing the backing Source dizainvfoto.ru
- moisturizing and grouting;
- cleaning the tiles diagonally with a damp sponge;
- polishing with a dry cloth.
We carry out the markings
Marking
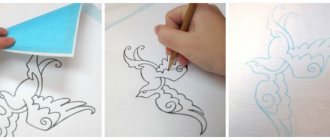
Before you start laying the mosaic, you need to carry out preliminary markings. This is especially important if you are carrying out such work for the first time. First, make a sketch. In this case, you should pay attention to some nuances:
- if the room has external corners (boxes or slopes), then the drawing should start from them;
- if there is any decorative element on the wall (mirror or panel), then it also becomes a priority;
- try to remove all possible trimming in inconspicuous corners (for example, the corner of the front door).
After the paper sketch is ready, it is transferred to the wall. If the mosaic is laid on the floor, then it is advisable to make a “dry” layout.
Glue
Many people are interested in what to glue the mosaic onto so that it holds firmly. The adhesive composition must be carefully selected to match the properties of the wall surface, material, and operating conditions.
Special tile adhesive
The easiest way is to purchase a special adhesive for tiles at a building materials store, made on the basis of Portland cement with the addition of plasticizers. This is a ready-made composition that only requires dilution with water to the required thickness. The glue ensures reliable adhesion to any surface. This glue is not suitable for glass mosaics due to its light gray tint.
Tile adhesive Source purplemint.ru
Polymer glue
The acrylic-based mixture ensures reliable fixation of mosaics made of any materials on various surfaces. This is the best ready-made adhesive for rooms with humid air. Dyes are added to the composition, which makes it possible to use it to create interesting design solutions. Before use, stir and apply to the surface. The glue dries quickly, forming a glass-like mass.
How to use it correctly
Before starting work, cement mixtures must be mixed with a solvent, and in reactive compositions, the base and hardener must be combined. Dispersive ones do not need to be stirred.
The rules of use are the same for almost all adhesives:
- Mix small portions - this is what the masters recommend. Reactive and cement mixtures quickly thicken and become difficult to work with. The density prevents the mass from being evenly distributed, so the decorative elements are laid unevenly.
- Apply the glue to a small area of the wall in a thin layer. After gluing the decorative elements, the adhesive mixture is applied further. Coating large surfaces causes the adhesive to begin to polymerize before the tile is attached. This reduces the quality of adhesion.
- Most cement mixtures are produced in packages of 25 and 5 kg. If you plan to decorate large areas, it is cheaper to buy in large packs.
Nuances
Each type of mosaic tile requires compliance with certain gluing rules.
Let's look at how to glue mosaics on a grid.
The sheet is held with the front side facing you, and the back side is immersed in the adhesive Source colibrimosaic.ru
Gently press it against the wall with a roller or spatula so that the distance between the mosaic squares is the same. Remove any remaining glue and wait until it dries completely.
Important Tips
- To maintain the same distance between parts, cross-shaped dividers are installed in the spaces between the plates. The crosses are then removed before the glue is completely dry.
- You can install the mosaic not only from bottom to top, but also in any direction, since it is light in weight.
- It is recommended to glue decorative panels at temperatures from +10 to +30˚С.
- To prevent mold from forming in the gaps, the surface is treated with a fungicidal coating.
- When cleaning the surface from glue and grout, avoid hard abrasive materials. You may scratch the parts and they will lose their shine.
Recommendations
Knowing how to lay a mosaic correctly, listen to the advice of experienced craftsmen:
- do not press the sheets against the wall with your hands to avoid unevenness;
- to prevent the glue from drying out, the surface area should be no more than nine tiles;
- dilute the glue to a medium consistency, since a thick composition dries quickly, and a liquid one sticks;
- carry out installation at a temperature not exceeding +25 degrees;
- Apply mosaic adhesive on the mesh in a layer of no more than 3 mm, so that excess solution does not complicate the grouting.
Recommendations will help you avoid mistakes.
Mosaic masonry looks both solid and in combination with other materials. Source keram-market.ru
TOP manufacturers
- Axton mosaic adhesive. It is used for interior decoration with mosaics in bathrooms, showers, and kitchens. Axton glue is available in the form of a dry mixture for mixing. Has high adhesion to concrete, brick and plaster.
The diluted mixture is viable for 2 hours. Economical consumption, allows you to apply glue in a layer of up to 5 mm. Axton provides reliable fastening without loosening or falling out of mosaic chips.
Briefly about the main thing
Mosaic tiles allow you to quickly and inexpensively tile the surface of any room. The variety of types makes it possible to choose the best option for different wall surfaces.
The basic requirements for creating a beautiful and durable mosaic are knowledge of what material the tiles are suitable for the room, and what glue to use to glue the mosaic.
Mosaic allows you to implement any design idea at low cost. The cladding looks impressive, and its properties are not inferior to ceramic tiles.
After studying the instructions on how to lay mosaic tiles, you can decorate a bathroom, toilet or other room yourself. It is important to adhere to the rules and recommendations for laying mosaic tiles.
Ratings 0
Required Tools
To work with mosaics prepare:
building level;
- spatula (toothed with a comb profile height of 3 mm, as well as rubber);
- roulette;
- pencil;
- plumb line;
- rule;
- grater (preference is given to a polyurethane product);
- rubber mallet;
- container for preparing the solution;
- knife;
- construction mixer.
In areas of complex configuration, you need to divide the mosaic tiles into parts. A standard tool, a tile cutter, is not suitable for this. You need to use an angle grinder, and with a diamond blade. There is a risk of injury when handling the material.
