Powdering
You can transfer the design onto the material in an original way, using tooth powder, crushed chalk or activated carbon, and also blue. First they make a matrix. It can be used several times. This is a blank in which the design along the contour is pierced with a sharp object (a needle). There are many holes on the surface of the matrix. The more there are, the higher the image accuracy. All holes are sprinkled with powder. The matrix is first attached to the material. For white surfaces, choose a dark powder; for black surfaces, on the contrary, light powder.
Advantages and disadvantages
minimal costs; clear contours.
a pattern is obtained on the fabric in one color; labor intensity of the process.
Transfer using decoupage film
Decoupage is becoming a very popular hobby, so many people know how to handle film from it. After printing the desired image on it, also prepare white acrylic paint.
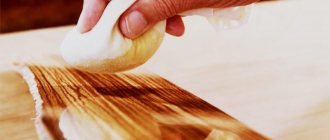
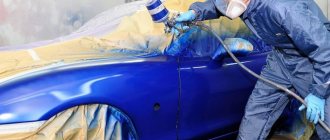
It is necessary to perfectly clean the wood and also give it a smooth surface. Next, we apply pre-slightly diluted paint in two layers. Moreover, the application directions must be perpendicular to each other.
The paint must be allowed to dry. Once this has happened, the dampened decoupage paper (about 30 seconds soaking in room temperature water) is placed on the surface, removing the base and rubbing with a sponge to ensure a tight seal. After waiting for it to dry, you can treat the surface with varnish.
Questions
How to paint plywood inside a house?
For interior decoration, various water-based paints are used - acrylic, latex. You can paint the canvas with wood enamel, otherwise called pentaphthalic. The composition is easy to apply, penetrates well between the fibers, and dries instantly.
What paints can you use to paint on plywood?
The wood canvas holds oil and acrylic compositions well, even gouache and watercolor. The sheet must be at least 6 mm thick. The surface must first be primed or impregnated with drying oil similar to oil.
Painting on the surface
How to paint plywood white?
To obtain a high-quality white surface without visible minor defects, matte paint is required. Glossy compounds are less able to hide flaws in the base. Before work, you also need to carefully prepare the surface.
How to paint plywood on the floor?
Elastic paint is well suited for finishing flooring. This composition has a rubber-like structure, a shiny appearance, and is resistant to ultraviolet radiation. The pigment forms a thin film, hides minor flaws, and conceals unevenness.
How to paint plywood against moisture?
The easiest way to protect the surface from moisture is to impregnate the sheet with drying oil or acrylic varnish. Another effective, but more expensive option is to paint the canvas with epoxy resin.
How to paint plywood furniture?
It is better to paint furniture items with water-based compounds. Such emulsions are easy to apply, dry quickly, and do not have a strong unpleasant odor.
Plywood sheet is an inexpensive material widely used for various purposes. Proper surface treatment increases the service life of the product, be it a floor or furniture made of plywood. Taking into account the characteristics of consumables allows you to quickly paint and avoid unpleasant consequences.
Did the article help you? ( 17 ratings, average: 4.18 out of 5)
Transfer using PVA or gel medium
Regardless of the material chosen, the process is approximately the same. However, in the case of gel, the application occurs directly on the board, well, the glue is applied to the photograph. The photo itself can be a simple printout on plain paper.
If this is important to the image, it is necessary to have a mirrored version of the photo, as later the picture will take on the correct appearance. The following is the procedure:
- The wood must be thoroughly cleaned and perfectly sanded to create a smooth surface. You can use 120 grit sandpaper;
- Processing photos with glue or wood gel. In the case of the latter, it is necessary to do everything as carefully as possible, without missing the slightest fragment;
- The sheet must be glued to the lubricated surface, and then passed over it with a roller for a better fit, absence of folds and air bubbles. This stage is extremely important, since it determines how well the drawing will be translated;
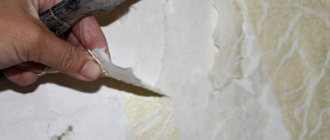
- Leave the product overnight, then, as soon as the gel is completely dry, wet the sheet and remove it with a dishwashing sponge. The image is translated quite reliably, and it is not so easy to erase it. However, it is still better not to try too hard. However, in the case of PVA glue, it will be more difficult to erase the paper layer;
- After all the paper has been removed, make sure that there are no traces of it left on the surface, as they may interfere with the next step - varnishing. You can use waterproof or clear acrylic varnish.
Laser printer
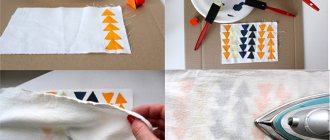
A laser printer and paper for freezing food products (freezer paper) will help to transfer the image to matter. It is better to print the design on thin white cotton or linen fabric. The freezing paper with the smooth shiny side must be glued to the material using an iron. For printing, cut out an A4 size rectangle.
You can print a picture on textiles in any color complexity. To do this, the glued blank (from freezer and fabric) is placed in the printer. First you need to make sure that the design will be printed on fabric and not on paper. Sometimes a printer not designed for printing on fabric may fail. In this case, the attempt must be repeated until the printing device accepts the workpiece.
Advantages and disadvantages
the ability to receive a copy in color; perfect picture.
labor-intensive process; a printer not designed for printing on fabric may not accept the workpiece; The pattern obtained on the fabric is erased during frequent washing.
Why is it necessary to decorate a tree with pictures?
Unlike paper and canvas, painting on wood is something new and interesting in our design.
Therefore, such paintings will attract attention, and those people who want to create an interior that can surprise can consider this particular option.
In addition, you can decorate the wood that is used directly in the decoration, making the interior that is familiar to many look completely new. In addition, you can decorate a variety of wooden products in this way, from boxes to furniture.
Finally, transferring an image onto a wooden surface can be a hobby for children and adults, and for some, a way to earn money. After all, handmade things are actively purchased today.
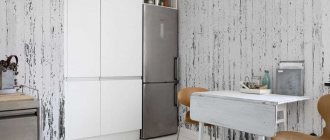
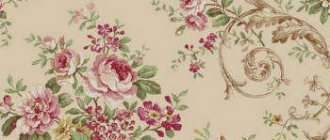
Pictures on boards - what are they?
Artists can paint on any materials: wood, paper, plywood, canvas. However, wooden decor has become a real symbol of nobility and quality. Pictures on wooden boards combine the natural texture of wood with the latest advances in printing. The size of the paintings can be very different and its choice depends on the area of the room where such decor will be located. Images may also vary. Landscapes, futuristic scenes, and photographs from personal archives that record pleasant life moments look great in the interior.
Transferring an image to wood - technology features
All photos from the article
A distinctive feature of the age of high technology is the ease with which beauty is replicated and originality is put on stream. But if not everyone can become an artist and paint great canvases, then many can create unique images using simple technologies.
Wood is one of the suitable materials on which a photograph or favorite drawing will look great. In addition to the fact that the quality of the product will remain unchanged for many years, it will be a kind of masterpiece or a piece of goods, depending on how it is disposed of.
Looks like a window to another world
Method two - glue
In addition to high-precision equipment, a source code and a wooden canvas, you will need:
- regular PVA glue;
- solvent;
- fine-grained emery;
- varnish, for example, Dulux;
- roller;
- sponge/long knife;
- a little patience.
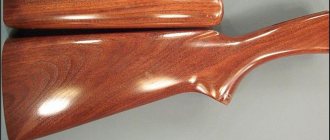
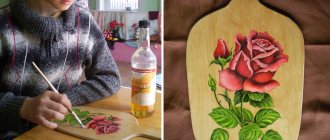
Note! Experienced craftsmen advise lightening the image slightly before transferring the photograph to wood, because the finished colors will be more saturated. Photo before application
Photo before application
roll out the sheet with a roller in the manner of smoothing wallpaper, or using the flat side of a knife; leave to dry for a day; moisten the sheet with a damp sponge; start slowly and carefully erasing the paper with your own hands, or rather, with your fingers; let the work dry; varnish.
Method three - gel
From it you will learn how to transfer a drawing onto wood using an acrylic gel medium. This modeling paste, used to create a relief surface, costs more than 500 rubles, but it’s not worth saving, nor is it worth using expired ones. According to reviews from the masters, they produce good products.
For tools and supplies you will need:
- photograph and tree of the same size;
- gel medium and brush for it;
- roller/knife/ruler;
- paraffin/matte glue used for decoupage;
- another paraffin brush.
Erasing the foggy veil
The working instructions are in many ways similar to the previous one:
- Apply gel to the board with a brush. The layer should not be thick, but also without bald spots;
- a photograph is placed on the treated area and smoothed, expelling air bubbles;
- leave overnight in a secluded place;
- roll up the paper and let dry;
- cover with paraffin.
Playing around with translations
Wondering how to transfer a photo onto wood without gel and glue? An alternative would be blank decoupage film on which the photograph will be printed.
After getting wet, the backing is pulled out from under the top film, leaving a rich pattern in place.
To work, you will need sandpaper, white acrylic paint, a plate of water, cotton pads, paper napkins, brushes, a marker, and patina varnish.
"CHIP-ART" guarantees
- Sand the surface;
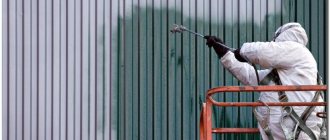
- Dilute the paint slightly with water and apply the first layer, brushing along;
- The second layer, respectively, with transverse strokes. Let dry;
- Before transferring the picture to the tree, you need to lower it for half a minute in water at room temperature;
- Take it out, apply it to the surface and pull out the base;
- Remove excess moisture from the film using blotting movements;
- Let it dry and cover up any imperfections with a marker.
- Open with varnish.
Note! You can buy special napkins for decoupage. With them, the question of how to transfer a drawing to wood will not cause any particular difficulties
In conclusion
The new possibilities of a wood surface used as a basis for a painting or photograph are unusual and evoke a lot of emotions. Familiar images look a little different than on paper - softer, more mysterious. Branded supplies will help perpetuate your work, which may outlive the paper version.
The video in this article shows an example of transferring an image to wood.
DIY painting on boards
For those who want to decorate their home with a modern and stylish piece of furniture, you can buy a piece of art you like, but this will most likely cost a lot of money. You can learn how to make a painting on boards with your own hands and create an original and creative art object yourself. To paint on old boards you will need the following materials:
- boards;
- paints of the required shades;
- brushes;
- liquid Nails;
- a piece of plywood;
- frame for a future painting.
First, we prepare the boards: sand them, clean them of dust and cut them into pieces at an angle of 45º. We paint the boards and place them on a sheet of plywood in the form of a picture. We glue them to the plywood with liquid nails, install the frame, and our work of art is ready to decorate any room.
We use an iron
You can transfer the drawing using an ordinary iron. True, in this case it is necessary to buy paper with a special coating for inkjet printing, designed for thermal transfer of the image printed on the printer onto light cotton fabric. One such sheet costs 0.5-1 dollar.
On top of the textile you need to place a drawing printed in color, face down. The top of the picture must be ironed with a hot iron (the steaming mode must be turned off). While the paper has not cooled down, it must be quickly removed from the fabric. A bright, richly colored image will remain on the surface of the material.
Advantages and disadvantages
allows you to get a copy in color; ease of implementation.
You will need thermal transfer paper; fabric with a printed picture in color can be washed at a temperature of no more than 40 degrees; Do not use bleach when washing.
With the help of light
You can transfer the outline of any image from paper to textile material using light. To complete the work, you need to have an ironed, clean fabric and the image itself. The paper is taped to the window. The material is spread over the image. It is also fixed with tape. Then, using a simple pencil, trace the contours of the image.
Advantages and disadvantages
minimum costs; ease of implementation; the ability to obtain a clear outline.
only the outlines of the picture are printed on the fabric; does not translate the color of the drawing.
You can use a rectangular piece of glass instead of a window. Then the transfer of the image from paper to textiles is performed in a horizontal position. The glass is placed on the seats of two chairs located opposite each other. A light source is placed below - a table lamp. The image and material are attached to the glass using tape. Having fixed the fabric, trace the contours of the design with a simple pencil.
Instructions
This method requires compliance with the following rules:
- The pattern is very tightly attached to the product. You can use a soap solution for this.
- Many craftsmen use a canter for this work. With it, the image turns out to be very accurate - almost jewelry work, which, however, takes a lot of time and requires some preliminary training.
- The instrument is taken with three fingers, resting on the ring finger, which serves as a kind of spring. The emboss is located 2-3 mm from the design, its light strokes form a dotted line - the main outline of the image is drawn. The smaller the detail of the picture, the more densely it breaks through.
- When all the lines have been transferred, you can wash off the paint.
- The image can be varnished.
Now you know how to transfer a design from paper to paper, to leather, to glass, to wood and to metal. Go ahead - get your tools, and good luck in your endeavors!
How to transfer a drawing from paper to glass
To work, take an image with good contours and a roll of cling film. To transfer, you need to purchase a felt-tip pen - a marker for glass; it fits well and is easily washed off the surface.
Instructions:
We take the film. Its size should be slightly larger than the drawing itself. The film is attached to the surface, which prevents the picture from getting lost. The image is placed on film and outlined thinly and very carefully. Now the film is carefully transferred with the front side to the previously prepared surface. Preparation consists of degreasing its front side. Make sure that the film is completely adhered to the glass and get rid of wrinkles and bubbles. For a clearer transfer, we trace the image again along the contour with any sharp object. It's time to get rid of the polyethylene. We do this very carefully so as not to smudge the drawing. If there are inaccuracies somewhere, now is the time to correct them. Now we draw the outline
This can be done using acrylic paints and a brush. After everything has dried, carefully remove traces of the marker using cotton swabs dipped in liquid. Inside, the image is filled in any way. If the technique is stained glass, then everything is poured along the contour. After drying, for a longer service life of the product, the image can be baked or varnished
It all depends on where this item will be used.
Painting with acrylic paints - how to use and what you need for this
With the advent of acrylic paints, painting received new possibilities. Acrylic paints can be applied to almost any substrate, be it canvas, cardboard, wood, fabric, glass and many others.
The paints are diluted with water and dry quickly. After drying, they become water-resistant and weather-resistant, do not turn yellow or fade. Also, acrylic paints are absolutely hypoallergenic.
Many artists create wonderful works using acrylic paints. Among them there are both adherents of traditional painting and various modernists trying to achieve a new level of reality in painting.
For example, world-famous self-taught artist Justin Geoffrey paints incredible pictures using acrylic, using the volume of strokes to create sculptural relief. So, in acrylic painting you have room for creativity. But where to start?
We collect the necessary materials
The first thing you need to paint with acrylics is acrylic paints