When gluing wallpaper, do not forget about ceiling plinths or baguettes, they are also often called fillets. The elements are used for decoration; they hide the protruding edges of the canvases and form a clear outline of the ceiling. But you still need to know how to glue baguettes to the ceiling and wallpaper, because it is not so simple. During this process, it is worth observing many nuances on which the strength and appearance of the finish depends.
Why are baguettes interesting?
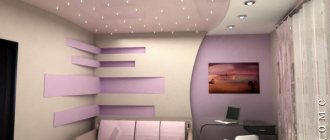
Unlike paper strips, baguettes hide uneven joints better. A large number of options for structures, colors, and patterns allow you to implement almost any design idea.
Baguettes are made from:
- polyurethane;
- polystyrene foam;
- plastic;
- gypsum;
- tree.
Plastic ones are used together with suspended ceilings, and wooden ones - only with wooden ones; they are practically not found in modern apartments. Gypsum ones are also not suitable for every interior, but polyurethane and foam ones are most widely used.
Why are baguettes so attractive?
- Easy to install - with the right calculations and thoughtful approach, anyone can handle this task.
- At an affordable price, at which you don’t have to worry about an accidentally damaged frieze.
- Easy to maintain - fillets lend themselves well to dry and wet cleaning.
The width of the ceiling plinth is chosen depending on the size and volume of the room. Since baguettes visually “eat up” space, narrow ones (10–50 mm) are suitable for small rooms; wide ones can be used in spacious ones.
Varieties
A baguette profile is easy to distinguish from its wall counterpart. Since it is attached to two planes, it has two gluing edges: a wider wall and a ceiling. Manufacturers offer a variety of baguettes, which can be divided according to different criteria into the following types:
- Decorative and fastening. The first ones have a pronounced aesthetics and create a complete look. The latter are more durable and flexible and are used as fastening elements for suspended ceilings.
- By type of fastening. Installation on fasteners involves the use of a hammer drill, screwdriver and self-tapping screws. A lightweight option is installation with glue (for example, liquid nails), when it is enough to press the part to the surface and hold it for some time.
Attaching a plinth to a suspended ceiling Source dekorator-s.ru
- To size. There are no strict criteria; the width of the baguette is chosen based on the dimensions of the room: area and especially ceiling height. Since the profile visually “eats up” the space, the smaller the room, the narrower the decor should be.
- According to the form. The ceiling plinth is varied in design, it can have a figured or thickened lower edge, a groove for mounting an LED strip, a complex section of a convex or concave shape, and a decorative insert.
The classification of ceiling moldings according to the material of manufacture includes the following varieties:
- Made of plastic. Products made of solid polyvinyl chloride are intended for use in systems with suspended ceilings as load-bearing structural elements. They are durable and flexible, a popular option is invisible, with different configurations. The small width allows you to minimize the loss of height of the main ceiling.
- Made from polystyrene foam. An environmentally friendly finishing option, lightweight and easy to install, popular due to its low cost. Friezes made of foam can be painted and combined with other decor. Of the minuses: the material is fire hazardous and fragile; the latter must be taken into account during installation.
Varieties of foam baguettes Source laspihills.com
See also: Catalog of companies that specialize in finishing materials and related work
- Their polyurethane. They look very much like plaster; strong and flexible enough not to break in radius-shaped areas. Ceiling moldings made of polyurethane are suitable for organizing hidden lighting. The polyurethane profile is convenient because it can be used in unheated rooms, for example, on a closed veranda or in a country house.
- Made from polystyrene foam. Decor, a type of foam plastic, is made by extrusion. In terms of properties, it is an average option between polystyrene foam and polyurethane; it bends easily. Like foam plastic, it is corroded by solvents, so only water-based paints are suitable for painting. Cheap decor can turn yellow in a year and a half.
- Wooden. A ceiling profile made of wood is not a cheap pleasure. It is suitable for strictly defined interiors with wooden wall panels or with a wooden ceiling; fastened with self-tapping screws. In order for a wooden baseboard to look elegant, it must fit against the walls without gaps, which is only possible with perfectly flat surfaces.
Double wooden plinth for the ceiling Source dekorator-s.ru
- Plaster. Classic decor option; It is not widely used because it is heavy, fragile and afraid of water. Due to its heavy weight, gypsum stucco must be mounted on putty or alabaster, which complicates and increases the cost of the work.
- Aluminum. Strong and durable profiles have practical significance and are used in ceiling frame systems (they fix the canvas when installing suspended ceilings). Self-tapping screws are used for fastening.
Which side should I glue the baguette on?
In order not to make a mistake with which side to glue the baguette to the ceiling and which to the wall, you need to take into account the material and design of the ceiling plinth.
- Symmetrical friezes with identical edges are the simplest option; it doesn’t matter which side you glue on.
- Asymmetrical, with a pattern or texture - these planks have one side higher. The wider side is glued to the wall, the narrow side to the ceiling.
Friezes with a complex design are usually used in renovations based on original designs, so there should be no problems with their installation.
Masters do not have a clear answer to this question. Both methods are acceptable, and both have their advantages:
- gluing baguettes to the wallpaper helps to hide errors in their adjustment to the height of the wall, and gives the opportunity to maneuver with the joining of the canvases according to the drawing;
- gluing to the wallpaper allows you to do this more reliably and hide possible stains from adhesive materials.
The decision at what stage of the repair to glue the baguettes also depends on the general condition of the walls. If they have to be leveled, it is better to install the moldings with finishing putty before wallpapering.
There are three ways to glue a baguette: with glue, liquid nails and finishing putty. When choosing a material for gluing, be sure to make sure that it is suitable for your type of friezes. Otherwise, unaesthetic stains may remain on the surface of the plinth, and some adhesive compositions are not compatible with polyurethane or PVC at all and can significantly damage baguettes made from these materials.
The most popular and effective adhesive compositions
To work with ceiling plinths, glues based on polymer, silicone and acrylic are used. Each of them has its own characteristics.
- Polymer adhesives.
They are made on the basis of polymers that dissolve in water. A wide range of such adhesive mixtures for different materials and conditions allows you to choose the best option for your baguette. Some craftsmen note that polymer glue is not very sticky and forces you to press the baseboard tightly for several minutes. This may be inconvenient when gluing long friezes.
- Silicone adhesives.
Most often they are produced in tubes for a pistol, which makes them easier to work with. The basis of this glue is a rubber base; some silicone mixtures include antibacterial and antimicrobial additives. However, they are not compatible with all types of ceiling plinths, so this point needs to be monitored additionally.
- Acrylic adhesives.
These substances are non-toxic, moisture resistant, and are not afraid of aggressive environments. This glue dries quickly, and this can become a problem, because an incorrectly glued baguette will no longer be able to be corrected. The second problem is the unpleasant smell of glue.
Whatever type of glue you choose, it is worth preparing a clean soft cloth, a brush and water. All this will be useful to quickly remove excess composition from under the baseboards. If you let them dry out, the appearance of the walls and ceiling will suffer.
Types of in-line decor
Wooden ceiling baguette
Knowing the characteristics of the material from which the baguette is made, you can choose the required type of ceiling decor:
- Plastic baguettes. Economy option. Durable, strong and reliable. Do not be afraid of moisture or sunlight. Universal, suitable for any style and design of the room, due to the fact that they can be of different shapes and can be easily painted in any color.
- Aluminum baguettes. Strong, durable, but not cheap. Suitable for decorating apartments in a modern style, as well as for finishing office premises.
- Wooden baguettes. Used when decorating rooms with a classic design. Expensive and noble. In order for wooden baguettes to serve for a long time, they are treated with special compounds, since wood is afraid of fire, moisture, dust and dampness.
How to glue baguettes onto liquid nails?
Gluing baguettes to the ceiling with liquid nails is essentially no different from working with any type of glue. The difference is in the composition of the mixtures - liquid nails contain a fine-grained filler, which allows you to connect almost any surface more reliably than conventional adhesives.
For ceiling skirting boards, it is important to choose the appropriate type of liquid nails. Please note that it is written on the packaging of the mixture that it is suitable specifically for your material: foam plastic, polyurethane, plastic, etc.
The procedure for working with liquid nails is as follows:
- degrease surfaces;
- apply liquid nails to the sides of the baguette - depending on the length and width of the product, this is done in a dotted or “snake” manner;
- Press the molding against the wall and ceiling for 1-2 minutes.
Liquid nails dry quite quickly. Excess can be easily removed with a damp sponge, but only until the product has hardened.
Briefly about the main thing
Baguette is one of the universal decorative elements, so the issues of its selection and installation remain relevant in any interior. Ceiling profiles differ in material and method of use (decorative and fastening); products made from polystyrene foam, polyurethane and expanded polystyrene are widely used. They can be glued before and after wallpaper using various adhesives, putty and liquid nails. To obtain a high-quality result, it is important that the surface of the walls is smooth and that the joints are adjusted using a miter box.
Ratings 0
How to glue baguettes onto putty?
Gluing baguettes onto finishing putty is one of the most economical options. It is suitable for “bare” walls, that is, that stage of renovation when the wallpaper has not yet been glued.
The process itself is not fundamentally different from gluing using other materials:
- apply putty in a thin layer on the surface of the frieze;
- press and hold for 1–2 minutes;
- remove excess putty (you can carefully stretch it along the wall).
The main difficulty is due to the fact that it is not always possible to apply the putty in a thin layer.
How to glue a baguette onto a suspended ceiling?
Typically, plastic baguettes are used with stretch ceilings. They can be secured with screws, but they can also be glued. The only recommendation is to use transparent glue that is compatible with the material of the baguette and ceiling, and promptly remove its excess.
- Apply a thin layer of glue in dots or in a “snake” pattern.
- Press the baguette onto the wall and ceiling surfaces for 1–2 minutes.
- Remove excess glue with a dry cloth.
After finishing work, the surface of the plastic baguettes can be wiped with solvent.
Installation recommendations
- The baguette should be glued along the intended line. Distribute excess glue along the entire length of the baseboard. Then carefully remove the unnecessary amount of glue with a sponge or damp cloth.
- Use a pencil to mark the desired length of the ceiling plinth, remove excess, and coat the rest with glue. Don’t forget to coat the joints of the baguette. Fill small gaps in the joints with putty and then sand the seams;
- To extend the service life of the ceiling plinth, paint is applied to its surface in several layers.
How to cut and glue baguettes without miter box?
A miter box is a special device that helps to accurately measure 45 and 90 degree angles and cut the baguette accordingly. However, this professional tool is not found in every home. You can do without a miter box when cutting friezes:
- using a school protractor;
- marking the baguette on a special mat;
- using any substrate with right angles.
In any case, before gluing, you need to attach the baguettes to each other to ensure correct joining.