Is it possible to stick a protective film on a smartphone yourself without bubbles? Will this method provide effective protection against damage to the touchscreen? Which film will be relevant to choose in each specific case? You can easily get answers to all these questions, as well as many others, by reading the article.
Please note that the article is not mandatory, but only advisory. The selected film for the screen, as well as the sticker method and all actions are performed by each owner after making an independent decision. We only recommend using protective equipment that will increase the time and comfort of operation.
Each reader can also leave his comments, describe his experience of using various types of protection and its effectiveness. We will be grateful if you indicate not only the model of the gadget on which you tested the protective film, but also the name of the specific product. In turn, we will try to answer all the questions that arise in the article, including complete instructions on how to stick the film on a smartphone at home and choose an alternative to the necessary tools.
Main functions of protective film
Visually, the film is a thin strip of plastic that matches the size of the smartphone and is equipped with cutouts for function keys and a microphone with speaker. The exception is universal film, which will need to be cut to fit the device, as well as holes made. The small thickness is compensated by high density, which provides protective functions.
Any film on the screen allows you to avoid problems with the violation of the aesthetics and functionality of the touchscreen during daily use or in certain situations. For example, applying a film to your phone before going to the beach is an ideal solution to prevent sand scratches.
Carrying your phone with various small objects - keys, coins, etc. will be safer with the protection attached. Accordingly, the main function of the film on the phone will be to reduce the likelihood of scratches and chips on the display.
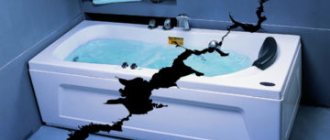
Remember that thin films on a smartphone will not protect the display from shocks and severe mechanical damage. An exception is glass film or safety glass, which can provide this protection within certain limits.
How to properly glue it yourself at home
It’s hard to imagine that sterile cleanliness reigns in a technician’s workshop. But in order for the coating to lie evenly, the tablet screen and the air in the room are cleaned of dust. The success of the job depends on proper surface preparation.
Preparatory work
How to prepare a workplace:
- Selecting a room.
There should be a minimum of dust in the room. In order not to start a general cleaning with ventilation in honor of the new coating of the gadget, it is better to sit in the kitchen. In the living room or bedroom, the source of dust will be upholstered furniture, curtains, and carpets. Pets should also be occupied with food or a toy in another room while working. Cat, dog hair, and particles of bird feathers appear in unexpected places, but they definitely do not belong under the protective film of the tablet.
- Preparing the site.
To clean the air, spray water from a spray bottle over the kitchen table. Moisture particles will settle on the table along with invisible dust. The work surface can only be wiped with a damp cloth.
You can place your tablet, packaging with protective film and additional equipment on a clean table:
- microfiber cloth;
- plastic ruler suitable for the width of the screen;
- screen cleaner - alcohol or a special antistatic agent;
- cotton pads;
- scissors;
- tape - for “plan B” if something goes wrong.
The technician also needs to prepare - put a bandage on his forehead to prevent hair from falling on the screen. Long sleeves should be rolled up and hands should be washed.
How to glue perfectly
A special film for a specific gadget model is ready for gluing. The holes in it correspond to the location of the speakers and buttons on the device. A one-piece universal covering must be shaped independently according to the width and length of the screen. Millimeter markings will help you do this quickly. How to proceed:
- apply a coating to the gadget screen;
- Use a thin felt-tip pen to mark marking points;
- cut with scissors.
The coating should extend beyond the screen on the sides by 2-3 millimeters, and on top should extend exactly along the line of the screen. This will help correct uneven edges when cutting, and it will become more convenient to stick the film. If the entire coating is larger than the gadget’s display, shifts, and applying markings is inconvenient, a home multifunctional device will help out.
The protective coating layer is sandwiched between two protective ones. The layer marked with the number 1 sticker covers the side of the film that is applied to the display. Layer No. 2 protects its outer side.
The next stage of work is gluing:
- treat the surface of the screen with an antistatic agent or a cotton pad soaked in alcohol;
- Finally clean the display with a microfiber cloth;
- separate protective layer No. 1;
- hold the film along the edges with your fingers, but touch the back side;
- place its edge on top, side or bottom of the screen, as convenient;
- moving from the edge and leveling with a ruler, gradually glue the coating.
Remove top layer No. 2 from the pasted film. You don’t have to separate the first protective layer completely, but peel off a small strip first and continue to gradually remove it as you move across the display.
Types and features
Before sticking the film on the screen, you should study the range of similar protective equipment and choose the optimal product. Each manufacturer provides the film with certain properties and characteristics that will be relevant under specific operating conditions. It is important to study all types of products, as well as their properties in advance, choosing the best option.
Types of films
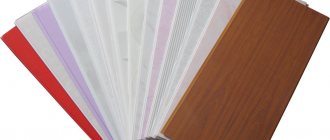
Depending on the type of surface, phone film is available from various brands in three versions:
- Mirror. This protection option will be of interest to women, allowing not only to increase the security of the touchscreen, but also to turn the smartphone into a kind of mirror. Please be aware in advance of the slight decrease in brightness as well as possible color distortion that is typical for similar products. When choosing an option with a mirror image, you should also remember that even small scratches on such a surface are very visible.
- Glossy. One of the most common types of film provides high-quality image transmission, all shades of color and provides high tactile sensitivity of the display. The negative side of such protection will be its softness - with such screen protection you will have to carry out the replacement procedure quite often. Even when worn with keys, after a few days you will notice that the film is covered with a network of small scratches.
- Matte. Excluding glass, this option will be the most effective in terms of ensuring safety, as well as maintaining the aesthetics of the device. If you were able to properly apply the protective film, it will last for a long time without causing any complaints. The downside will be a decrease in screen brightness and distortion of information on the display.
Features of use
The operation of gadgets with protective films installed will not differ from devices without protection. Quick response to touch, ease of studying information, communication on social networks - all this will remain with you. The film is made of plastic with a thickness of a fraction of a millimeter, and also fits so tightly to the screen that it is not felt. The main thing is to stick it on the phone without bubbles or debris between the display and the protection.
Some types of protection can be periodically removed, washed and put back on. This procedure is easy to perform yourself, and using high-quality film is a pleasure. However, you can glue the film and periodically wash off dust, dirt and debris from it, even from a not too expensive brand or cut it yourself. However, after some time, it will no longer stick to the display and you will need to purchase new protection.
Removing film coating from glass
The film material is not durable, and after a few years it is necessary to replace it with a new one. To make the process go quickly and without flaws, choose one of the options described below:
- Using a sharp tool, you need to remove the film from the corner, then carefully pull it;
- Heat the surface to 40 degrees and remove the coating;
- Using a product containing ammonia, spray the surface. The substance promotes the removal of the film.
The film material is not durable, and after a few years it is necessary to replace it with a new one.
Tools for work
Service centers carry out the procedure of gluing the film on the phone quickly and efficiently, using special tools. However, any owner can protect the phone display themselves by doing the work at home. Moreover, all the necessary tools can be replaced with improvised means and familiar objects.
In order to stick the film on your phone at home you will need:
- Napkins. You need two wipes - for cleaning the display and degreasing, as well as for wiping after cleaning. You should choose napkins that do not leave marks, lint and absorb moisture well. As a rule, wipes are included in high-quality film models.
- Cardboard or plastic spatula. If the kit does not provide such a tool, you can use a thick business card or plastic card.
- Scotch. This item may not be needed if all the necessary steps have been taken to prepare the room and the place where the sticker will be applied.
- Scissors. If you are using a universal protective film for your phone, you will need scissors to cut it according to the template. Measure each side carefully or pre-cut a template from cardboard to achieve maximum identity.
Prepare the necessary tools in advance so that they can be used at the right time. Any method of gluing a protective film to a phone screen requires high speed work to reduce the likelihood of dust and debris particles getting onto the cleaned display.
Preparing the device before applying the sticker
At this stage, it is very important to follow the instructions, since improper preparation of the display of the tablet and other devices can lead to irreversible damage to the protective film, which can then only be thrown into the trash.
Before gluing a new film, you need to remove the old one, if any. It is imperative to wipe the display from dust, using only a lint-free cloth, check for dust particles, fingerprints and other contaminants, if any, and remove them. It is important to know that under no circumstances should you wipe the screen with alcohol or other alcohol-based liquids, only with special means for cleaning computer monitors or with water as a last resort.
Cleaning the screen from dust
How to stick a protective film on your phone: step-by-step plan
Before gluing the film to your phone at home, you need to not only prepare all the necessary tools or replacement items, but also carefully study the instructions. We offer two step-by-step instructions, including a video that clearly shows the most common method of installing protection. Leave the page open until the last step of the work is completed, and then leave a comment about how you managed to stick the film correctly without bubbles or streaks between the protection and the touchscreen.
Preparing the premises
Professionals suggest that before sticking the film onto the phone with your own hands, thoroughly remove the dust in the room. Carry out a wet cleaning and prepare a level and well-lit place in which you will perform the sticker procedure. You can even choose a bathroom where it will be easiest to stick a bubble-free film on your iPhone due to the high humidity.
Preparing tools
You can add a can of compressed air to the already specified set of tools. Using such a can, you can ensure the main condition - the absence of dust particles and debris immediately before leveling the film on the display. Remember that all tools should be at hand, but not interfere with work.
Surface degreasing
To degrease the surface, use a special cloth from the kit. If there is no such impregnated napkin, take an alcohol solution, cologne, vodka or even pure alcohol. After degreasing, immediately wipe the screen with a dry, lint-free cloth. It is necessary that not a single speck of dust gets onto the display in the interval between cleaning it and gluing it.
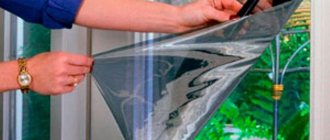
Pasting the film
In order to glue even universal film evenly and correctly, you should perform the procedure in stages. Attach the edge with the sticker to one side of the smartphone, level the surface with a plastic card and only then remove the next layer of protection. High speed does not negate the fact that this operation should be carried out carefully, avoiding the formation of bubbles. The procedure will be considered complete when the film is completely glued to the display and all functional holes match.
Nuances worth knowing about
After the base covers the entire area of the screen, the work of gluing the film can be considered complete. However, there are some points that are especially worth noting. So, for example, it will not be possible to lay down the film without the formation of bubbles under any circumstances. But this is not a reason to be upset, since they can be easily removed with light pressure from the card or a cloth. After completely removing air formations from the base, the second side is removed; it is its removal that will give the screen a bright, smooth look.
The finished result
Besides this, there are other nuances:
- It will not work to glue the protection immediately, rather than gradually.
- You should not bring the film close to either side of the tablet. This can lead to rapid peeling.
- The film can be cleaned with absolutely any means.
- The average service life of the protective surface is one year.
It is important to note: if after gluing a couple of days later you find debris under it, then it cannot be removed and re-glued, since you will still not achieve the desired result.
Removing dust particles and other defects
Even if bubbles appear during the sticker process, do not worry, they can be removed after the film and display are completely aligned. Remove bubbles starting from the middle of the screen, moving them to the edges of the smartphone.
Do not press too hard on the display - adhesive films do not require much force to adhere. If the bubble does not want to roll, the reason for its appearance is lint, hair or dust. In this case, you need to lift the edge of the film and use a strip of adhesive tape or tape to clean it. Do not puncture the bubbles - this will not help solve the problem, but will easily ruin the protection.
How to glue film, or some useful tips from the editors
There are several recommendations that will help you apply the protective accessory correctly and extend its service life. Useful tips from experts:
- It is not advisable to stick the film close to the edge of the screen;
- if gluing fails, it is possible to remove the protective layer and wash it under water to remove dust particles;
- It is best to apply the accessory immediately after purchasing a new device;
- to completely remove dust from the screen, you can use paper tape;
- During operation, it is recommended to wipe the film with wet wipes.
Protective glass is much stronger than film and can withstand more serious damage.
What is the film for?
Screen protectors gained popularity in the late 2000s when touchscreen phones went on sale. Currently, some doubt the need for such a film, but generally experts argue that there is a point in this type of device protection.
Read also: Colors from (Black) to edff (Iceberg)
Many experts emphasize that grains of sand cause damage to any device, so when going to the beach or on a hike, it is recommended to apply a protective film to prevent the possibility of scratches, and then put the phone in a case.
If the film makes it difficult to use the device, you can remove it after returning home.
How to wipe the screen
Water or damper napkins are not suitable for such procedures. Special compounds sold in equipment care stores can help you get rid of greasy stains. Often these forms take the form of a spray. The spray should be applied to a napkin, and it, in turn, should be used to wipe the screen. There is no need to press hard on it - the composition deals with harmful substances with simple contact.
Dust particles are removed using paper tape. It needs to be glued and then immediately torn off. The adhesive surface will take all the trash with it.
If the glass of the tablet is damaged so badly that cracks have formed on it, then there is no point in trying to glue the fragments together - the monitors of all modern devices, even those not equipped with sensors, contain liquid that spills out when broken. The display can be replaced at a service center.
Subscribe to our Social networks