When using acrylic bathtubs, consumers often encounter various problems.
A carelessly placed metal bucket scratches the coating. The cigarette burns through the acrylic. A heavy object falls on the coating and it bursts or, worse, a through hole or delamination appears.
Of course, this is not pleasant, because the appearance of the plumbing is spoiled. But you can deal with all the above defects with your own hands and completely restore the coating. How to restore the surface in case of cracks, breakdowns and delaminations - read below in our article. As for the fight against scratches and chips a separate material for you .
What you need to repair plumbing
To repair small defects in the surface of a bathtub or shower stall, you should assess the extent of the damage, then it will be easier to understand which product will have to be used. So there are two main problems that may arise:
- Defects acquired due to mechanical influence are the fall of heavy or sharp products, exposure to fire, etc.;
- The use of chemical elements, if you choose aggressive substances for cleaning, the integrity of the acrylic layer may be damaged.
To repair small flaws in the surface of a bathtub or shower stall, you should assess the extent of the damage.
Required materials and tools
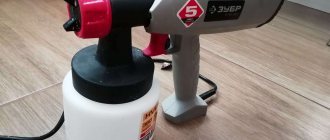
To repair cracked acrylic bathtubs yourself, the first step is to prepare the material, as well as the tools that will be required for the process. Acrylic substance in liquid form, degreasing agents, cleaning agents. You will also need:
- Grinder/drill;
- Nozzle in the form of a whisk;
- Sandpaper of different grain sizes;
- Pliers;
- Rubber spatula;
- Sponge;
- Flashlight;
- Film coating.
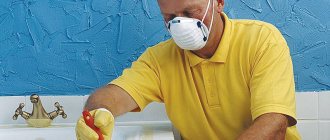
To protect the master, prepare gloves and a respirator.
To repair cracked acrylic bathtubs yourself, the first step is to prepare the material, as well as the tools that will be required for the process.
Restoration of the enamel layer
We carry out our own repairs of chipped enamel of metal bathtubs made of cast iron and steel using the following technology:
cleaning the metal in the defective area with coarse sandpaper;
- removing dust with a vacuum cleaner or washing with a cleaning agent without abrasive impurities;
- solvent degreasing;
- preparing an acrylic mixture or epoxy enamel;
- layer-by-layer application of enamel paint or filling the cavity with self-leveling acrylic in one step.
After laying the repair mixture on the chip site, it should protrude like a bump above the factory coating adjacent to this area. After the composition has hardened, this tubercle is polished with abrasive materials with a change in grain size from larger to smaller. Next, polishing is carried out with a special paste.
To avoid getting new scratches with sandpaper, cover the chipped area around the perimeter with masking tape.
Small chip
Repairing a chip on a small bathtub with your own hands is quite simple. The main nuances of restoration work in this case are:
- cleaning of cast iron and steel is impossible due to the microscopic size of the defect;
- instead, rinsing is done with a chlorine-free cleaning agent;
- It is economically feasible to use repair kits in small packaging (syringes, cans, barcode correctors);
- application in one go.
Preparation of the mixture according to the manufacturer's instructions.
The product can be applied with a brush; it is more convenient to level the material on the surface with a spatula.
Applying acrylic reducing agent with a homemade wooden spatula made from wood chips.
Manufacturers of some bathtubs open their inner surface with varnish. Therefore, after repairing a defective area, it may be necessary to apply one or two layers of varnish.
Large chip
To restore areas of plumbing with large chips, the repair solution must be applied in stages over several steps. This is due to the low viscosity of the product and the complex geometry of the bath.
In order to remove the required amount of “patch” with sandpaper without grinding off the structural material in the areas adjacent to it, you can shade the treated area with a dark marker.
As soon as the abrasive material removes the last traces of the marker, the surface at the site of the former chip will take on the design outline.
This technique is discussed in more detail in the video below:
Thus, a chip in the enamel coating of a cast iron or steel bowl, or the very structural material of an acrylic bathtub, can be repaired on your own. For this purpose, the industry produces one, two and three-component repair compositions of self-leveling acrylic, enamel paint, and acrylic restorer with special properties.
Means for sealing cracks, potholes and chips
You can renovate a bathroom using different means. The choice of substance also depends on the nature of the damage, whether the coating is cracked, whether a gap or hole has appeared, etc. For chips and cracks, car putty is suitable. If there are only small flaws on the surface, then you can quickly eliminate them with the help of enamel, which is applied with a brush to the defective areas.
The surface can be filled, this helps to completely renew the coating. There is a product on sale called Stakryl, which creates a new thick layer that covers all defects in the base.
Stakryl creates a new thick layer that covers all base defects.
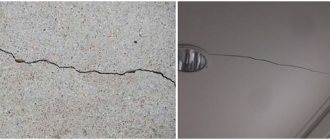
How to repair a crack with your own hands
The crack may be small at first, but if repair is delayed for a long time, it will increase in size and will be more difficult to repair. You should purchase a special repair kit for an acrylic bathtub. The self-repair process consists of the following steps:
- They start by drilling out the crack at the edges so that it does not spread any further. This is done with a 5mm drill.
- Next, the size of the flaw is increased in order to fill it with a high-quality solution; a drill is also taken.
- Apply masking tape around the edges to protect the rest of the area from the effects of sandpaper. The damaged area is treated with sandpaper to make the surface rough.
- Wipe the areas with soap and water.
- Mix liquid acrylic and hardener, see the ratio on the packaging.
- The resulting composition is applied and leveling is done with a rubber spatula.
- The surface should dry for a day.
The shades of the bathtub may differ, it is important to choose the appropriate option; on the set it is written which shade is included - cold or warm type.
The shades of the bathtub may vary, it is important to choose the appropriate option.
Removing scratches from an acrylic bathtub
Getting rid of scratches is easy. This is a minor defect; usually scratches on the acrylic surface are shallow and can be easily restored. First of all, the area with the scratch needs to be treated with sandpaper. Prepare two types of sandpaper - coarse-grained and fine-grained. Use coarse sandpaper first, then fine-grained sandpaper. After sanding, the surface to be restored should be degreased using some ready-made composition or, for example, just alcohol. After degreasing, polish for working with acrylic is applied to the treated area and left to dry. If the length of the scratch is minimal - just a few millimeters - you can repair it with epoxy glue.
EDP two-component universal fast-curing epoxy adhesive 0.25 kg, art. EK000132481
We offer another method for removing scratches, which is especially good if they are of significant length. In this case, use a special tape. Before using it, the area with the scratch is thoroughly degreased, after which repair tape is applied along the defect, removing the protective layer from it. It is important to position it so that on both sides of the scratch it occupies an adjacent area at least 1 cm wide. When gluing the repair tape, you need to act carefully, slowly, and make sure that no air bubbles remain under it. The area repaired with tape will take at least three hours to dry; throughout this period it must be protected from moisture.
Remember that you need to restore all scratches that appear, including the smallest and most insignificant ones. Otherwise, they will increase over time, and their elimination will require much more effort, time and restorative material.
Surface preparation
The preparatory stage is required when the defect is already old and operating conditions have caused the problem to worsen. If you decide to fix the chip right away, the process will be shorter, without preparation. But, if the crack is old, then carry out the steps described below:
- Remove the rust layer using a knife, needle or screwdriver. You can use a special solution.
- Wash the surface so that no dirt remains, use detergents without abrasive elements.
- Get a clean base, then dry it with a hairdryer.
- Use acetone to degrease the base, then dry it with a hairdryer.
The preparatory stage is required when the defect is already old and operating conditions have caused the problem to worsen.
Polyurethane foam
You don’t want to mix cement mortar - polyurethane foam is used.
The algorithm of actions is as follows:
- the joint is prepared - cleaned of dirt and dust, the surfaces are treated with degreasing liquids, then dried;
- The foam container is thoroughly shaken before use;
- the gap is filled with foam. As the foam gains hardness, it increases in volume by 30 times;
- excess foam, after it has completely dried, is cut off;
- the surface treated with foam can also be refined with ceramic tiles or paint.
Sealing a seam in a bathroom with foam
Types of possible damage
Before you seal a plastic bathtub or cover up a defect in acrylic, you should understand what caused the damage. There are not many reasons for such flaws:
- Mechanical loads on the surface can lead to chips; if an object falls on the base, or the coating is forcefully touched with the sharp side of the tool, it is damaged;
- Acrylic is not resistant to chemical elements, strong substances can damage the base, do not use products with chlorine and oxalic acid.
Before you seal a plastic bathtub or cover up a defect in acrylic, you should understand what caused the damage.
Repair of minor defects
Minor defects can be quickly and easily eliminated by expanding the size of the crack, degreasing the area, preparing paint and applying it to the damaged area. Cover the top with masking tape, leave it on for 5-6 hours, then remove the tape. Treat with alcohol and polish. The seal is completed with a coating of polish.
The seal is completed with a coating of polish.
Application of border tape
Bathroom curb tape covers the seam very quickly and conveniently. It is specially made from materials that prevent mold.
Example of border tape
We install the curb tape.
- when buying tape in a store, you need to decide in advance on the width of the gap between the wall and the bathtub;
- the wall surface is cleaned of dirt and degreased;
- carefully fill the bathtub and wall space with silicone;
- measure the required length from the roll;
- special “liquid nails” are applied to the tape and then pressed to the wall surface and glued;
- The glue should dry completely within 24 hours.
Sealing a seam in a bathroom with curb tape
While the glue dries, it is necessary to prevent water from getting into the joint. So, different options were considered for eliminating leaks that may occur between the wall and the bathtub. Residents themselves and construction professionals use them in practice, both individually and in combination of different methods. The gap that appears at the junction with the wall is filled with foam, and either a plinth made of plastic special for this work or a curb tape is mounted on top of it. The leak is usually no longer observed.
Acrylic peels off, what to do
If peeling of the coating occurs, such areas should be glued together using glue for polymer bases. A hole is made in these areas, then the adhesive is poured into it. After drying, the process of sealing the cracks, which was described above, is carried out.
If peeling of the coating occurs, such areas should be glued together using glue for polymer bases.
Repair of serious defects
Damage that leads to a leak in the bathtub and water constantly appears in the room after taking a shower is considered serious. To fix the problem you need fiberglass. Proceed as follows:
- The edges are cleaned with a knife.
- The problem area is sanded with sandpaper.
- Treat with an alcohol solution.
- Epoxy resin is applied.
- Wait for the layer to harden.
- Treat the area again with sandpaper.
- The smooth coating is wiped with alcohol.
- Polish is applied.
Damage that leads to a leak in the bathtub and water constantly appears in the room after taking a shower is considered serious.
How to prevent breakdown
To avoid the need to carry out the repair work described above, you should evaluate the condition of the bathtub, both external and internal, in advance. Details that prevent an emerging defect:
- Creaking indicates improper installation of plumbing fixtures or thinness of the coating;
- If there are deflections in the base, then you can place reliable materials under it, for example, bricks, to hide such an addition, cover the area with a plastic screen;
- In the light you will notice gaps, which indicates the unreliability of the coating, then use latex paint and strengthen the base using the pouring method.
In the light you will notice gaps, which indicates the unreliability of the coating, then use latex paint and strengthen the base using the pouring method.
It is possible to repair an acrylic bathtub at home. The process is not very complicated, the main thing is to prepare the surface and tools. It’s better to strengthen the coating in advance, which has become unreliable.
Problem resolution options
Experts know many ways to deal with this problem if water is leaking. Before choosing how to eliminate leaks between the bathtub and the wall, it is worth familiarizing yourself with all the methods in detail.
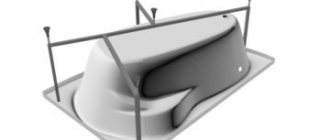
Gap between bathtub and wall
Usually one of the following methods is used:
- seal the gap with mortar;
- foam the joint with polyurethane foam;
- filling the gap with silicone sealant;
- curb tape is installed.
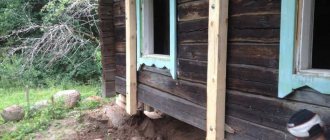
A plinth made of ceramic or plastic is installed along the edges of the bathtub and between the wall. According to Soviet standards, a bathroom was included in the design of a house or apartment based on the standard dimensions of the bathtub itself. If the size of Soviet baths is 170 cm, then a typical bathroom was also 171 - 172 cm wide.
Currently, the approach to the design and construction of apartment buildings has changed. The dimensions of the bathroom spaces have also changed. In addition, the range of bathtub models has expanded significantly, which differ from the standard ones in both configuration and size. Naturally, when purchasing a non-standard bathtub, a gap appears between the bathtub and the wall.
Small cracks and methods for sealing them will be discussed below, but what should you do if there is a gap of 4 cm or more? In this case, you cannot do without installing a protective screen. Underneath it is necessary to install a frame made of wooden blocks, boards or a metal profile. This design is sheathed to choose from:
- waterproof GVL;
- plywood;
- fiberboard sheets.
Alternatively, you can glue ceramic tiles on top of this base (use “liquid nails”). Fill the gaps between the tiles with a special grout, and fill the junction with the bathtub with a waterproof sealant. For small gaps between the wall and the bathtub, there are other ways to eliminate leaks.